


In this tutorial, I’ll be showing you how you can create a realistic water reflection by creating a separate displacement file and then using it through displace filter. This technique works really well if you want to add a zig-zag water reflection to your artworks so let’s get started!
Step 1
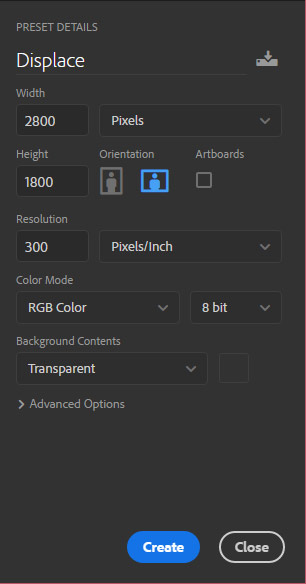
First, we’ll be creating a file for the Displace filter so we can use it later. Create a new white document by selecting File > New and enter the width and height according to that image in which you are going to use this displace file. I’m creating document with 2800 (width) X 1800 (height) as this is the resolution of the image in which I’ll be using this file.
Step 2
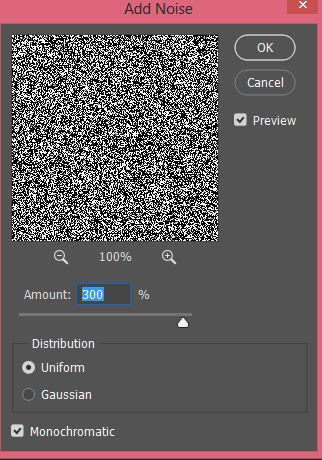
Go to Filter > Noise > Add Noise and add noise to the newly created white document. Please make sure that the foreground/background color set to black/white by pressing (D) on the keyboard.
I entered the following settings:
Step 3
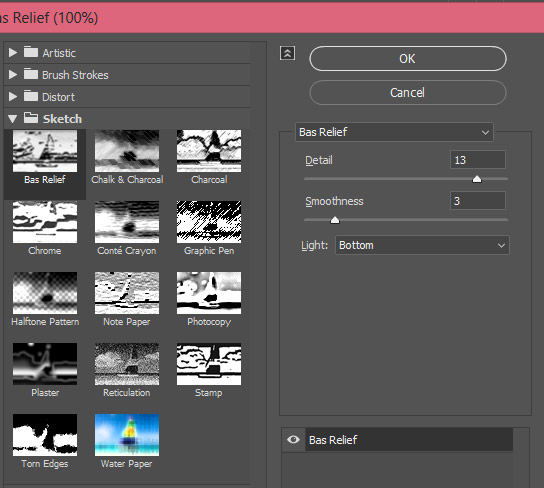
Now go to Filter > Gallery > Sketch > Bas Relief and entered the shown settings below. Again guys make sure that foreground and background color is set to default black/white.
Step 4
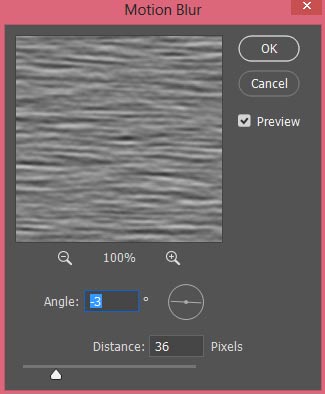
Now go to Filter > Blur > Motion Blur to actually turn this Noise and Bas Relief effect into a water like effect.
Here are my settings for Motion Blur:
Step 5
Now we need to change the perspective of the document. To do this, activate the Transform Tool (CTRL + T) and while this tool is active right-click anywhere in the document and then choose Perspective. Then change the perspective of the image by selecting the right bottom handler and holding the Shift key and by dragging your mouse.
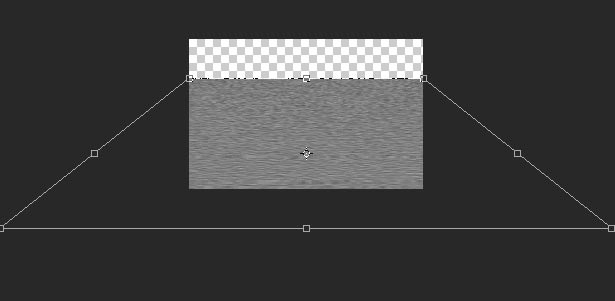
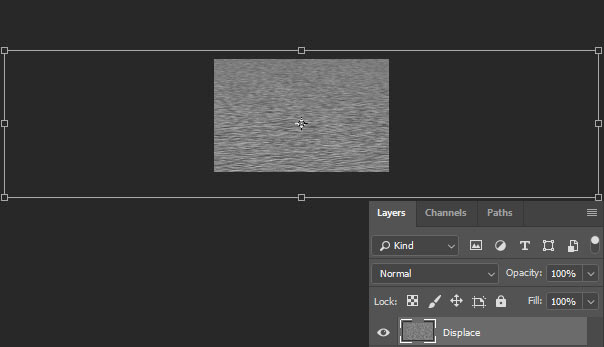
Once you have done with the perspective, again activate the transform tool and resize it to fit the main document. Now go to File > Save As save this file as a PSD file and name it Displace.
Step 6
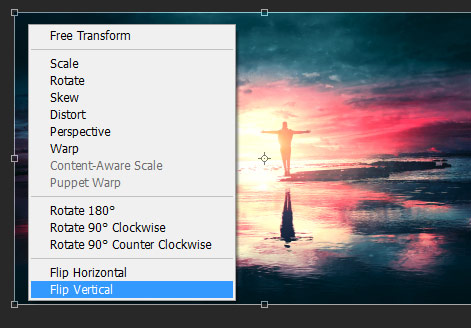
I opened one of my artwork which I’ve been working on. You can see that this image needed a reflection as I added lights, clouds to the sky and changed the color of the sky as well. These things need to be reflected in the water. First, I’ll duplicate this layer by pressing CTRL+ J. Name this layer “Reflection”.

Activate the Transform Tool (CTRL + T) and click anywhere in the document and then choose Flip Vertical to flip the reflection layer.
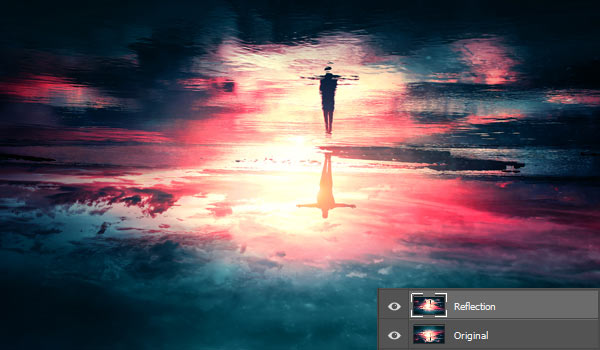
Here you can see the results after flipping the reflection layer:
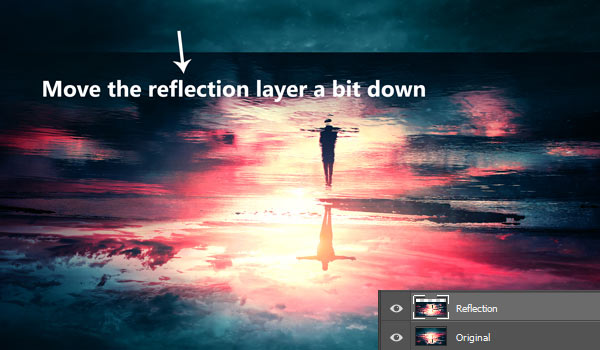
Step 8
Now we need to find the meeting point I’d say that these two images needed to be merged to create the reflection. First, I just dragged it below, a bit, using the Move Tool (V). You can also use the Blend Modes see through the reflection layer to make sure that you are positioning the image in the right position.
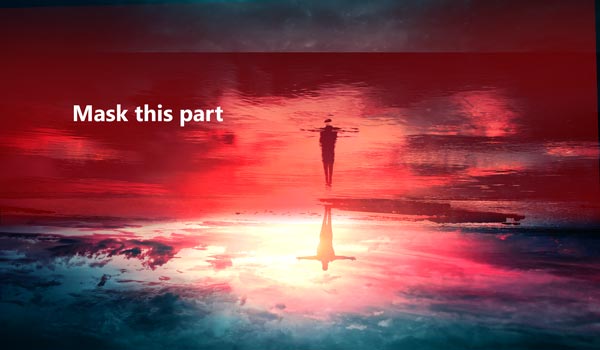
Go to Layer > Layer Mask > Reveal All and add a mask to reflection layer. Use the soft black brush to remove the highlighted parts of the reflection to blend it with the original image.
Step 9
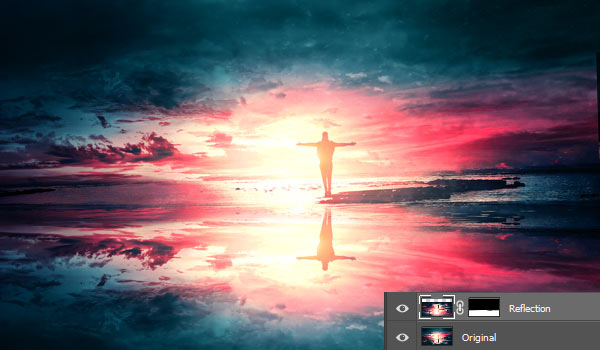
Once you have done with the masking you’ll have the results resemble below image. The reflection looks good here if we assume the water is still like you have already seen this technique I used in my Castle and rainy London tutorial.
But now we’ll use the displace file which we created earlier to create a zig-zag water reflection. First, convert the reflection layer into Smart Object, right click on it and then choose Convert to Smart Object.
Now to go to Filter > Distort > Displace.
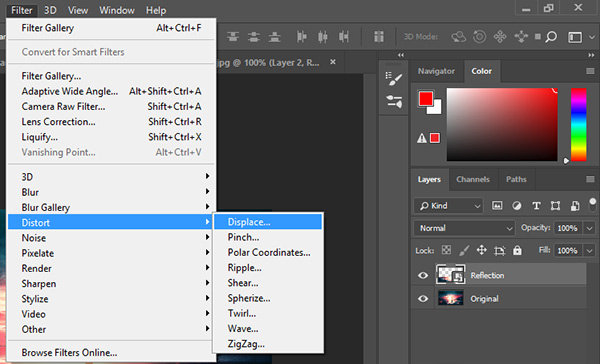
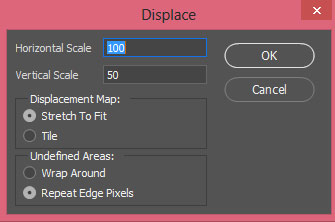
Now you’ll have the following dialog box and you need to enter the horizontal and vertical scale settings. These settings will scale the image horizontally and vertically to create a zig-zag pattern like we see in the water. Remember Horizontal Scale needed to be 2x than Vertical Scale. I entered 100 and 50 but you can try different value if you are not getting the results which you want.
Step 10
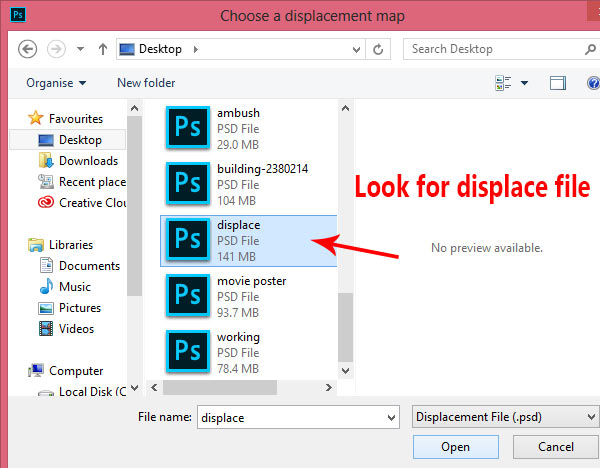
Once you press OK and a new dialog box will appear asking you to select the displace file. You need to select the displace file which we created earlier. So browse the file on your PC and then select it and hit the Open button.
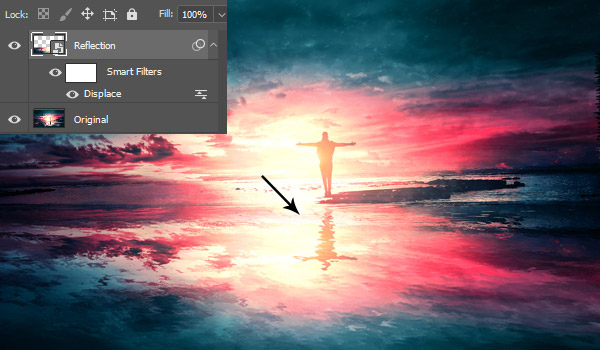
Once you do that, you’ll see the reflection in the water like in the below image.
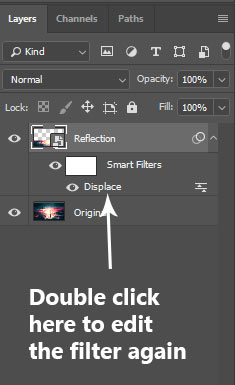
If you are not happy with the displacement filter results then you can click on the displace filter name to edit it. Then again you need to enter the Horizontal and Vertical Scale settings and then browse the displace file to apply the filter with your new settings. You can repeat the same process until you get the expected results.
Need Help With Photoshop or Looking for Professional Support?
Whether you're just getting started with Photoshop or need expert-level assistance, we're here to help! Contact us for personalized Photoshop tutorials, project support, or creative services.
Get in touch today to take your skills or projects to the next level.
CONTACT US NOW📘 Want to Master Photoshop Faster?
🎁 Get Your FREE PDF E-Book "Top 10 Photoshop Tricks Every Designer Must Know" Now – Packed with expert tips, shortcuts, and techniques to boost your creativity & workflow.
👉 Download Your FREE PDF E-Book NOW!

