

In this Photoshop tutorial I’ll show you how you can extract a subject from an image using selection techniques. These selection techniques can help you to even extract out a single piece of details. Basically, I’ll introduce three extraction techniques for selection and it doesn’t matter whether you are beginner or advanced level of Photoshop user, this tutorial will surely help you.
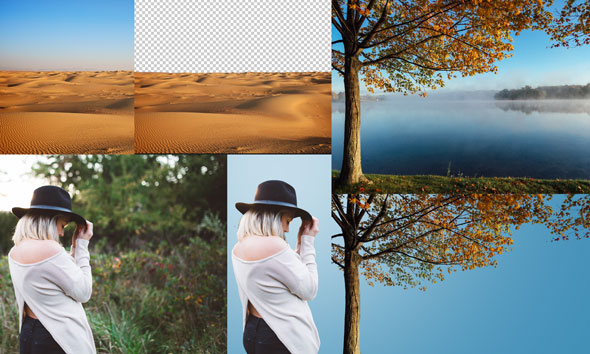
Tutorial Resources
First Technique : Using Quick Selection Tools
Step 1
First technique is very simple and most of us using this techniques in our work flow using quick selection Tools like, Quick Selection Tool (W), Magical Wand Tool (W) and Polygon Lasso Tool (L).
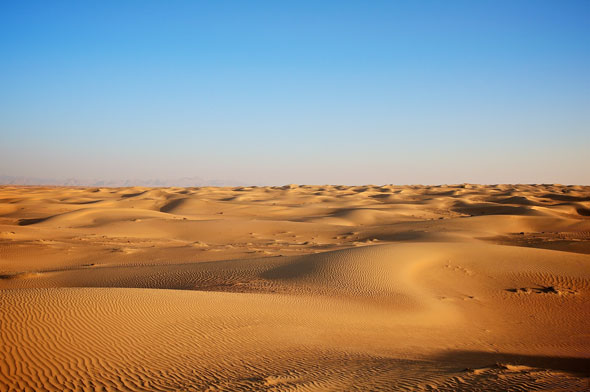
Let’s make the selection with first technique. I have this landscape image open in Photoshop. Now I want to make the selection of sky parts of the landscape.
Activate the Quick Selection Tool (W).
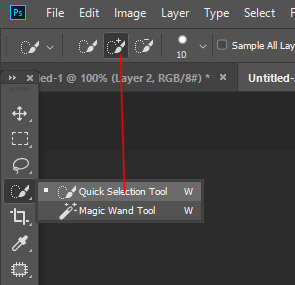
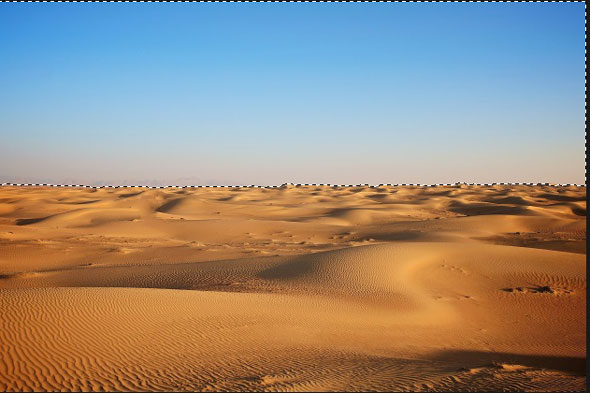
Drag it on the sky to make the selection of it.
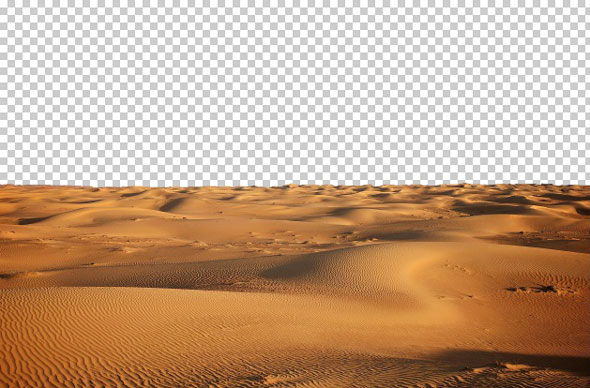
Here we’ve selected sky parts of the landscape. It’s a pretty much simple technique and works best when we have a solid background as we’ve in the landscape.
Step 2
Go to Layer > Layer Mask > Reveal Selection to add a Layer Mask to landscape layer and boom!. The sky part is gone. Very clean and decent selection.
Why we can’t use Magic Wand Tool (W)? Since Magic Wand Tool (W) works based on color samples so it will only make the selection of color area which it samples from the background. If you click, with this tool, on the blue parts then only the blue color pixels will be selected not the rest. You can see the below image that I’ve clicked on the blue part (top left corner) as a result only those parts, having blue color pixels, is selected.

That’s why we are not using it. Similarly, rest of the tools such as Polygon Lasso Tool, Rectangle Tool, Elliptical Marquee Tool has limitation. Try them and see why they are not suitable to use when we’ve large solid background area for selection.
Second Technique: Selecting Parts
Step 3
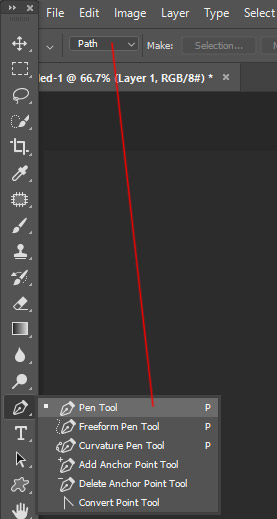
Second selection technique used when we need to select the portion of an image which we want like selecting model from its background, making the selection of an object and any particular area. In this techniques we use Pen Tool (P) and which is very useful in order to make selections. Let’s say we want to extract the model from its background. Activate the Pen Tool (P). Set the Mode to Path on the option bar.
Now start making a model selection by placing first anchor point on the model. Now I just have a starting point for my path. To create a path around the model I’ll have to go around the model adding an anchor point in each part of the model body where the path needs to change direction.

Once you’ve gone through entire model parts, then simply click on the starting anchor point to close the path. We all are human and mistake do happen while making the selection. With Pen Tool (P), you can easily go back to your previous anchor point without losing the entire path. To go back, simply press CTRL + Z .

Step 4
You cannot go back to previous point while making selection using Polygon Lasso Tool and this is the reason that you should use Pen Tool (P). That is why Pen Tool (P) is best. Now while our path is selected, right click on anywhere in the document and then choose make selection.

Now go to Layer > Layer Mask > Reveal Selection to extract the model.

Always zoom in while making selection using Pen Tool (P). Initially, Pen Tool (P) looks complicate to understand and really very difficult to use if you are beginner. But once you know how to use it then it is the best selection tools available in Photoshop.
Third Technique : Making Advanced Selections
Step 5
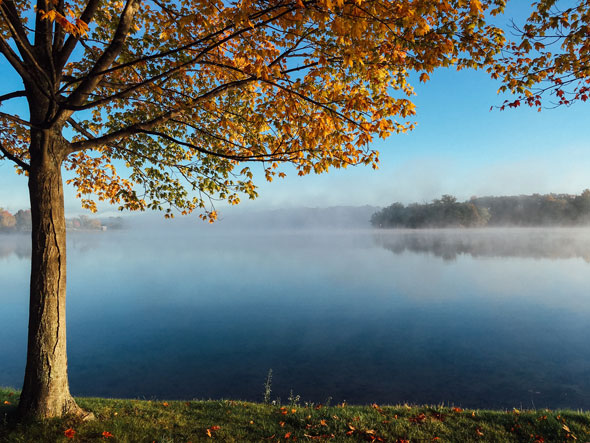
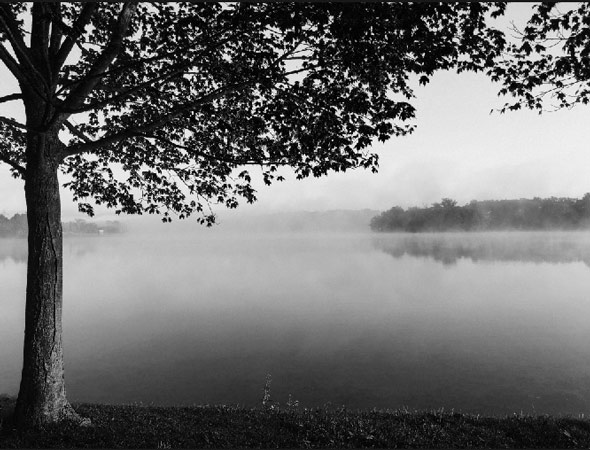
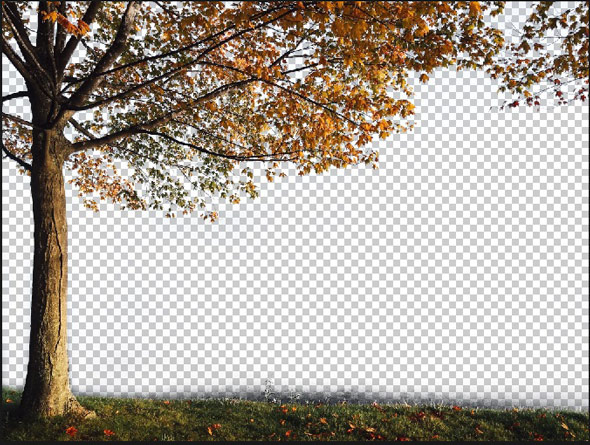
With this technique you can make the more complex selections. In this techniques we’ll use the combination of Channels and Calculations to make the selections. Open up the tree image in Photoshop and I want make the selection of tree.
Step 6
Let’s make the selection with Magic Wand Tool (W). With this you’ve to click on the blue sky parts between the branches of tree to make the selection. This is time consuming and it’s not appropriate to click over and over again to sample the color for selection.

We can’t use the Quick Selection Tool (W) as well because we don’t have solid background for selection. However, if you use then it can also ruin the selection.
Step 7
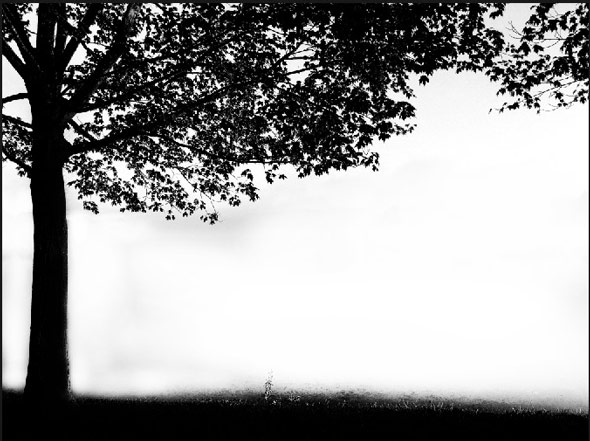
What about Pen Tool (P)? It is more time consuming than last one. With this tool, we’ve to go around the entire tree in order to make selection. I don’t think it’s a good idea and it will take hours to make the selection.
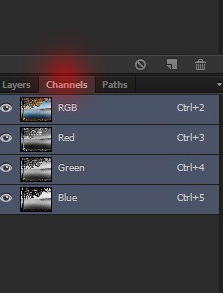
To overcome these limitations, we’ll use Channel Techniques. First switch to Channel group at bottom of layer panel. If channel is not showing on layer panel then go to Window > Channel to show the tab of channels. Under the Channel group you’ll find the three channel named Red, Blue and Green.
Step 8
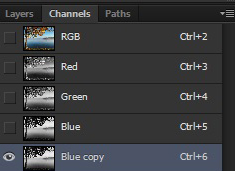
Now we need to select the channel which has more contrast between the tree and its background. I found that the blue channel has more contrast between the tree and its background. I am going to duplicate it as I don’t want to harm original channel. To duplicate the channel, right-click on it and choose ‘duplicate channel’.
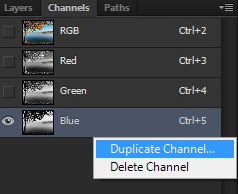
Once you duplicated it you’ll have a channel named ‘Blue Copy’ as shown below.
Step 9
Now our task is to whiten those area which we don’t want like tree background and to darken those which we want like tree parts. In short increasing contrast between tree and its background. For this purpose, I am using Calculation techniques. While the blue copy channel selected go to Image > Calculations. You’ll have a dialog box appear as shown below :
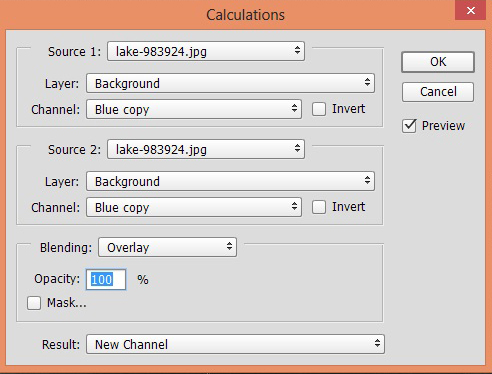
It’s look complicated and we not going to get into here deeply for the sake of simplicity. Here we can done our task (increasing contrast) using blend modes. The above settings you are seeing Photoshop automatically select these but if not then you can manually select them like I did it.
So in the source 1: I selected the lake image (you can see lake-983924 is selected) which I am working on. Choose Background in Layer option and for Channel we already selected the Blue copy.
Leave everything same for source 2 like we did for source 1. Now change the Blending to Overlay and click OK. Feel free to experiment using blend modes but most of the situation Overlay and Multiply works best.
Once you have done this you’ll see a Alpha Channel right underneath the blue copy channel.

Step 10
Here are the results with increased contrast :
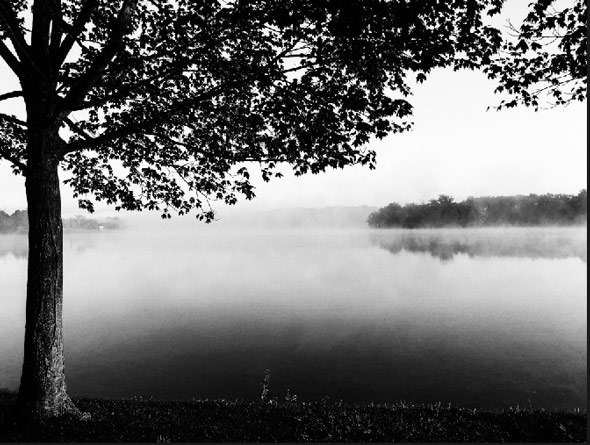
Here you can compare it before using Calculations.
Step 11
You can notice that there is still not enough contrast between the tree and its background. We need to increase it more until we make the background completely white. To do this, activate the Brush Tool (B). Use a soft round white brush to paint over the tree background as we don’t want it. If you are close to the edge of tree parts like the trunk, leaves, and branches, then you can change the brush mode to Overlay (on the options bar) to paint over the tree as well without worrying that you’ll make the tree white. Similarly, make the tree completely black and use overlay blend mode with black color when you are painting over the tree parts that are close to its background. You can also vary the brush size and opacity for better results.
Once you’ve done this properly, you’ll have the similar results as shown below :
You can also use Dodge & Burn Tool for this purpose or even you can use Level Adjustment layer to darken and brighten the parts.
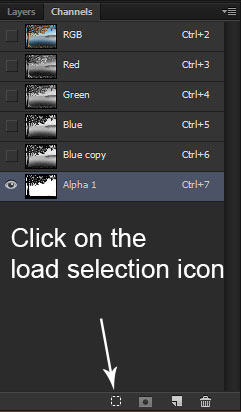
Step 12
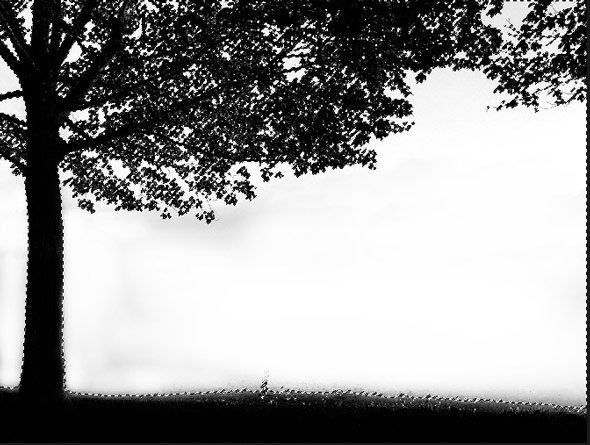
Now it’s time to get the results of our hard work and we are going to load the selection. Click on the load selection icon to load the selection.
Here is the selection of every single piece of details :
Step 13
Now click on the RGB Channel in the Channel Tab and then switch back to Layers tab. While the selection is active, go to Layer > Layer Mask > Reveal Selection to extract the tree.
Step 14
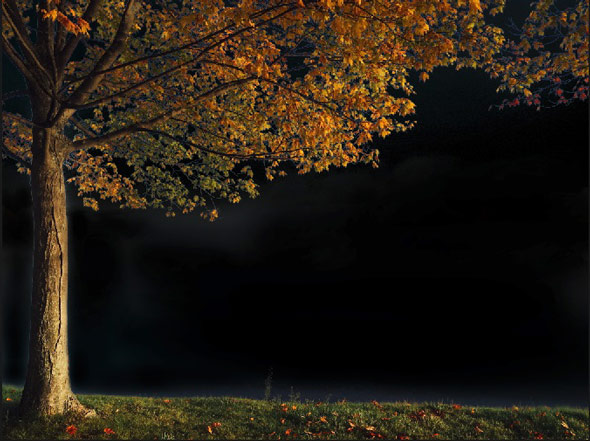
In the transparent background, it looks clean but in black background, you can notice the mistakes and there are still some parts visible of tree background as shown below.
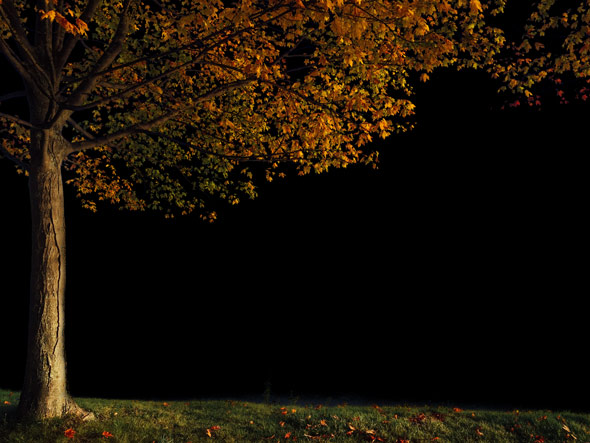
To fix this, load the selection one more time but this time from layer mask of the tree. Hold down the CTRL/CMD key and click on the thumbnail of layer mask to load the selection. Now inverse the selection by pressing CTRL + I as we only want to hide the background. Then simply press ALT + BACKSPACE to mask all the unwanted details of tree background (make sure your foreground color is set to black).
Now we got very clean selection and the tree is ready to place on any background.
Remember you can even make the selection of tree with Color Range tool but after that you need to increase the contrast between the subject and background. That is why the Calculation and Channels techniques works best.
Conclusion
Thanks for following the tutorial and these are the techniques for making selections. I hope, now you can make any complex selections even you can make the hair selection as well. and feel free to let me know if you baffled at any step. Have a great day!
Need Help With Photoshop or Looking for Professional Support?
Whether you're just getting started with Photoshop or need expert-level assistance, we're here to help! Contact us for personalized Photoshop tutorials, project support, or creative services.
Get in touch today to take your skills or projects to the next level.
CONTACT US NOW📘 Want to Master Photoshop Faster?
🎁 Get Your FREE PDF E-Book "Top 10 Photoshop Tricks Every Designer Must Know" Now – Packed with expert tips, shortcuts, and techniques to boost your creativity & workflow.
👉 Download Your FREE PDF E-Book NOW!

