

In this tutorial, I’ll show you how to master Frequency Separation retouching in Photoshop. This is the second tutorial on frequency separation and I want to simplify this technique for you guys. You can read the detail explanation on it here.
I modified it and that will help you to master this splendid technique. It will take only 2 minutes to retouch any portrait or any images that you are working on. Obviously, you can fine-tune the settings to suit your project as it is a non-destructive way to retouch skin. So, let’s get started!
Tutorial Resources
Step 1 – Choose your Image
Open the image that you want to work on by selecting File > Open.
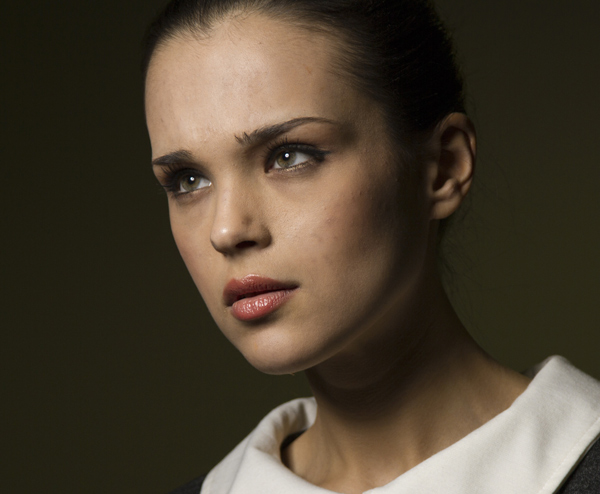
Here is the image that I am using for this tutorial and you can download it from Pixabay using the link mentioned above:
Step 2 – Clean up
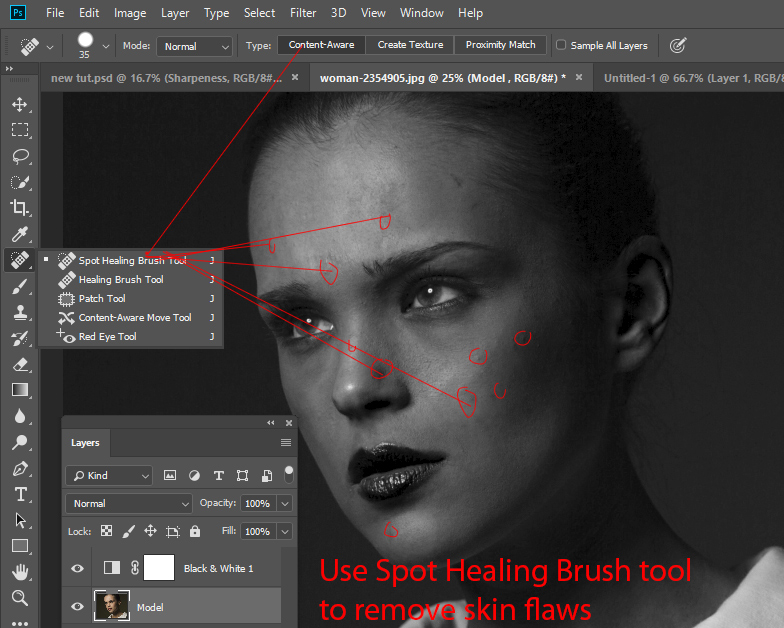
I am going to do little bit clean up on the image using Spot Healing Brush Tool. Go to Layer > Adjustment Layers > Black/White and drag the Red Slider to left so we can see the skin flaws.

Now select Spot Healing Brush Tool (J) to remove mostly acne. You can see where I’ve used this tool. Feel free to do according to your way. Make sure when you use Spot Healing Brush Tool (J) the Type on the options bar is selected to Content-Aware.
Did you know that Spot Healing Brush Tool (J) samples the skin automatically to clone it?
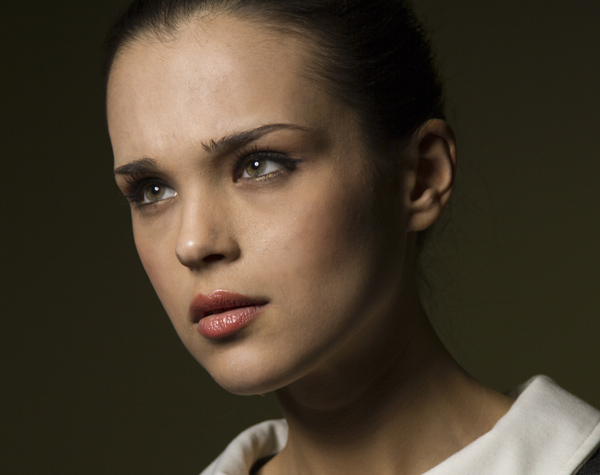
Now you can delete Black/White Adjustment layer to see the results. Much better see below:
Step 3 – Sharpen the Image
You know about frequency separation it has two parts Sharpening and Blurring the image. You can get an airbrush effect or look on the skin. First, we’ll sharpen the image using High Pass and then we’ll soften it using Surface Blur.
Duplicate the model layer twice by pressing CTRL/CMD + J.
I’ve converted both of these layers into Smart Objects. You can do the same by right-clicking on each layer and then choose “Convert to Smart Object”.
It is necessary otherwise you wouldn’t be able to alter the settings of the filter later if you want to do so. Name it Blur and Sharpness as shown below:

Select the Sharpness layer and then go to Filter > Other > High Pass. Set the Radius value to 2.1px or until you see the skin details.
Also, it doesn’t make sense to enter specific values here because you can fine-tune it later.

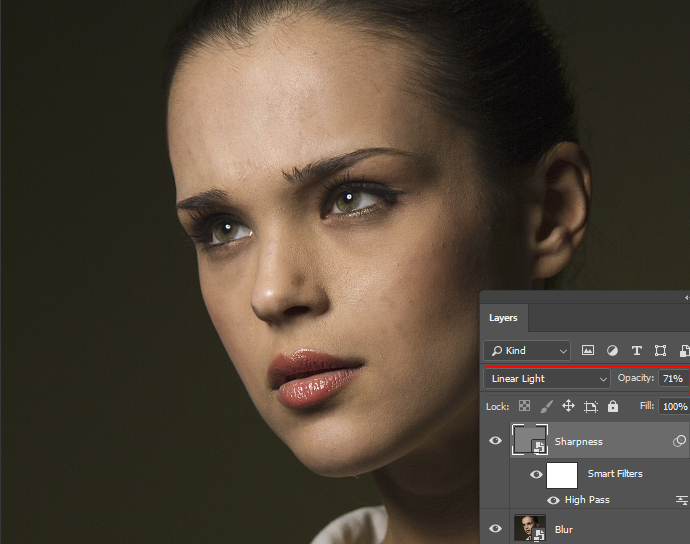
Change the blending to Linear Light and reduce the opacity to 70%. When you change the blending mode, your image will become incredibly sharp as shown below but don’t worry about it we’ll fix it in the next couple steps.
Step 4 – Soften the Image
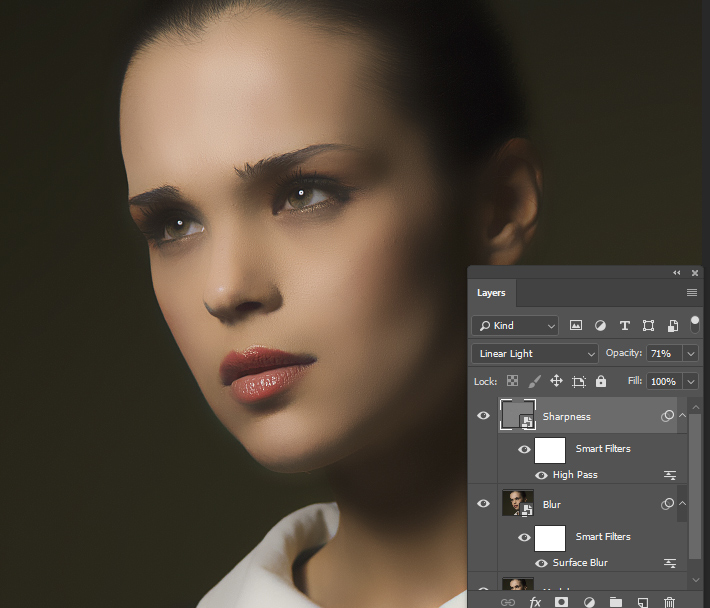
Now we’ll soften the image as it look way too sharp. Select the Blur and then go to Filter > Blur > Surface Blur. I entered the value for radius 60px for threshold 30px.

You don’t need to worry about the values here just set it until the skin details start to fade away. In the end, you can change it to better suit your taste so don’t worry about it.
Oops, skin looks like plastic and very blurry!
Step 5 – Results
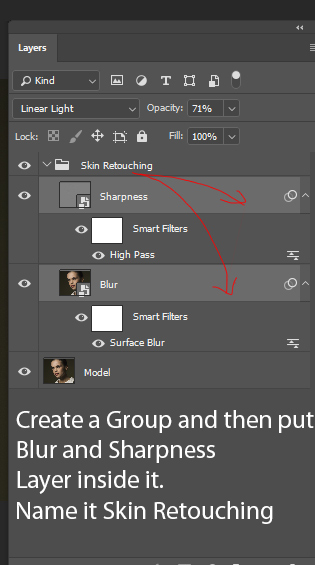
In order to fix this, select both layer Sharpness and Blur Layer and then press CTRL + G to group them. Name this group “Skin Retouching”.
Now reduce the opacity of the group to 50%.
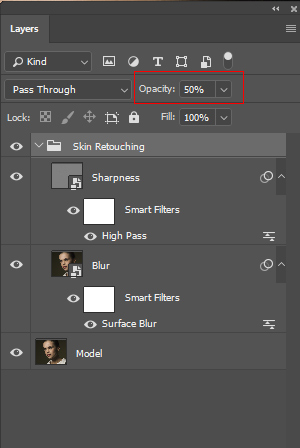
See the results. Looks amazing. Isn’t it?

In the end, I added a Curves adjustment layer to boost the highlights slightly. You can go to Layer > New Adjustment Layer > Curves and use the settings below:
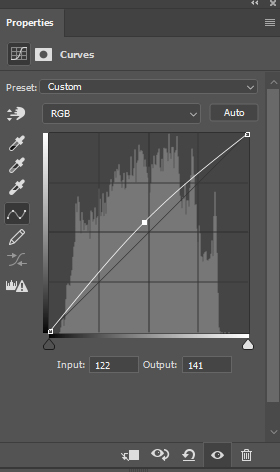
I inverted the layer mask of Curves by pressing CTRL + I and make sure when you do that layer mask is selected. I revealed the effect mostly on the highlights area, so wherever I am seeing highlights exactly there I revealed the effect by painting over the layer mask using a white brush.

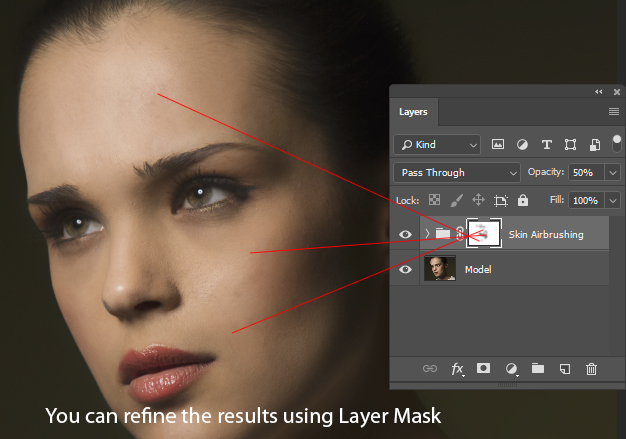
Bonus Tip – Using Layer Mask
As I said this method is non-destructive meaning you can go back to settings any time to fine-tune the settings. You can reduce the opacity of both layers and you can change both filters’ settings by double-clicking on it that is why I was saying that you don’t need to worry about the values for High Pass and Surface Blur filter as you can alter them at any time..
If you want to bring back the skin details what you can do is that add a layer mask to Skin Retouching Group by selecting Layer > Layer Mask > Reveal All. Now you can use a soft black brush to hide the effect of both layers to bring back the original texture of the skin.
You can also use an inverted or Hide All layer mask then you can use a soft white brush wherever you want the airbrush effect to occur on the skin.
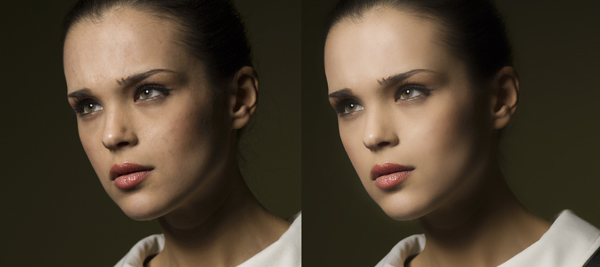
Compare the before and after results and you’ll notice significant improvement on the skin. Hope you like the tutorial, feel free to let me know about your thoughts in the comment section and take care!

Need Help With Photoshop or Looking for Professional Support?
Whether you're just getting started with Photoshop or need expert-level assistance, we're here to help! Contact us for personalized Photoshop tutorials, project support, or creative services.
Get in touch today to take your skills or projects to the next level.
CONTACT US NOW📘 Want to Master Photoshop Faster?
🎁 Get Your FREE PDF E-Book "Top 10 Photoshop Tricks Every Designer Must Know" Now – Packed with expert tips, shortcuts, and techniques to boost your creativity & workflow.
👉 Download Your FREE PDF E-Book NOW!

