


In this tutorial, I’ll be showing you how you can retouch skin using the frequency separation technique in Photoshop. We’ll start with removing blemishes, then using the frequency separation technique, and finally using Dodge tool to put a cherry on a cake. Let’s get started!
Tutorial Resources
Step 1
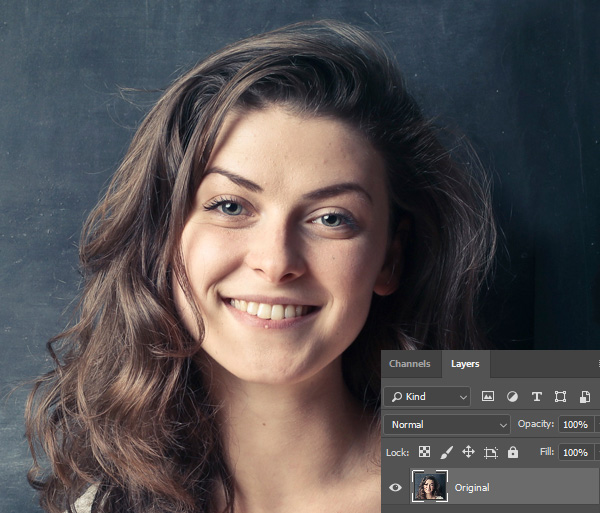
Open up the woman in Photoshop by selecting File > Open. You can download this image from the tutorial resource section. I zoomed the image to focus on the skin, after zooming I cropped it as we only going to work on the skin in this tutorial.
I renamed the layer “Original Layer”, it’s always the best thing to rename your layer for the faster workflow.
Step 2 – Removing Blemishes
The very first thing of the retouching is doing some clean up on the skin, for example, removing blemishes, spots or pores is a great thing to start with.
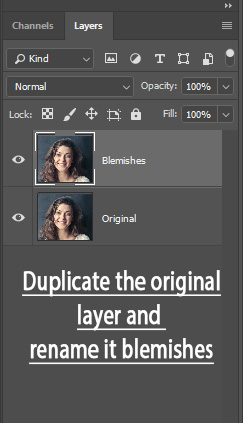
So, duplicate the original layer by pressing CTRL/CMD + J. Rename this layer “Blemishes”.
Step 3
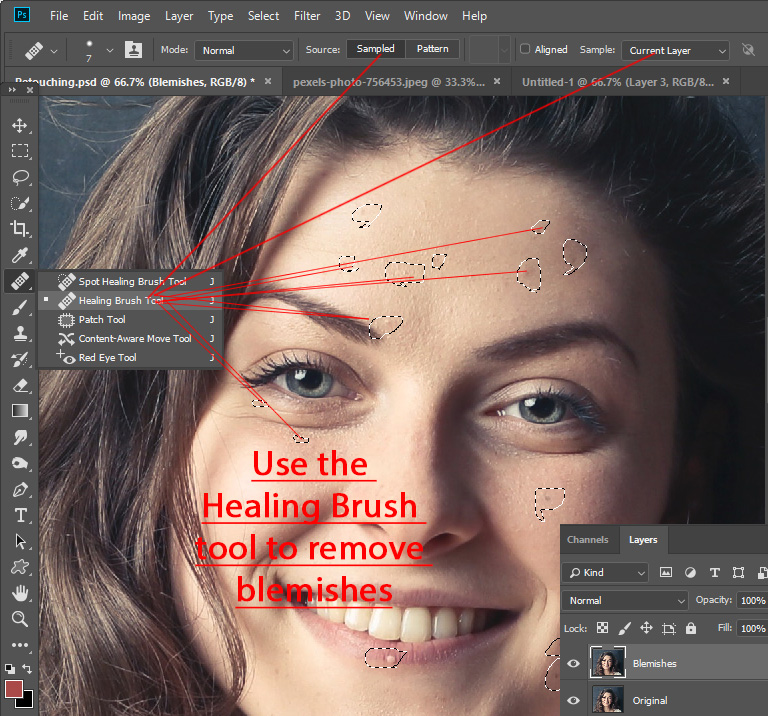
Now use the Healing Brush Tool to remove spots, blemishes, and pores from the skin. All you have to do is, pick the Healing Brush Tool and press the ALT/OPT to sample the source from the model face and paint over the spots to heal them.
Before using the Healing Brush Tool, make sure Blemishes Layer is selected, select the Source: Sampled and Sample: Current Layer in the option bar as shown in the image below.
Here you can see how I did it:
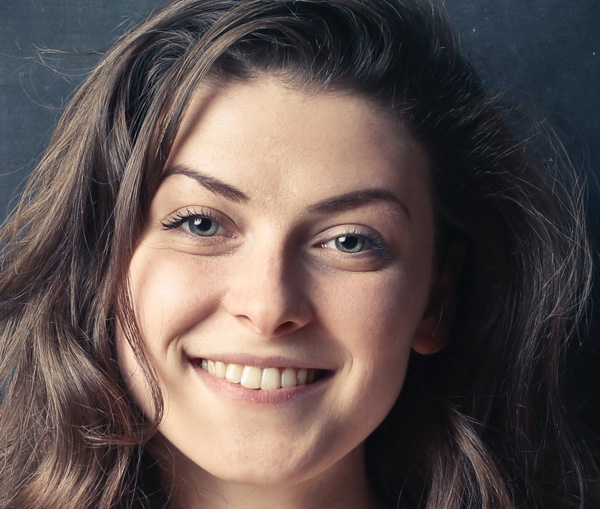
Here are the results after removing blemishes:
Step 4 – Using Frequency Separation Technique
The Frequency Separation Technique involves two parts.
In the first part, we’ll apply the blur to the skin to soften it and in the second part, we’ll bring back the lost details by sharpening the image.
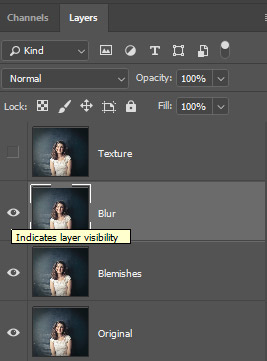
So, now we need two copies of blemishes layer to use this technique. Make two copy of Blemishes Layer by pressing CTRL/CMD + J. Rename the first one Blur and second one Texture.
Disable the texture layer for now by clicking the eye icon.
Here we have two more layers now:
Select the Blur Layer, then go to Filter > Blur > Gaussian blur and increase the Radius Value until that point the skin starts to blur away.
You can also preview a specific skin part that has most of the texture, for example under the eye, then use the Radius Value until it starts blurring.
Here are the settings used for blur:
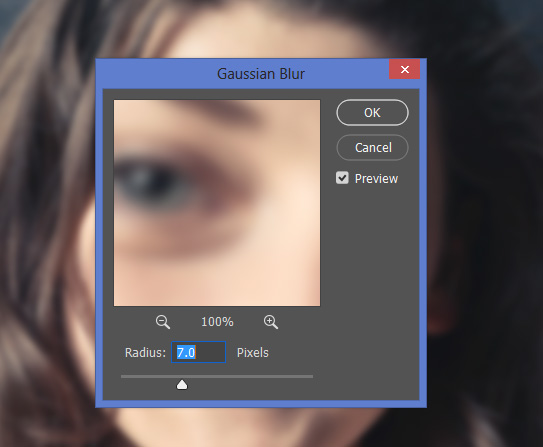
Here are the blur results:

Step 5
Now we’ll bring back the texture to the image. Enable the texture layer by clicking the eye-icon, go to Image > Apply Image.
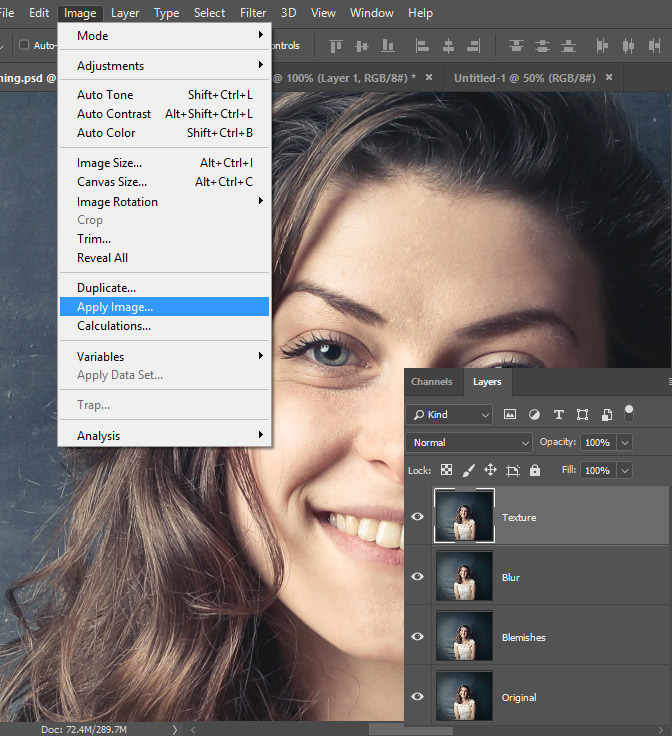
In the Apply Image dialog box:
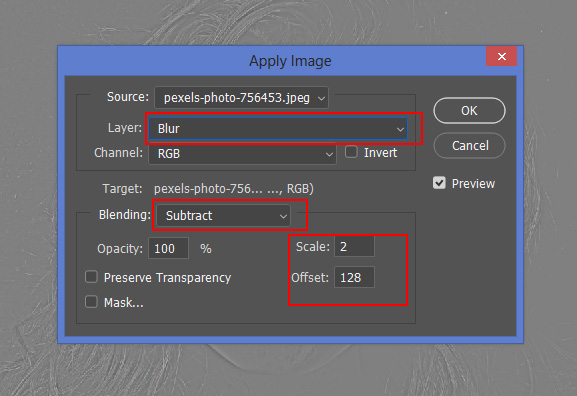
Select Layer: Blur as we’ll subtract the color from this layer to bring the texture back.
Select Blending: Subtract this will subtract the color from the blur layer.
Set the Scale: 2 and Offset: 128.
Don’t ask why I put these values for scale and offset. It’s a long story that will make the tutorial long. Just use these values as most of the photographer recommends this for the best results.
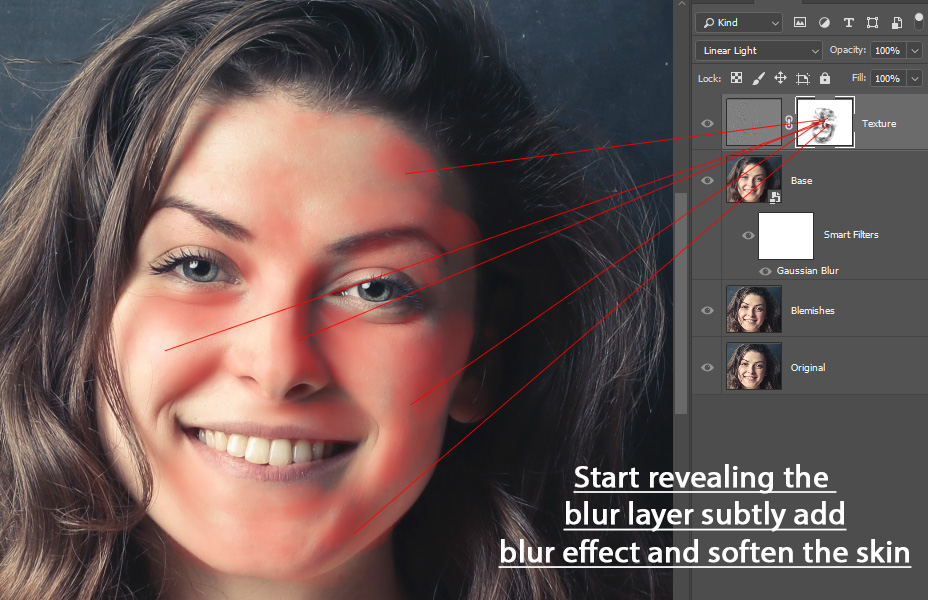
Set the blending mode of the texture layer to Linear Light. This will add sharpness to the image and you can notice the blur effect is no longer visible.
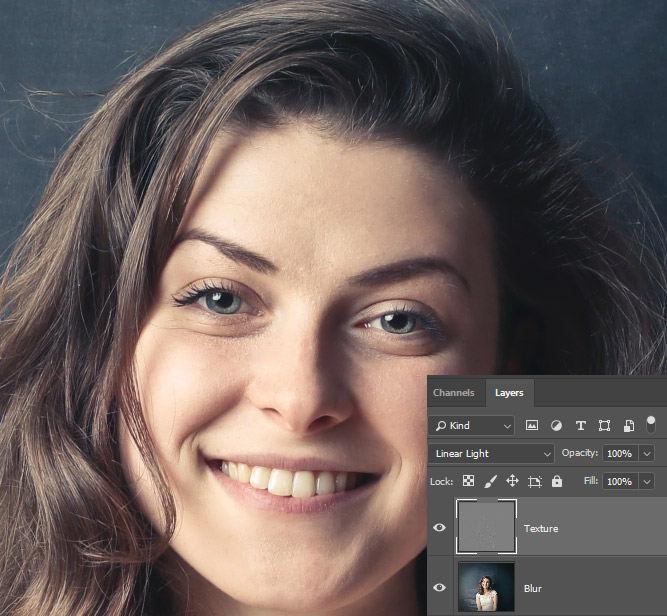
The Second part of the frequency separation done as well.
Step 6
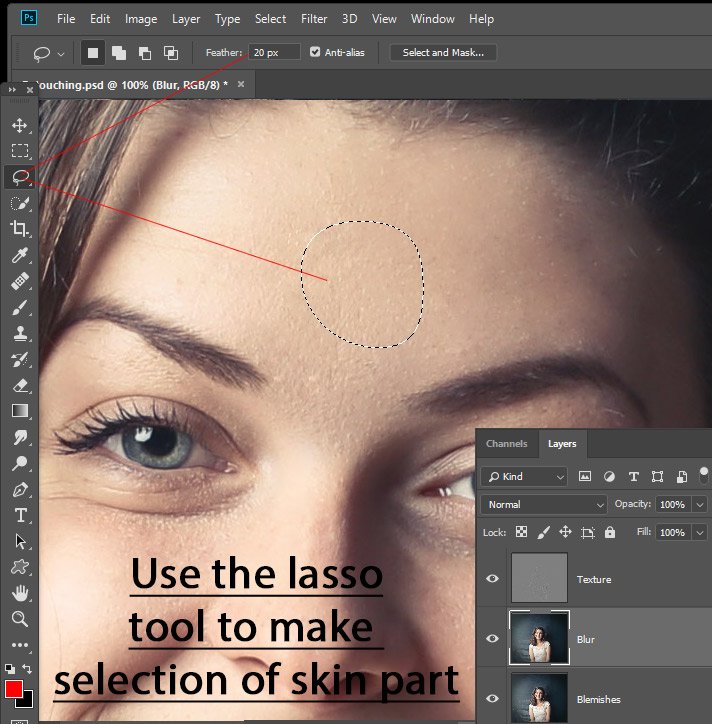
Now we’ll blur the parts of the face one by one by selecting and then applying the blur filter.
Select Lasso Tool, set the Feather to 20 to 30px and make a selection of the skin part. Increasing Feather is must otherwise you’ll get sharp blur effect on the skin. So make sure you are using the high values for feather.
Go to Filter > Blur > Gaussian Blur, make sure you selected the Blur layer, and enter the Radius Value, until you get rid of glossiness.

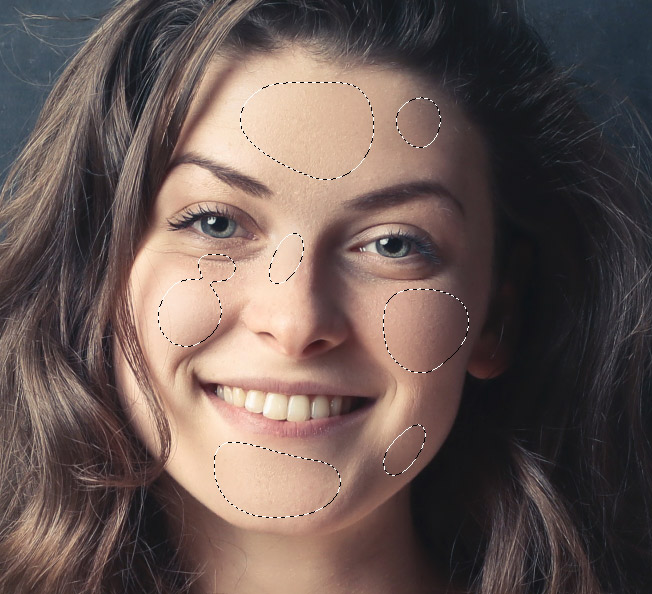
Similarly, use it on the other skin parts to add soft effect. Just make the selection using the Lasso Tool and then blur the part using the Gaussian Blur.
Here you can see how I did it on other parts:
OR
Step 7 – Using Mask to Reveal the Soft Effect
For some reason, I don’t know why the blur effect which we’ve applied in the previous step to the image isn’t showing a smooth effect on the skin. But If you are getting the results here, then you can skip to Step 8.
In this step, I use a mask to add soft effect to the image instead of adding blur using lasso tool. It is giving me fantastic results. Everything is same here. The only thing that is changed is that I converted the Blur Layer into Smart Object. You can right-click on it, then choose “Convert to Smart Objects”. Rest of the settings are the same as we used earlier.
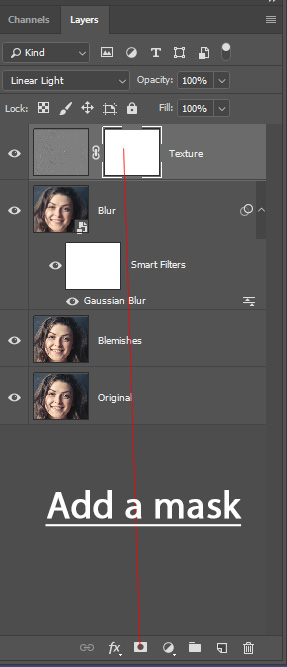
Here are things got interesting when you add a mask to texture layer. What we are going to do is that we’ll reveal the soft effect of the blur layer by removing the texture layer effect where we want to soften the skin, rest will be intact to preserve the sharpness of the skin.
So, add a mask to texture layer by clicking on the Add Layer Mask at the bottom of the layer.
Use a soft, basic brush with black color to remove the texture layer effect subtly to add smooth and soft effect to the skin. Remember we are masking the texture layer, revealing the blur layer which is right beneath it.
Here you can see how I did it:
In case, if you masked the texture layer too much and maybe you want to bring back the details again, then you can simply paint on those parts with a white brush.
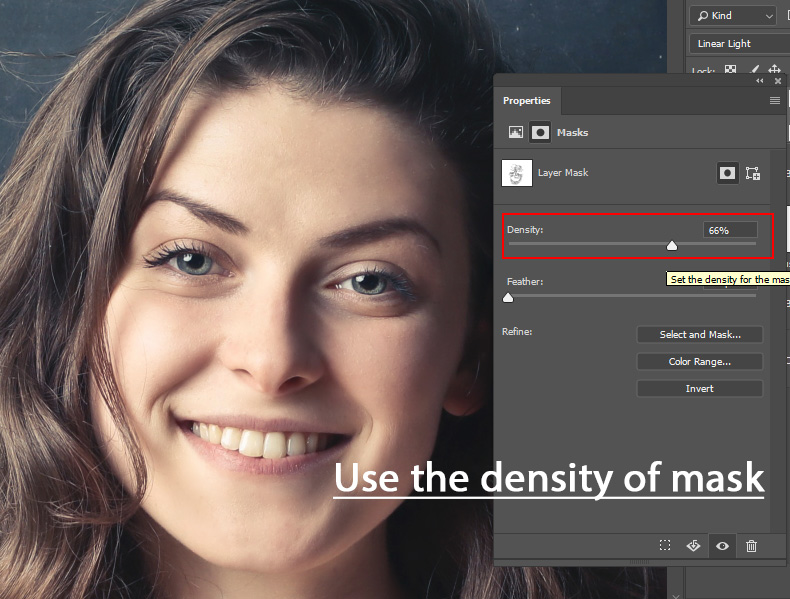
I managed to remove the effect where exactly I want but I found that the blur effect applied a bit much. What I did here, I double-clicked on the mask, then I reduced the density of the mask by dragging the Density Slider to the left to reduce the mask effect. That will re-apply the effect of the texture layer to image thus bringing back the texture details.
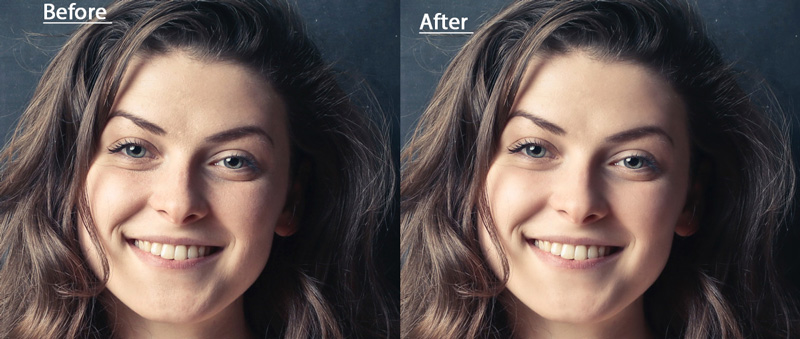
So this is how I balanced out the smoothness and sharpness effect on the image. You can compare the results below:
Step 8 – Apply Dodging & Burning
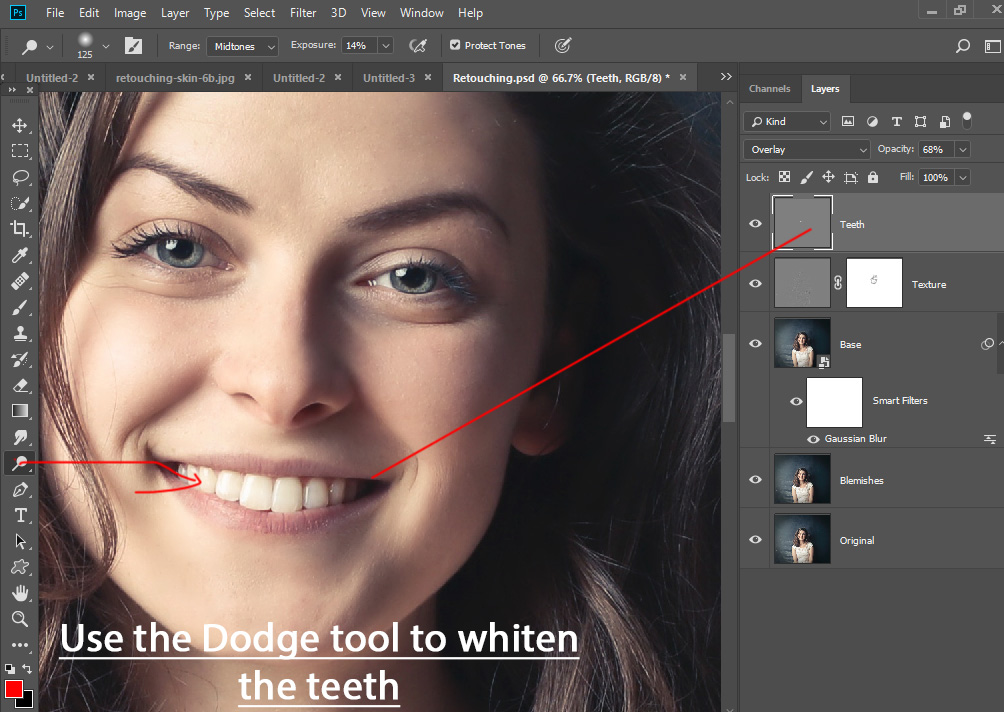
We’ll do dodging on the image for whitening her teeth and apply it on the face as well. You can check out this tutorial for a detail explanation Dodge & Burn Tool tool.
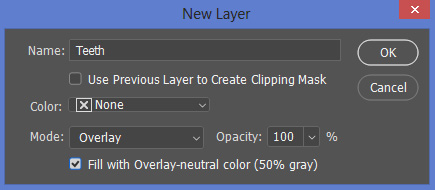
Go to Layer > New > and fill this layer with 50% Gray color and change the blending mode to Overlay. Name it “teeth”
Now use the Dodge Tool (O) to whiten the teeth. You can reduce the opacity of the layer after applying the Dodge tool to subtle the dodge effect.
I created another layer filled with gray color and blend mode set to Overlay. But this time I used the Dodge Tool on the face with the same settings.
See the image below for reference:

I did some dodging on her eyes as well. Here are my final results:

Bonus Tip
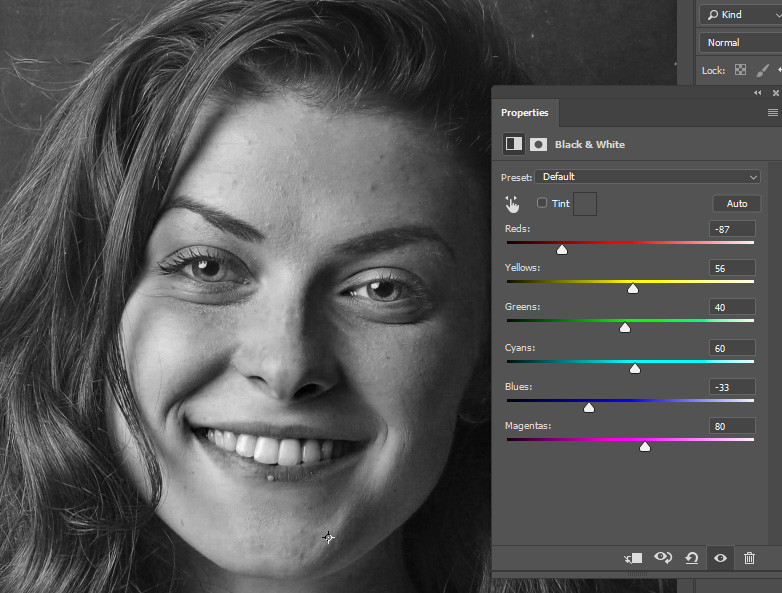
Here is a tip for you on removing blemishes. When you view the image in Color, you are not seeing details on the skin as our eyes see them in black/white. Sometimes things get worse, thanks to the light.
You can see the skin blemishes using a Black/white adjustment layer. Make a Black/white adjustment by selecting Layer > New Adjustment Layer > Black/White and then reduce the Reds, Yellows and sometimes Blue to see the spots and blemishes on the skin.
Then you can perfectly clean up the skin.
Need Help With Photoshop or Looking for Professional Support?
Whether you're just getting started with Photoshop or need expert-level assistance, we're here to help! Contact us for personalized Photoshop tutorials, project support, or creative services.
Get in touch today to take your skills or projects to the next level.
CONTACT US NOW📘 Want to Master Photoshop Faster?
🎁 Get Your FREE PDF E-Book "Top 10 Photoshop Tricks Every Designer Must Know" Now – Packed with expert tips, shortcuts, and techniques to boost your creativity & workflow.
👉 Download Your FREE PDF E-Book NOW!

