

In this tutorial, we’ll take a look at the Improved Select & Mask feature that comes with Photoshop 2021. You know the Adobe Photoshop 2021 release is already here and Adobe added a lot of new features to Photoshop 2021.
This feature is one of them and it has improved vastly, it has some new features such as Refine Hair Button and Refine Mode: Content & Object Aware. I’ll try to test this feature to see if it works and if it does, do you we need to make further refinements to our selections or not. Let’s get into it!
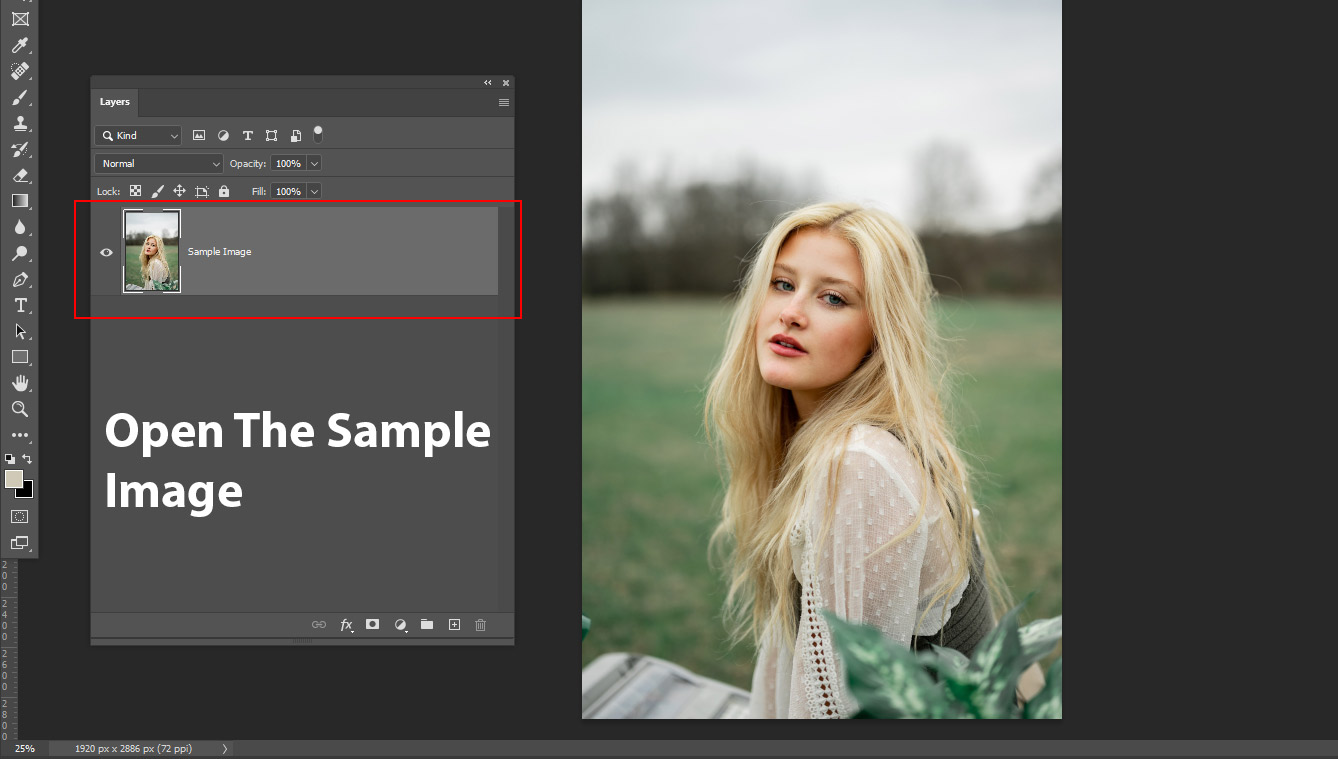
Step 1 – Open The Sample Image
First, you can download the sample image from Unsplash and download it if you want to follow along with me. You can see in the below image, I have opened the image by selecting File > Open.
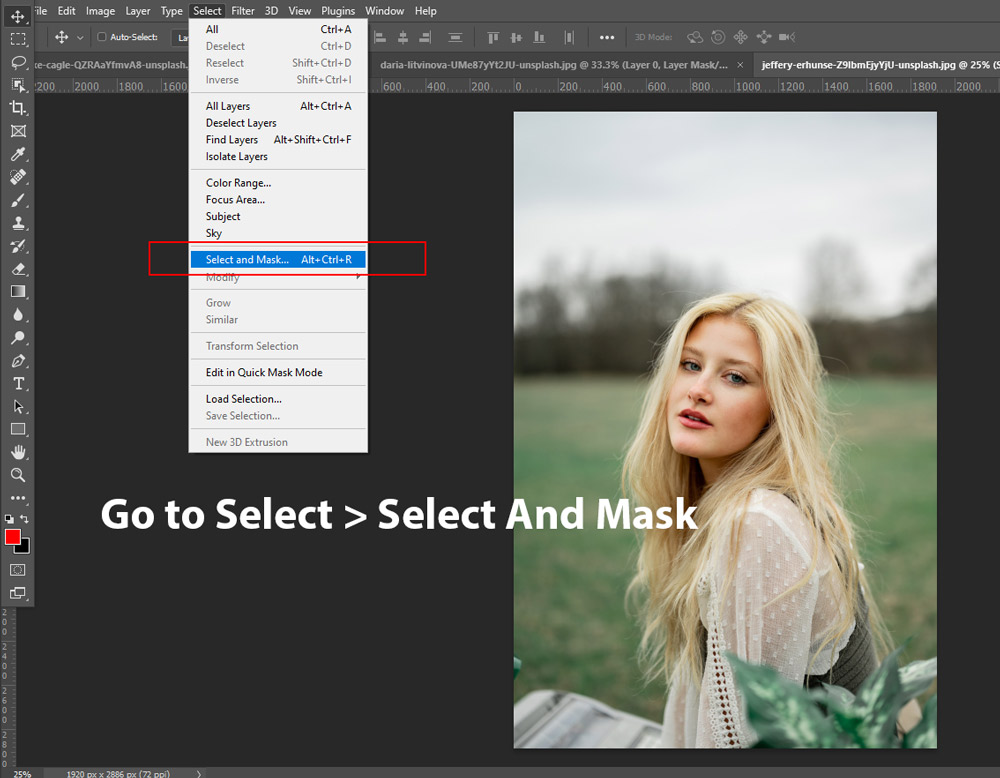
Step 2 – Improved Select & Mask
To test this improved Select & Mask Feature, go to Select > Select & Mask.
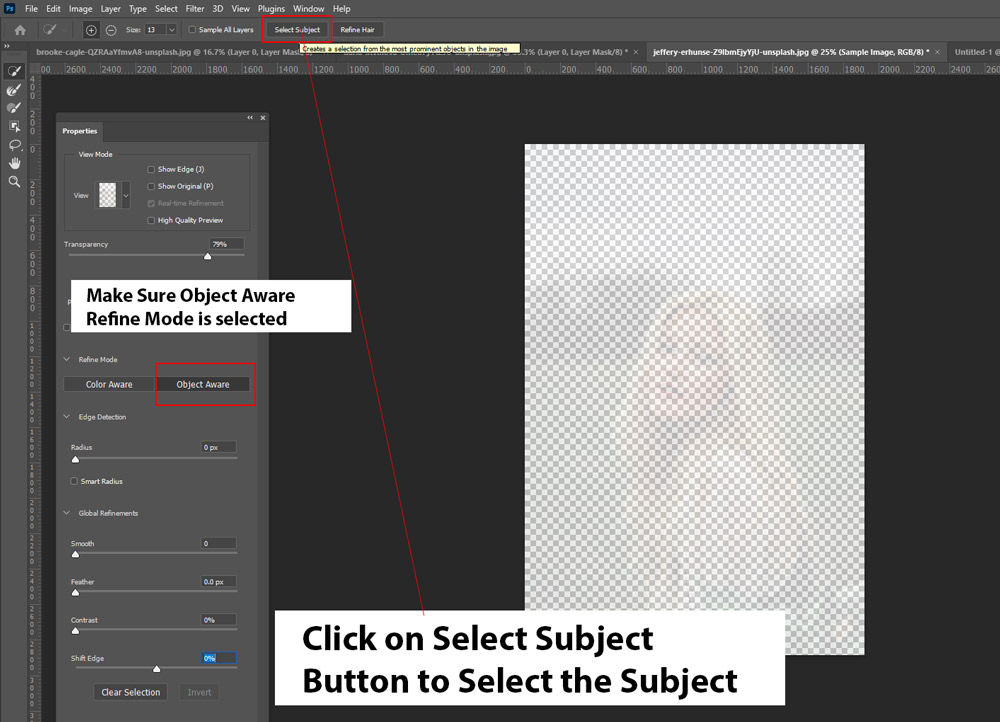
Step 3 – Select Subject in Two Clicks
Once you are inside the Select & Mask, click on the Select Subject Button to select the subject and remove the background. In the previous version of Photoshop, it won’t select subject inside the select and mask dialog box but in Photoshop 2021 it can select subject inside the dialog box of Select & Mask.
Also, we have a brand new Refine Mode: Color & Object Aware. I selected the Object Aware Tool because I am working on a complex background. You can select Color Aware if the background is clean and simple. Bottom line is Object Aware for complex & busy background, and Color Aware is for simple and clean background.
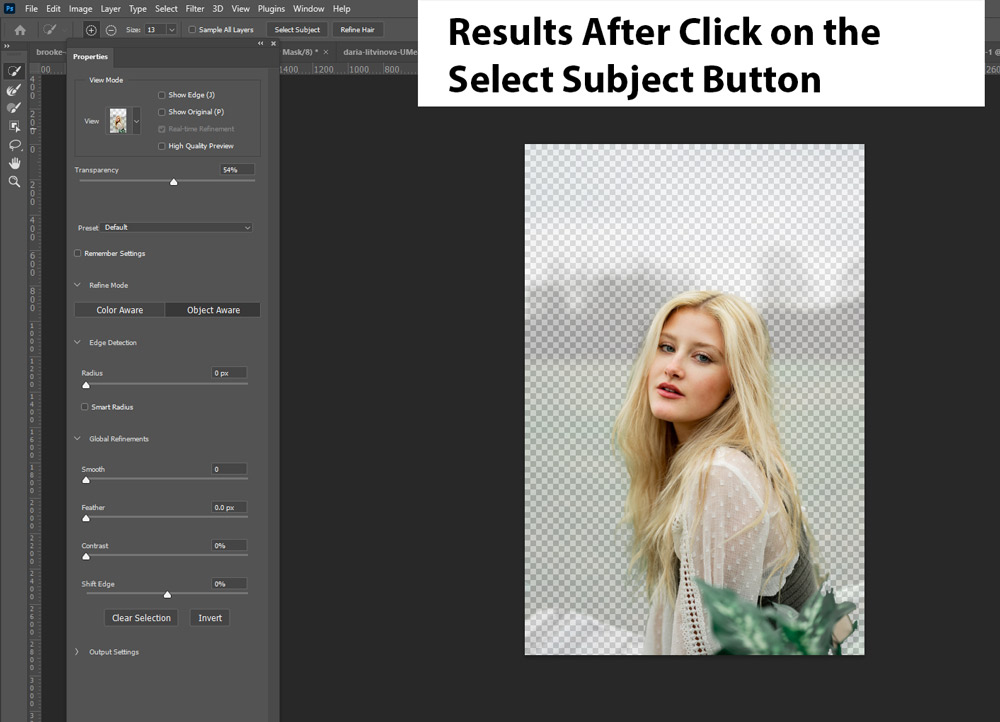
Click on the Select Subject Button:
Here you can see the results after clicking on the Select Subject button:
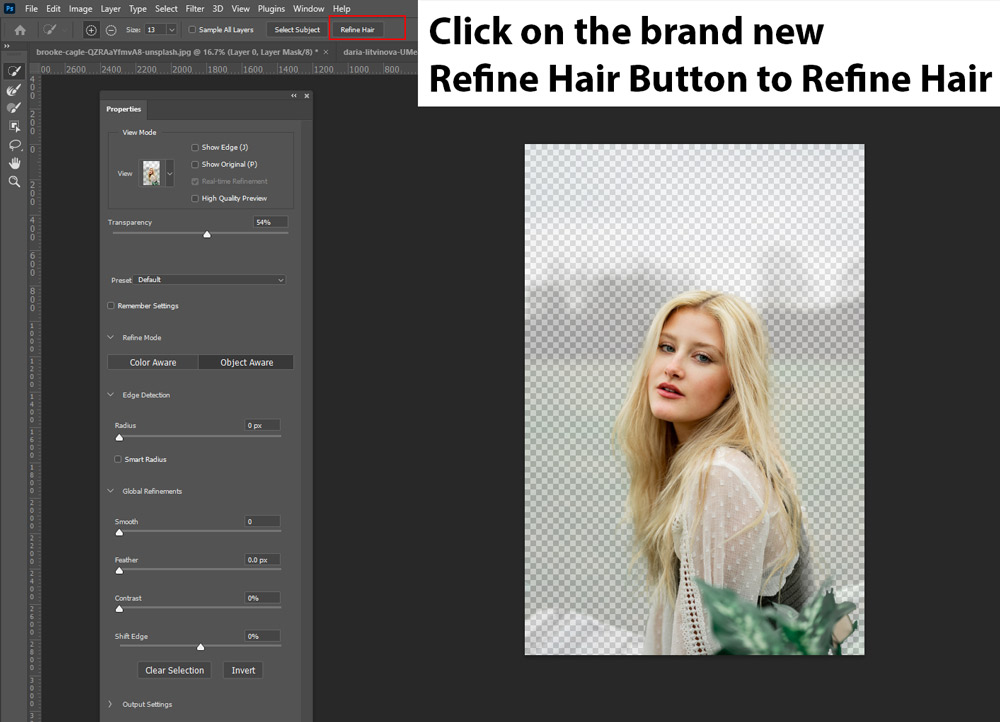
They added a brand new button Refine Hair, it lets you refine hair in just one click instead of refining the hair using the Refine Edge Brush Tool. You can still use Refine Edge Brush Tool but I am testing it for the sake of simplicity and tutorial.
Step 4 – Add A New Background
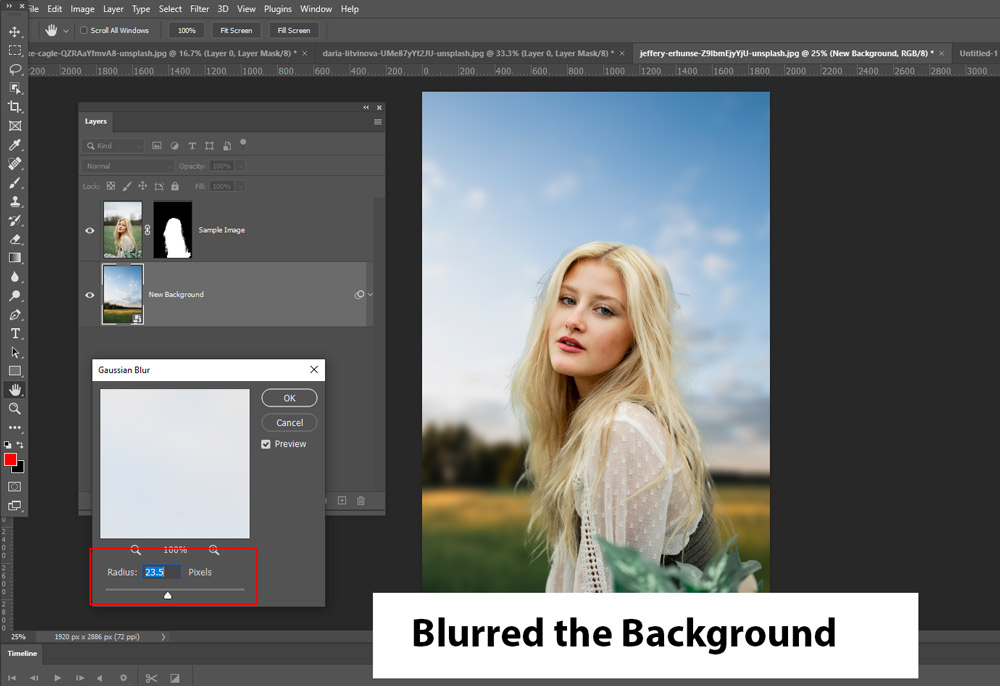
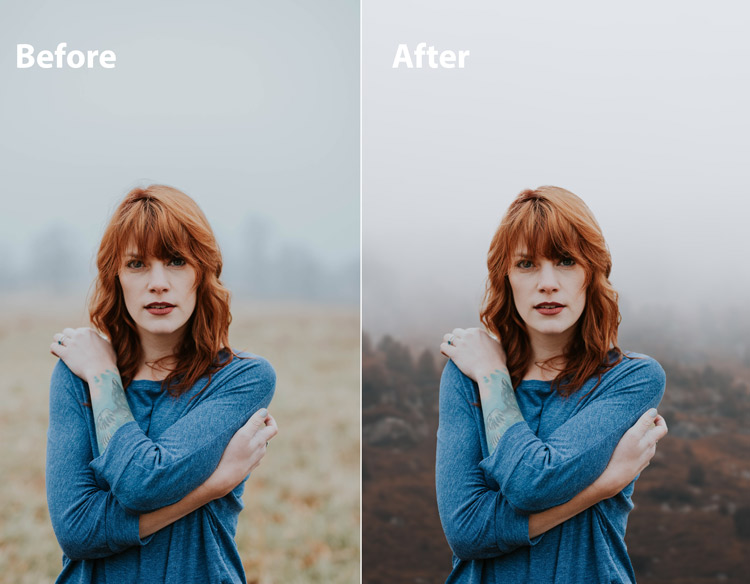
Before I zoom in and show you the results of Select & Mask, I want to add a new background behind the subject. I added a new background as you can see in the image below.

I went to Filter > Blur > Gaussian Blur and then I blurred the background using the settings shown in the below image:
Step 5 – Select & Mask Results
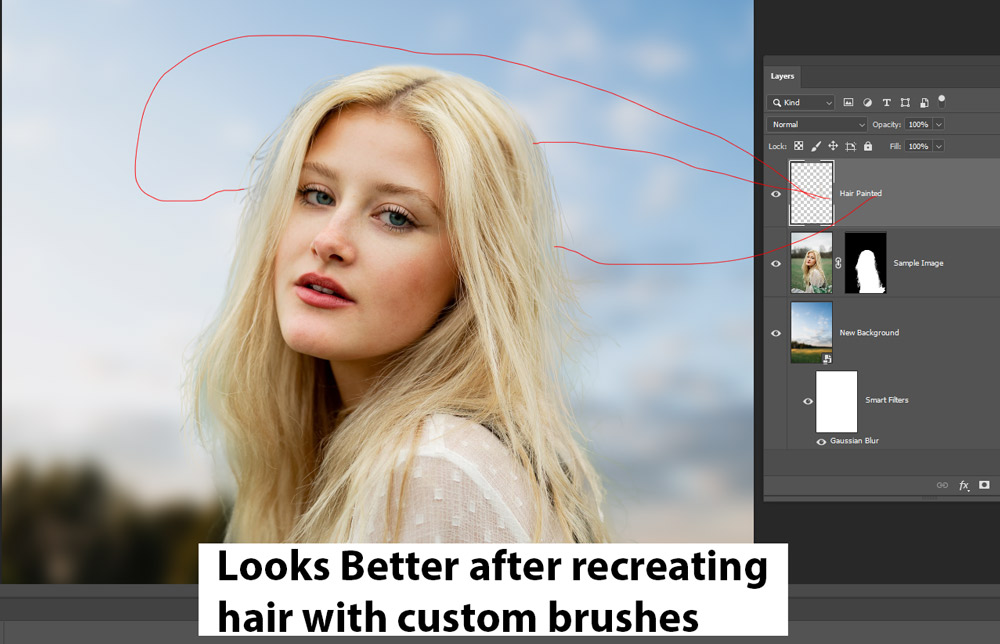
You can see how it did in the below image. I zoomed in so you can see how it has selected the hair and extracted them. In my opinion or as you can see it is not perfect but not bad for just one click. Not sure when we will get the perfect results but if we leave everything on A.I. then there won’t be any fun and challenge to learn from your own and others.
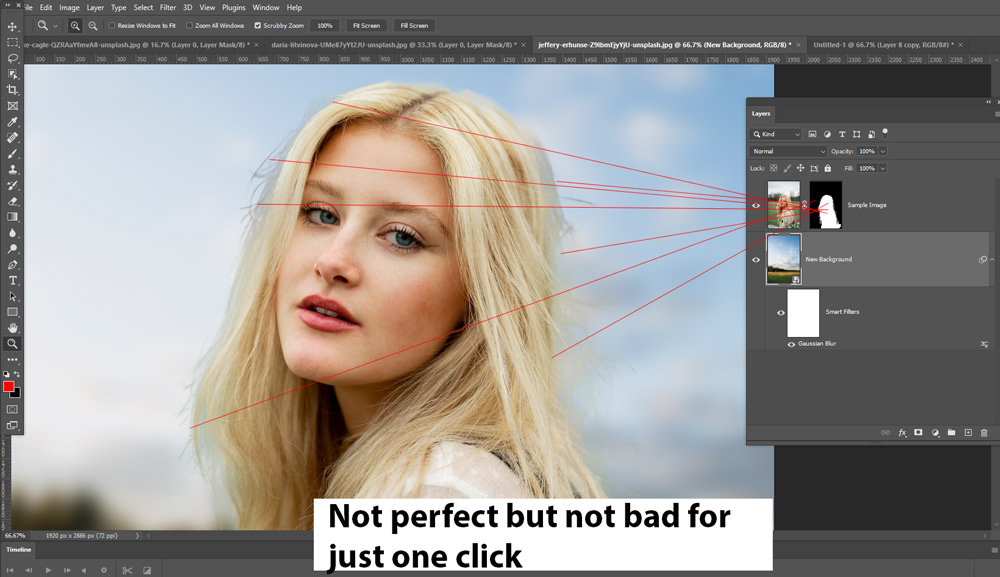
I have recreated the hair using my custom brushes and it started to look better after fixing the hair. If you want to learn more about how to use the custom hair brushes to recreate hair, you can follow my How to Remove Background in Photoshop tutorial, where I have shown how to remove background, fix hair, recreate them using custom hair brushes, and even you can download the custom hair brushes for free.
Step 6 – Does it really work?
Looking at the example of this tutorial, it’s been clear that it has improved significantly and as a Photoshop tutor, I couldn’t ask for more. I mean, it is just getting close to you a perfect selection in just 2 clicks and what else you want now. Sometimes if you have a complicated background and your subject doesn’t have flyaway hair, in that case, you don’t even need to do further selection refinements.
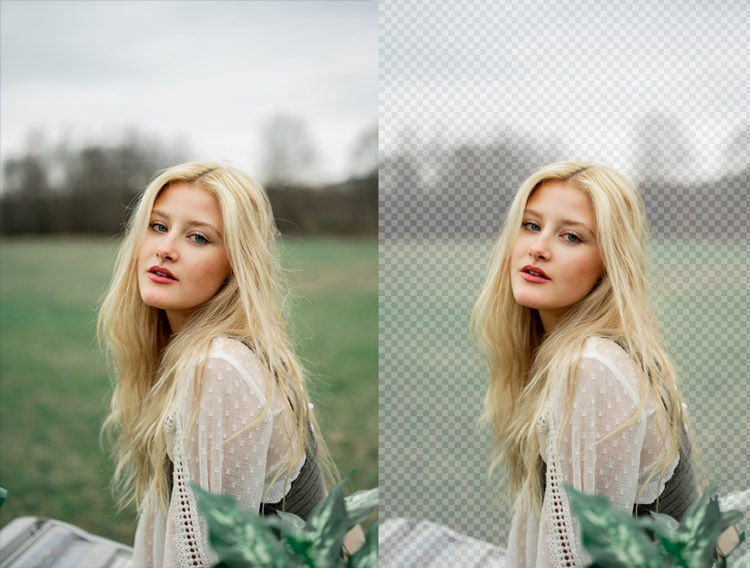
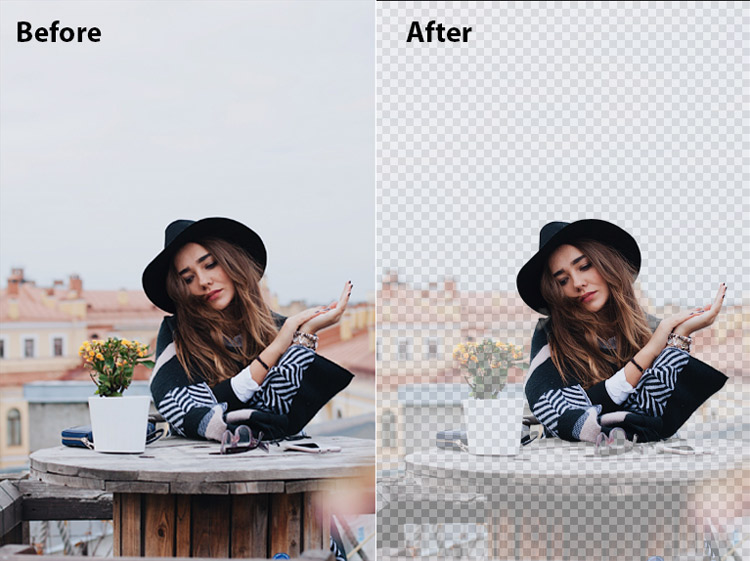
The below image also shows that it only cares about the subject and it ignores other stuff while making a selection. That’s show how accurate is the Improved Select & Mask.
Step 7 – How To Get The Most Out Of It?
That’s the question you need to ask yourself and the answer depends on person to person basis. For me, I can make it work on almost any image but to get the most out of it, I’d recommend choosing a new background but relevant to the existing background of your subject.
If you put your subject on a new background that is completely different from the existing one then it might not work and you might have to spend more time blending your subject on the new background.
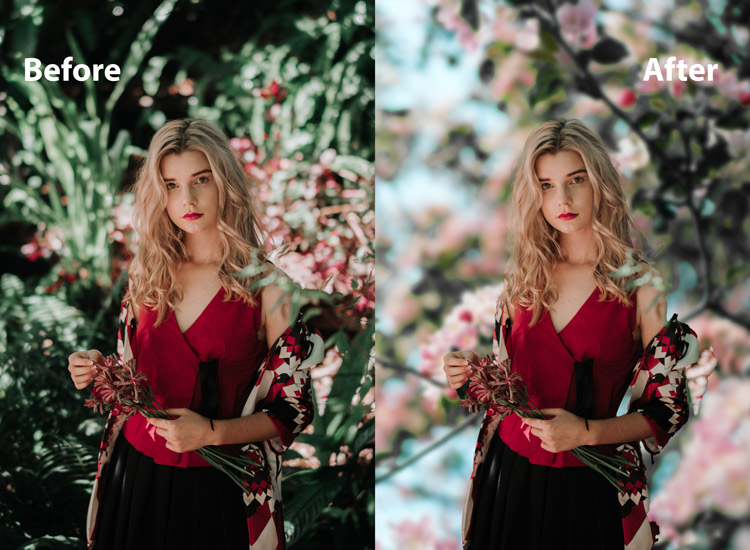
The below example explains it better where I cut-out my subject from a background which has greenery and I’ve chosen a relevant background which shows flowers and greenery as well.
There is no doubt it is going well with the image and I didn’t even paint hair or did any adjustment. It’s just only 2 clicks and you can see it looks nice.
I hope you enjoyed the tutorial. Let me know if you have any questions in the comments below. If you have used this feature or have some feedback on the improved Select & Mask, do let me know in the comments below.
Need Help With Photoshop or Looking for Professional Support?
Whether you're just getting started with Photoshop or need expert-level assistance, we're here to help! Contact us for personalized Photoshop tutorials, project support, or creative services.
Get in touch today to take your skills or projects to the next level.
CONTACT US NOW📘 Want to Master Photoshop Faster?
🎁 Get Your FREE PDF E-Book "Top 10 Photoshop Tricks Every Designer Must Know" Now – Packed with expert tips, shortcuts, and techniques to boost your creativity & workflow.
👉 Download Your FREE PDF E-Book NOW!
