
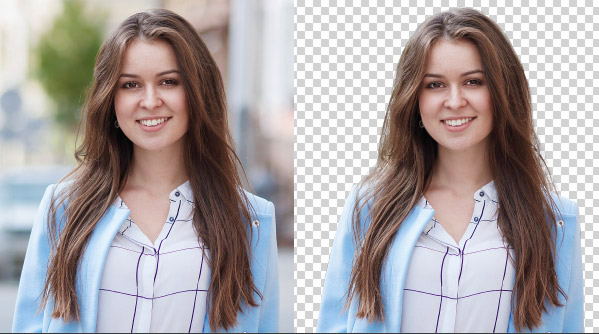

Learn how to remove the background in Photoshop by combining the use of multiple Photoshop tools. We’ll first use the improved Select & Mask to remove the background in just 2 clicks. Then use the Background Eraser (E) tool to remove the background and in the end, we’ll extract hair from a complex background with lots of hair details and finishing it up using custom hair brushes & adding a new background.
Jump to your favorite section:
- Manually Remove Complicated Background/Fix Hair
- Removing Background in just 2 clicks with Photoshop 2021
- How to Recreate Hair Using Custom Hair Brushes
Removing Busy & Complicated Backgrounds
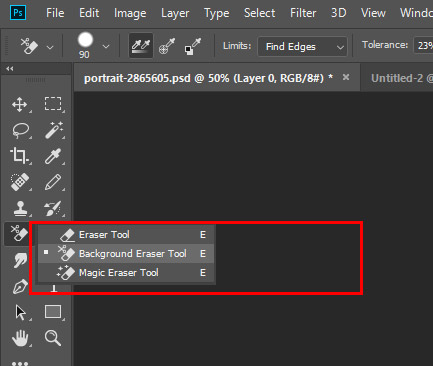
Step 1 – Select The Background Eraser Tool
This tool works by sampling the color from the image. Basically, it samples the colors to erase them and then it erases those pixels by matching them with the sampled color. Whenever you click on the image to erase its parts this is when it samples the colors to erase.
You can activate this tool by pressing (E) or alternatively you can hover to Toolbox and find it underneath the eraser tool.
Step 2 – Open the Sample Image
Now open the sample image which you’d like to remove the background from. I am using this woman portrait image and I opened it in Photoshop by selecting File > Open.
Once you opened the image duplicate it by pressing CTRL + J so you’ll have a backup of your original in case anything goes wrong.

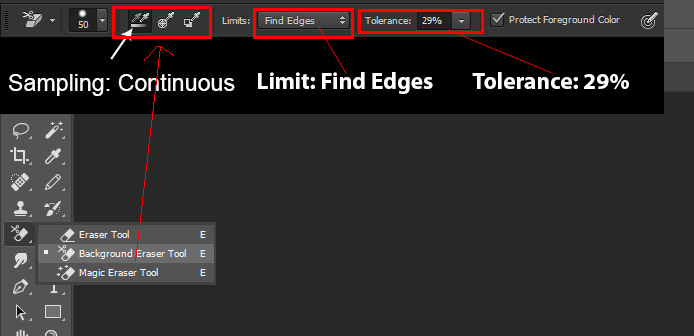
Step 3 – Set The Background Eraser Tool Settings
Now we’ll set the tool for the use. Set the Sampling: Continuous that means it will sample the different colors whenever we click on the area of the image to erase it. You can see in our image we have many colors so that is why I selected it.
Set the Limit: Edges and Tolerance to 25-29%. Low tolerance value will limit the eraser near to the sampled color and vice versa.
You can also check the Protect Foreground Color option and this will tell the eraser tool not to erase the foreground color pixels. You can also select a color from the image to protect it.
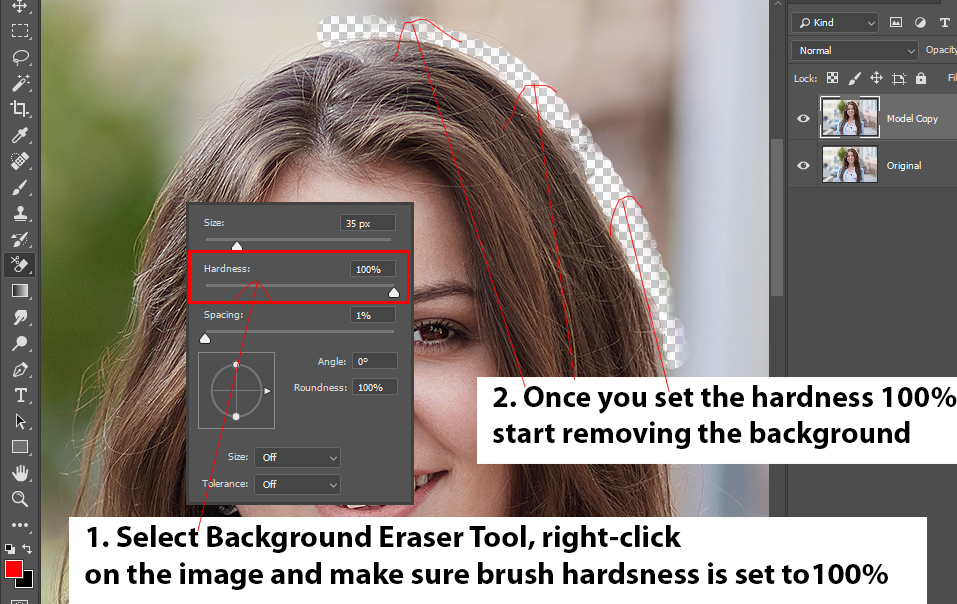
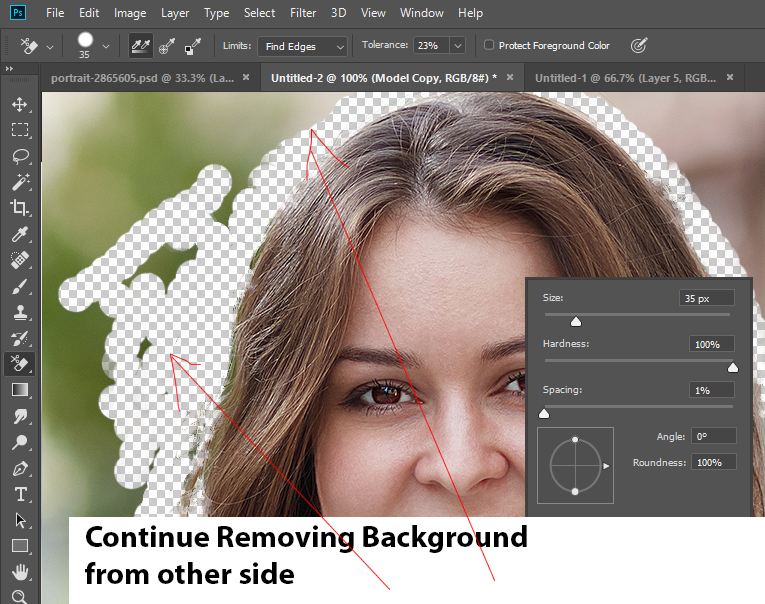
Step 4 – Start Removing the Background
With the given setting above start erasing the background by painting on the image. Make sure you are using a hard round brush with Hardness set to 100% so the edges of the hair extract out in a smooth manner.
You can set the hardness of the brush, right click on the anywhere while the Background Eraser is active and then use the slider to reduce the hardness. You can also vary the brush size as well.
Here you can see I used the tool on the right side:
Similarly, I used it on the left side of the image as well. Remember you can also sample the color from the model hair to protect it whenever you are close to hair.
So, right now our hardest part has done which is hair and for remaining body parts you can use the Pen Tool (P).
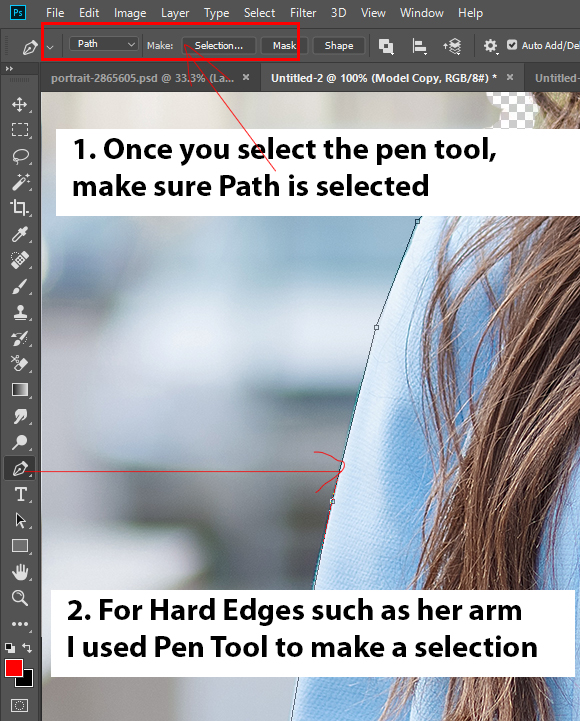
Once you made a path around the arm, make a selection and use the background eraser to erase the background around the model arm:
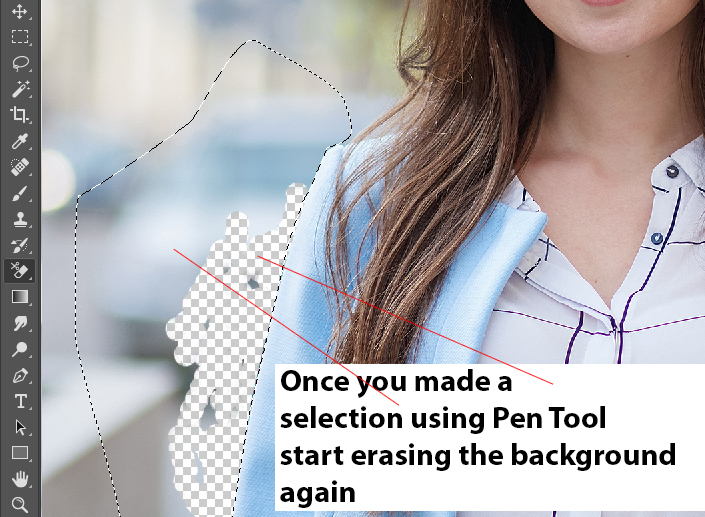
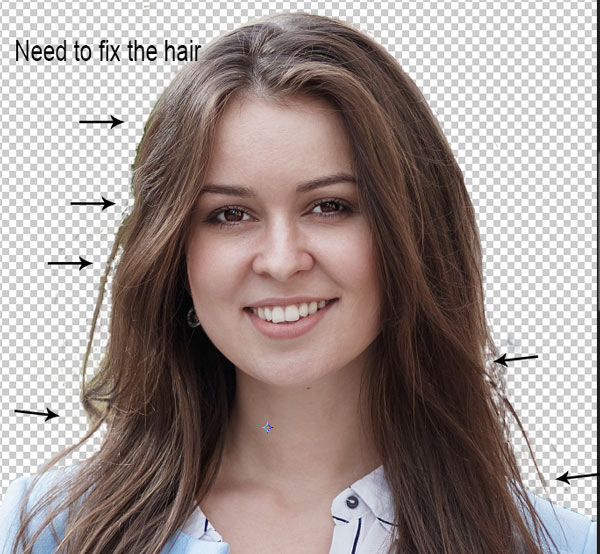
Don’t worry about the hair glitches and some hair strands which we just lost we’ll fix them in a couple of steps.
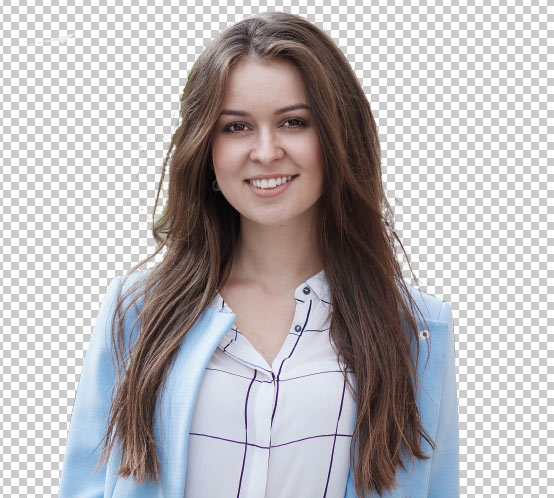
Here I removed the background completely:
Step 5 – Recreate Hair using the Brush Tool
The eraser tool has done most of our work but we can do a lot more to improve the image mostly the hairs. Now we’ll paint the hair to fix it using the Brush Tool.
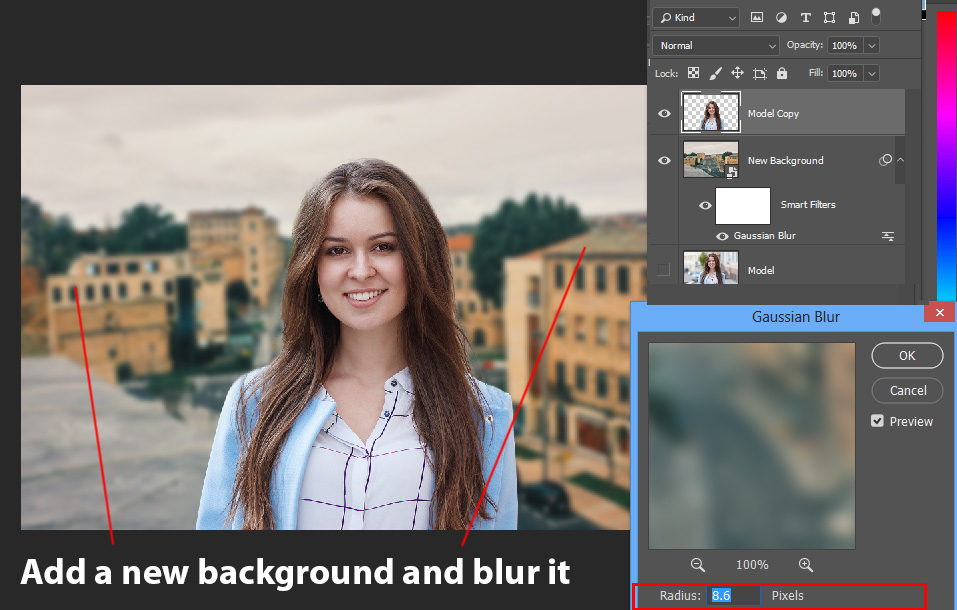
Step 6 – Add A New & Relevant Background
I added a new background behind the model, you can use any image you want and I added Gaussian Blur to blur the background.
If you add your final background here then it is going to much easy for you to deal with the hair as sometimes final background may help you hide a lot of mistakes. Also, you will not waste your time on those areas that you don’t have to.
Download Hair Brushes (You need to Subscribe)
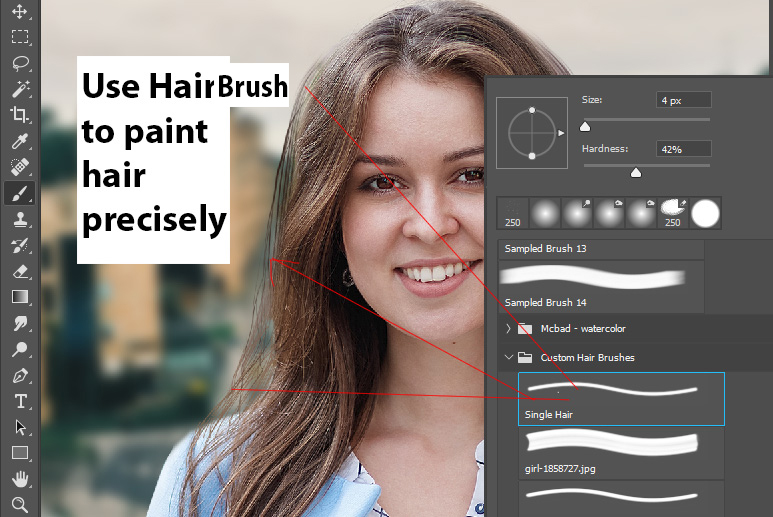
Step 7 – Use Custom Hair Brushes to Instead of a Regular Brush to Paint Hair (Subscribe Above^^)
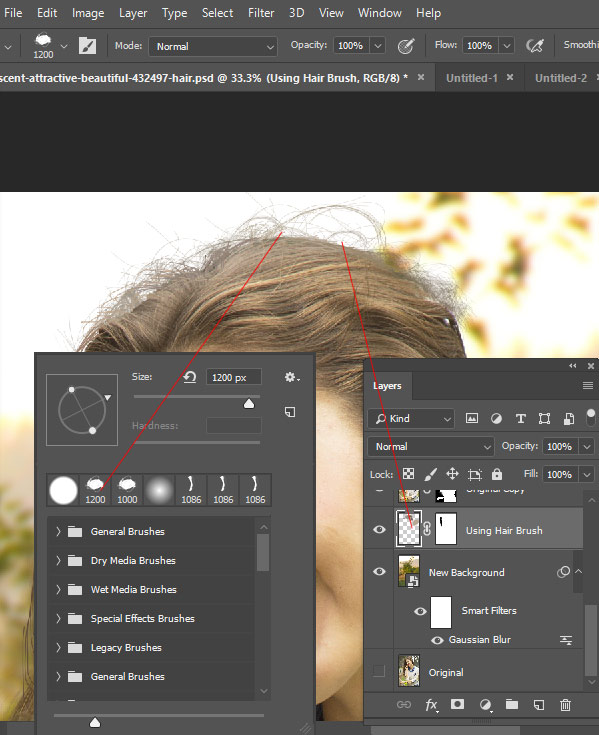
I am using my custom hair brushes to recreate hair. If you want them, please subscribe using the form mentioned above this step. Once you have downloaded the brushes, you can use them to paint or recreate hair.
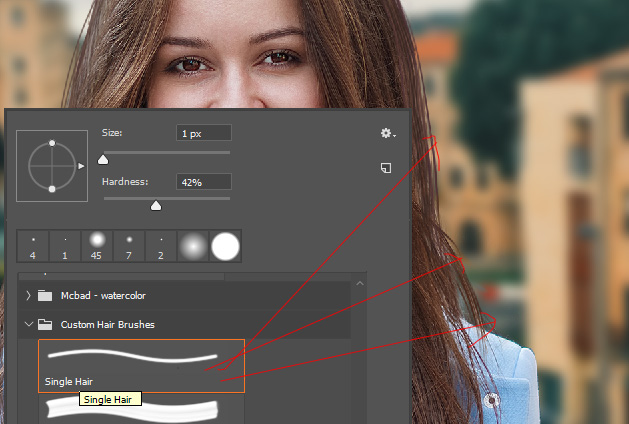
Here are my custom hair brushes in action: I used a single hair brush to paint single fly away hair strands:
You can sample a color from model and then I painted highlights on the hair. Try to sample different colors and paint hair.
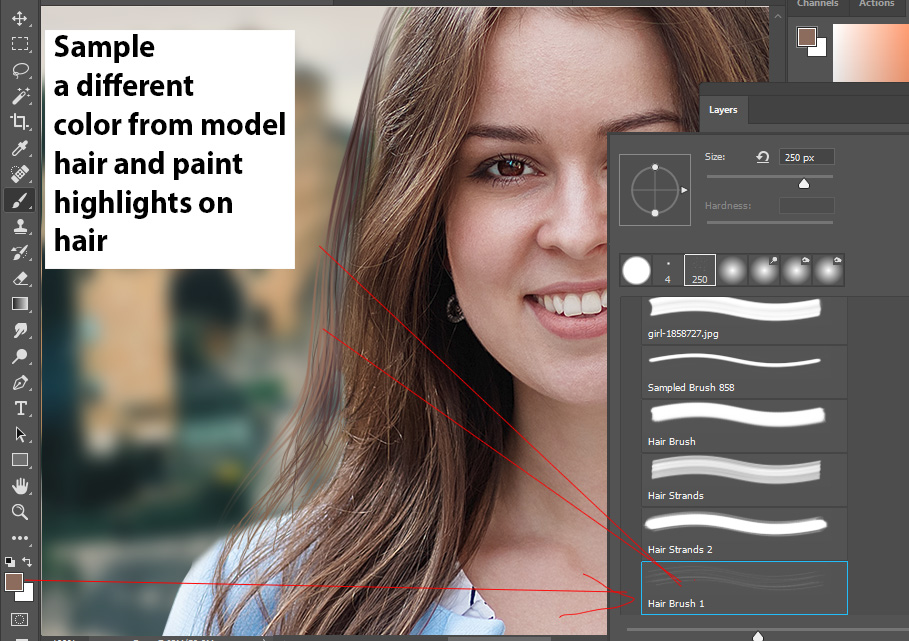
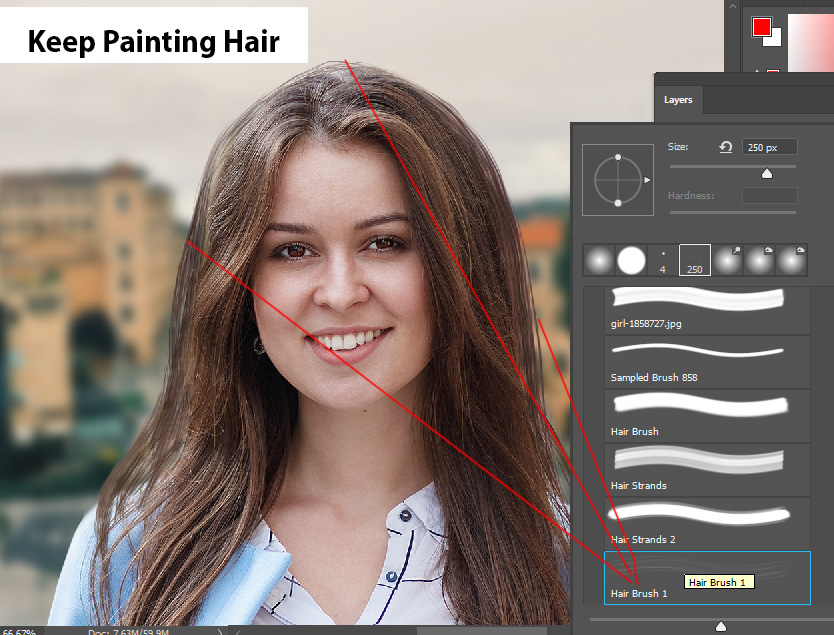
Keep painting hair and you can see here I painted on top:
Here I painted on the right:
Here you can see the final results:

How to Remove Background In Just 2 Clicks with Photoshop 2021
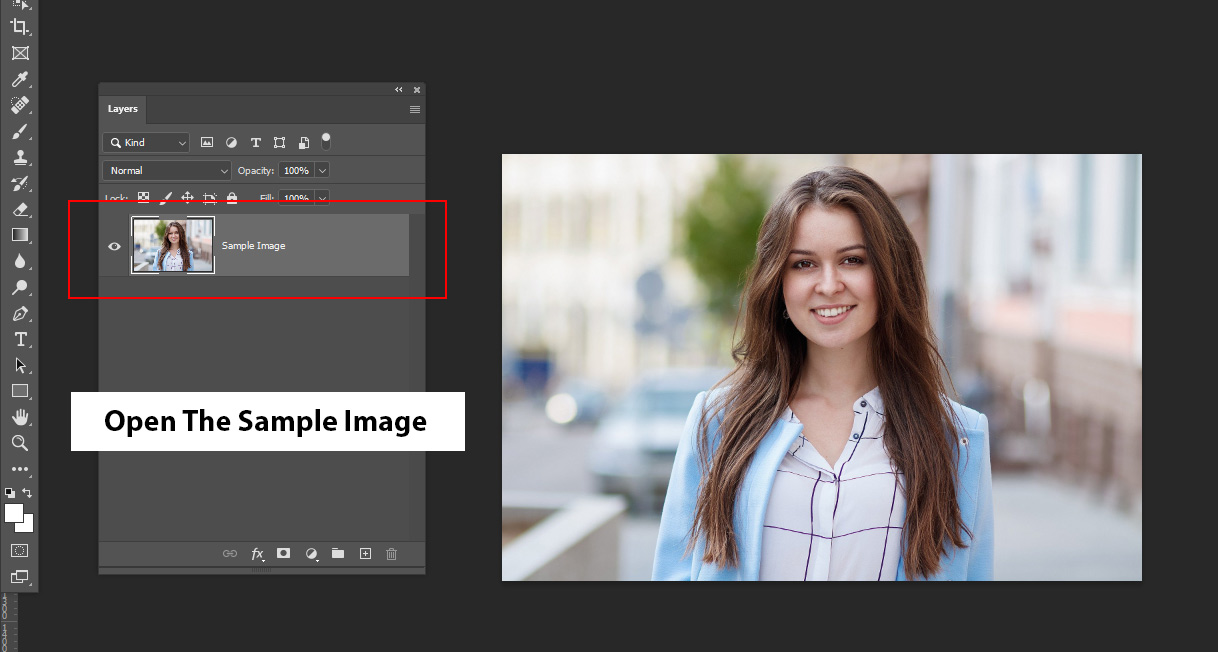
Step 1 – Open The Sample Image
Download the sample image from Pixabay if you want to follow along with me. You can see in the below image, I have opened the image by selecting File > Open.
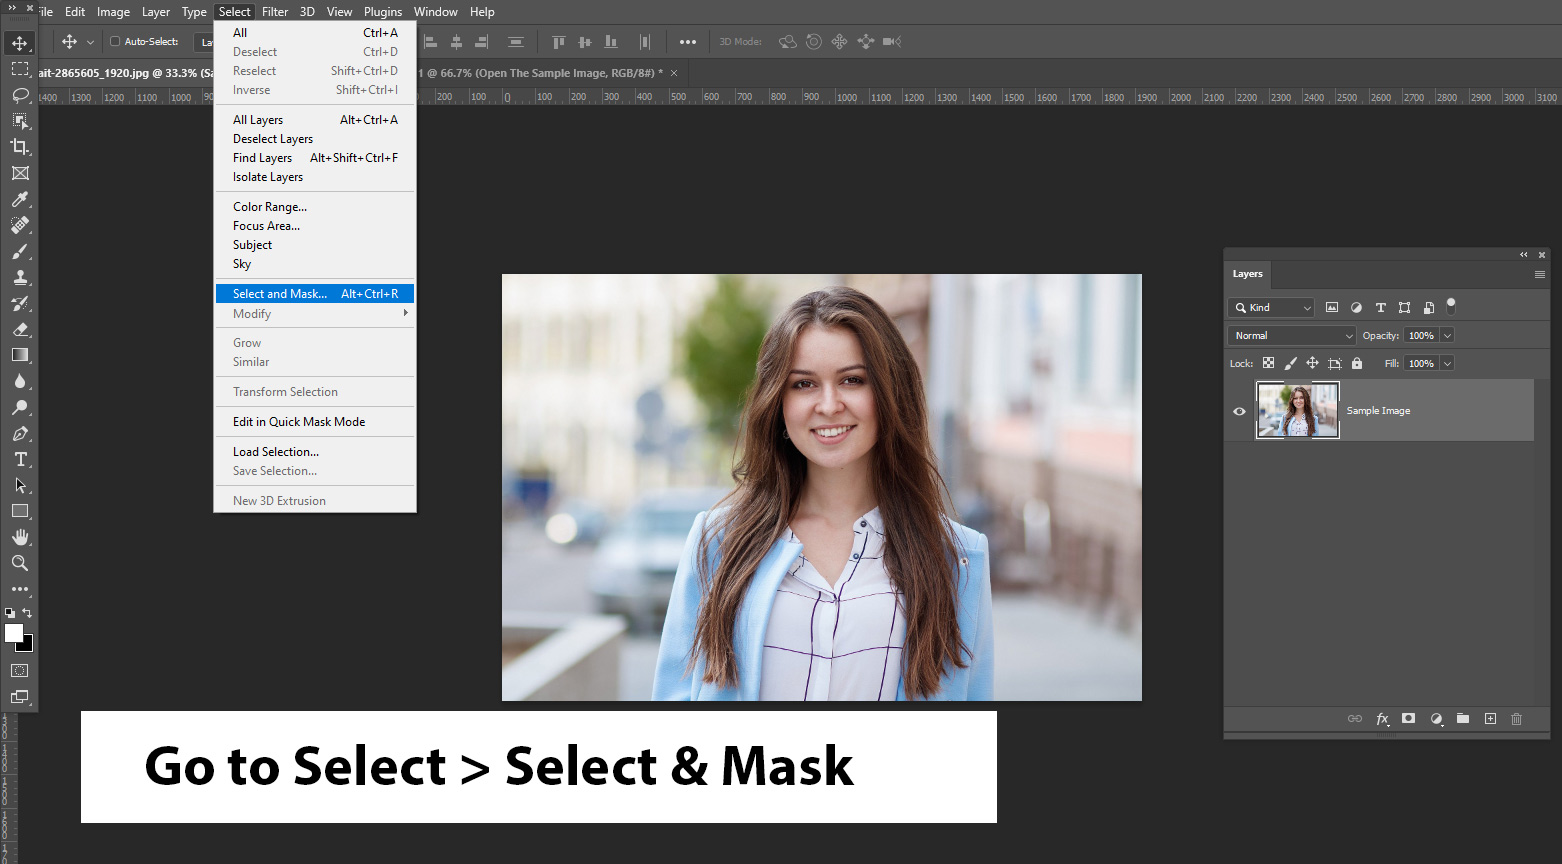
Step 2 – Access Select & Mask Feature
Go to Select > Select & Mask.
Step 3 – Remove The Background in 2 Clicks
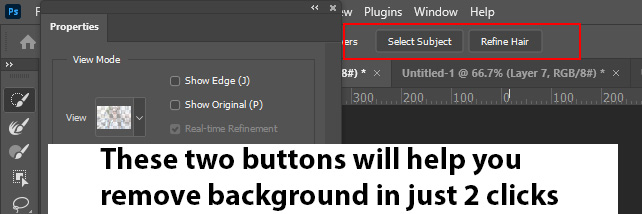
Let me show you the two buttons that will help you remove background in just two clicks. You can see in the below image two buttons Select Subject & Refine Hair inside the Select & Mask Dialog Box.
Please Note: These Two Buttons are only available in the Photoshop 2021 Update. If you are working in the older version of Photoshop, Refine Hair Button is not available in the older versions.
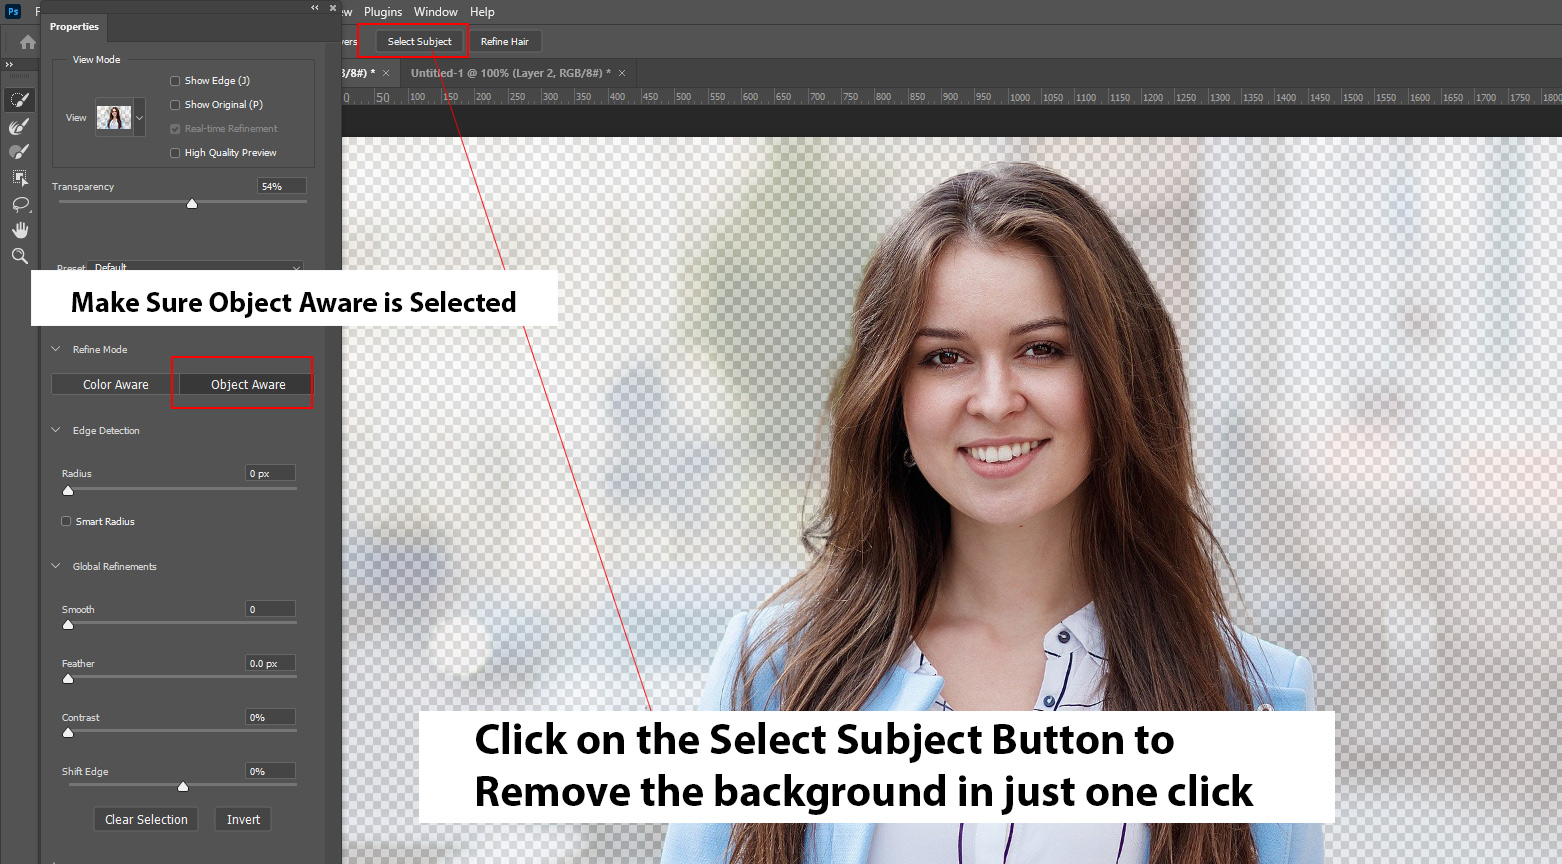
Once you are inside the Select & Mask, click on the Select Subject Button to remove the background.
Also, we have a brand new Refine Mode: Color & Object Aware. I selected the Object Aware Tool because I am working on a complex background. You can select Color Aware if the background is clean and simple. Bottom line is Object Aware for complex & busy background, and Color Aware is for simple and clean background.
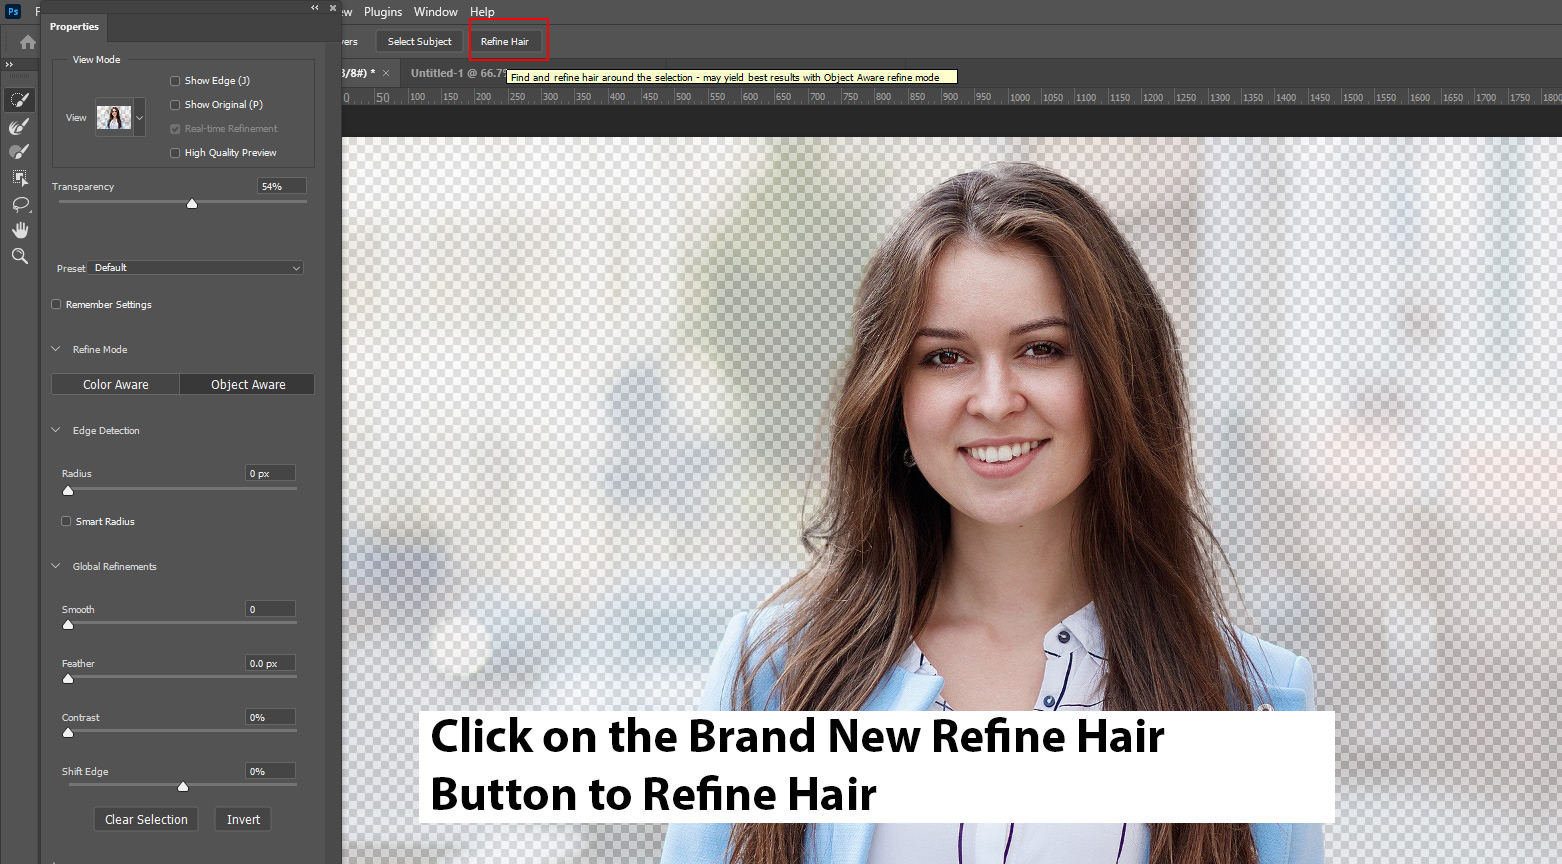
They added a brand new button Refine Hair, it lets you refine hair in just one click instead of refining the hair using the Refine Edge Brush Tool. You can still use Refine Edge Brush Tool but I am testing it for the sake of simplicity and tutorial.
Click on the Refine Hair Button to refine hair if necessary:
Step 4 – Output the Results
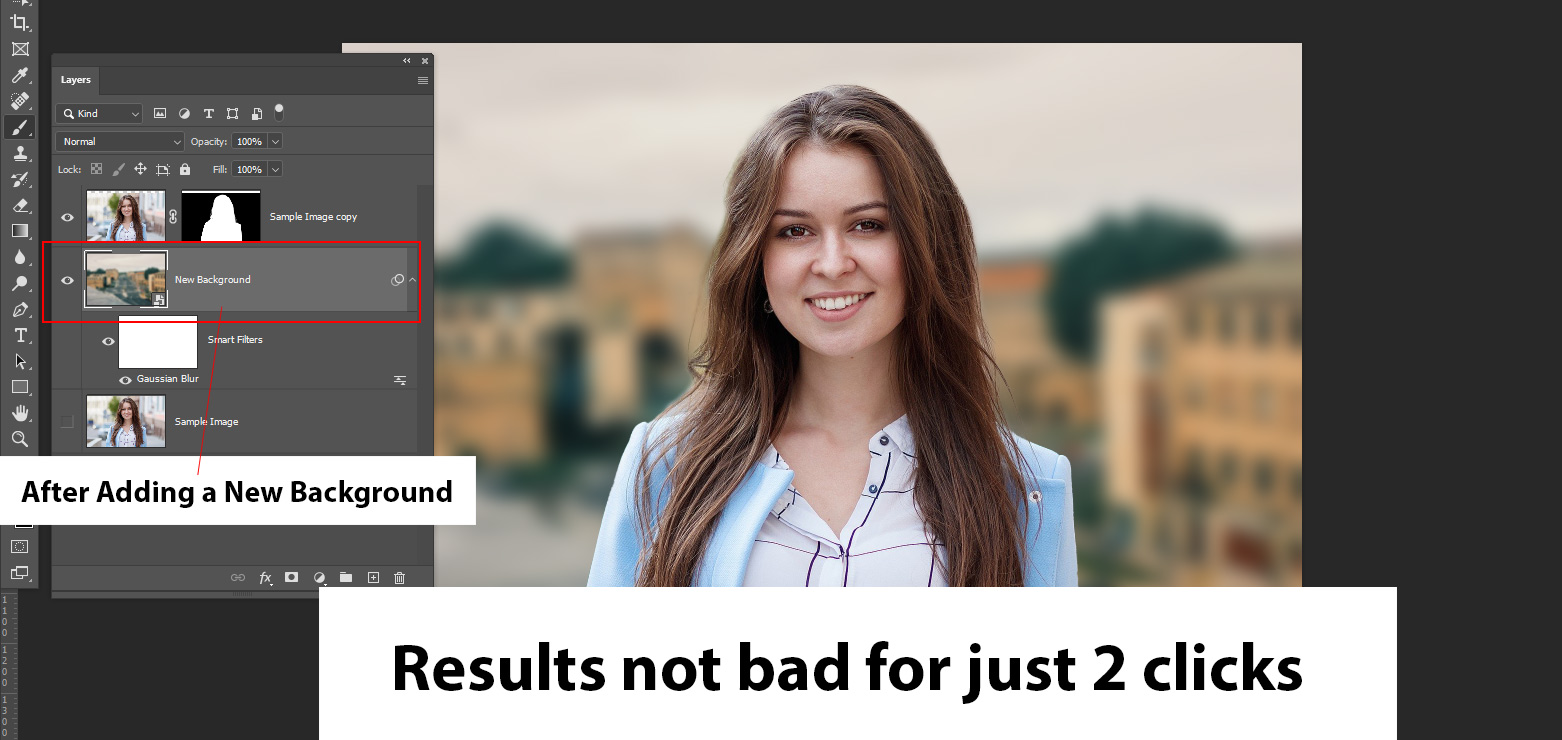
Once you are happy with the results, go to Output To: New Layer with Mask. You will get the results on a new layer with an attached layer mask so you can avoid any harm to your original image.
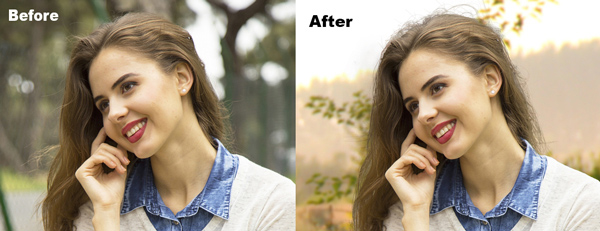
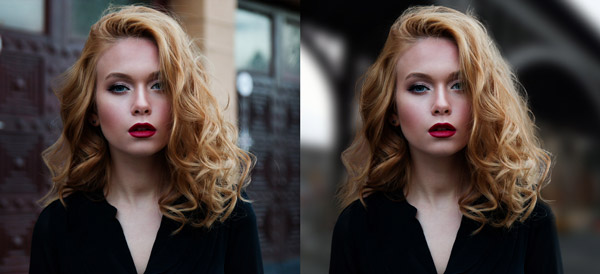
Here you can see that we have removed the background in just 2 clicks:

After removing the background, I have added a new background and you can see it’s not for bad for just 2 clicks.
Of course, there is a lot to improve and you can recreate hair, adjust lighting, and color to make the new background look like that no one can tell that the background was removed and replaced. You can follow example 2 and example 3 in the tutorial where I show you how to recreate hair using custom hair brushes in Photoshop.
Recreating Hairs
Step 1
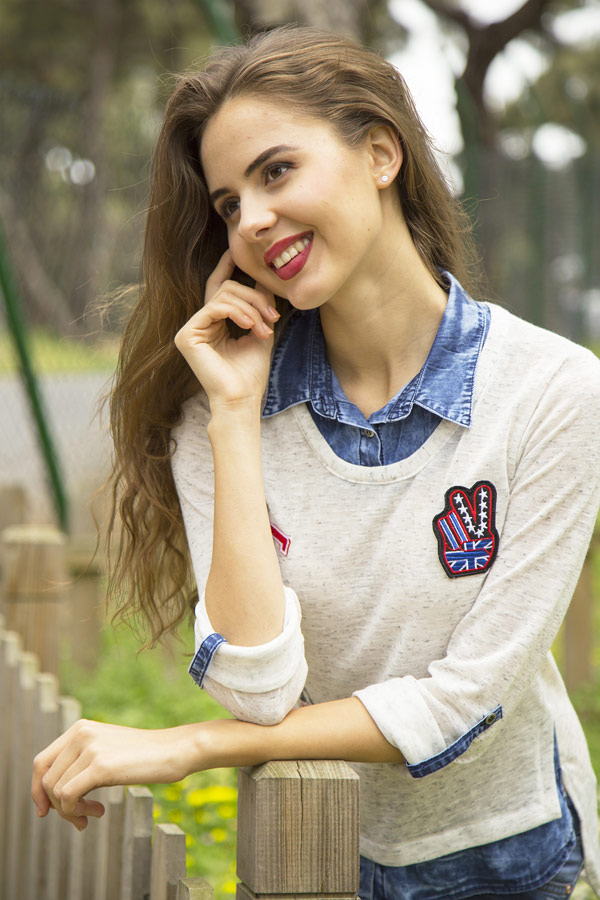
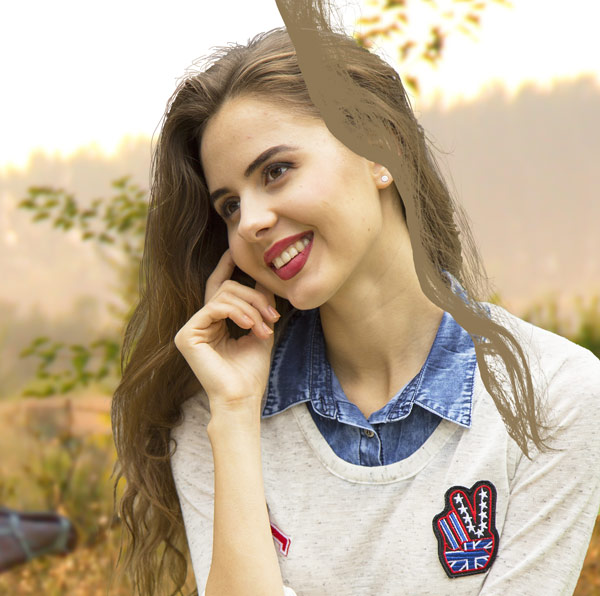
I’m using this girl image, download it from Pexels and I opened in Photoshop by selecting File > Open. You can see in this image, the hair is difficult to extract because the background is not plain or solid or white, and thanks to flying away and stray hairs.
Make a Rough Selection
Step 2
Now you need to make a rough selection of the subject either using Pen Tool or you can use the latest Select Subject feature to make a selection.
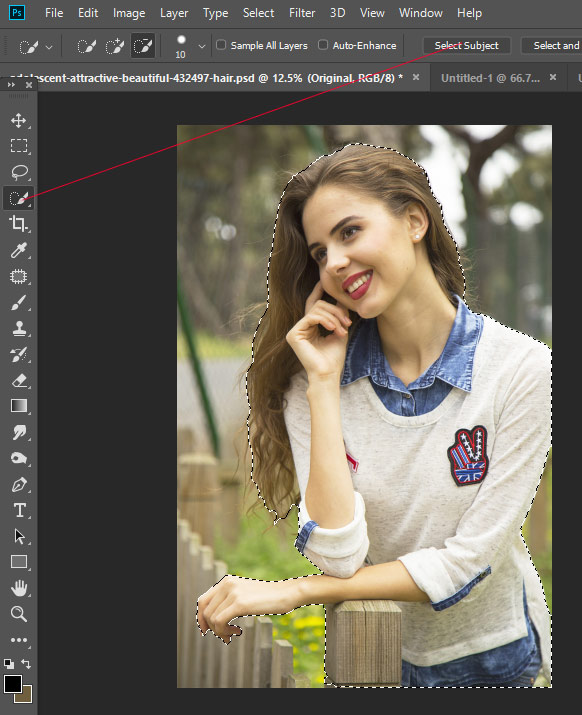
Step 3
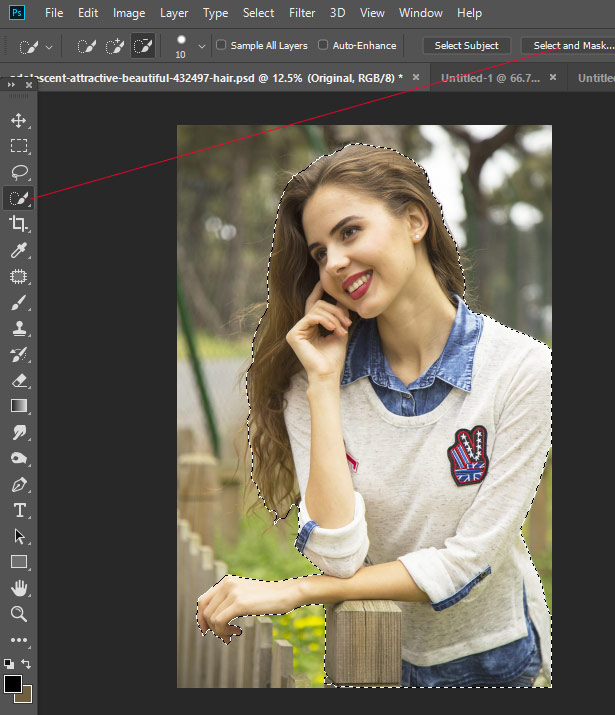
Just beside the Select Subject button, you’ll see a Select And Mask button click on that so we can refine the selection.
If you are using the Photoshop CS6 or CS5, then first you need to add a mask once you made the selection. Then right-click on the mask and select Refine Mask. Now you’ll have the same option which you are seeing in the below image.
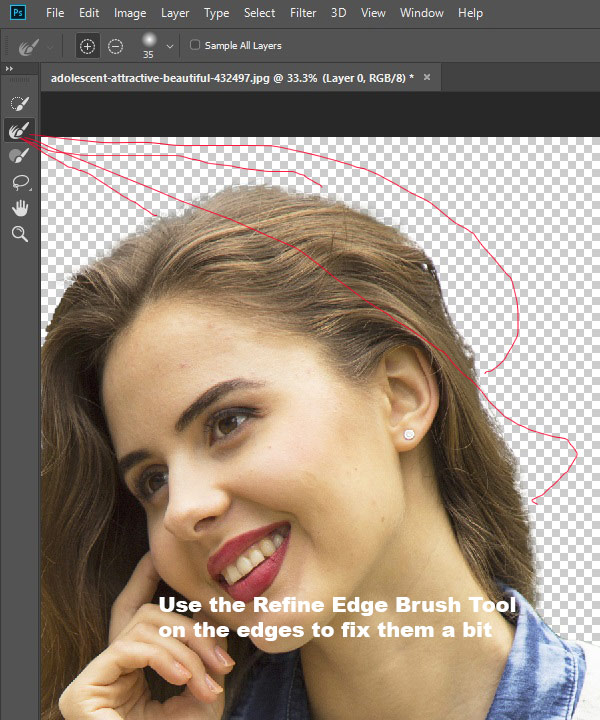
Now you need to refine the selection which we just made. Once you click on the Select and Mask button, then use the Refine Edge Brush Tool to make some adjustments to the edges of the hair as they look too sharp right now. While this tool won’t work on this complicated background but at least it can make our task a bit easier by softening the edges of the hair.
Here you can see I used the Refine Edge Brush Tool to refine the hair on the right:
Here I used it on the left part of the hair:

Here I used on the bottom hairs:

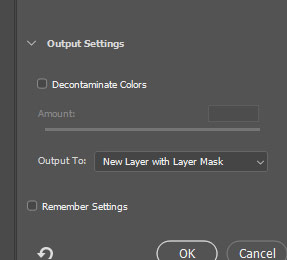
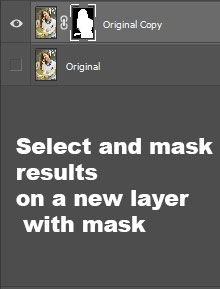
Once you are happy with the results and scroll down to output settings (on the right side) and use the New Layer with Mask to create a new layer with a mask.
Here we have original copy layer with new masking results:
Reap the Benefit of New Background
Step 4
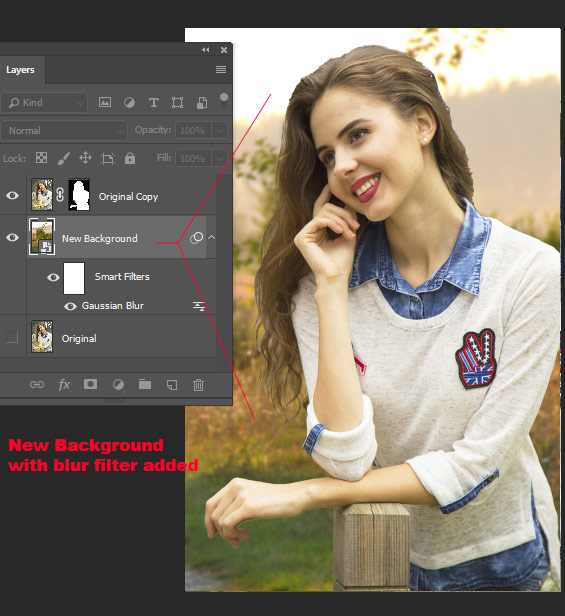
So, guys, we are extracting the girl for what? Obviously, we are going to add a different background behind her. Before we proceed further, just add your new background here.
If you add your final background here then it is going to much easy for you to deal with the hair as sometimes final background may help you hide a lot of mistakes. You will not waste your time on those areas which you don’t need to be.
So I added my new background behind her:
How to Recreate Hair Strands
Step 5
So you can see we are almost done but we need to give the final touches to hair. For that, I am using hair brushes to paint back the stray and fly away hairs.
Download Hair Brushes (You need to Subscribe)
You can get these brushes once you subscribed to our newsletter only from this tutorial, don’t use the sidebar form otherwise you won’t get a link to download brushes.
Here you can see I created a new layer below the woman layer and then I used the hairbrush to paint the flyaway hair on the top.
Here I created a new layer on top of all layers and painted using another hairbrush:
So this time I painted over the woman and clearly, I need to erase some other areas to blend the hair. Go to Layer > Layer Mask > Reveal All to add a mask to hair layer and mask those unwanted parts using a black brush.

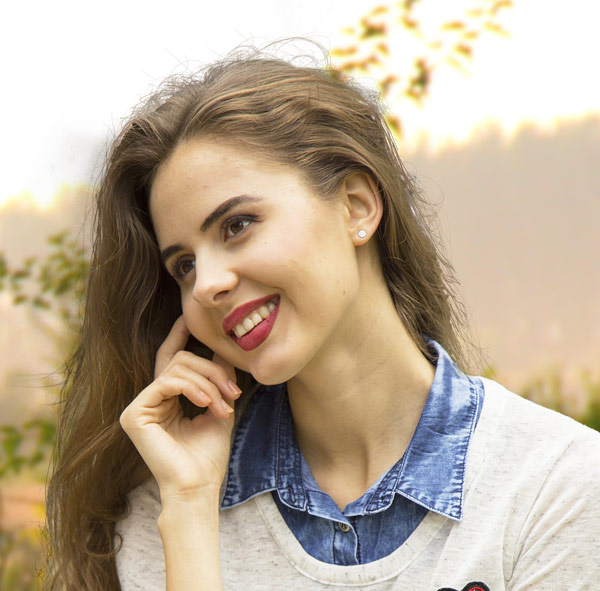
Results after masking:
Step 6
Similarly, I painted more hairs using hair brushes. What I did I sampled the color from the model hair, then painted some more hairs where I think there should be. I vary the brush size and colors to paint hair. I ended up with the following results but you can do a lot better than me if you spend some more time.
Here you can see the how many brush strokes of hair’s brushes I used in order to replicate the hairs:
Some More Examples
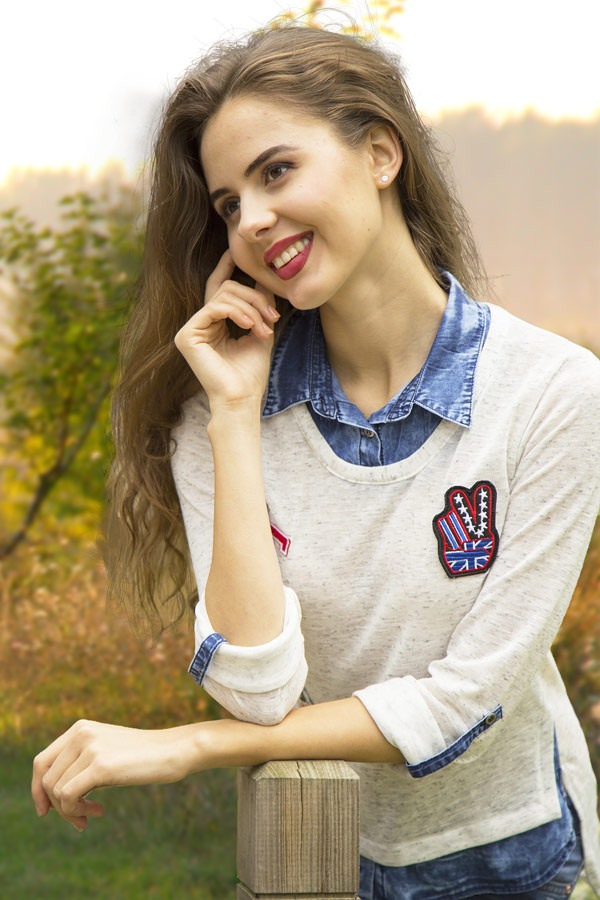
Example 4:

Example 5:
Need Help With Photoshop or Looking for Professional Support?
Whether you're just getting started with Photoshop or need expert-level assistance, we're here to help! Contact us for personalized Photoshop tutorials, project support, or creative services.
Get in touch today to take your skills or projects to the next level.
CONTACT US NOW📘 Want to Master Photoshop Faster?
🎁 Get Your FREE PDF E-Book "Top 10 Photoshop Tricks Every Designer Must Know" Now – Packed with expert tips, shortcuts, and techniques to boost your creativity & workflow.
👉 Download Your FREE PDF E-Book NOW!
