
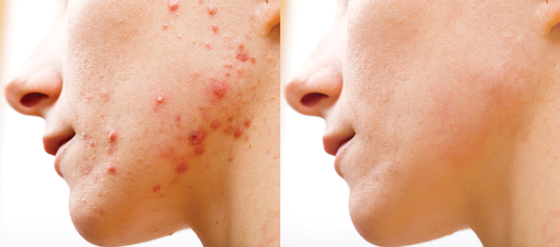

In this quick tutorial, I’ll show you how to remove acne in Photoshop. Not only we are going to remove the acne, but I’ll also show you some techniques that will work on any image for improving skin. You’ll also learn how to get rid of glossiness by creating skin texture using Photoshop tools. So let’s get started!
Step 1
I am using this image from Adobe Stock, it’s a premium image, I won’t be able to provide to you. But the technique that I am about to demonstrate here definitely work on any image. So don’t worry about it.
I opened the image in Photoshop by selecting File > New. As you can see the face is full of acne as well as the skin flaws.

Step 2 – Improving Skin
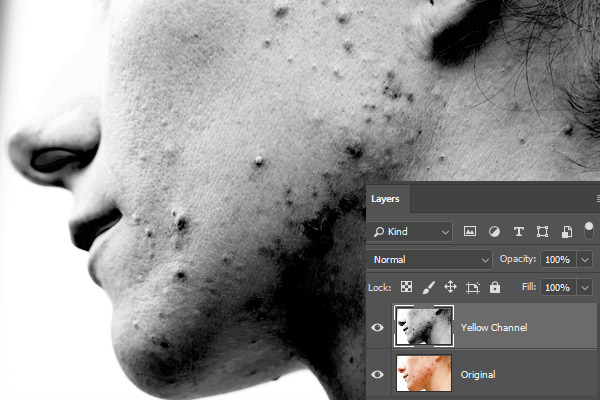
I am going to improve the skin here by reducing flaws on the skin. This technique involves the use of the Yellow channel as it has the most of the skin flaws compared to any other channel.
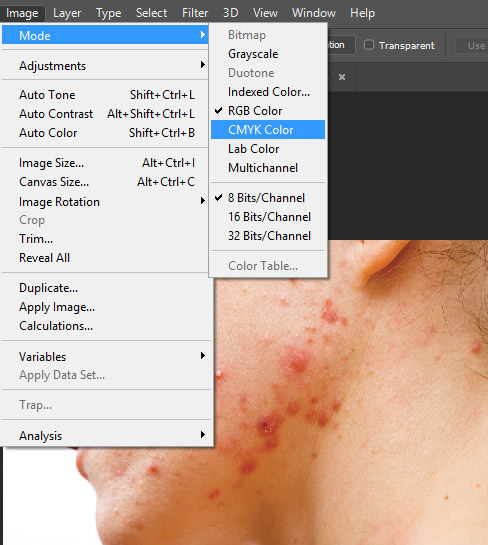
First, convert the image to CMYK Mode by selecting Image > Mode > CMYK.
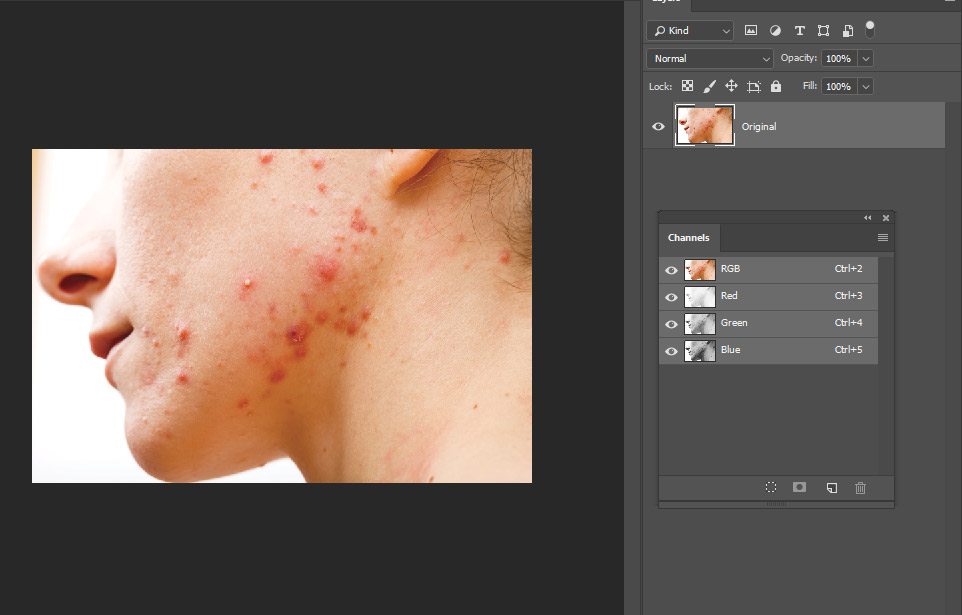
Now go to Windows > Channel and in the Channel Tab select the Yellow Channel.
Now press CTRL/CMD + A to select the entire channel and then press CTRL/CMD + C to copy it.

Once you copied the channel, we need to switch back to RGB Mode. Go to Image > Mode > RGB to get back in the RGB Mode.

Here we are in RGB Mode:
Step 3
Hit CMD/CTRL + SHIFT + N to create a new layer and then press CTRL + V to paste the copied yellow channel on the new layer. Name it “Yellow Channel”.
Press CTRL + I to inverse the yellow channel layer.

Now, change the blending mode to Soft Light and reduce the opacity to 39%.
You can see now that skin has improved a lot. Also, we have faded away acne to some extent. You can use this technique on any image, I guarantee you that it will always gonna improve the skin.

Here you can compare the results:
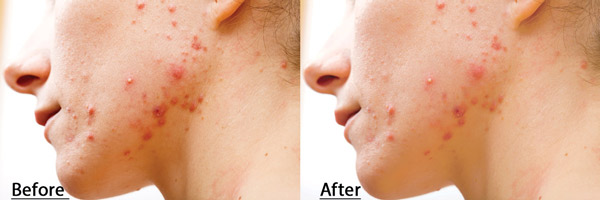
Step 4 – Using Spot Healing Brush Tool
Now, we’ll use the Spot Healing Brush to remove the acne. This tool basically samples the best matching parts to clone other parts automatically and you don’t need to worry about sampling parts of the skin while using this tool.
If you want to sample the parts manually, then the best option for you is to use the Healing Brush. I already showed how I used it for skin retouching in my frequency separation tutorial. You might want to dig in it.
Select the Spot Healing Brush tool in the tool panel.
Set the Type: Content Aware for cloning skin.
Make sure you checked the Sample All Layers to sample the source from any layer.
Before using this tool, make sure that you created a new layer as I did it below. I named it “Spot Healing”.

Now use the Spot Healing Brush to get rid of acne from the face. Remember you only need to click on the acne to fix them.

Here are my final results:
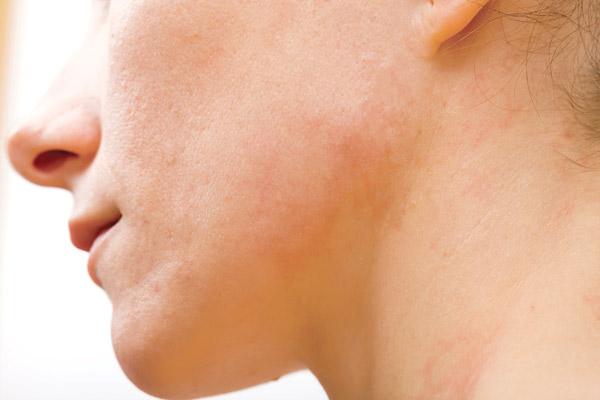
Bonus Tip
The bonus tip is that creating the skin texture using the Patch Tool. Sometimes using the Spot Healing Brush, it creates glossiness or blur on the skin that results in losing the skin details or texture. Because it automatically samples the results or nearby parts to clone the skin tones. These nearby parts could be anything it could be the texture or maybe blur areas. That is why it creates a blur effect on the skin.
Patch Tool won’t work with single layer. You need to create a merged layer in order to use it. Hit CTRL/CMD + ALT/OPTION + SHIFT + E to create merged copy of all layers.
Make sure Patch Mode is set to Normal and Select the Source.
Make the selection of a part that you want to clone or maybe a blurry part to put a texture on it, then once you made the selection move your mouse on any other skin parts that you want to copy and then leave the mouse to paste it on the selected areas.
I used the Patch Tool to fix the glossy and blurry skin. That’s it for now. I hope you like the tips and tricks. Thanks for following along!

Need Help With Photoshop or Looking for Professional Support?
Whether you're just getting started with Photoshop or need expert-level assistance, we're here to help! Contact us for personalized Photoshop tutorials, project support, or creative services.
Get in touch today to take your skills or projects to the next level.
CONTACT US NOW📘 Want to Master Photoshop Faster?
🎁 Get Your FREE PDF E-Book "Top 10 Photoshop Tricks Every Designer Must Know" Now – Packed with expert tips, shortcuts, and techniques to boost your creativity & workflow.
👉 Download Your FREE PDF E-Book NOW!
