

When it comes to Color Grading there are two powerful tools that first come to mind The Tone Curve and The New Color Grading Panel. Although, both tools do have their own benefits but the tone curve stands out to me than the Color Grading panel. Both of these can be used for Color Grading but which tool is the best? We’ll find out in this tutorial after comparing these tools in a detailed manner. Let’s get into it.
This tutorial uses Adobe Camera Raw filter in Photoshop, but you can also use Lightroom to follow this tutorial. There is no difference at all except using different software.
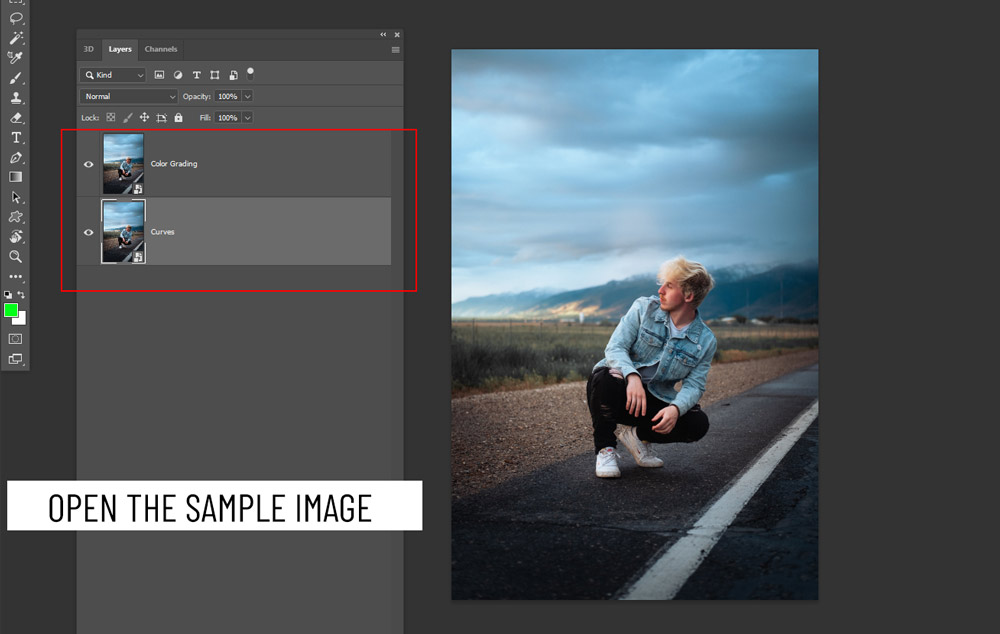
Step 1 – Open the Sample Image
As always if you want to follow along with me you can download the sample image from Unsplash. Make sure you have the latest Photoshop update installed in your PC otherwise you might not see the New Color Grading Panel in the Camera Raw filter.
I have duplicated the sample image and named them “The Curves” & “Color Grading”.
We’ll use Curves on the Curves layer and the Color Grading Panel on the “Color Grading” layer.
Step 2 – Color Grading with The Tone Curve
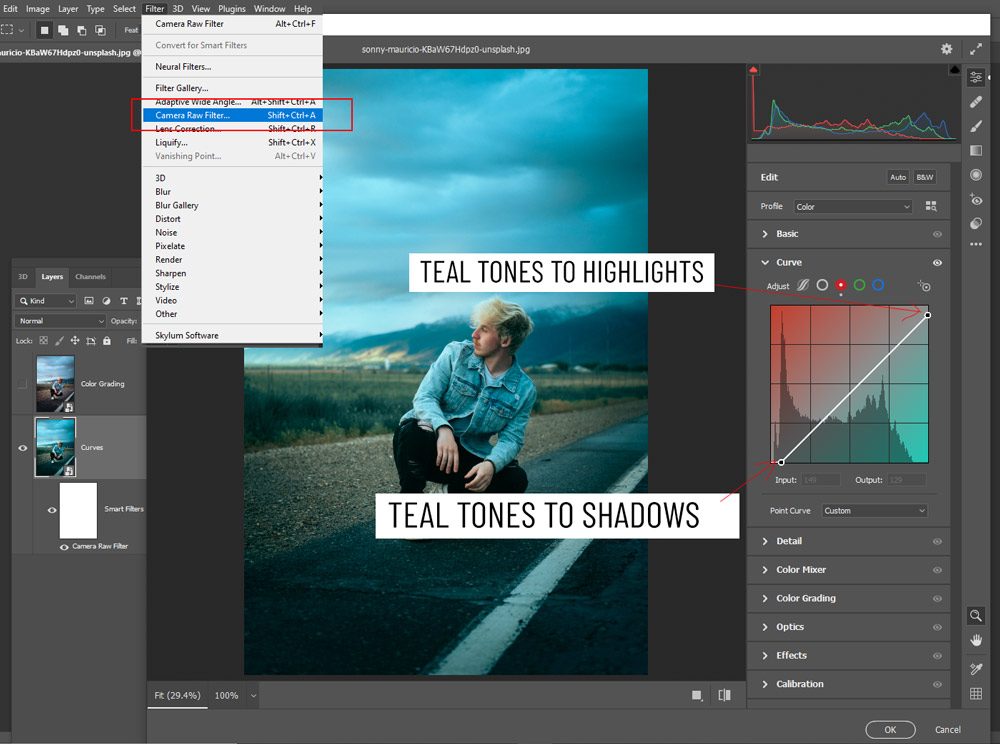
For the sake of simplicity, I am adding cinematic teal tones to the image using the Tone Curve.
Select the Curves layer, then go Filter > Camera Raw Filter.
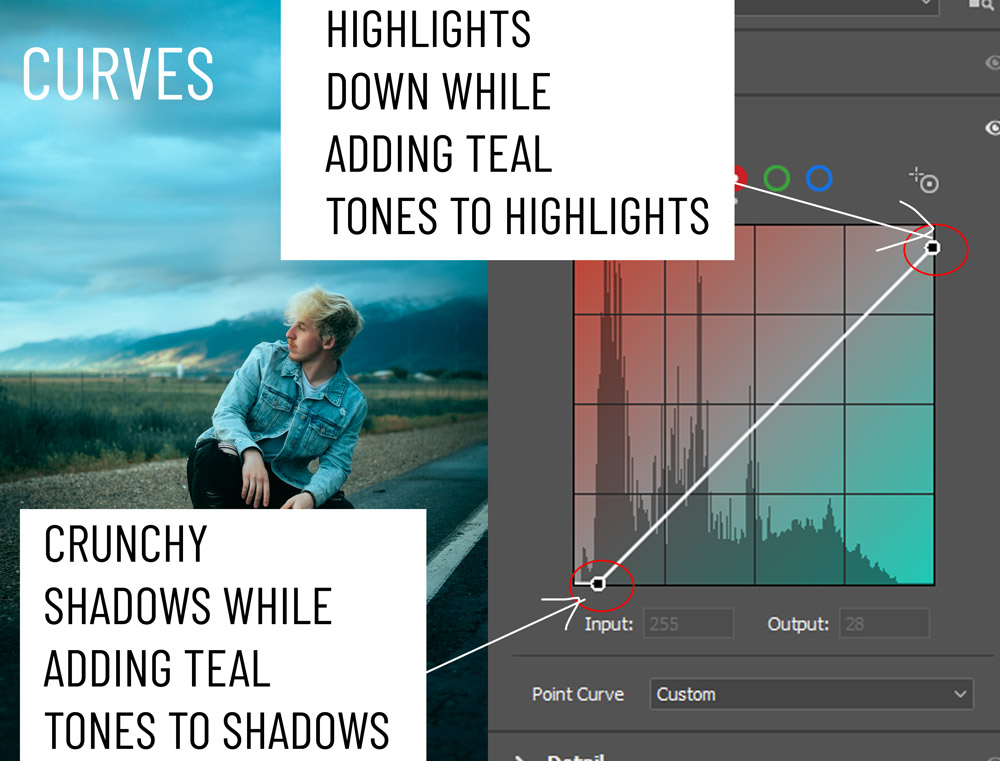
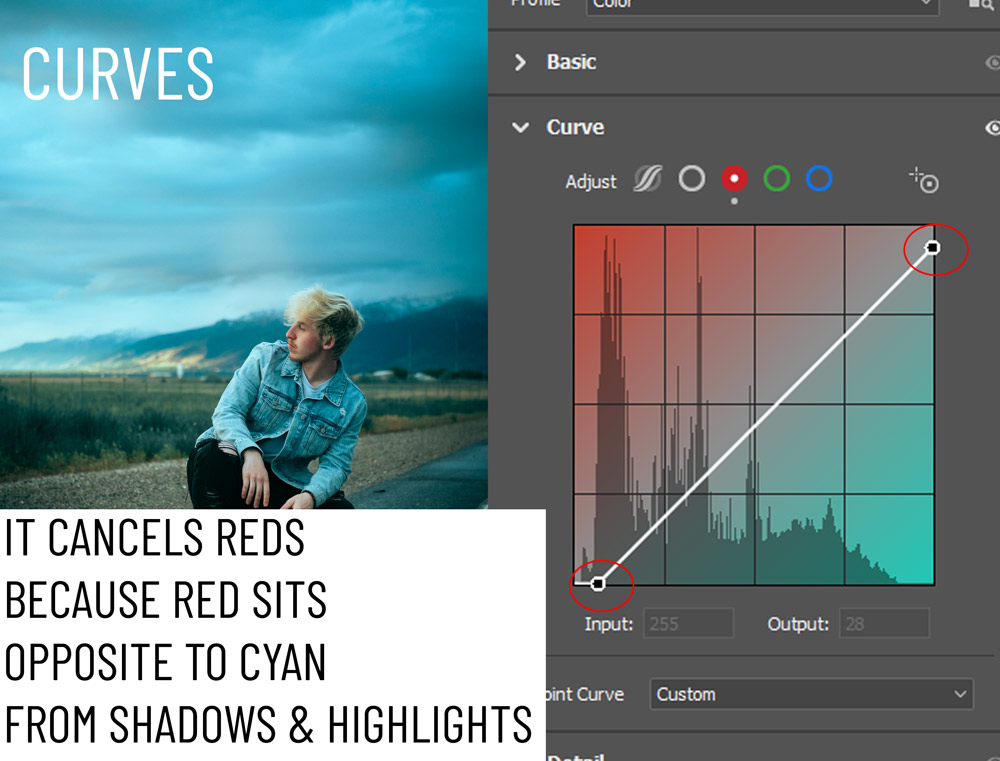
Scroll down to The Tone Curve Panel, select the Red Channel and add teal tones to shadows and highlights as shown below.
Step 3 – Color Grading with The Color Grading Panel
Select the Color Grading layer.
Go to Filters > Camera Raw Filter Again
Scroll down to the Color Grading Panel and add the teal color to shadows and highlights. The Hue is set to 195 for both shadows and highlights. Saturation varies a little from 16 to 25.

Step 4 – The Difference
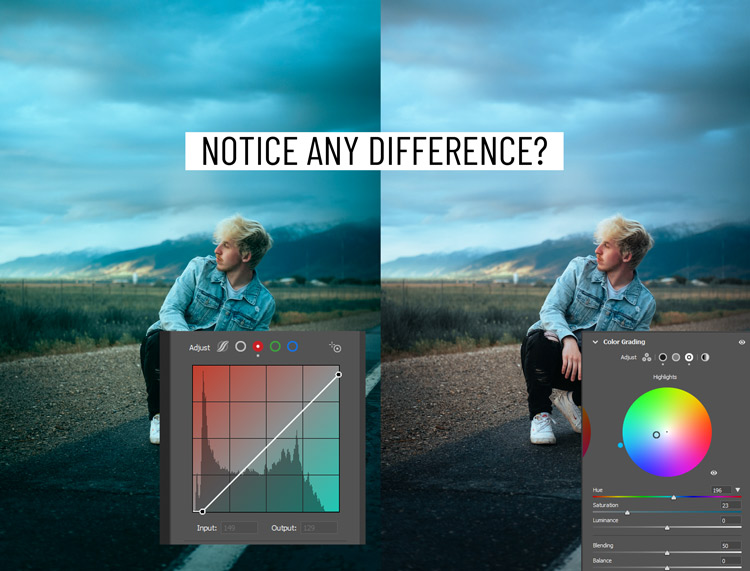
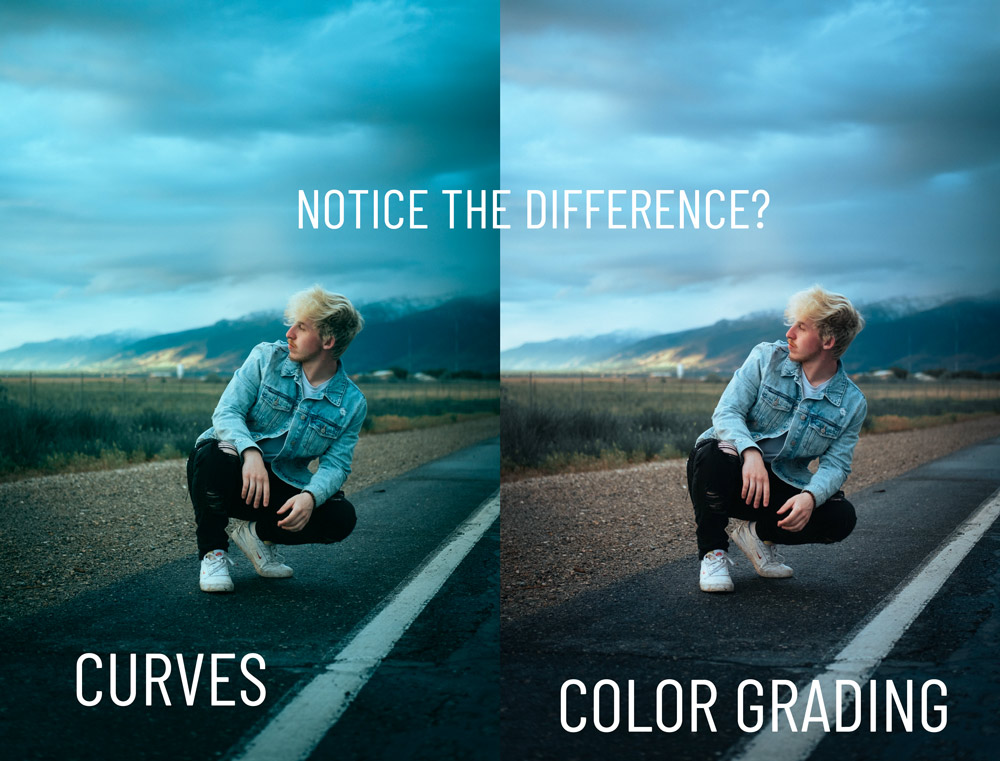
With both tools, we have added teal tones to the image. You can see the results in the image below.
But can you tell any difference?
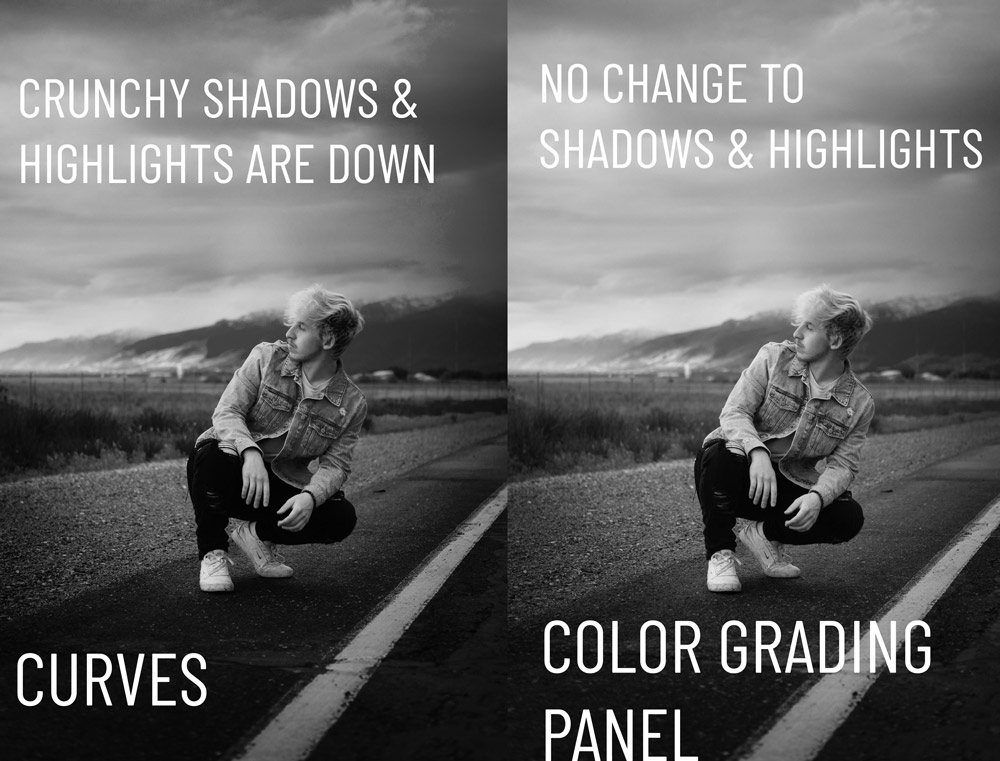
Change in Shadows & Highlights
Your eyes might be deceiving if you are not seeing any difference. It has made a lot of differences to shadows & highlights and colors of the image.
Looking at both of the images in black/white, you can see The Tone Curve has made changes to shadows and highlights in the image. The shadows are more darker (crunchy) and the highlights are down as well when adding the color.
Whereas in the image on your right, you can see there is no difference to shadows and highlights made by the Color Grading Panel. It added the color to the highlights and shadows. That’s it.
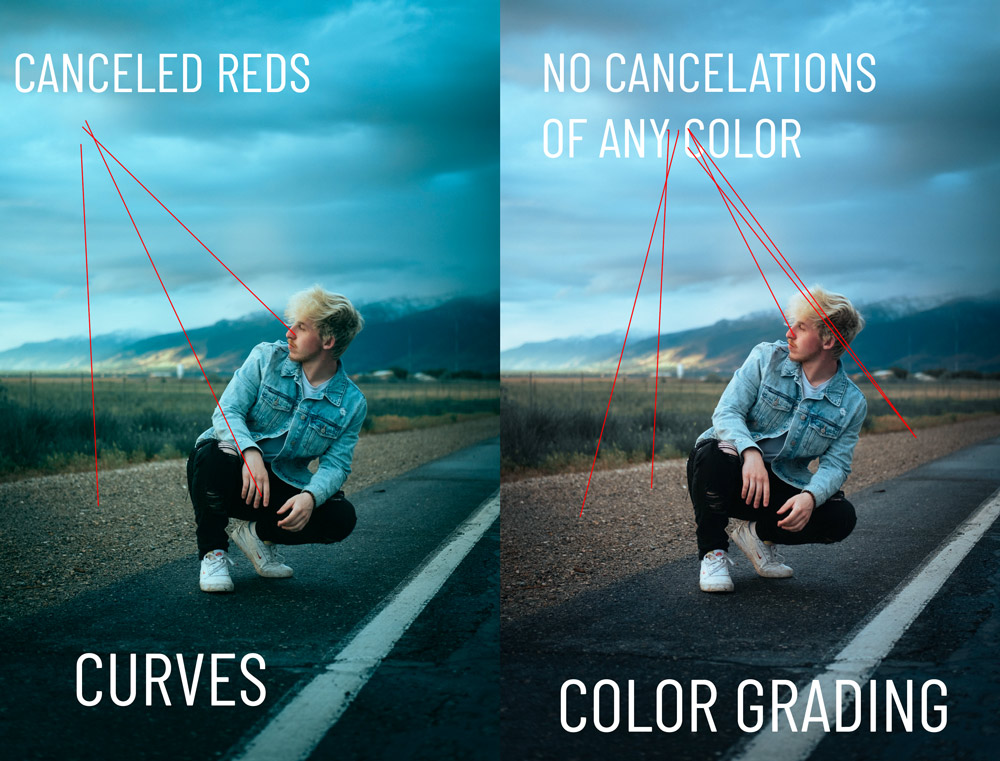
Canceled Red Tones
There is one more difference if you still haven’t caught it. If you notice, you can see the Tone Curve has canceled the red tones in the image but the Color Grading panel has not.
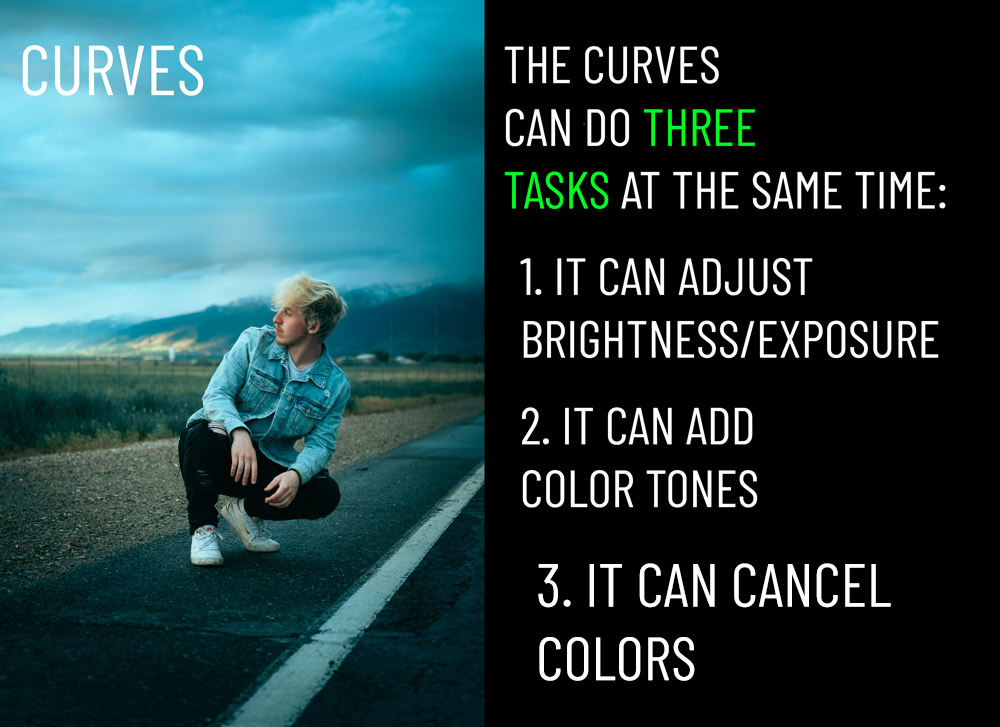
Why The Tone Curves Makes The Change?
The answer is The Tone Curve is a multi-talented candidate as it is doing 3 tasks at the same time.
When we added teal tones to the image, we made the shadows and highlights further dark as well. It’s how the Curve works and you can say it’s the nature of Curves.
It also cancels red tones because the opposite of red is cyan. When you add cyan tones using the Red Channel, it means not only you are adding cyan tones but you are also canceling out any red tones in the image.
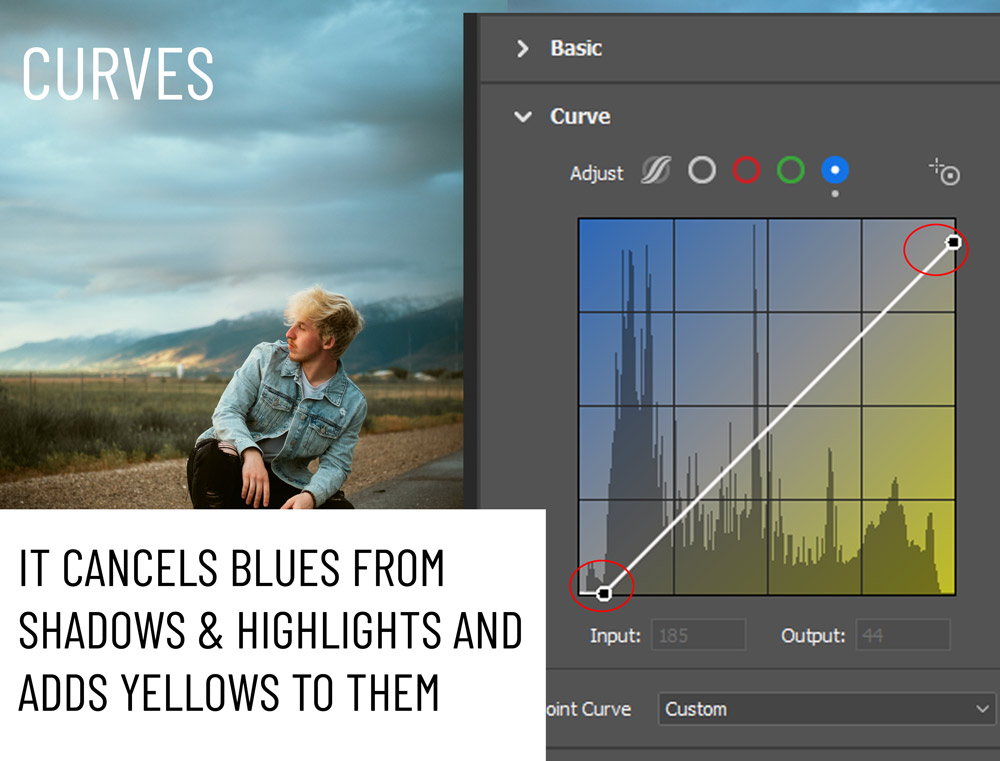
It applies to other channels of the Tone Curve, here you can see we are canceling out blues but adding yellows (Blue is the opposite of yellow).
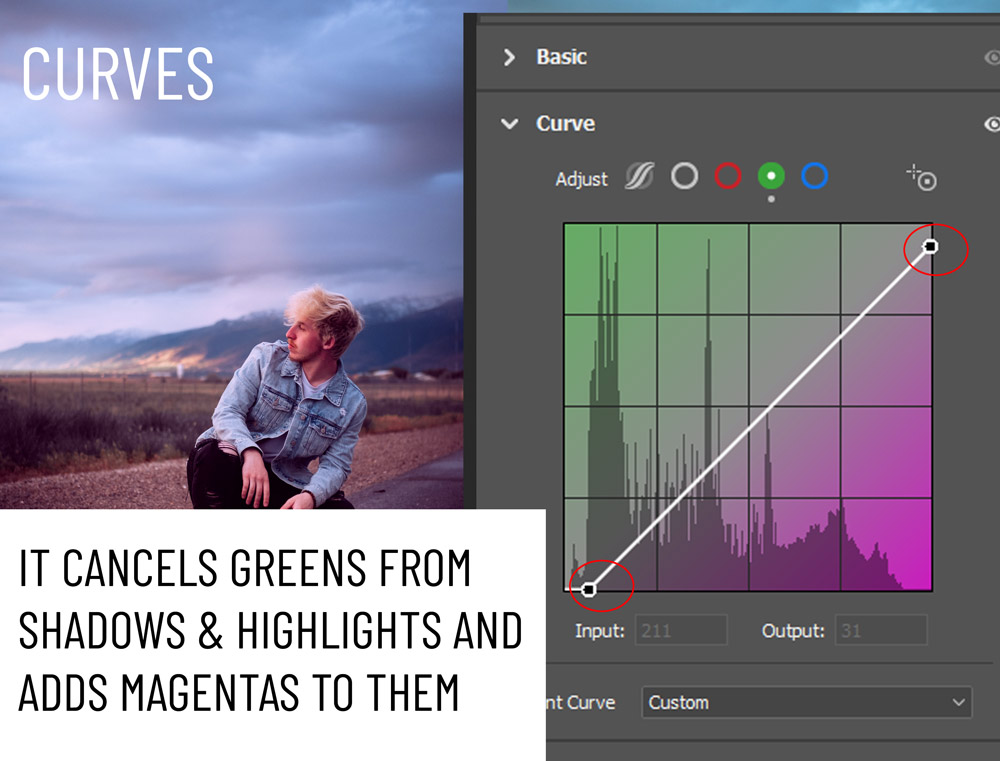
Here we are adding magentas but removing greens from the image (Green sits opposite to Magenta):
Here are the key points for you when you use The Tone Curve RGB Channels in the future:
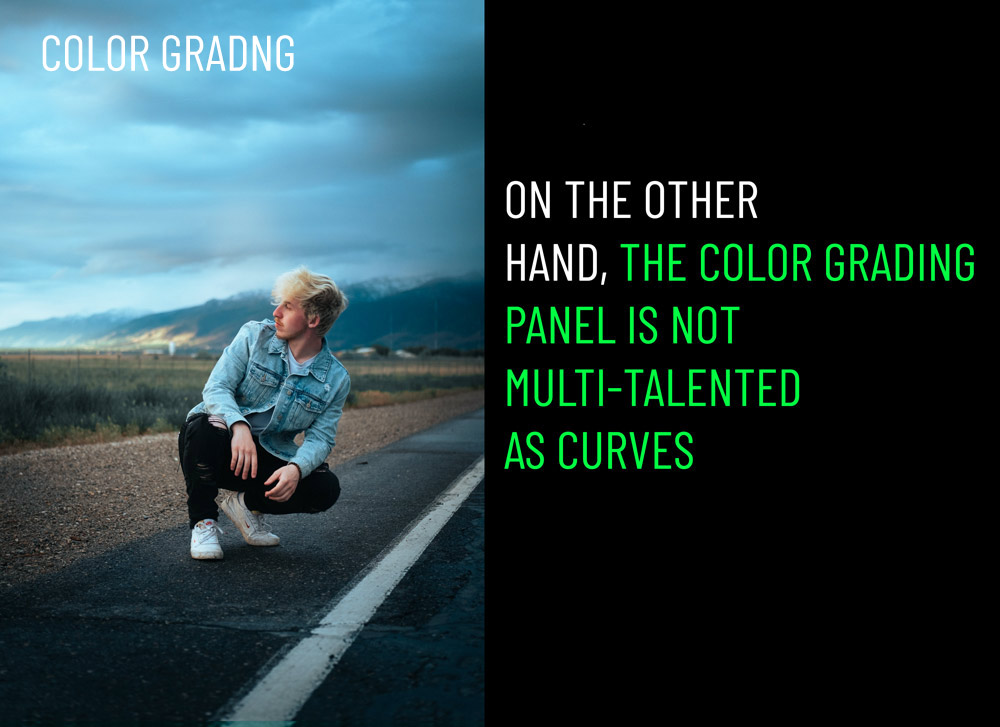
The Color Grading Panel is not multi-talented as Curves:
The Use?
I tend to use the combination of both in my images. But if you are happy with the light information or exposure or shadows and highlights of your image, you can skip the use of Tone Curves RGB Channel instead use the Color Grading Panel to add colors to the image.
Also, there is a lot of use of the Curves which may be a little complicated to you but I have described the most common ones so you have a good understanding of the tone curve. Most of the time people don’t use it as this looks very complicated especially to beginners but you are leaving a lot on the table if you are not using it.
That’s it for the tutorial. Let me know if you have questions, I am sure you might have. Please comment below.
Need Help With Photoshop or Looking for Professional Support?
Whether you're just getting started with Photoshop or need expert-level assistance, we're here to help! Contact us for personalized Photoshop tutorials, project support, or creative services.
Get in touch today to take your skills or projects to the next level.
CONTACT US NOW📘 Want to Master Photoshop Faster?
🎁 Get Your FREE PDF E-Book "Top 10 Photoshop Tricks Every Designer Must Know" Now – Packed with expert tips, shortcuts, and techniques to boost your creativity & workflow.
👉 Download Your FREE PDF E-Book NOW!

