

Learn how to correct color and remove color casts from your images in just 5 steps. There is a ton of ways to remove color casts but the key is always finding opposite color of the color that you want to remove from the image. This tutorial will show you how to use adjustment layers to correct color, brighten up darken areas, and paint lights to finish color correction treatment.
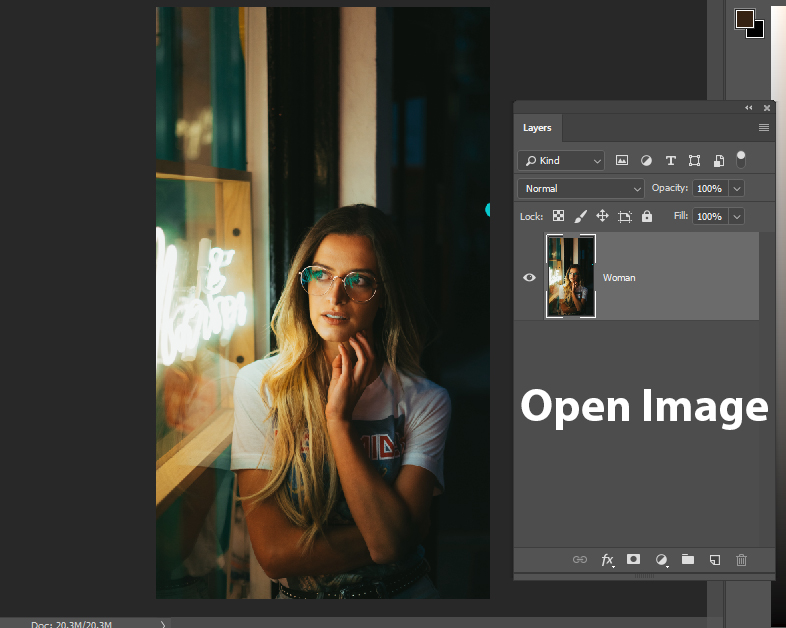
I am using this image for this tutorial which you can download it here. You can use any image you’d like to that needs color correction treatment, just open it up in Photoshop by selecting File > Open.
Step 1 – Find Opposite Colors
As I said you can remove any color cast and correct color if you know which color you want to remove. You can easily spot the color by looking at your images.
To find complementary color of any color, you can fill a layer with any color and then press CTRL + I to invert color and by inverting color you’ll get its opposite color. If you want to know how to find an opposite color then check out my another color correction tutorial.
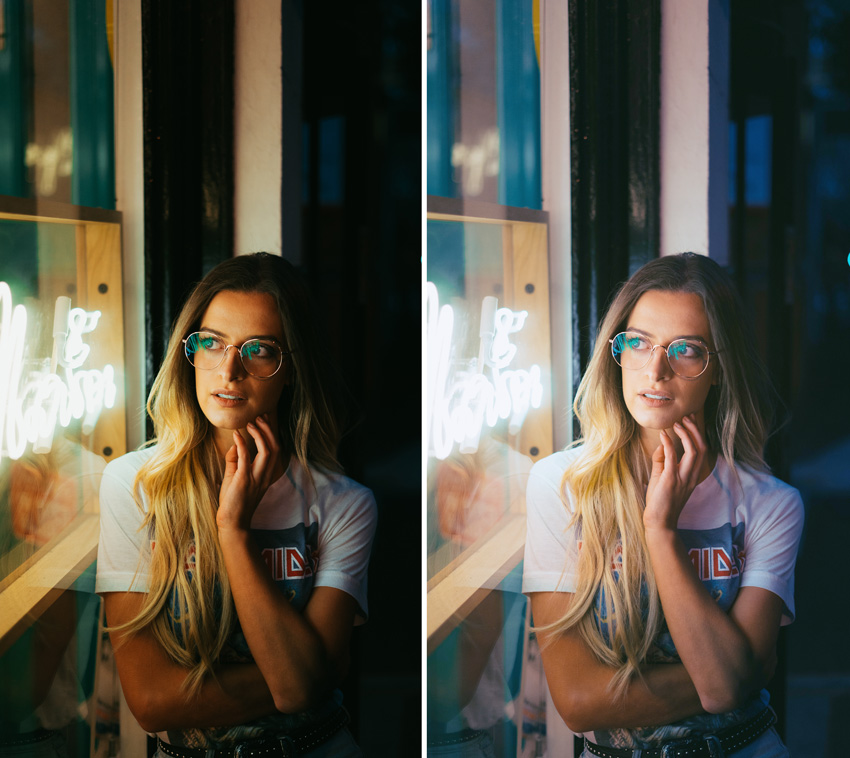
For example, in my case, there is a yellow color cast throughout the image. You can see the color is affecting woman’s skin tones, background, and even clothes.
I spotted the color to remove that is Yellow. The opposite color of Yellow is Blue so if I add blue color to my image it will remove yellow color leading to color correction and much natural image.

Step 2 – Begin Color Correction
Once you find a color to remove from your image it’s time to begin color correction. Go to Layer > New Adjustment Layer > Color Balance and add a Color Balance adjustment layer.
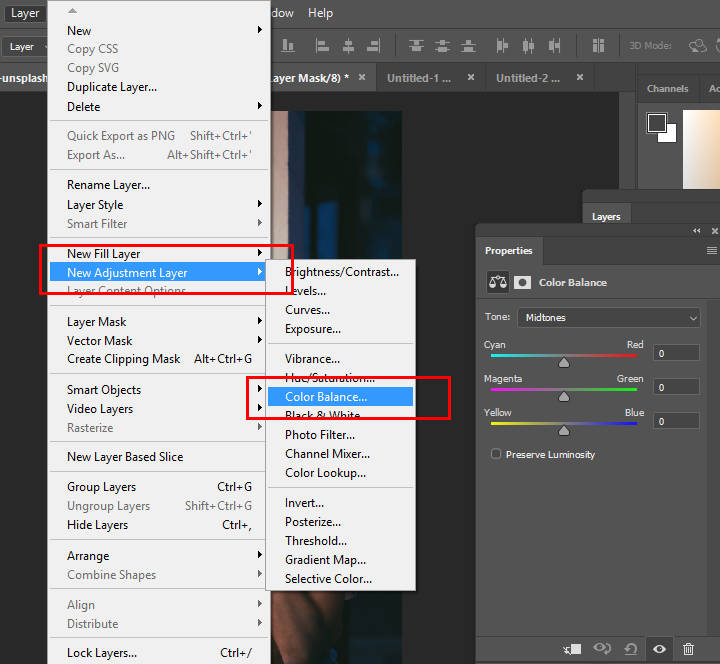
In the Color Balance adjustment layer, I’d recommend you to use Midtones settings as this will cancel out color in a 50/50 ratio leaving you with a neutral color tone.
You need to use Yellow Color, drag it to right to add blue tones to the image. As you drag the slider to right, you’ll see Photoshop will cancel yellow color and add blue tones to the image.

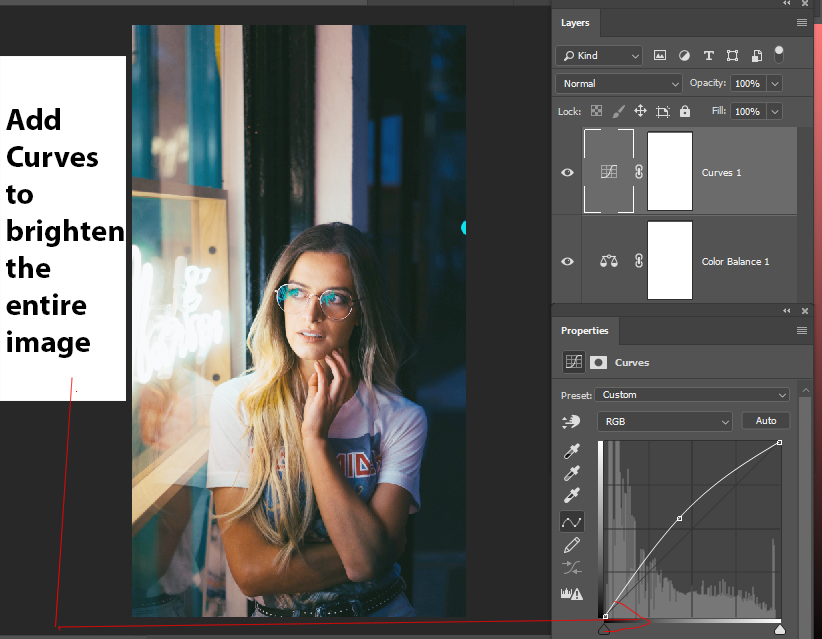
Step 3 – Balance Light Between Highlights & Shadows
The bright areas in the image are really good but we need to lit up darken areas to find the right balance between the light and dark.
To do this, create a Curves Adjustment Layer by selecting Layer > New Adjustment Layer > Curves. Now increase the brightness of the whole image using the following settings:
To affect only shadows, we’ll use Blend IF. Bring up the Blending Options by right-clicking on Curves and choose Blending Options.
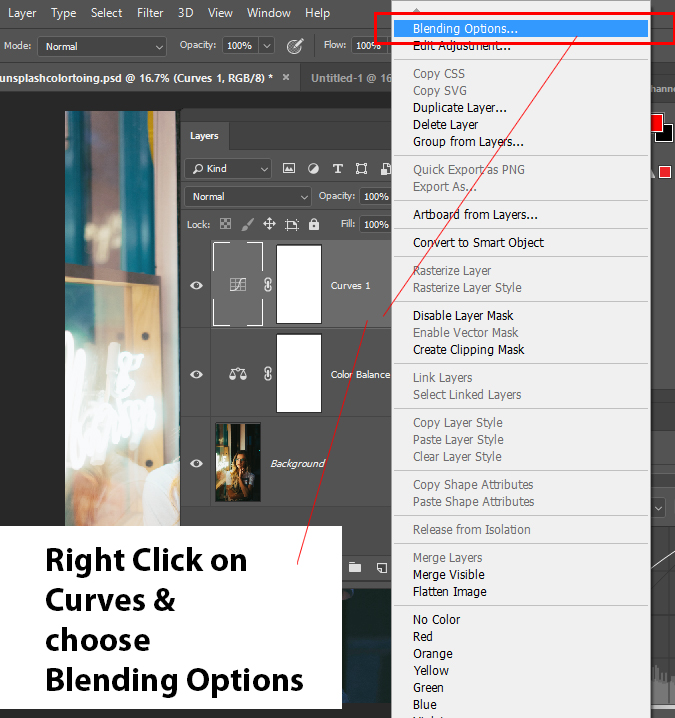
In the Underlying Layer Section, split the white slider by holding down ALT Key and Click & Drag to left.

Drag the white slider to left until you start seeing that Curves starting to affect the shadows of the image.

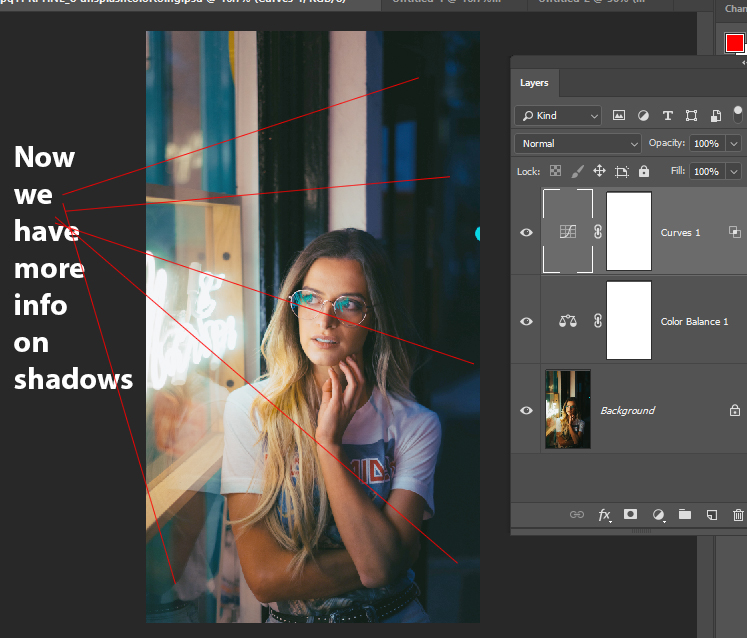
You can see we have lit up the shadows using Curves:
Here you can compare the results below:

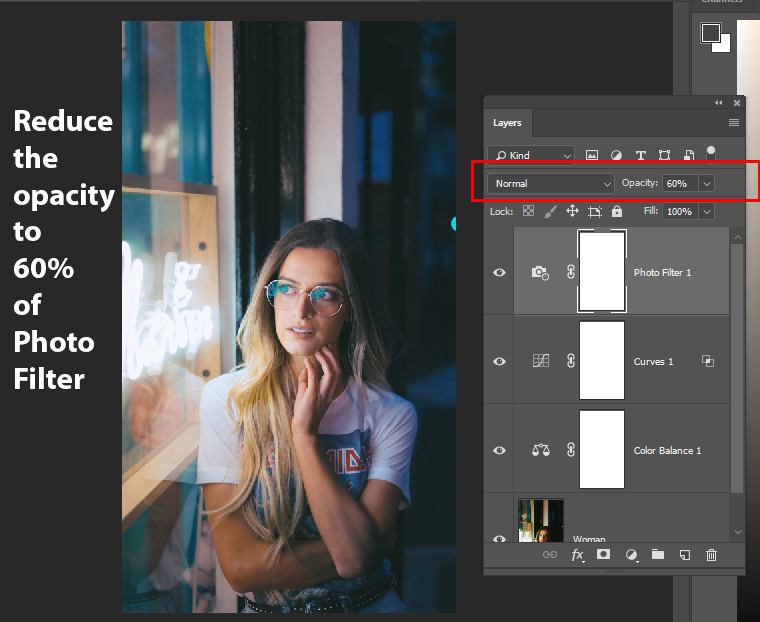
Step 4 – Improve Color Correction
If you think that Color Balance adjustment didn’t do its job properly then you can add more adjustment layers to get the results you need.
I used a Photo Filter adjustment layer and used a Deep Blue Filter.

I reduced the opacity to 60% to 40% or less. You can play around with the opacity slider and even use blending modes to blend colors.
Step 5 – Adding Lights
In the end, I painted light on the image. You can see there is a light source coming from the window and although the light looks pretty good I want to slightly boost it by adding light there.
To do this, I picked a dark orange color and paint on a new layer using a soft round brush.

After that, I changed the blending mode to Linear Dodge and reduced the opacity to 30%.

Here you can see we have given a pretty decent color correction to the image from step 1 to step 7:

I hope you enjoyed the tutorial and now you can correct the color of any image that needs it. Don’t forget to leave a comment in the comment section below.
Need Help With Photoshop or Looking for Professional Support?
Whether you're just getting started with Photoshop or need expert-level assistance, we're here to help! Contact us for personalized Photoshop tutorials, project support, or creative services.
Get in touch today to take your skills or projects to the next level.
CONTACT US NOW📘 Want to Master Photoshop Faster?
🎁 Get Your FREE PDF E-Book "Top 10 Photoshop Tricks Every Designer Must Know" Now – Packed with expert tips, shortcuts, and techniques to boost your creativity & workflow.
👉 Download Your FREE PDF E-Book NOW!

