

In this lesson, we’ll cover a couple of best methods to correct colors in Photoshop. First one will be very simple that is using the opposite color to remove the color cast. Second, one using ACR to do the same but in a more precise manner. Let’s get started to take your Photoshop maneuver to next level!
Tutorial Resources
Step 1
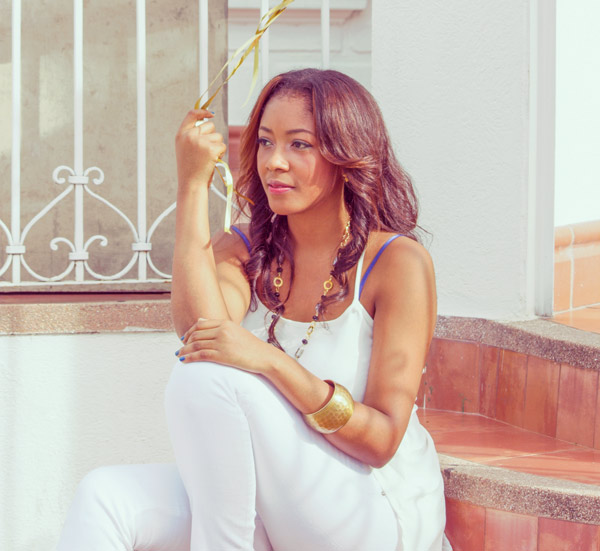
I opened the image in Photoshop and you can download it from the above-mentioned link. Go to File > Open and open it up.
As you can notice it has exposure and color problems and we need to take care of that. You can notice the orange color cast and also the image is not really brightened up.

Step 2: First Method using Opposite Color
To remove the color cast we ca use Opposite Color Method that is really a quick way to do it.
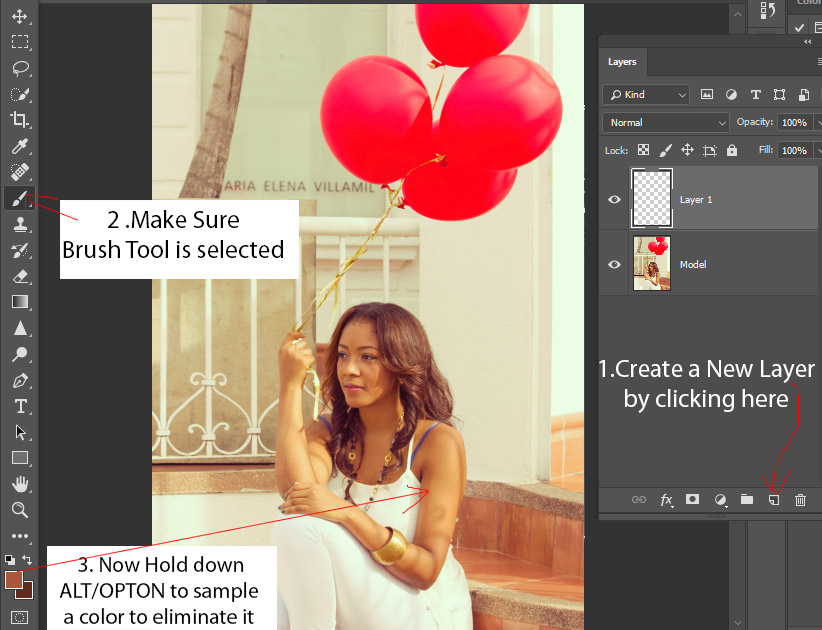
1. First, create a new layer either by clicking on the Create New Layer button or Hit CTRL/CMD + SHIFT + N.
2. Make sure Brush Tool (B) is active by hovering to Tool Panel and selecting it from there.
3. Now Hold Down ALT/OPTION and your brush will turn into an Eye Dropper Tool allowing you to sample the color which you’d like to remove. In our case, we have an orange color cast and so we are going to sample orange color from the model.
So I sampled the color from model skin that is from a darker area (from her arms), see the arrow and you can see the Foreground color changed to Orange.
Step 3
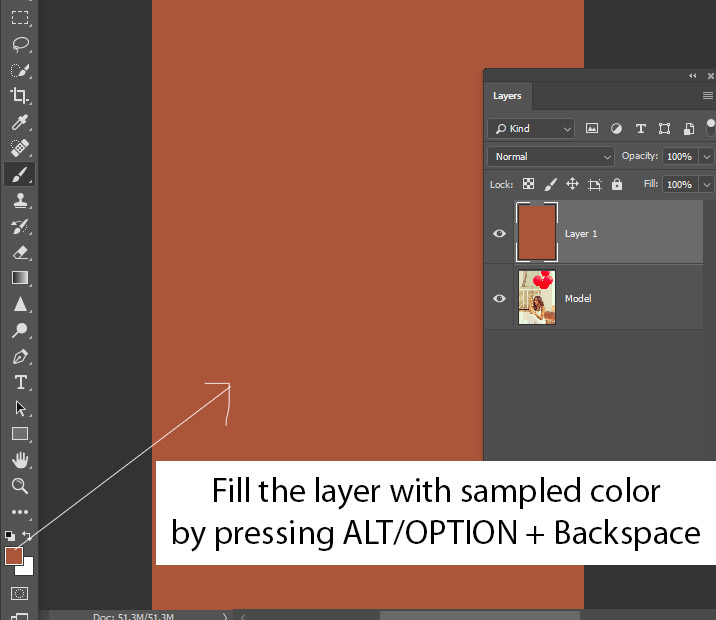
So that you have selected the color to eliminate and you need to fill the layer with this color. Press ALT/OPTION + BACKSPACE to fill the layer from sampled color.
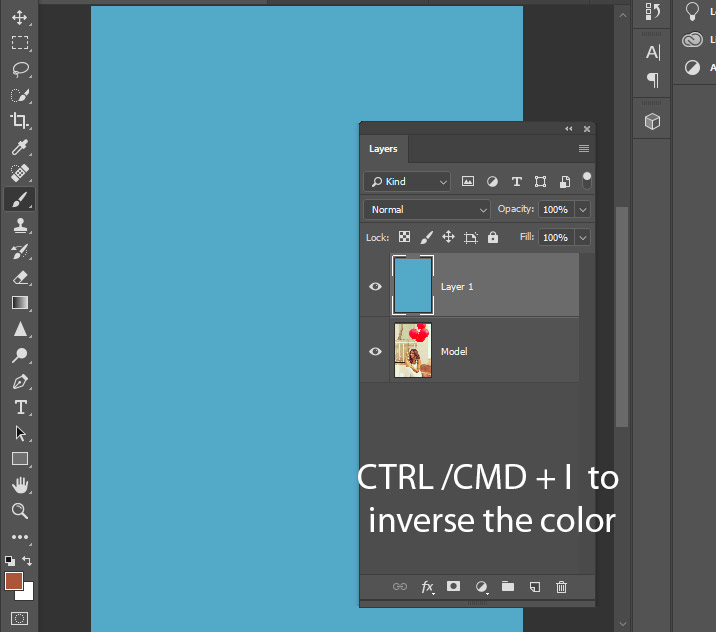
To find the opposite color of color, all you have to do is press CTRL/CMD + I and Photoshop will give you the opposite color of the selected color. In our case, Orange opposite color is Cyan as we have a cyan color layer now.
Step 4
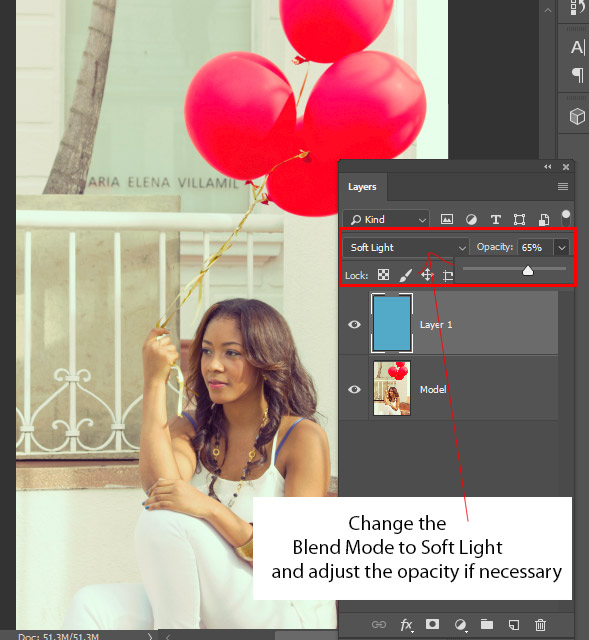
Change the blending mode of layer 1 which is a color filled layer to Soft Light and feel free to adjust the opacity if necessary as I did.
Try not to do overdo it and just try to balance the color by reducing the opacity so not blueish and not too orangy.
Step 5
Now right-click on the layer 1 and then select Blending Options.

In the Blending Options, hold down ALT/OPTION and click to split the Underlying layer Black slider and move it towards to right.
This will tell Photoshop to blend the color of layer 1 into the highlights parts of the underlying layer that is our model layer.
Resulting in a more natural looking color:

You can compare the results here:

Step 6: Second Method using Adobe Camera Raw
There is another way to take care of color cast that is using Adobe Camera Raw.
We’ll start from scratch here, so duplicate the model layer by pressing CTRL/CMD + J. It’s always a good thing to work on duplicate image rather than working on the original layer just in case.

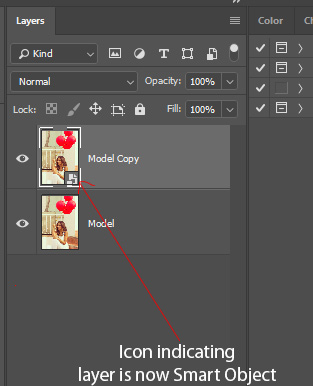
Convert the model layer into Smart Objects by right-clicking on it and then choose Convert to Smart Objects.

Here you can see a folder icon indicating the layer is now Smart Object that will help alter the settings at any time of a filter.
Step 7
Go to Filter > Camera Raw and Adobe Camera Raw work space will open up that resembles below image.
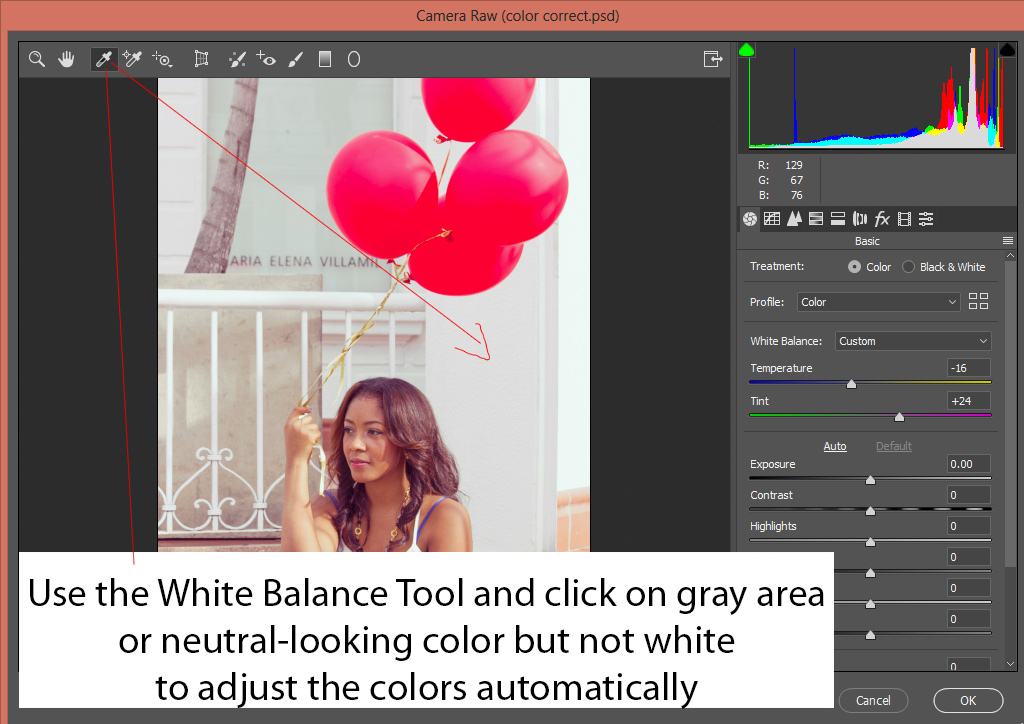
Now select the White Balance tool third button at the very top indicated by the arrow.
Once you selected it, click on Gray or Neutral-Looking Color (if no gray color) but not white in the image to adjust the white balance.
In my case, I’ve clicked on the wall as it has neutral-looking color to remove any color tints and color cast from the image. You can see in the image that it did a really great job!
Step 8
1. On the very right, you have Temperature Options and you can alter the settings here if you are not happy with White Balance Tool Work as you can notice I brought down the tint a bit and increased the temperature a little.

2. Below Temprature Settings, you have some more settings but I’ve only changed the Highlights & Shadows.
I reduced the Highlights to recover highlight details specially the right leg as it was fading away with the wall.
I also increased highlights on Shadows by using the Shadows Slider to bring more light to the darker parts.
Feel free to play around with more sliders if you want to sleuth the best setting for your image.
Results so far:
Step 8
The image looks a bit blueish although I am happy with the results adding the orange color a bit may improve the results significantly.
Create a Curves adjustment layer by selecting Layers > New Adjustment Layer > Curves.
I’m adding the orange color back using Blue Channel. Just click in the middle of the blue diagonal line and drag it a little bit below.
Now use the RGB Channel to brighten up the image a bit.

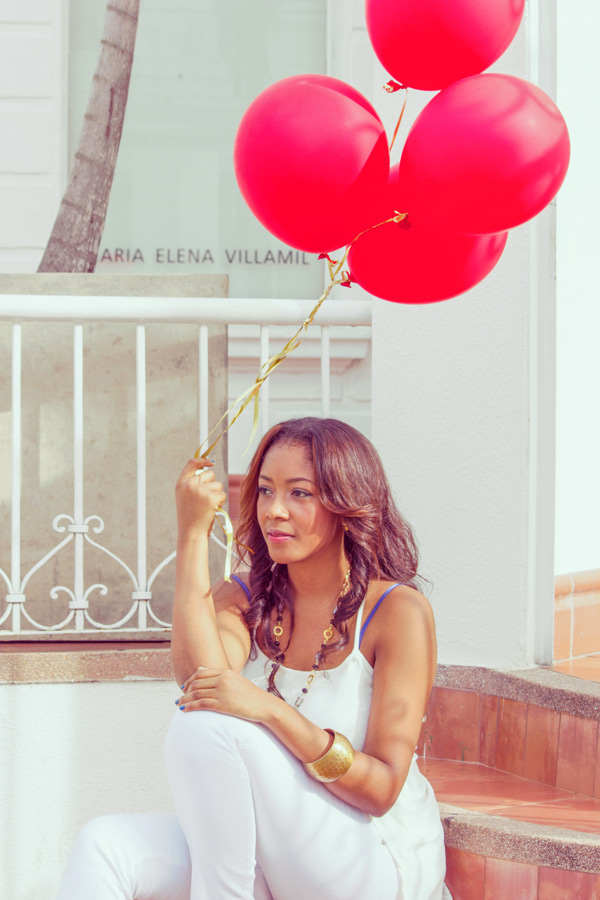
After using Curves you can see the final results:
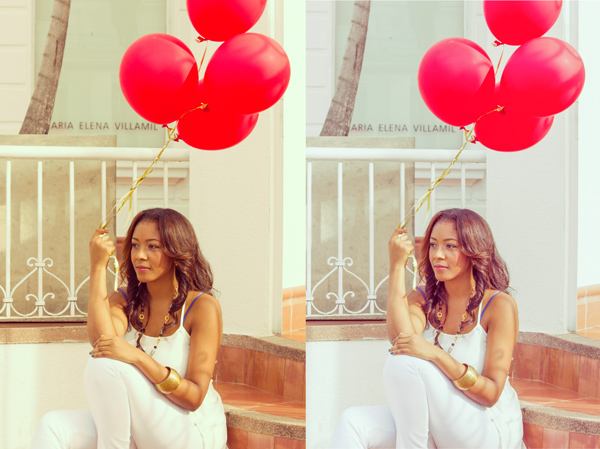
Final results:

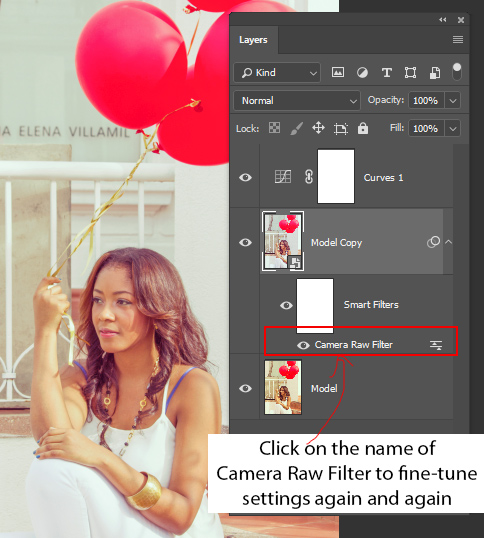
Bonus Tip
Anytime if you feel that you want to change the settings of Camera Raw you can do that by clicking on the name of the Filter. So all thanks to Smart Objects allowing us to alter the settings of a filter anytime.
Need Help With Photoshop or Looking for Professional Support?
Whether you're just getting started with Photoshop or need expert-level assistance, we're here to help! Contact us for personalized Photoshop tutorials, project support, or creative services.
Get in touch today to take your skills or projects to the next level.
CONTACT US NOW📘 Want to Master Photoshop Faster?
🎁 Get Your FREE PDF E-Book "Top 10 Photoshop Tricks Every Designer Must Know" Now – Packed with expert tips, shortcuts, and techniques to boost your creativity & workflow.
👉 Download Your FREE PDF E-Book NOW!

