


Learn how to replace a sky in just one-click with Photoshop’s new Sky Replacement feature. With so many features coming to Photoshop 2021, the new Sky Replacement feature is one of them. Adobe has released 21 new features for Photoshop, the Sky Replacement is one of them that stand out to me.
We gonna take a look at this latest feature, and I am gonna show you how you can use it to make the sky replacement process easy and hassle-free. The best parts it is non-destructive meaning that whatever changes you make in the Sky Replacement Dialog Box, it gonna preserve each change and group them as a group of layers for further refinement. Let’s get into it!
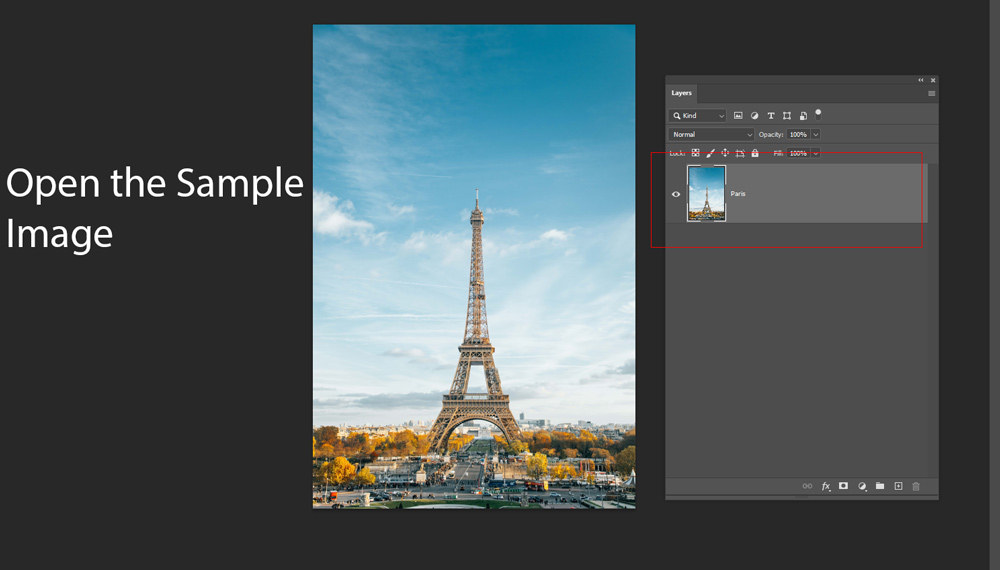
Step 1 – Open the Sample Image
To follow along with the tutorial you can download the sample image from Unsplash. I have opened the sample image in Photoshop to test the new sky replacement feature. You can see the image is opened below in Photoshop.
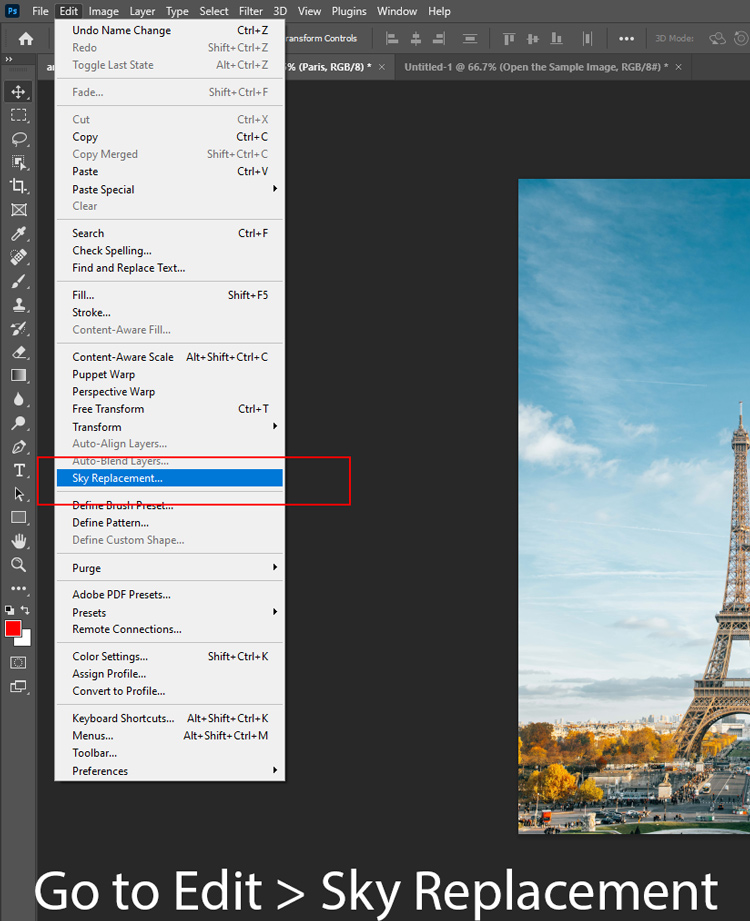
Step 2 – Access The New Sky Replacement Feature
To access the new Sky Replacement feature, go to Edit > Sky Replacement. Make sure you have the Latest Photoshop version 2021 otherwise you might not able to find this option.
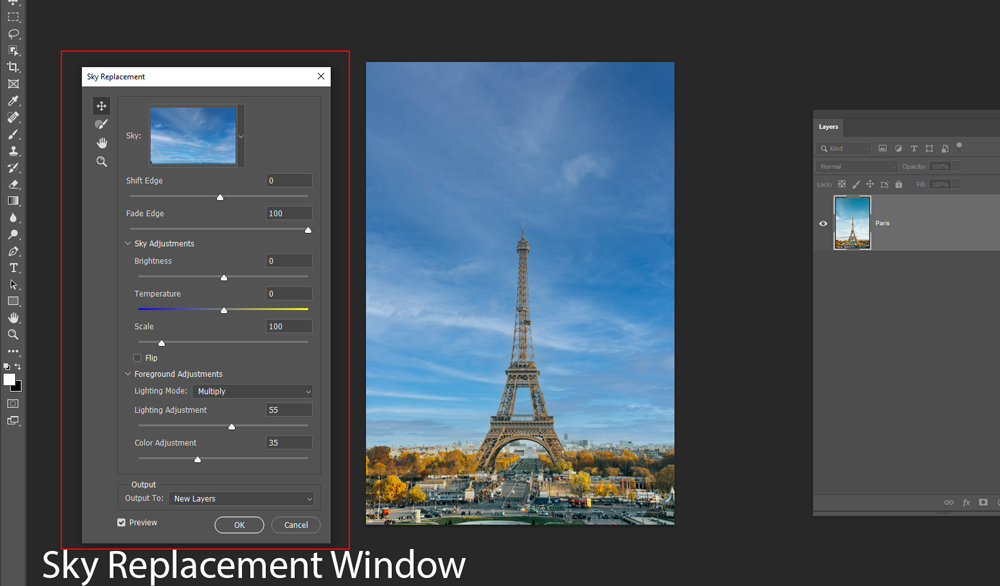
Step 3 – Replace The Sky with One-Click
Once you have accessed the New Sky Replacement Feature, you can see the Sky Replacement dialog box will appear as shown below.
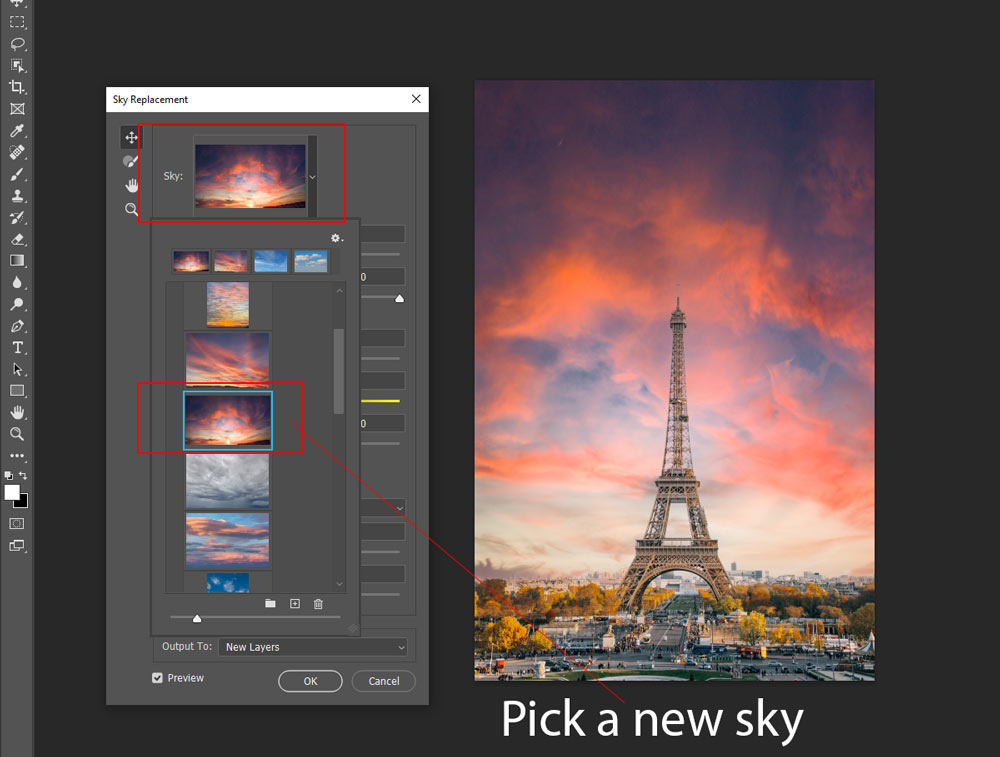
To change the sky in just one click, all you have to do is select a new sky in the Sky Box to replace the existing one as I did it in the below image, and boom you are done. You can see I have replaced the sky in a matter of seconds and no complex selection is needed. You can also scroll down to see different sky images there. Pick the one that you’d like to add.
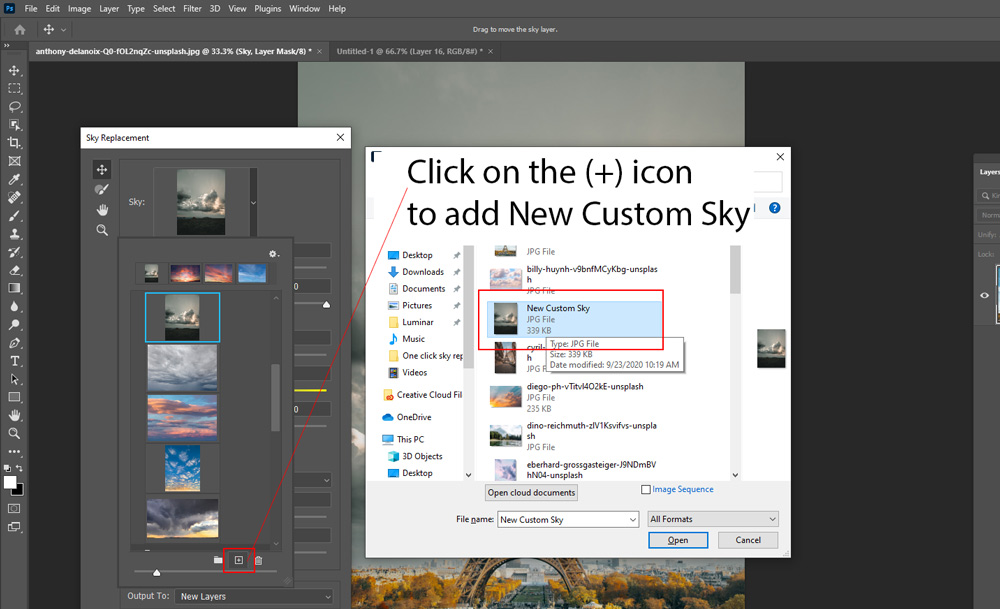
You can also add your custom sky image, to do this, click on the (+) icon and then browse through your computer, and then select a new custom sky image that you’d like to add.
Step 4 – Sky Edge Refinements
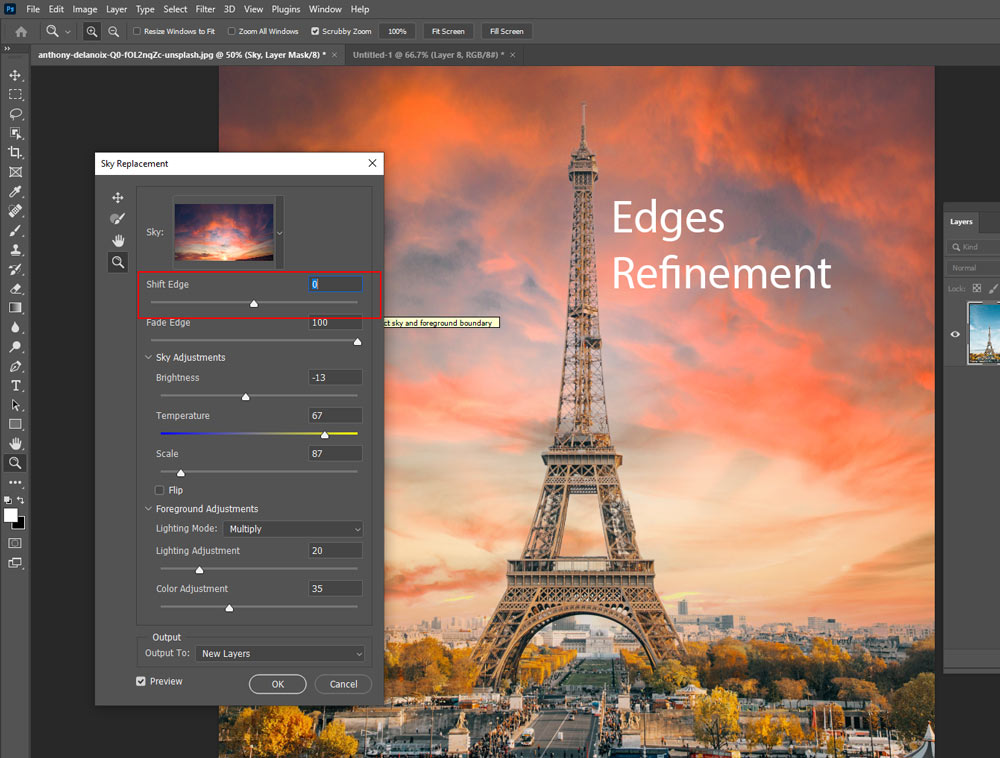
After replacing the sky, you can do a lot of refinements using the options available to you in the Sky Replacement dialog box. The first thing is working with edges, you can control the edges of the new sky using Shift Edges.
For example, you can shift the edges one way or another way to add or remove edges of the new sky. Just click & drag the Shift Edges Slider to add or remove the new sky edges.
You can also use the Refine Edge Brush to simply add or remove the new sky by just painting on those areas where you want. This will help you if it didn’t give you a perfect composite.
Make sure to change the blend mode to Normal and switch between (+) & (-) icon to add or subtract the new sky.

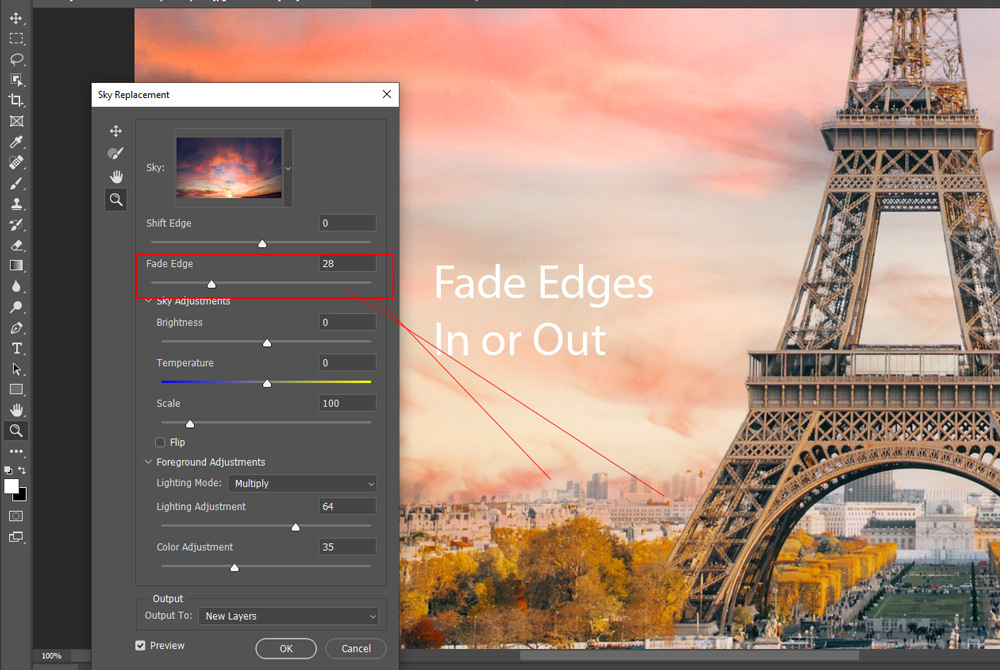
You can also fade the edges of the new sky using the Fade Edges Slider.
Step 5 – Sky Adjustments
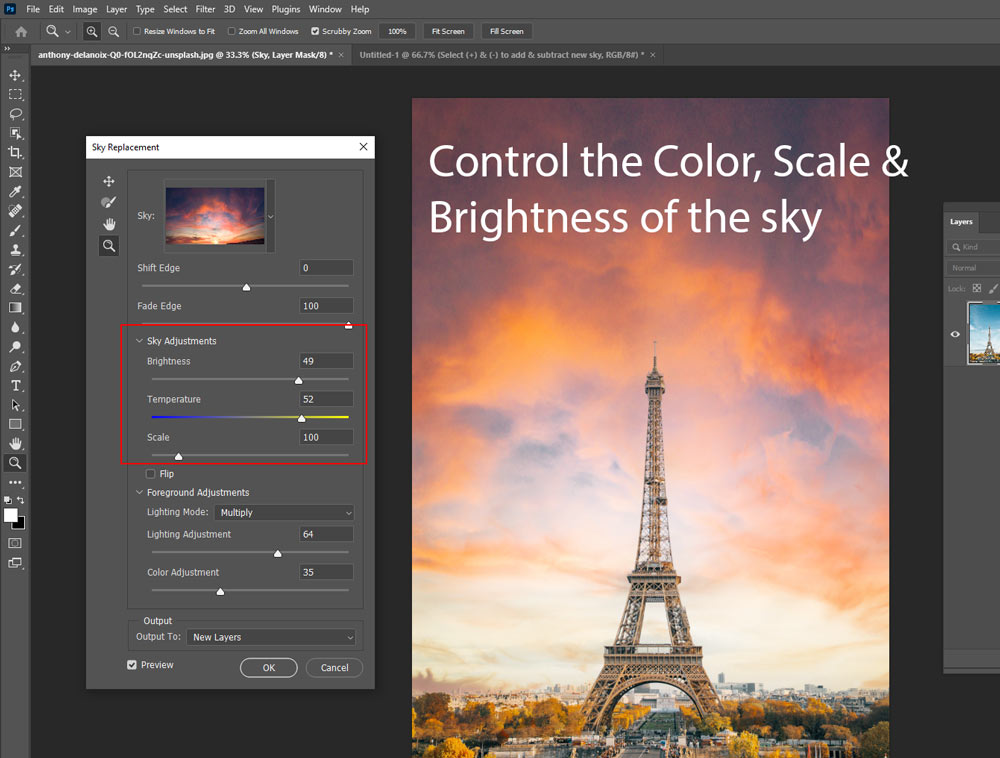
After refining edges, you can also make sky adjustments in the Sky Adjustments section. There are three options in this section, Brightness, Color & Scale. They are self explanatory for example Brightness Slider makes the sky darker or brighter.
Color Slider adjusts the Color Temperature in the sky, you can make the sky warmer or cooler which depends on you.
With Scale Slider you can make the sky image larger or smaller.
Step 6 – Foreground Adjustments
Next, we have Foreground Adjustments that will help you match the lighting and coloring of the sky with the foreground.
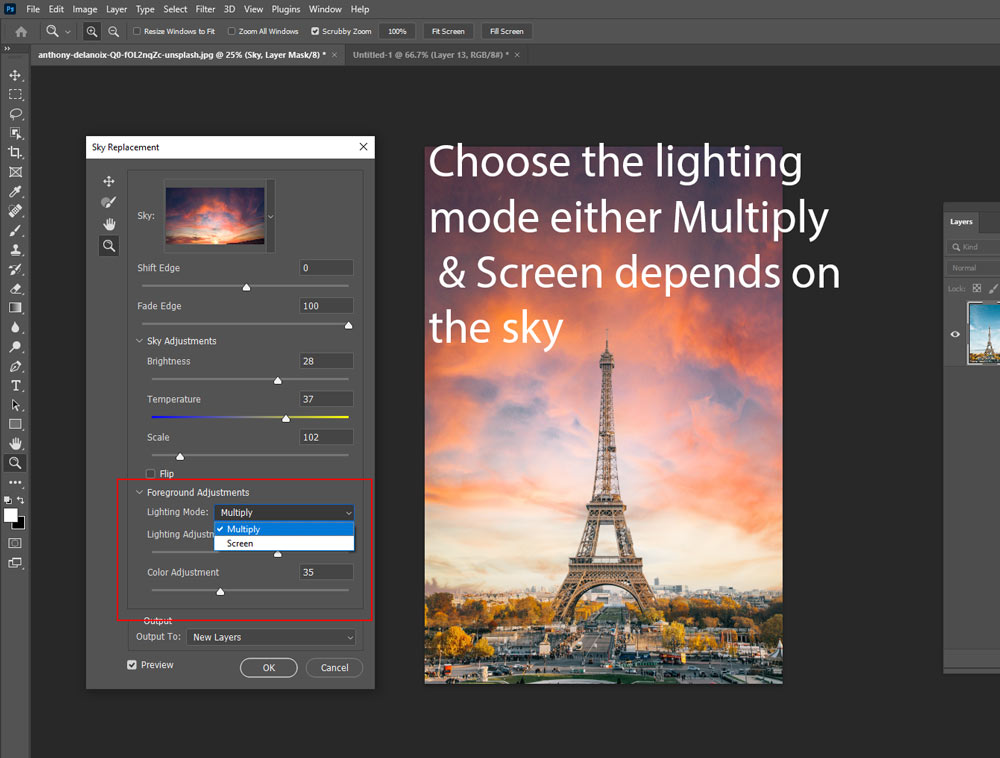
First, we have Lighting Mode that shows 2 options: Multiply & Screen Blend Modes.
You can choose Multiple blend mode to darken the foreground and use the Screen blend mode to brighten the foreground.
So basically it depends on your composite for example if you are working on a sunset image you might want to go for Multiply blend mode as the sunset has dark tones so choose wisely.
Next, we have Lighting Adjustment which controls the intensity or you can say the opacity of the Lighting Mode. In my case I have selected Multiply Blend Mode which is making the foreground darker but
I can use the Lighting Adjustment slider to tell Photoshop how less or more I want the dark effect (or Multiply Blend Mode Effect) on my foreground.
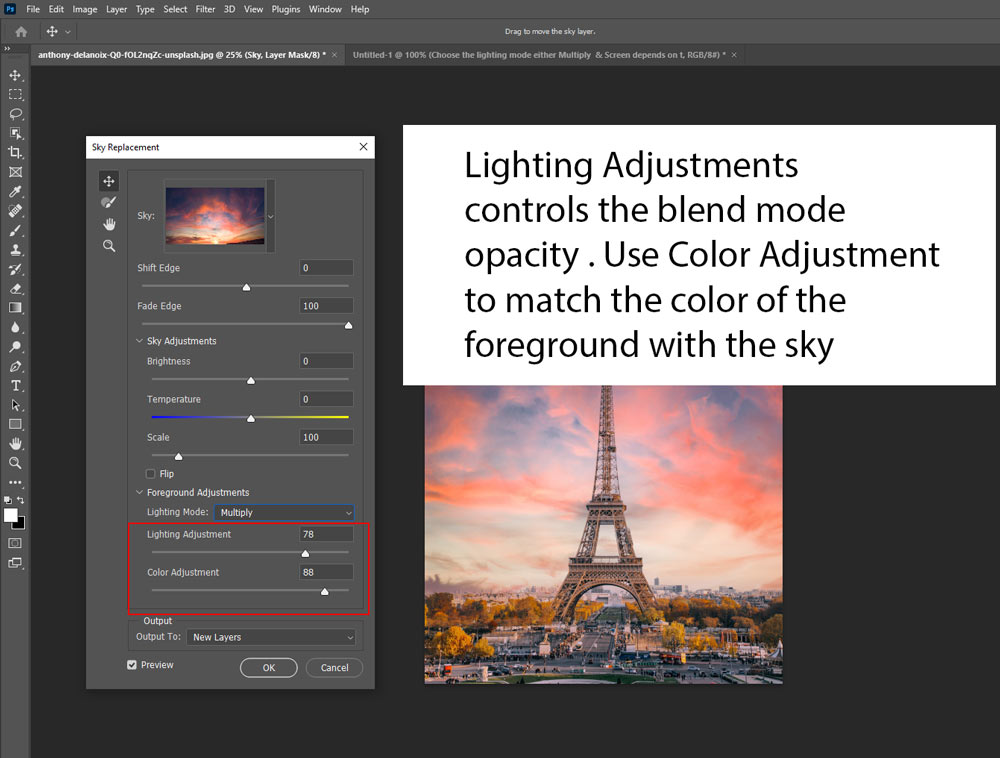
Color Adjustment Slider will try to match the color of the foreground with the sky. I think it gonna try to pick the color that happens to be most on the sky and add that color to the foreground to match it.
You can see in the image below, it detected red color in the sky and added the same to the foreground.
Step 7 – Output The Results
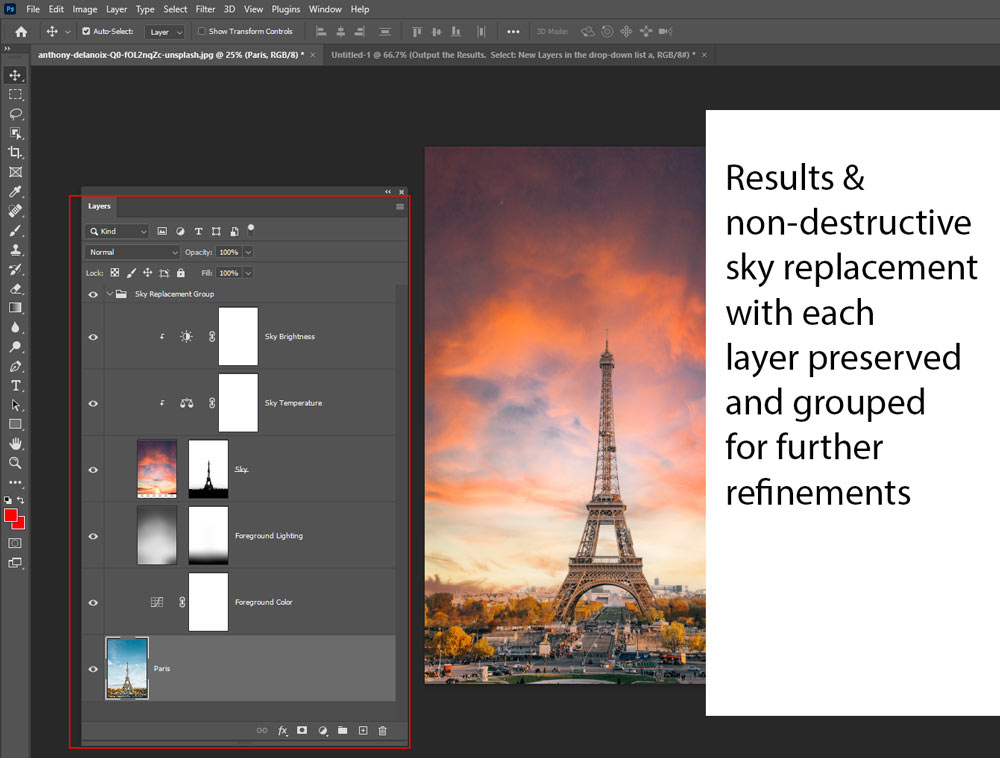
Next, you can output the results at the very bottom of the Sky Replacement dialog box. Select Output To: New Layers to make sure that you get every layer for further refinements.

Once you press OK, you can see a group called “Sky Replacement Group” on your layer stack with each layer containing the settings we used to replace the sky. Isn’t it amazing? Now you can edit these layers to further refine the results if necessary.
Step 8 – Further Refinements
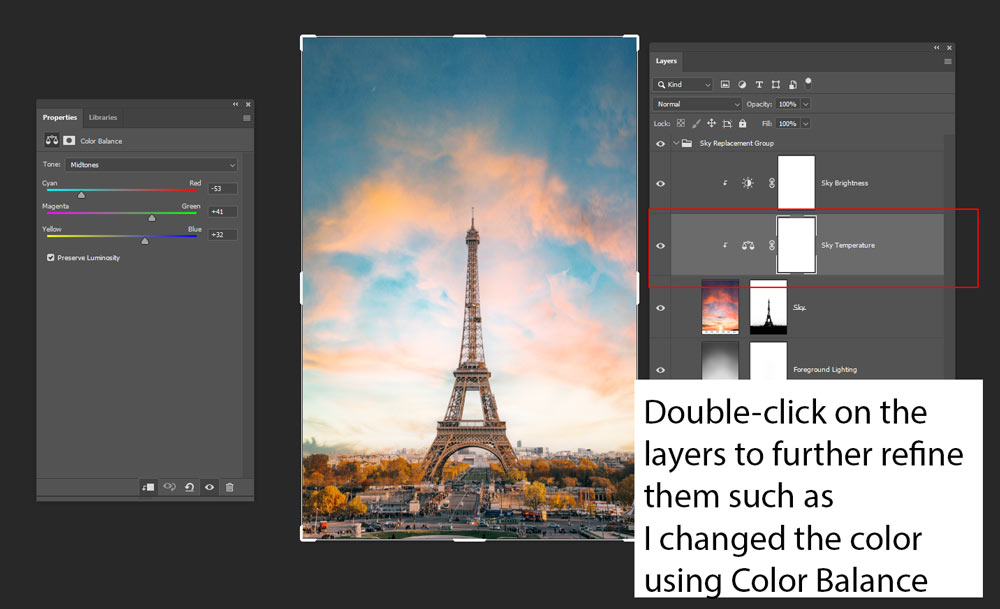
After you are done using the New Sky Replacement Feature, you can access the adjustment layers properties, masks, and layers to edit those layers and make further adjustments.
Let’s say that I want to change the coloring of the sky I can do this by double-clicking on the Color Balance adjustment layer and then tweaking its settings as I did below.
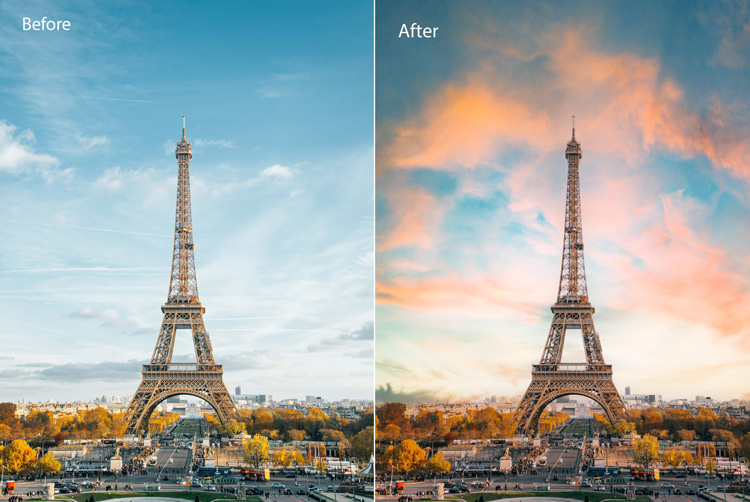
Here are the before and after results:
Adobe continues to add a lot of new features to Photoshop making the task such as sky replacement much easier and even non-destructive so kudos to Adobe for adding this one of the demanding features to Photoshop. At least we have don’t go through the lengthy and complex process of sky replacement in Photoshop. Comment down below what your thoughts are on this feature.
Need Help With Photoshop or Looking for Professional Support?
Whether you're just getting started with Photoshop or need expert-level assistance, we're here to help! Contact us for personalized Photoshop tutorials, project support, or creative services.
Get in touch today to take your skills or projects to the next level.
CONTACT US NOW📘 Want to Master Photoshop Faster?
🎁 Get Your FREE PDF E-Book "Top 10 Photoshop Tricks Every Designer Must Know" Now – Packed with expert tips, shortcuts, and techniques to boost your creativity & workflow.
👉 Download Your FREE PDF E-Book NOW!

