

In this tutorial, you’ll learn how to replace a sky to create a dramatic mood in Photoshop without investing your time in creating a complex selection. There will be some tips & tricks that will help you isolate the sky without tracing it and then we’ll add another sky image there to make a dramatic scene. This tutorial is a bit on the intermediate side as it shows advanced masking & layer methods so make sure you must have a good understanding of Photoshop’s features otherwise it might go over your head.
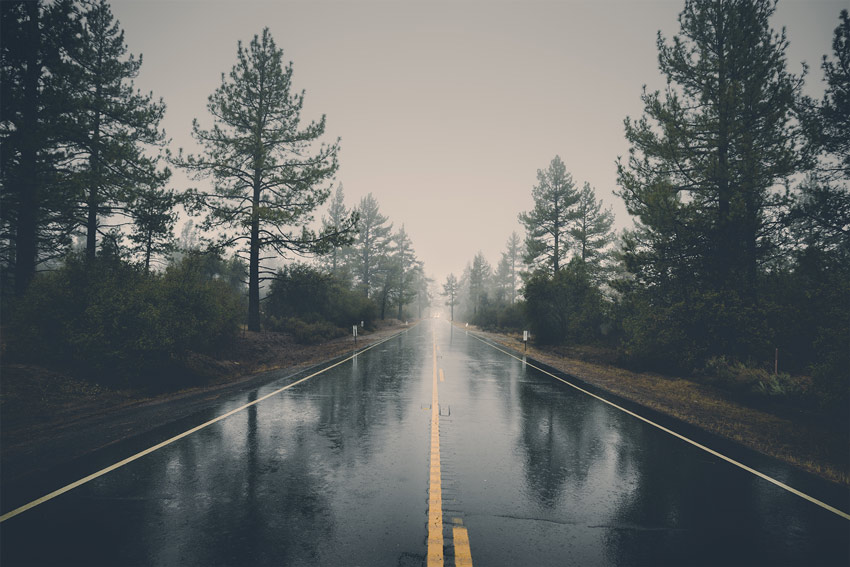
Before:
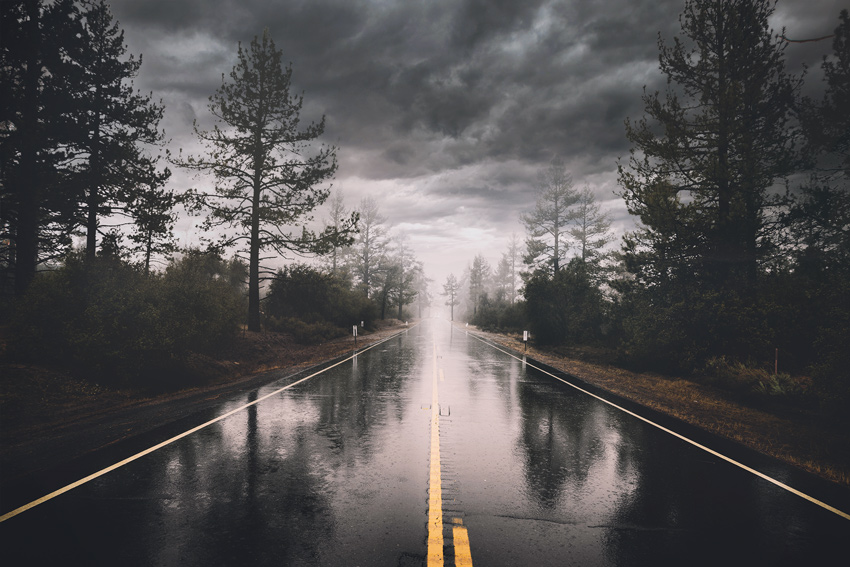
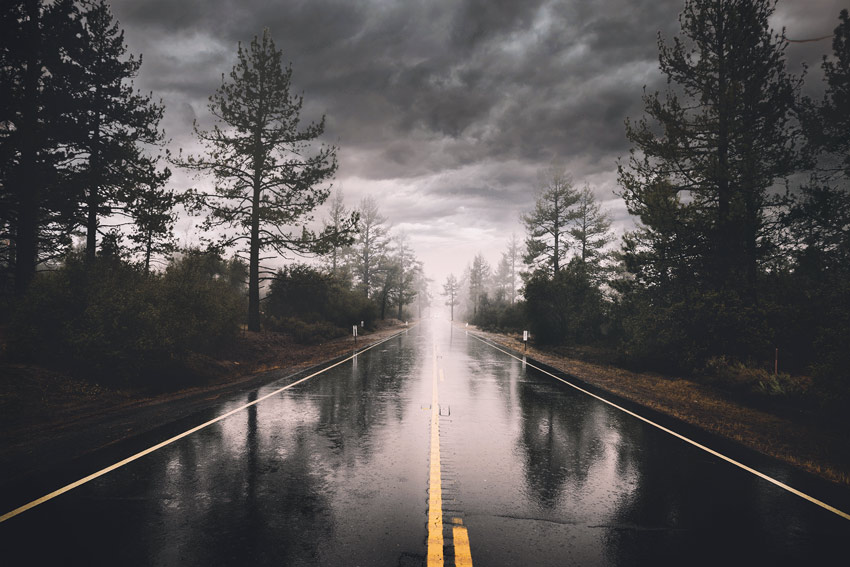
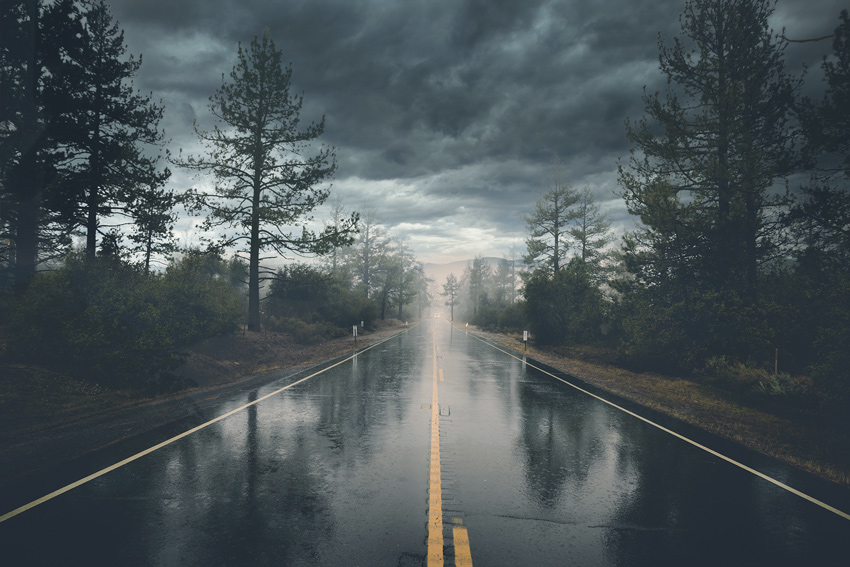
After:
Step 1 – Add The Landscape 1
You can download this forest image from Pexels if you want to follow along. The image looks dramatic because of the mist covering the whole image parts such as road, tree, bushes, and sky. We can reap the benefit of the mist to blend our new sky.
Go to File > Open & open the image in Photoshop.

Step 2 – Add the Sky
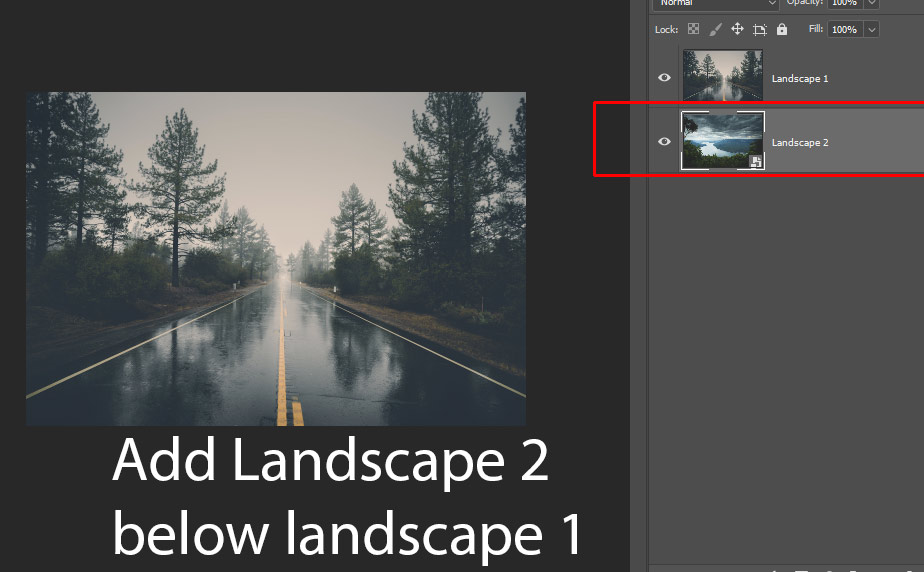
Add the Landscape 2 image (sky), download from Unsplash, right-underneath the Landscape 1 we will use it as a sky so make sure to scale it to get the sky parts of it. Before placing it make sure your landscape 1 layer is unlocked, you can unlock any layer by double-clicking on the layer. Once you unlocked the layer now you can move any layer under it so move the landscape 2 under it using the Move Tool (V).
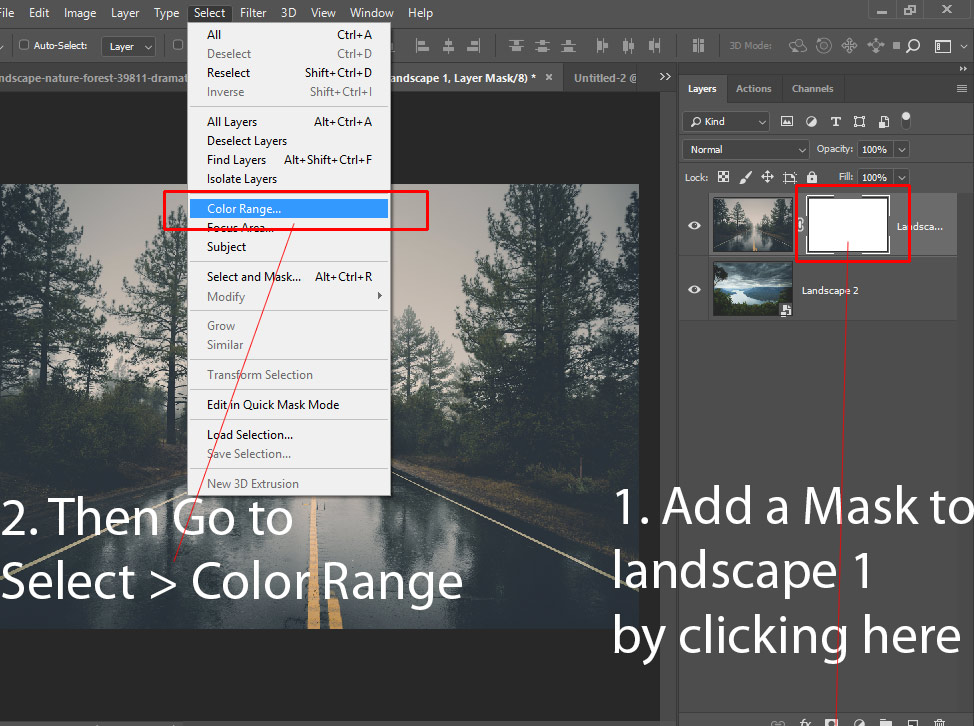
Once you placed landscape 2 under landscape 1 it’s time to remove the sky in just one click. To do this, add a layer mask to the Landscape 1 layer by clicking on the Add a Layer Mask Icon at the bottom of the layer panel. Next, go to Select > Color Range.
Step 3 – Replace the Sky
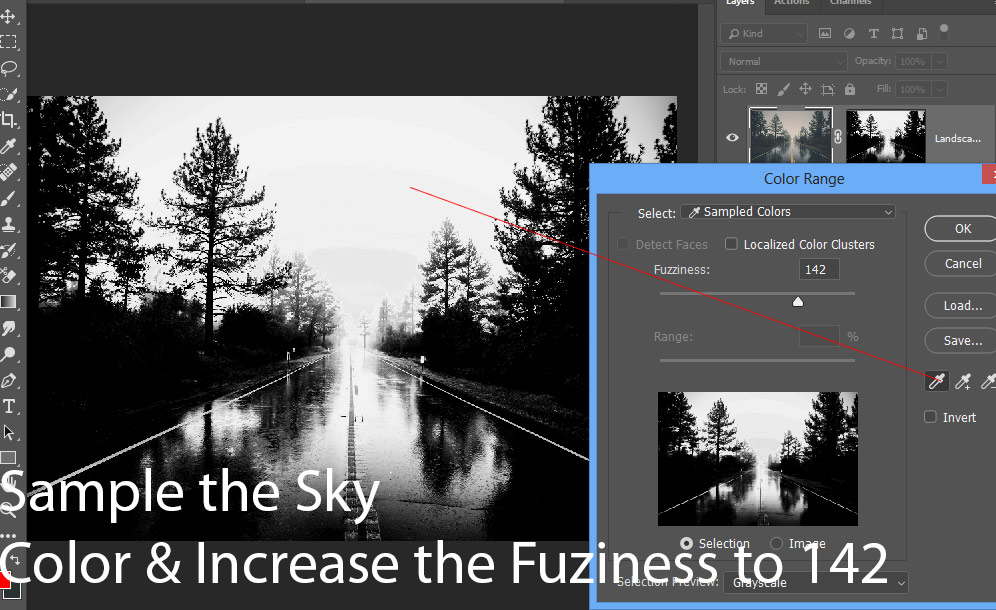
Once you are in the Dialog Box of Color Range, hover your mouse over the sky and sample the sky color by clicking on it. After sampling the color increase the Fuzziness to 142 to select more of this color. This will isolate the sky properly and as you can see the sky is in the white color.
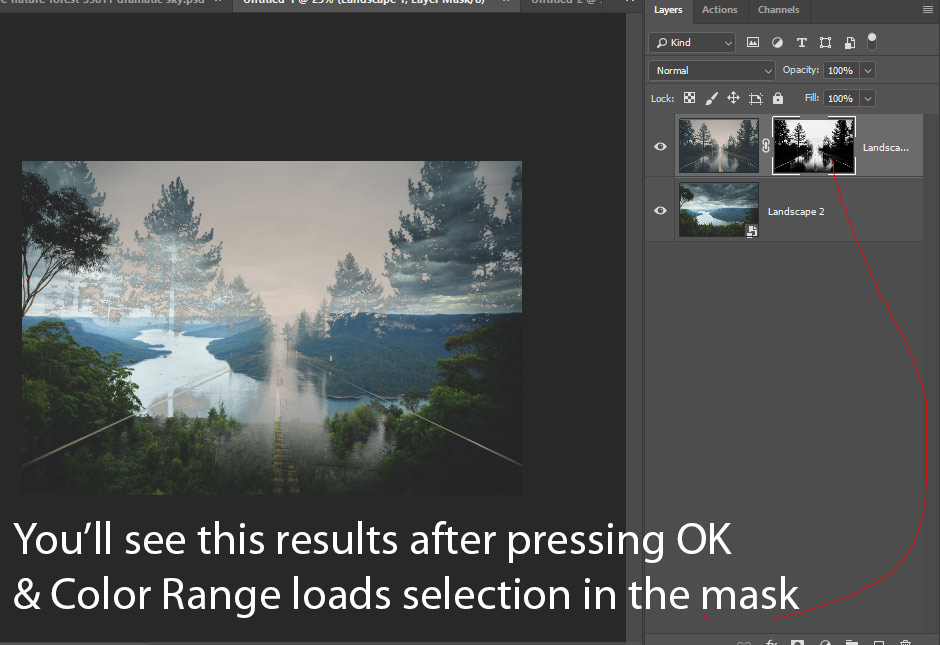
Press Ok to load the selection in the layer mask of Landscape 1. Just press OK and Photoshop will automatically load the selection into the layer mask. You’ll have similar results:
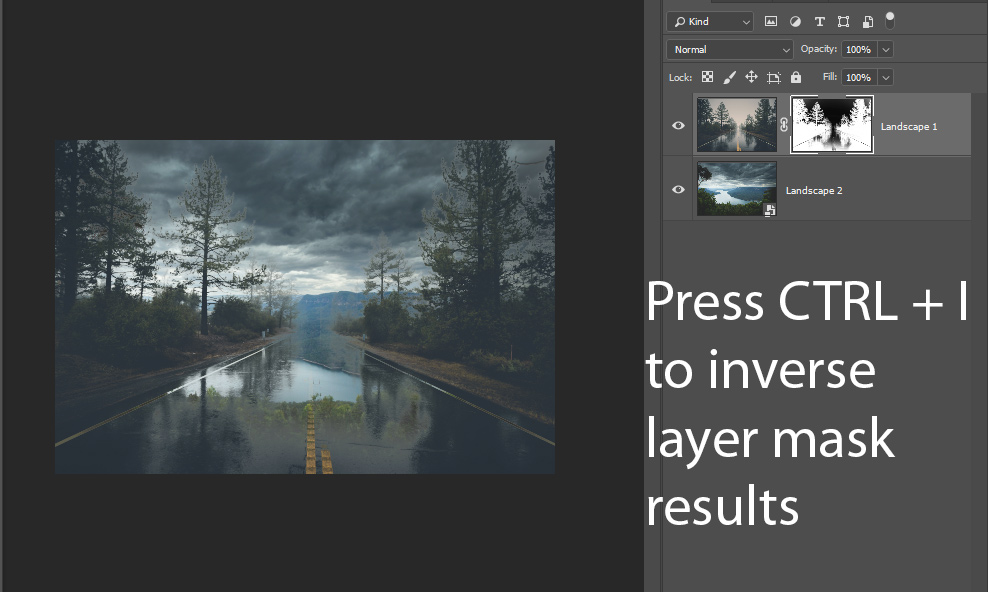
Press CTRL + I to invert the layer mask results and you’ll see the sky has been replaced & it needs a bit of retouching to fix some glitches. If you want you can adjust the sky layer to make sure sky parts are visible.
Step 4 – Masking & Revealing
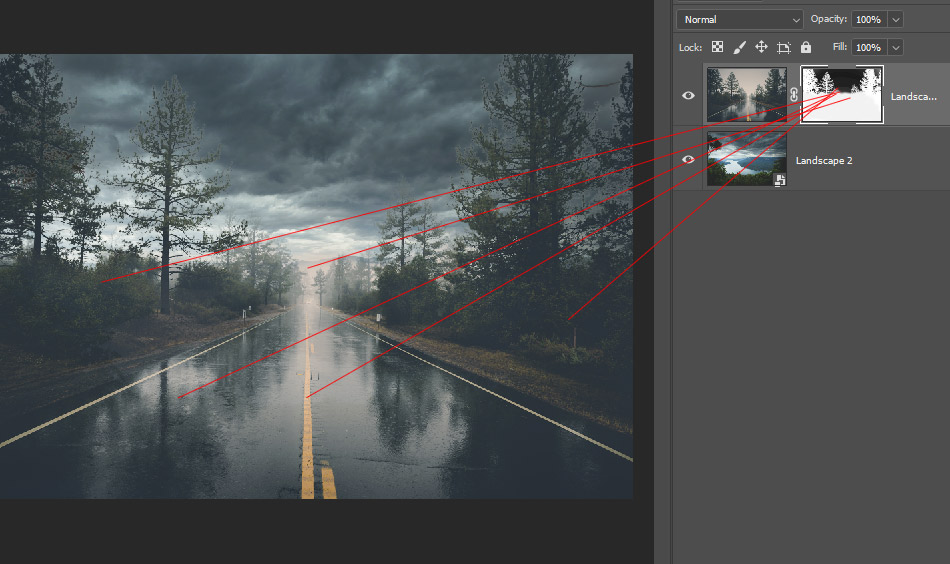
Now it’s time to reveal some of the parts of landscape 1 that was removed using Color Range.
In the below image you can see we need to reveal the parts of landscape 1 that got masked in the last step. Take a look at them below.
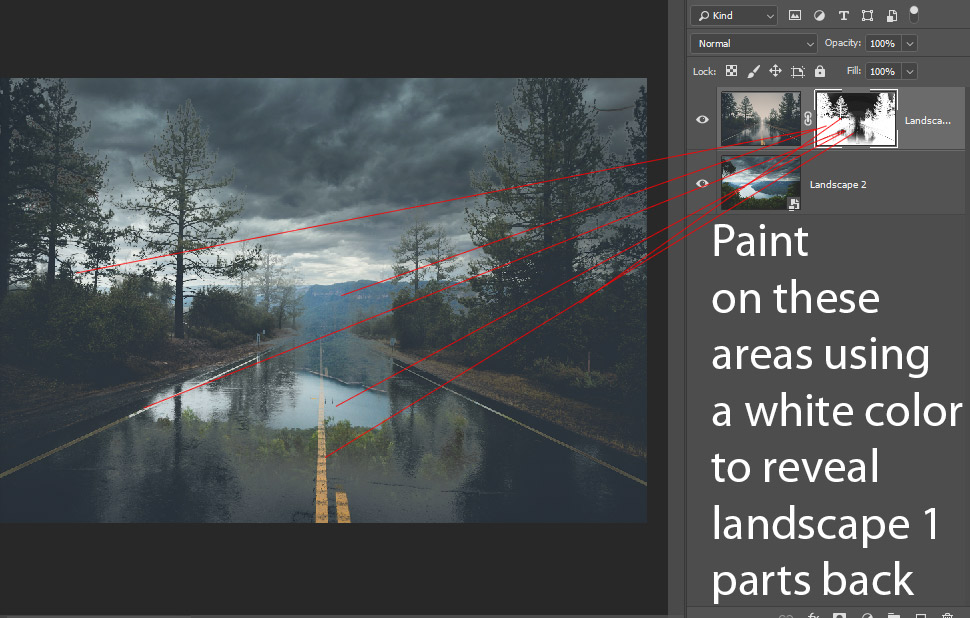
To do this, select the layer mask of landscape 1 and then use a soft round brush with white color and paint on the area to bring them back.
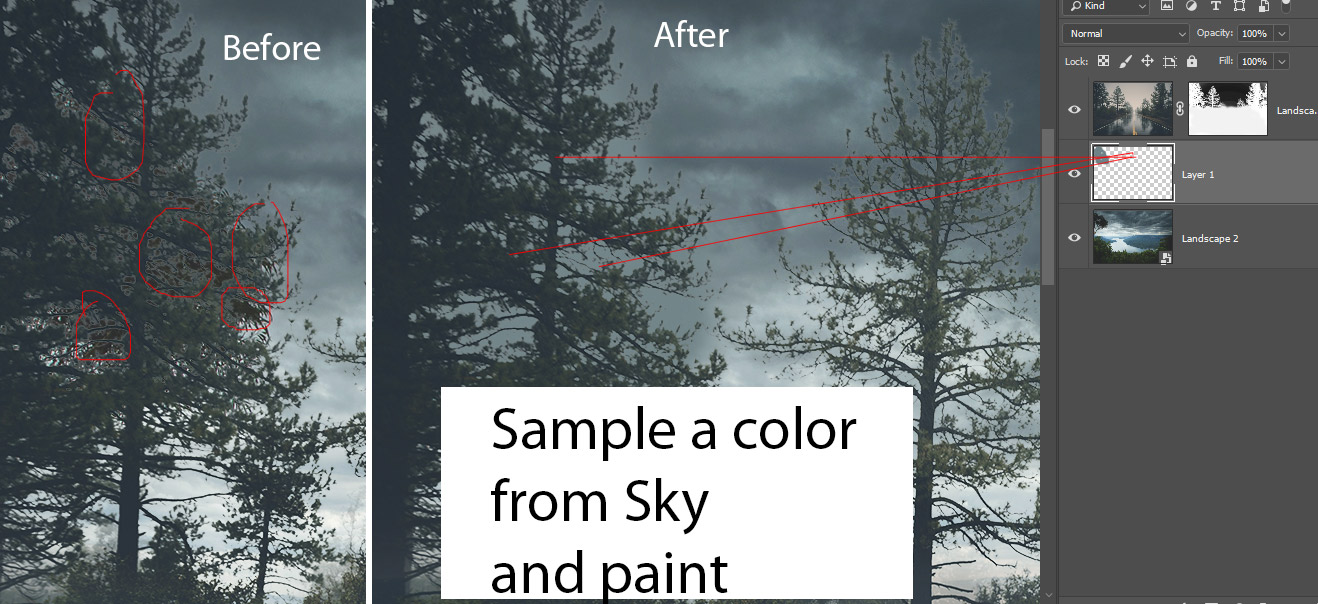
There is a tree right on the left of the Landscape 2 layer which is still visible if you notice it in the below image. I created a new layer above landscape 2 and sampled a color from the sky and painted over it to cover the tree. You can also use Clone Stamp Tool (S) for cloning but painting over it will take care of it so I painted.
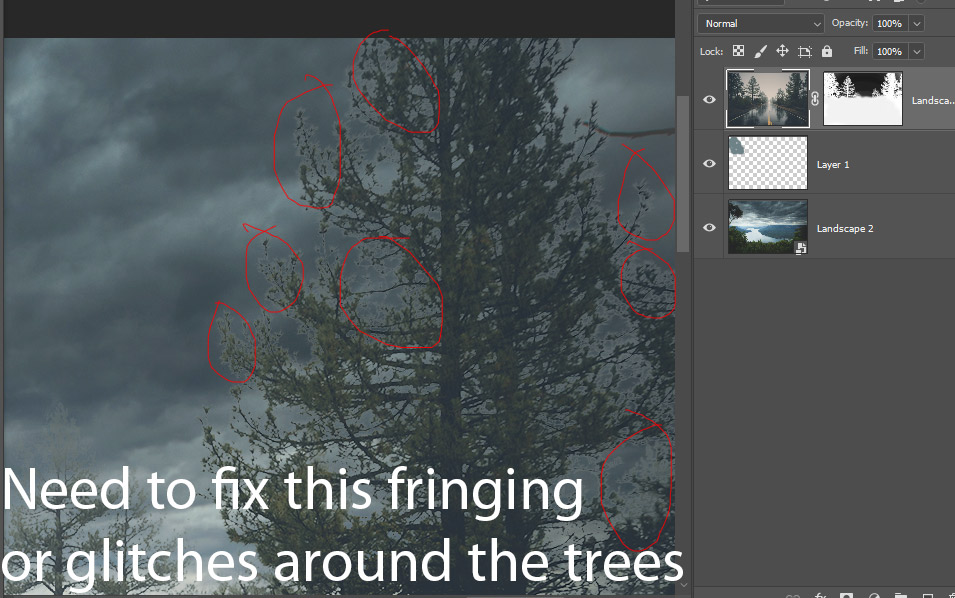
Step 5 – Fixing Fringing
If you zoom in to the image you’ll notice white fringing or some unwanted parts that are visible. This happens when the Color Range command couldn’t make the selection properly allowing some sky parts to be visible.
But we can take care of this by painting over these parts so we can cover them.
Take a look at the below image what needs to be fixed:
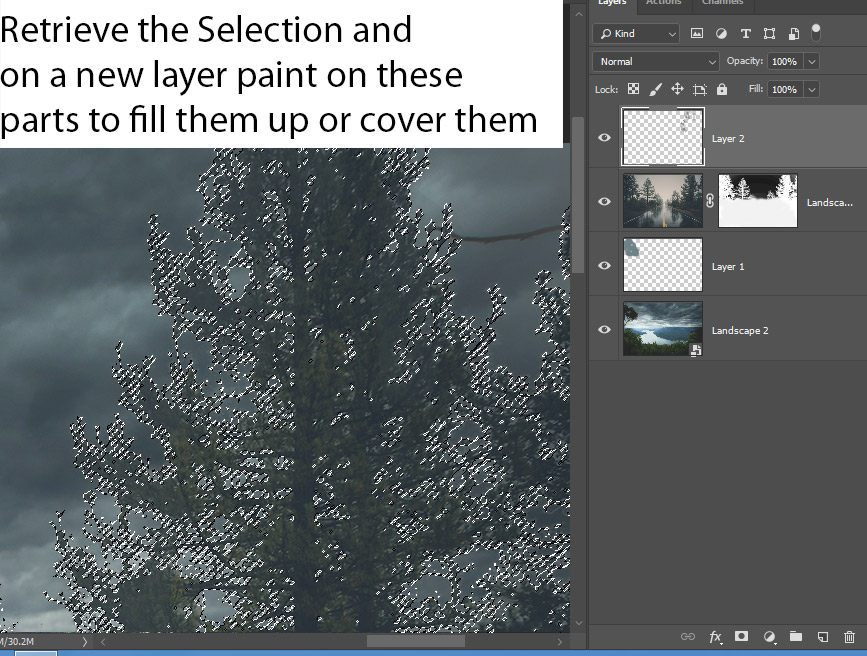
Now what you wanna do is, create a new layer by pressing CTRL + SHIFT + N and then load the selection of layer mask by Holding Down CTRL + Click on the layer mask thumbnail.
Once the selection is active you can sample the color from trees and paint over them. To be more precious or avoid color leaking in the background make sure to clip the layer to landscape 1 by pressing CTRL + ALT+ G.
Here you can compare before & after results:
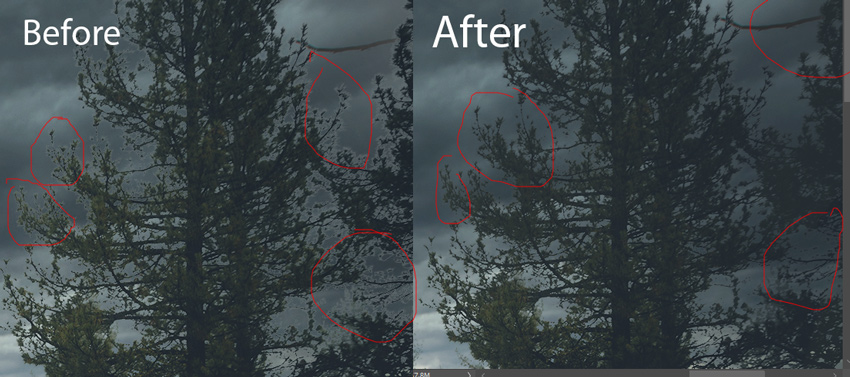
Results so far:
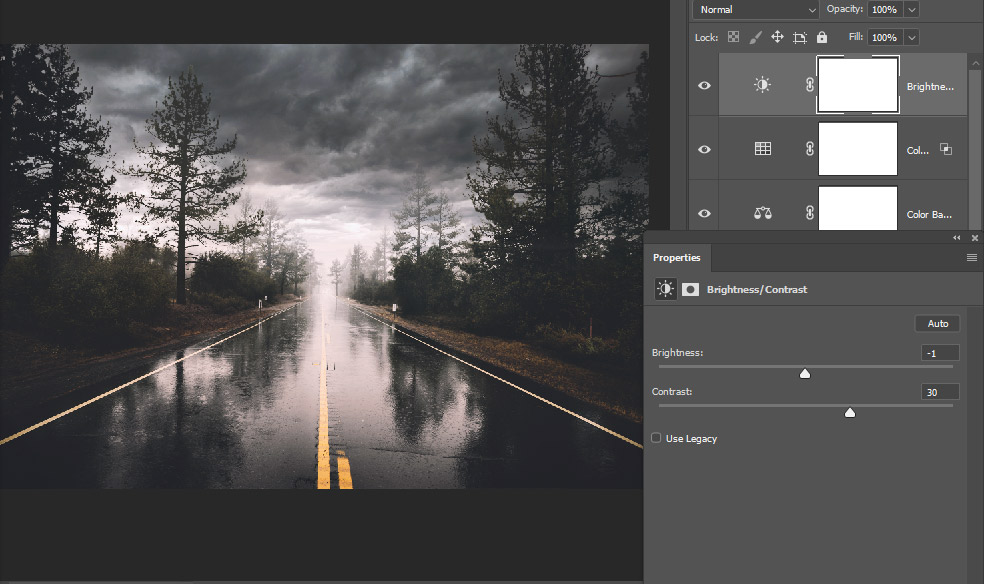
Step 6 – Increase Contrast
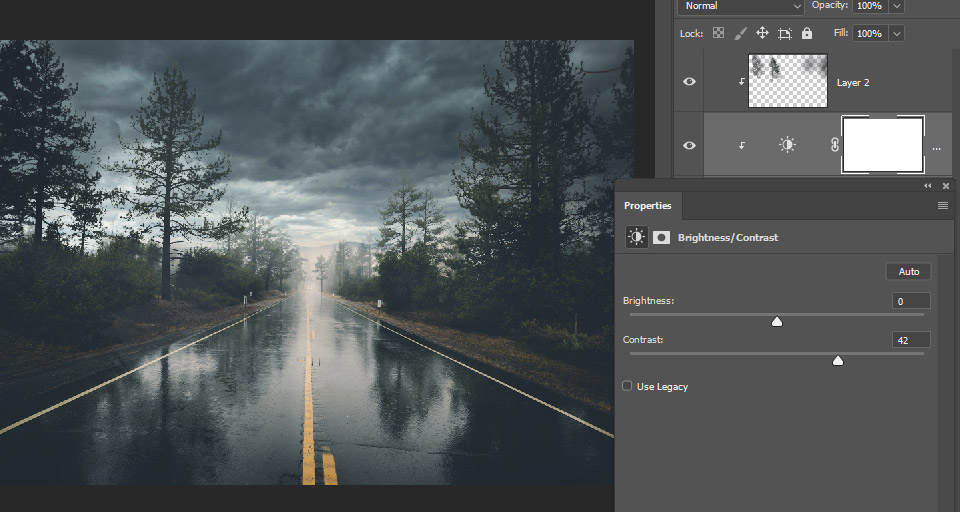
I increased the contrast of the entire image using a Brightness/Contrast adjustment layer. You can go to Layer > New Adjustment Layer > Brightness/Contrast to create this layer and then increase the contrast.
Step 7 – Colorizing Parts
If you see the center of the image the color is not matching with the sky. Because it has a color that is kinda light yellow or orange. Also, if there are other parts that you could find whose color is not matching with their surroundings you can colorize that part.
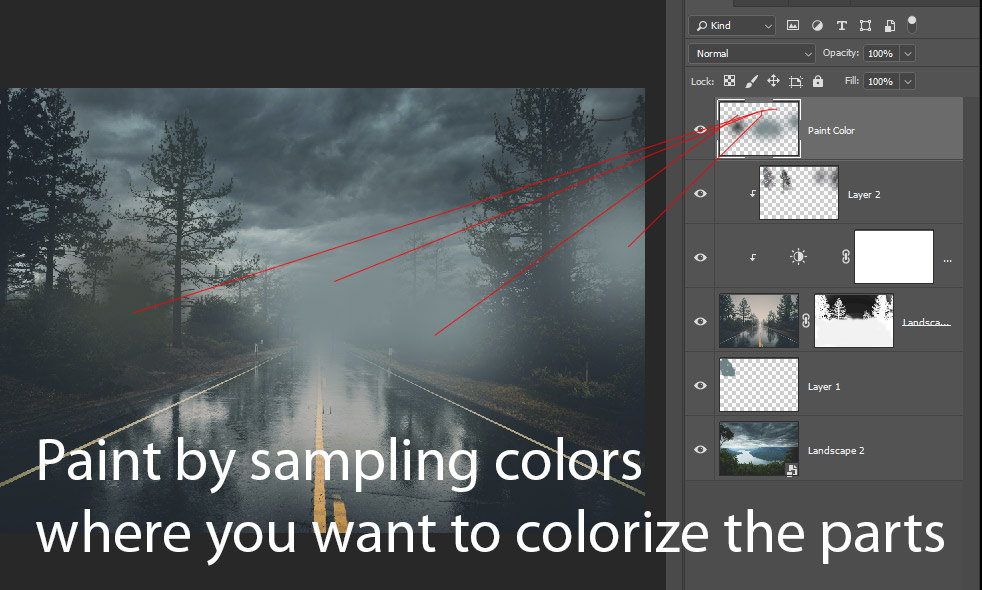
To do this, first paint on the parts that you want to colorize using a color (usually sample the nearby parts which you want to colorize). You can see I painted on a new layer.
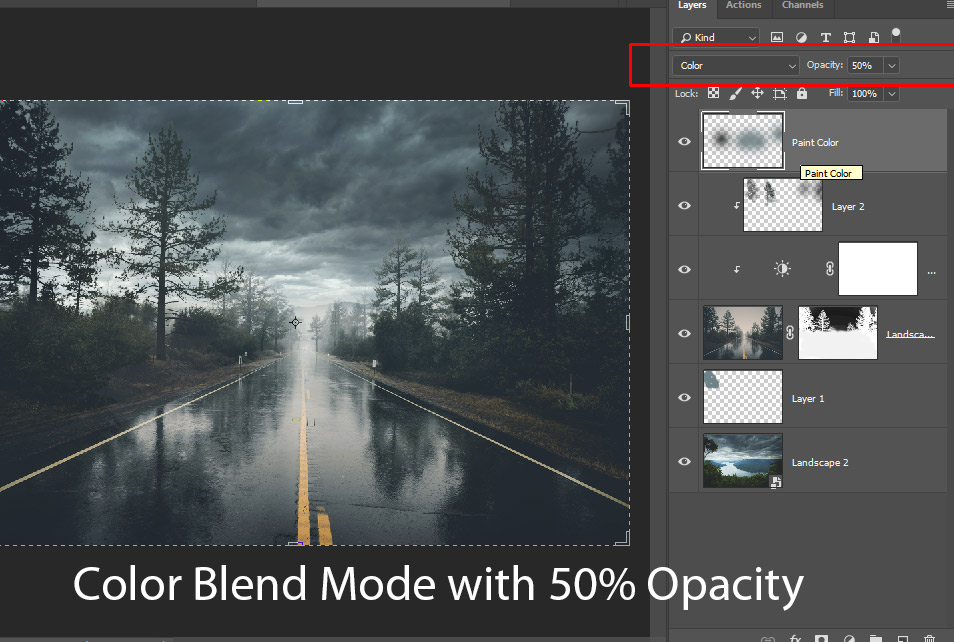
Change the blend mode to Color with 50% Opacity. Now we have matching color everywhere in the image.
Step 8 – Final Coloring
Once everything is set we can move to final coloring to finish it off. I changed the color using a Color Balance adjustment layer. You can see the settings of Midtones & Highlights below.

Next, I created a Color Lookup adjustment layer.
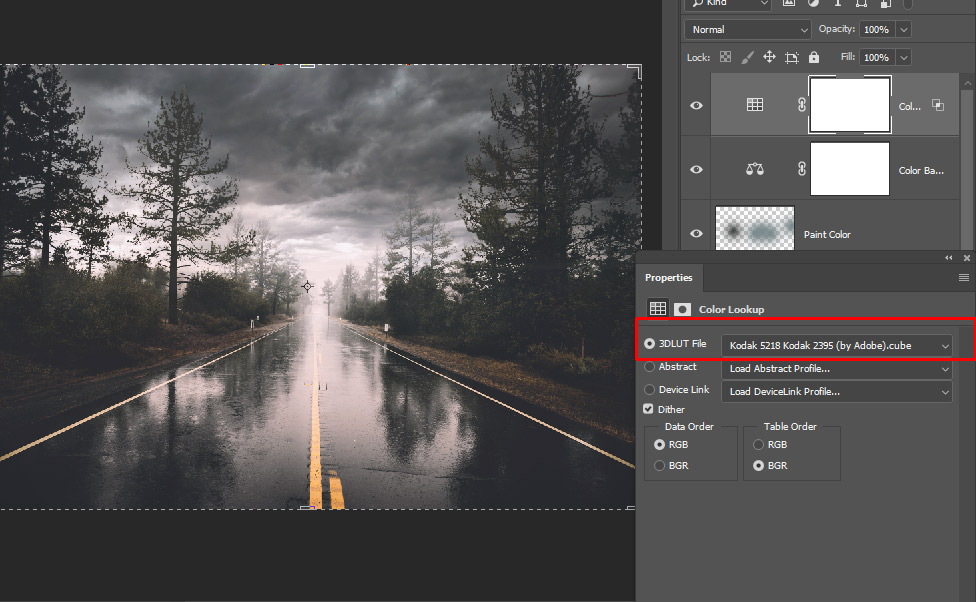
I noticed this Color Lookup adjustment lifting the shadows of the image but also the highlights. I like the effect in the highlights so I decided to keep it only to highlights using Blend IF.
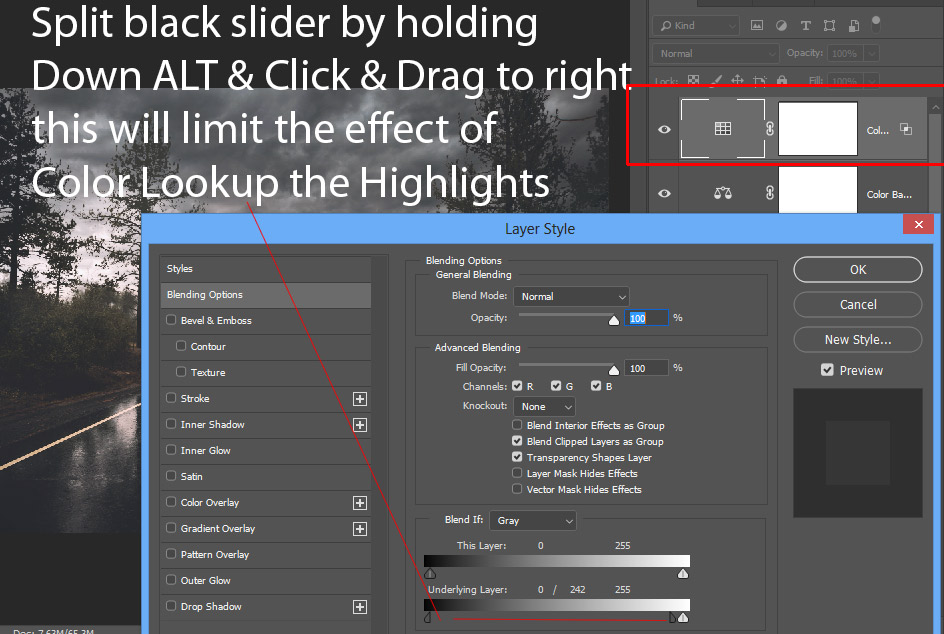
Right-click on the Color Lookup layer and choose “Blending Options”. Split the black slider and move it towards white slider or right & this will make sure Color Lookup will affect only highlights of the image.
After that, I created a Brightness/Contrast adjustment layer to increase contrast of the entire image.
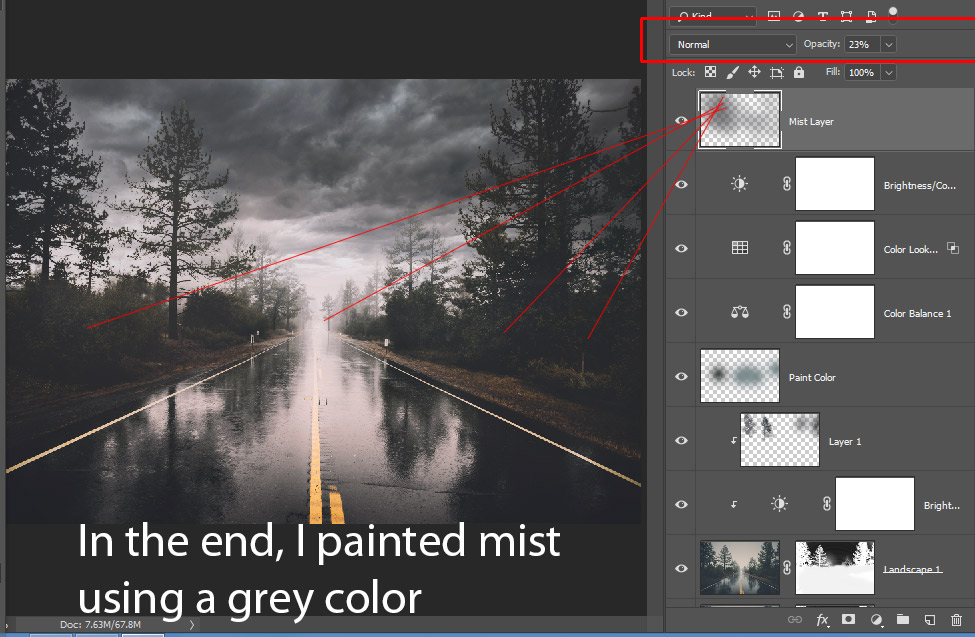
Step 9 – Painting Mist & Finishing Touches
In the end, I painted some mist using a grey color and I used a soft round to paint mist. I also reduced the opacity of this layer to 23% not to do overdo it.
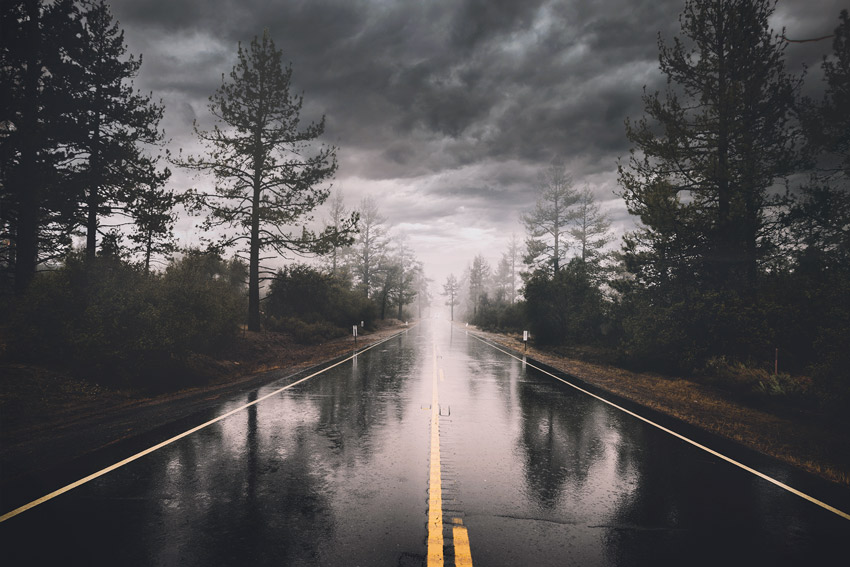
Here are the final results:
A Word of Advice
Thanks for making this far if you are still there, I want to give you advice if you come across a situation where you kinda start seeing through landscape 1 layer or over some parts you are seeing the parts of landscape 2. In that case, what you can do is duplicate the landscape 1 with layer mask & this should add the parts of Landscape 1 back there making landscape 2 parts invisible. I am not sure why this happened to me but you can fix this by just duplicating the landscape 1 layer.
Thanks for following the tutorial and please let me if you have any comments!
Need Help With Photoshop or Looking for Professional Support?
Whether you're just getting started with Photoshop or need expert-level assistance, we're here to help! Contact us for personalized Photoshop tutorials, project support, or creative services.
Get in touch today to take your skills or projects to the next level.
CONTACT US NOW📘 Want to Master Photoshop Faster?
🎁 Get Your FREE PDF E-Book "Top 10 Photoshop Tricks Every Designer Must Know" Now – Packed with expert tips, shortcuts, and techniques to boost your creativity & workflow.
👉 Download Your FREE PDF E-Book NOW!

