Now that we have covered the basics of Color and Color Mode, let us look at Color Profiles and Color Swatches.
Color Profile
You can select your color profile in two ways. The first is to select it when you create a New project. You will select your Color Mode (RGB for Screen projects or CMYK for Print projects) and then under Advanced you will see Color Profile and a drop-down.
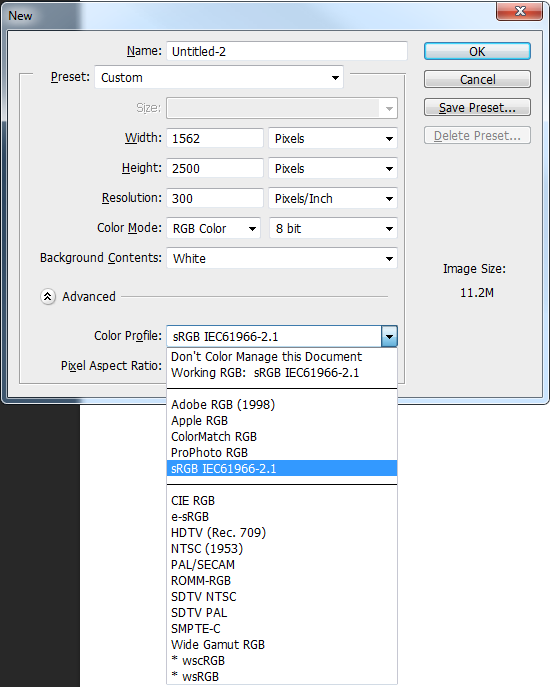
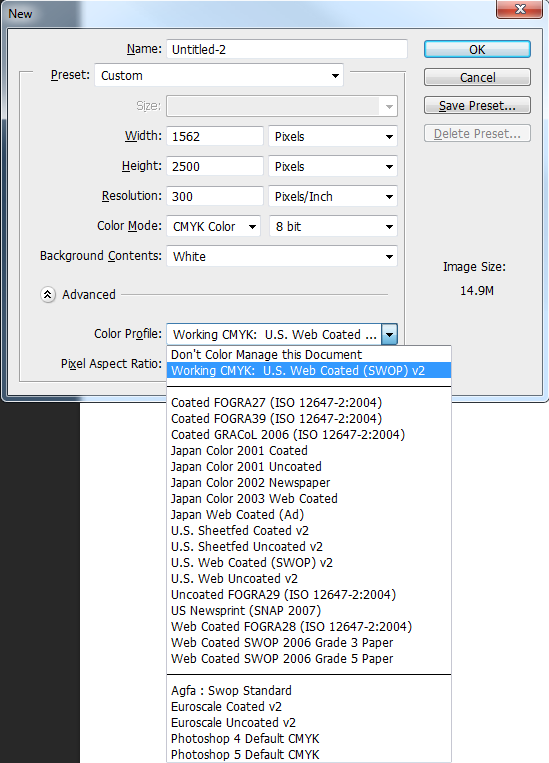
What you choose in Color Profile will largely be a matter of preference. Wide-Gamut RGB is good if you are working in RGB color because it will give you a wide range of RGB colors to choose from when you are working.
In the CMYK color mode, what you want will depend on the type of press and paper. If you plan to use a commercial printer, use that printer’s recommendation for the Color Profile. If you are unsure or if you will be printing at home, Web Coated SWOP 2006 Grade 5 Paper is a good for most projects.
If you are in a project already, you have two ways to change your Color Profile.
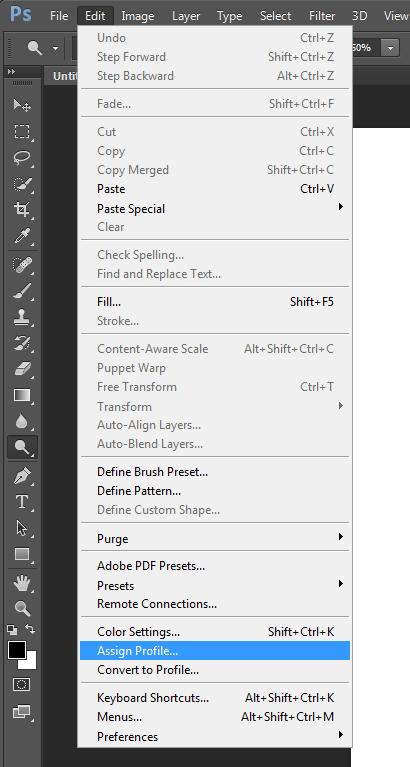
If you are changing from profiles but staying in the same Color Mode, RGB, or CMYK, then go to Edit and select Assign Profile.
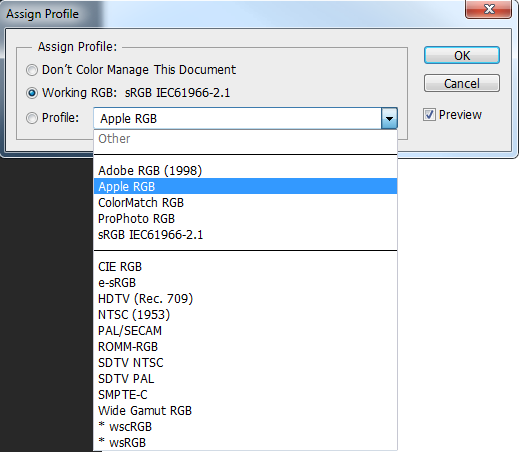
This will bring you to the assign profile window, where you can select the new Color Profile. If you are in RGB Mode, then it will show you selections for RGB, as pictured below. If you are in CMYK, the selections will be for CMYK profiles and will be the same selection that you see when you are selecting the profile when creating a new project.
If you need to chance profiles from one Color Mode to another, then go to Edit and Convert to Profile.
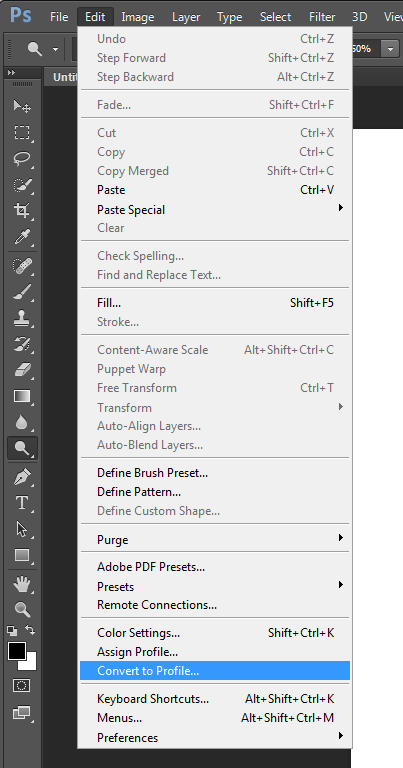
Under Destination Space, you will see Profile and a drop down.
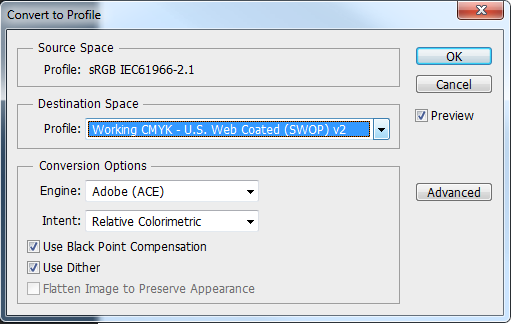
This drop down will let you select from all Color Profiles in all Color Modes. Choose the RGB or CMYK Profile that you would like to work in for your project.
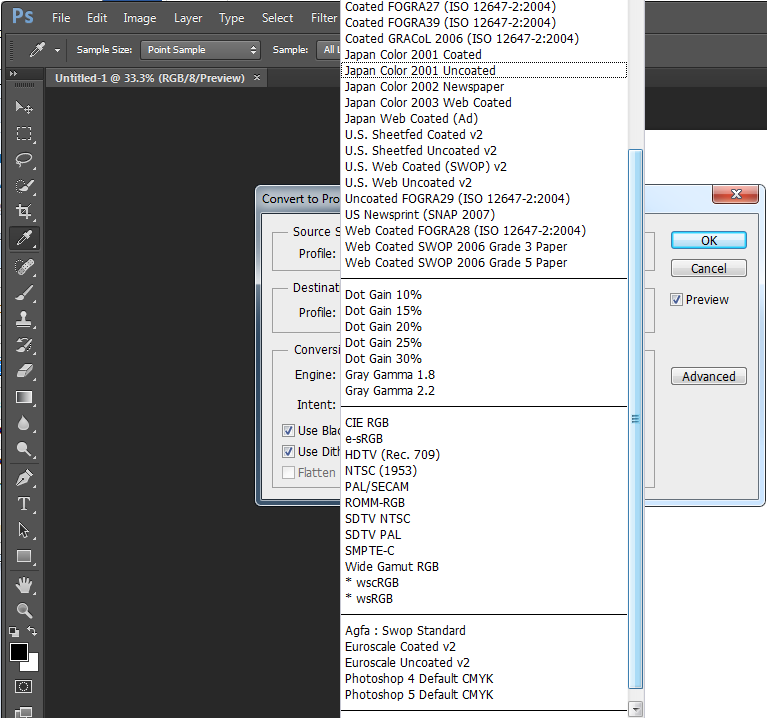
As you learn and practice with Photoshop, play with the different CMYK and RGB profiles, for example choosing the different regional colors, to see how the different color profile work and which you ultimately prefer to work with for your own projects.
Color Swatches
When you are ready to use a color in Photoshop, you can select the color from the Color Swatch.
As you can see at the top right of your Photoshop screen, you have two boxes for colors. The top box is your primary color; the bottom is your secondary color. The primary color is the main color for outlines, while the secondary color will be your fill-in color if you are drawing solid boxes, for example.
To use Color Swatches to change the color, simply click on the box that you want to change the color for and then click on the Swatches subtab above that you see here.
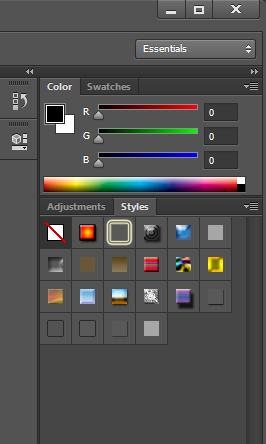
You will go to the swatch that you want to select and left click on it. Nothing will seem to happen. You will only see a dropper.
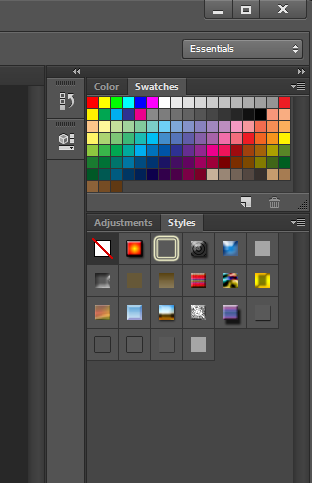
Go back to the Color subtab. You will see that the color has changed.
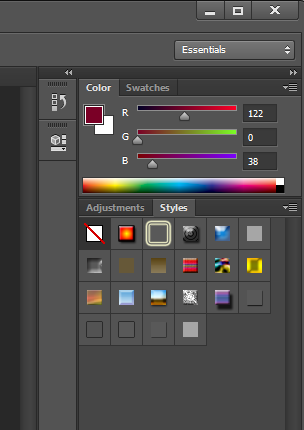
You can add swatches to your selection of swatches from a picture you have open.
Select the square you want to change the color for and then go to the left of your screen to the Eyedropper tool.
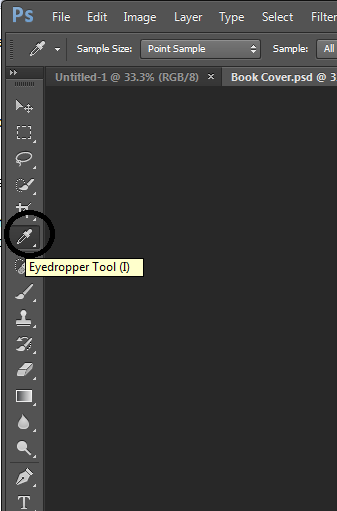
Your cursor will become an eyedropper. Bring it to the color on your picture that you wish to select. The Eyedropper does not appear in this screenshot, but you will see it on your screen. In the picture below, say that you want to select the blue hue in the iris of the woman pictured.

You simple left click over the blue until you capture the blue you are looking for (it may take a few tries if you have a small area to work with. You will see at the top right that your color box has changed.
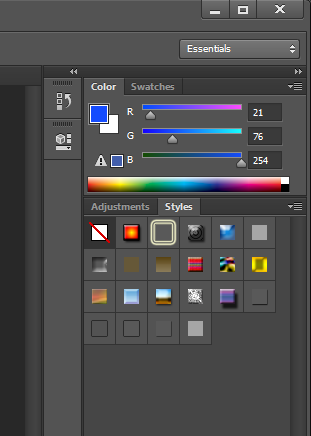
Click over to the Swatch subtab and right click over the existing swatches. Choose New Swatch.
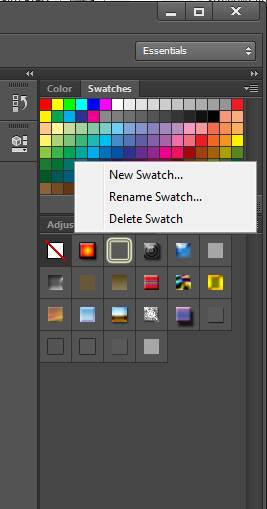
You will receive a pop-up screen with a default swatch name. You can keep the default or change the name then click OK. Your custom color will be added to your swatches to select, as you need it.

Using Color Codes
You can also use Color Codes to create color swatches as well. When you enter your color code in the boxes (where you see the numerical values 21, 76, 254) the color box will change. As before, go to your Swatch sub tab to add a new swatch of that color.

This is useful if you have been assigned a project and have been told the color codes to incorporate in the design, if you lift the HTML color code from a website, for example if you use a tool like Get Color to discover the color code from an image on a website.

What Are Color Codes and How Do You Get Them?
HTML Color Codes, RGB Hex Colors, and RGB Dec Colors are just different ways to input the “name” of your color. Names like “Blue” and “Yellow” are far too ambiguous for computers to provide an accurate color. The Code, however, will select a specific hue based on the number or letter value. If you use a tool like Get Color to lift colors from an image, it will provide you all three color codes. In Get Color you simply follow the instruction on the screen. Left click and hold the dropper, bringing it to the color you desire. You will see the color screen on the window change color as you drag the dropper along.
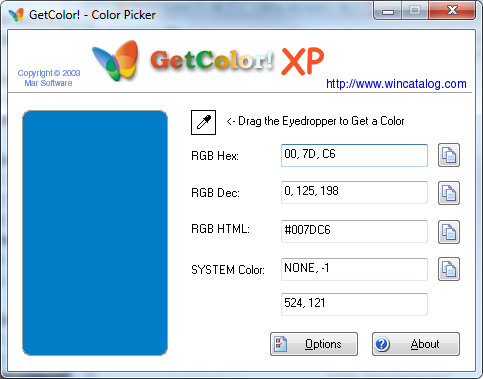
You can input these color codes depending on your preference in Photoshop. You will notice that the digits in the RGB HTML field, #007DC6 are the same digits I the RGB Hex, 00, 7D, C6. This is because Hex color and HTML color are the same codes, put together differently depending on if you need to use the code for creating a website (the HTML code) or for selecting color in a program like Photoshop (the Hex code).
Photoshop defaults to RGB Dec, which for this example is 0, 125, 198.
If you do not know the RGB Dec code for a color, you can change this to RGB Hex. At the top right of the color box you will see four lines and an arrow. Click this and select Web Color Sliders. This will allow you to enter the Hex or HTML color codes that you have obtained.
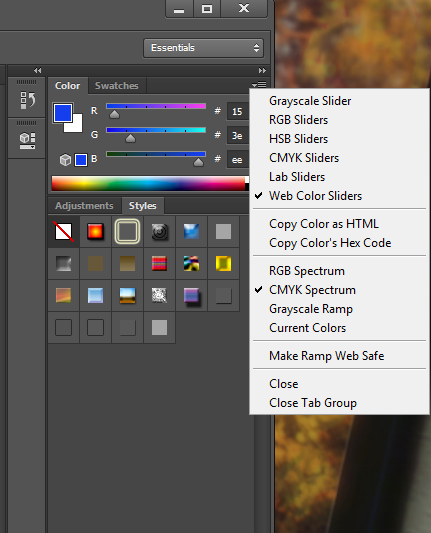
You simply place your mouse in the desired field, type over the value there, and hit enter.
The order you enter the colors is simple. RGB – Red, Green, Blue, or the R, G, and B fields that are present in Photoshop.
Note: The color box will always show as RGB codes regardless of whether you are in RGB or CMYK Color Mode.
Converting your HTML Color to RGB HEX
If you have HTML Color #B97B3A, and that is all you know for the color you need to use, read the color from left to right, ignoring the #.
The first two digits/letters are Red. The second two digits/letters are Green. The last two digits/letters are Blue. Your RGB Hex Code is B9, 7B, 3A and you will put these codes into their corresponding box, R, G, and B respectively.
Now that you know the basics of how to play with color in Photoshop, it is time to enjoy. Take time to experiment with different Color Modes and Color Profiles to see how they enhance and affect your project. With practice and instruction from your commercial printer, you will find the Profiles that work best for you.
Need Help With Photoshop or Looking for Professional Support?
Whether you're just getting started with Photoshop or need expert-level assistance, we're here to help! Contact us for personalized Photoshop tutorials, project support, or creative services.
Get in touch today to take your skills or projects to the next level.
CONTACT US NOW
