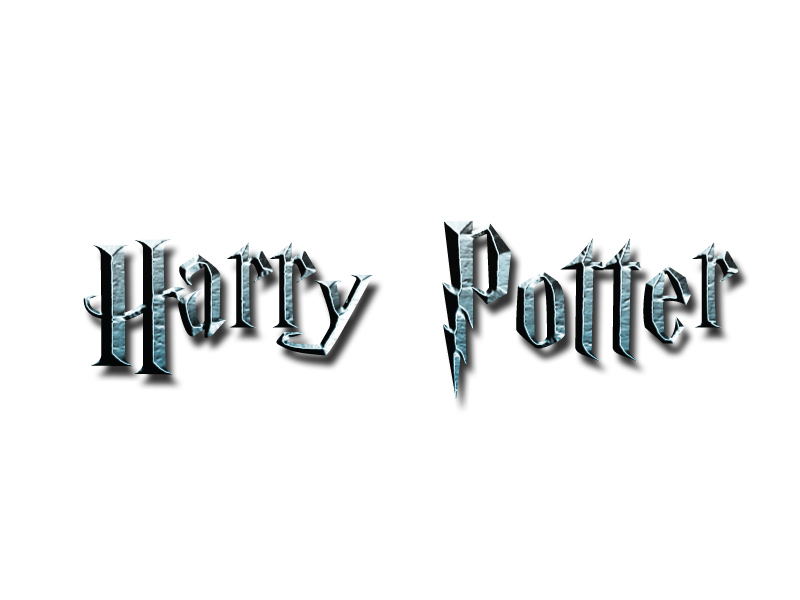
Want to make a movie poster with Harry Potter Text Effect?! No problem, it’s as easy as abc, thanks to Blending Options.
Preparation:
You will need the Harry Potter font, which may be downloaded here. If you want to know how to install a font, click here.
This tutorial was done on Adobe Photoshop CS5. Other versions may vary slightly.
NOTE: Harry Potter and the Harry Potter logo are trademarks of their respective owners.
Step 1:
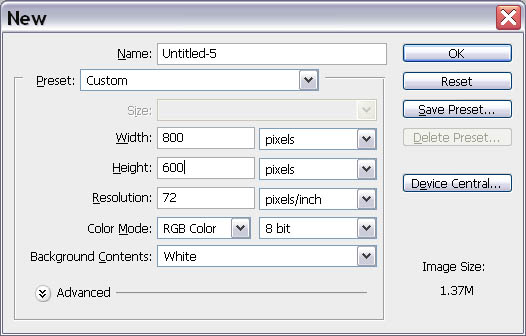
Create a new document with the following settings.
Step 2:
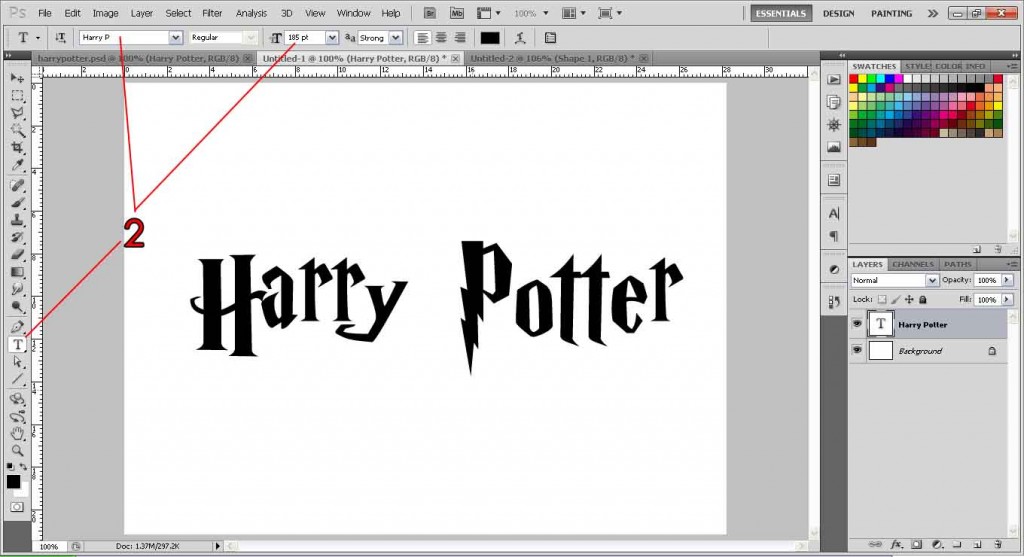
Select the Text Tool and type out your text in the canvas. Font will be Harry P, I am using size 185 pt for this tutorial. (it varies with your dimensions and resolution, but just use 185 if you’re following me)
Step 3:
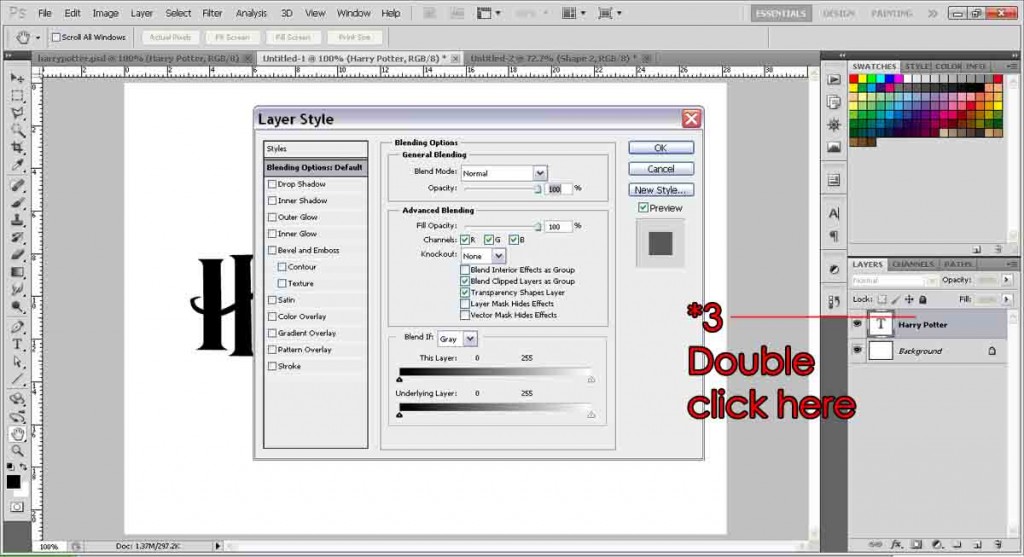
Double click on the Text Layer to bring up the Blending Options Menu.
Step 4:
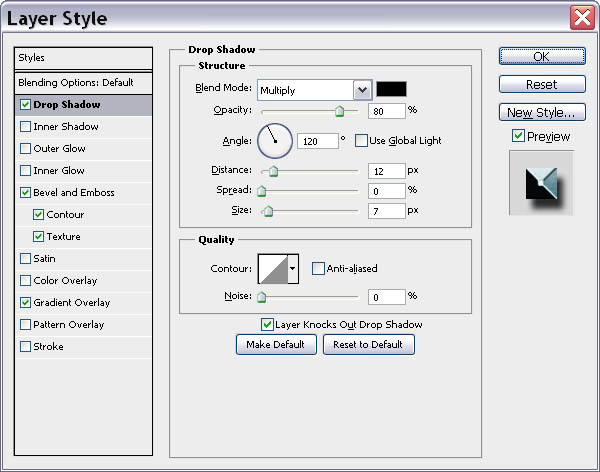
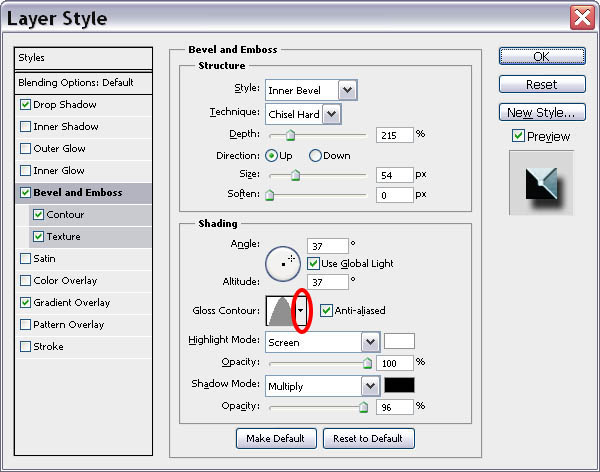
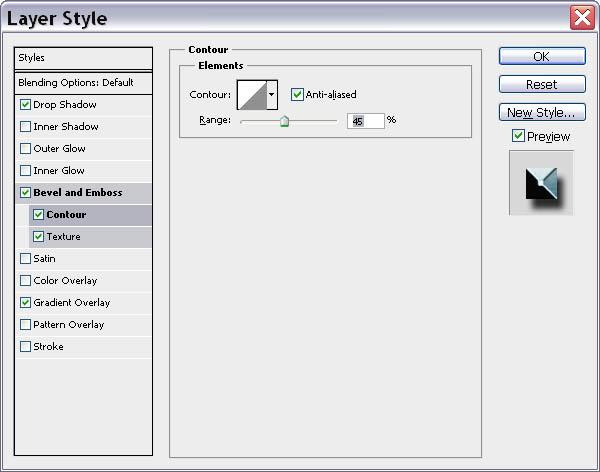
Follow the below settings in the screenshots provided. Be sure to copy exactly or you might not get the same results! (for the dimensions and resolution that I used in Step 1 only. Effects vary with different dimensions/resolution used)
Drop Shadow
Bevel and Emboss
At the glass contour, simply click on the black arrow (circled in red) to reveal a list of templates, simply choose the second one.
Contour
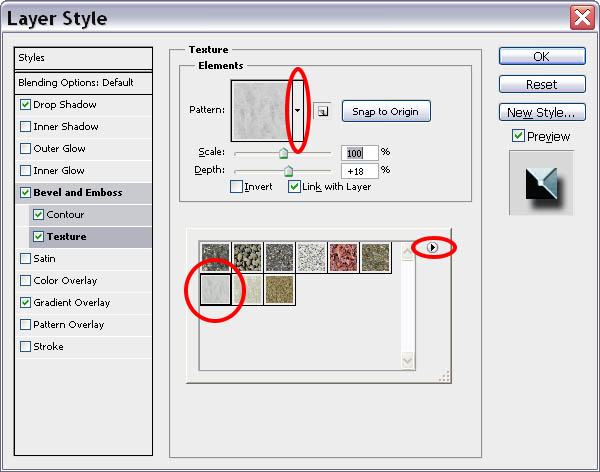
Texture
To find this texture, click on the black arrow-down, then black arrow-right, then click on Rock Patterns, and hit OK. Then select that texture. (all circled in red)
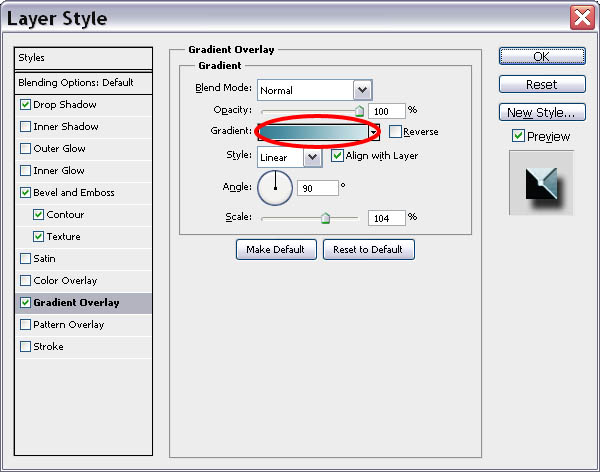
Gradient Overlay
Now time for gradient. After following the other settings, it’s time to customize our own gradient colors. Click once on the gradient bar (circled in red) to open the Gradient Editor.
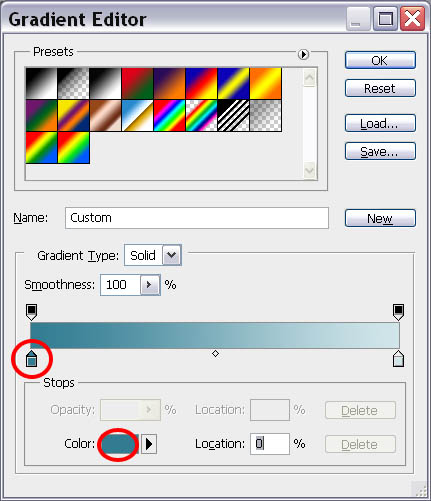
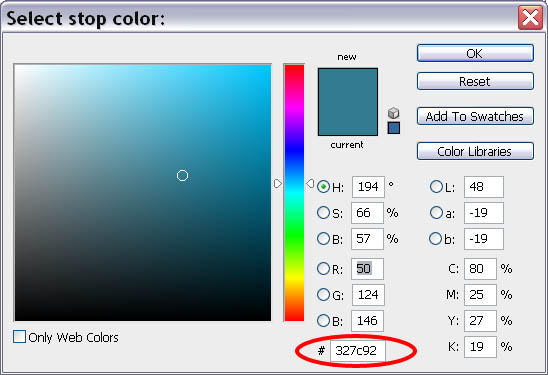
At the Gradient Editor, we’re just gonna need 4 stops (the square boxes circled in red), one at each corner. Now let’s edit the bottom left stop, click on the stop once, then click once at the color (once again, all circled in red for your convenience). The Color Map pops out, and simply punch in the numbers/letters you see (circled in red, or #327c92). Repeat the same for the bottom right stop, color code is #d1e6ea. The top 2 stops (both left and right) are simply black.
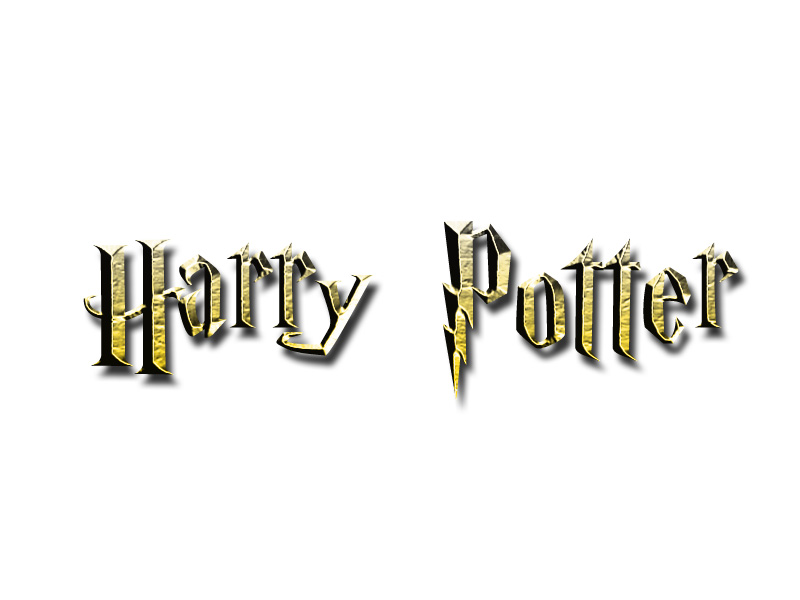
After applying all the settings, you should get a nice Harry Potter effect ð

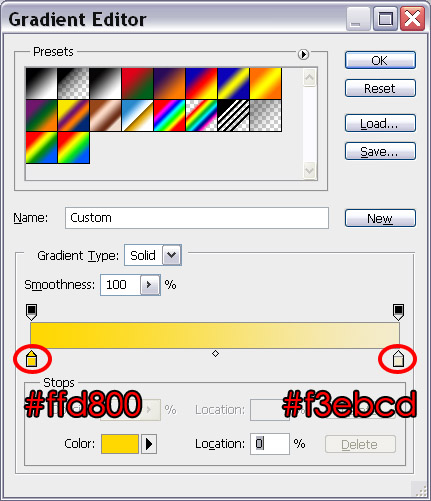
To make it a golden type, simply go to the Gradient Overlay > Gradient Editor and change the color codes, as shown in the example.
And there we go.
Need Help With Photoshop or Looking for Professional Support?
Whether you're just getting started with Photoshop or need expert-level assistance, we're here to help! Contact us for personalized Photoshop tutorials, project support, or creative services.
Get in touch today to take your skills or projects to the next level.
CONTACT US NOW

