In this tutorial, I’ll show you how to create a dripping blood text effect in Photoshop. You’ll learn how to create a horror and bloody dripping text using blending options in Photoshop. You’ll also learn how to paint dripping and bleeding blood using default Photoshop brushes as well as how to add blood cells effect inside the text using bubbles patterns.
This blood text style is suitable for any horror or for Halloween text related projects. You can make your own title with bloody effect and you can also save the text style for the future use. Follow along the tutorial and learn how to replicate a blood text style!
Tutorial Resources
Add the Text
Step 1
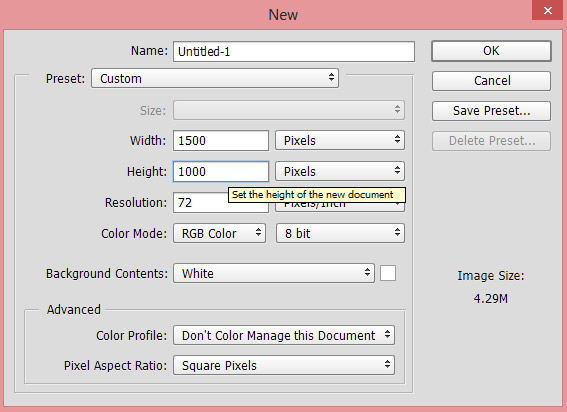
Go to File > New and then create a new document in Photoshop with the following settings. I’m working on a smaller document but if you want you can also go higher settings. Just increase the value of the width and height according to you needs.
Step 2
I am going to change the background color from white to a fade green. Set the foreground color to #d9ebd5. Press ALT + BACKSPACE to fill the document with above mentioned color. Feel free to choose the color which you want and you can also use some rusty and grungy texture as well for the background. But remember to choose the color or texture which looks best for the final outcome.
Here is the document filled with color:

Step 3
Download the Gypsy Curse font and install it but if you want you can choose different font as there many blood font available on the internet. Activate the Type Tool by pressing (T) on the keyboard. Now type the text like I typed ‘blood’ and I am using Gypsy Curse font in Regular style. Once you have typed your text then you can enlarge the text (if needed) by activating Transform Tool (CTRL + T) and don’t forget to align the text in the middle of the document. Feel free to type the text which you want!!

Step 4
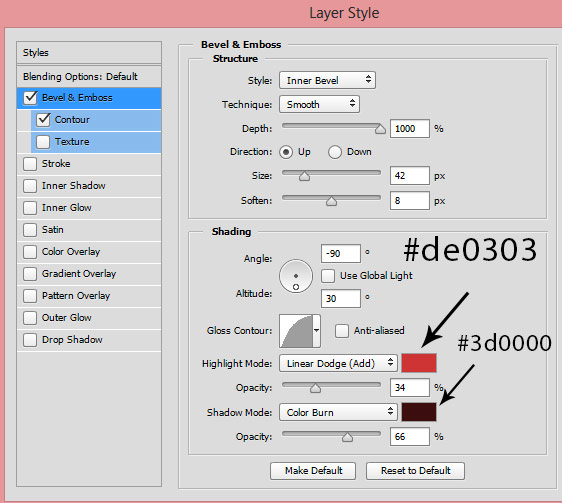
Now we’ll apply the blending options to achieve the dripping blood text style. Right click on your text and choose ‘blending options’. Check the Bevel & Emboss and use the following settings.
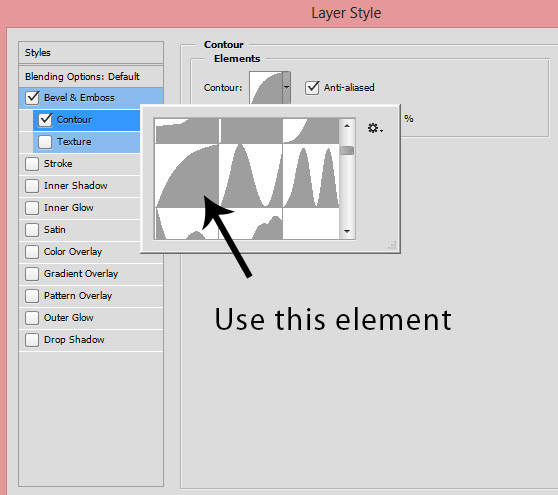
Right underneath the Bevel & Emboss check the Contour as well and use the indicated contour element for text.
Step 5
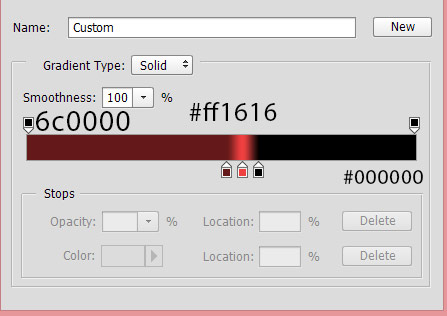
Now use the Stroke settings below. This will add a black stroke around the text and shiny red color on the middle of it.
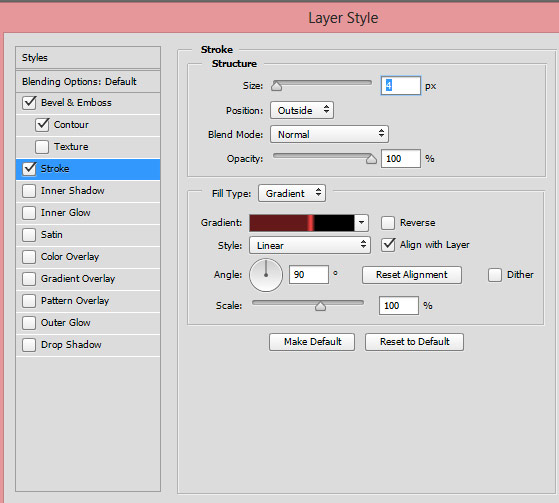
Here you can which colors code which I’ve used for Gradient and as you can see I’ve used three colors for the gradient.
Step 6
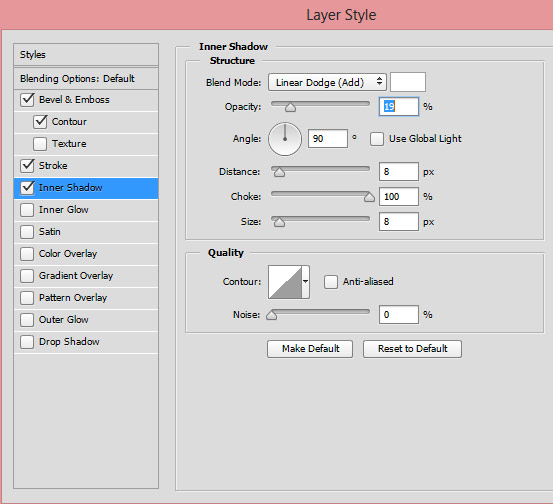
I used the Inner Shadows to brighten up the text. You can see that I have used the default white color with Linear Dodge mode.
Step 7
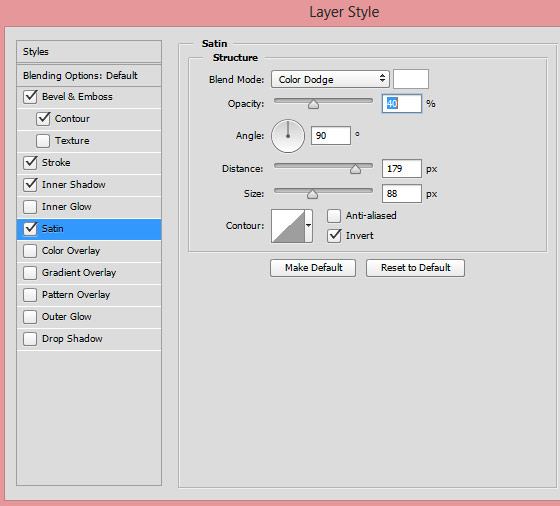
Using Satin effect I added more brighter color to text.
Step 8
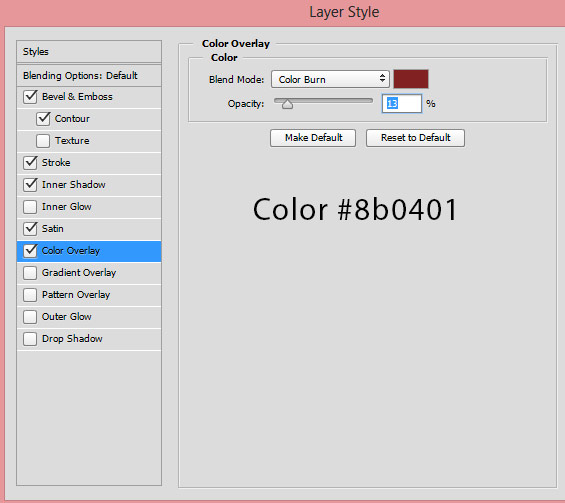
Using Color Overlay options I added little darken red color with Color Burn blend mode.
Step 9
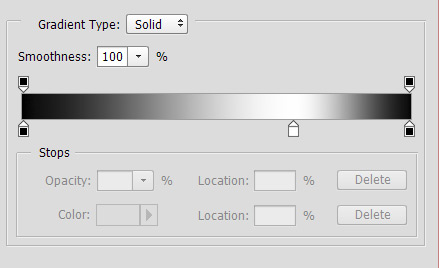
Check the Gradient Overlay options to add darkness on the upper and lower parts. This will also add more brightness to middle parts of the text. You can see I have used only two colors Black/White.
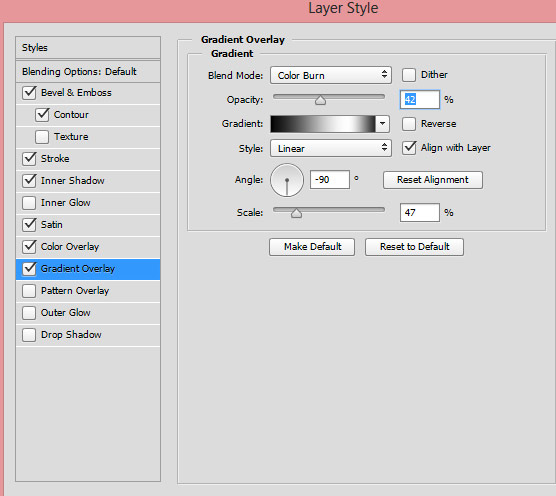
In the below image you can clearly see that which color I have used.
Step 10
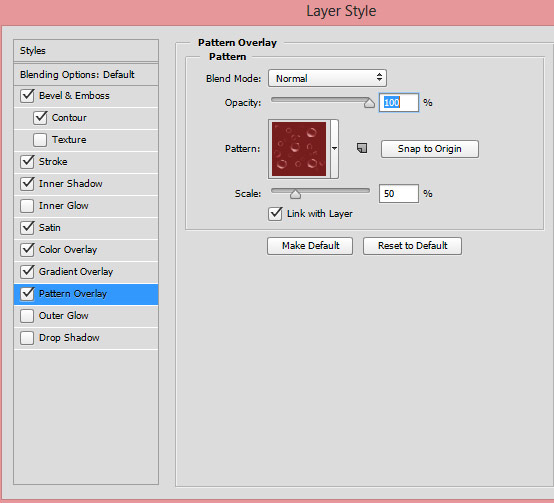
Download the bubbles patterns files and then load the bubbles patterns in Photoshop. Once you loaded the bubbles patterns, check the Pattern Overlay options and under the pattern structure, you’ll see that there is default pattern is selected. We need to select own bubble patterns to apply it to text. In the below image you have a down arrow icon, right next to pattern, click on that and choose the red bubble pattern to select it.
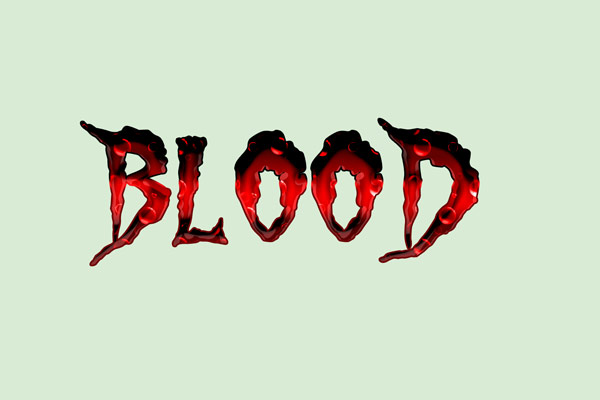
Now use the red bubbles patterns and apply it to the text and add red blood cells effect inside the text. This will make the text look like that there are blood cells flowing inside the text. Here you can see the settings:
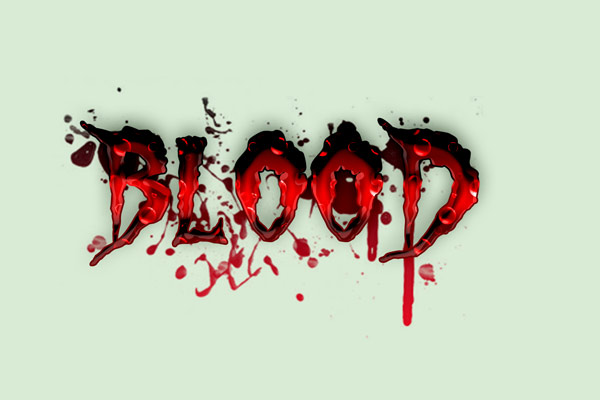
Results so far:
Step 11
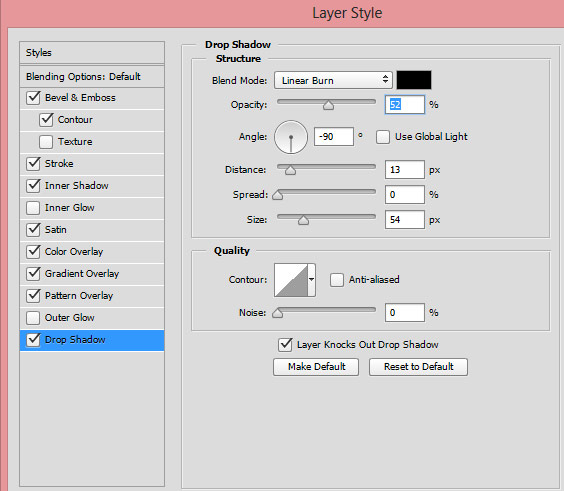
Right now the text doesn’t look to have shadow and it doesn’t look good. I used the Drop Shadows options to add shadows around the text and this will also add realism to it.
Results:

Step 12
Download the splatter brushes and load them into Photoshop.
Using the splatter brushes I painted dripping blood behind the text. To do this, you need to create a new layer and drag it under the text layer using Move Tool (V). Now use different splatter brushes to paint the blood with dark red color (I chose #4d0000). Don’t forget to name this layer ‘dripping blood’. Also, you can paint the blood over the text and just create a new layer above the text layer and paint the blood.
What I actually did here is that I painted some splatter effect using the brushes. Then I added a layer mask to this layer, again I used the same brush with black color to mask them in order to get the nice dripping blood effect. Try to achieve variation and also don’t forget to vary the brush opacity and size. If you don’t want to use the splatter brushes then you can also use blood textures.
Finally, I painted some more blood using a hard round brush with the same color. To do that, pick a red color (choose #d80c22) and activate the Brush Tool (B). Set the opacity and flow to 60-70%. Use a hard round brush to paint the dripping blood coming out from the text with 4-10 pixels brush size. To paint the blood vertically, you can hold the Shift key and it will the make the mouse movement straight. After painting the blood, I painted the drip in the blood. Use the same color and paint the drip at the end of the blood using hard round brush with size 2-6 pixels. Also, make sure you to get the nice length for blood and try to paint the blood in different length so it will look good. Don’t forget to create a new layer for the drips under the text layer.
If you want you can also add the blending options effect to painted blood to make it look realistic. But I would like the keep this effect simple but sometimes changes are good. Feel free to experiment with that and who knows maybe you’ll get the better effect than this one.
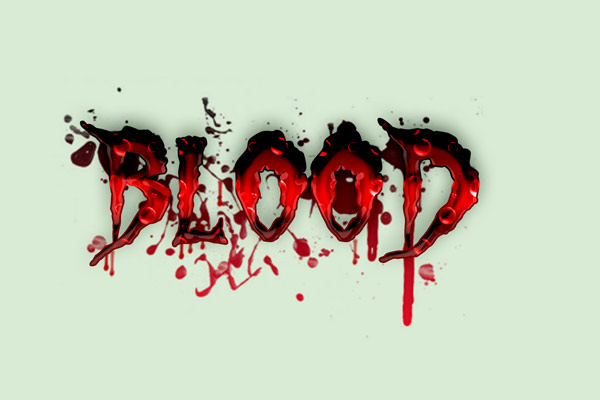
Final Results:
Conclusion
Thanks for following the tutorial and I hope you enjoyed the tutorial. If you like the tutorial then share it into the world and do let me know if you have any concerns about the tutorial I would be happy to help you. Have a great Photoshopping day!!
Need Help With Photoshop or Looking for Professional Support?
Whether you're just getting started with Photoshop or need expert-level assistance, we're here to help! Contact us for personalized Photoshop tutorials, project support, or creative services.
Get in touch today to take your skills or projects to the next level.
CONTACT US NOW📘 Want to Master Photoshop Faster?
🎁 Get Your FREE PDF E-Book "Top 10 Photoshop Tricks Every Designer Must Know" Now – Packed with expert tips, shortcuts, and techniques to boost your creativity & workflow.
👉 Download Your FREE PDF E-Book NOW!