Chrome effects give your text a classy metallic embossed look, and can be used for many things, like cars (think car model at the back of a car), movie poster titles (think Spiderman), and much more.
Preparation:
The first step is to get your photograph ready in Photoshop. You can drag it into Photoshop or just go to File > Open > your photo.
This tutorial was done on Adobe Photoshop CS5. Other versions may vary slightly.
Step 1
Open a new document at 13″ X 6″ (W X H), 300 pixels/inch settings.

Step 2
Select the Type Tool, choose a thick font, set it to medium gray, and type your desired text. My settings in the example are, Font: Enter Sansman (downloaded from dafont, check the links section), size 210 and italicized.

Step 3
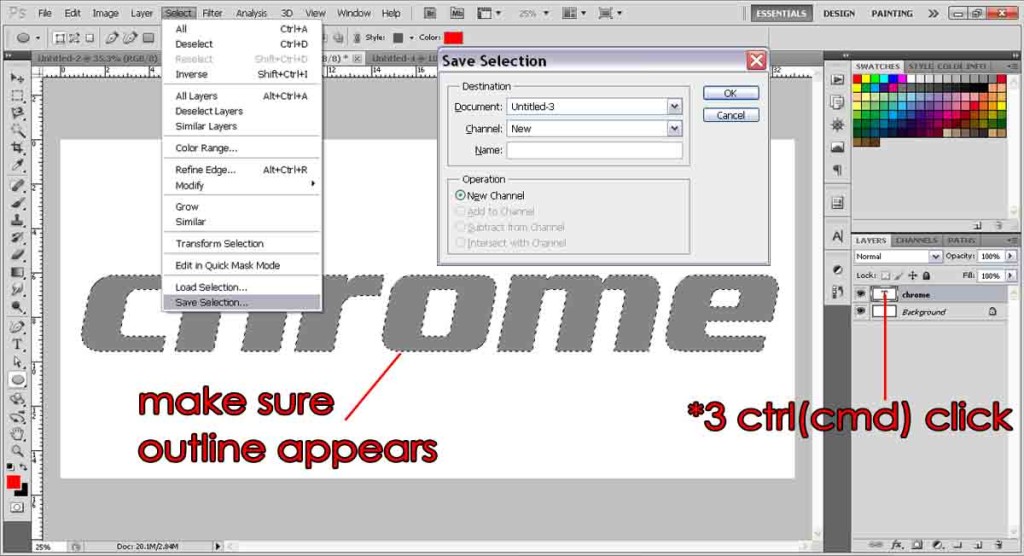
Hold ctrl and click on the text layer icon (hold cmd if you’re on a mac). You should see an outline around the text. Then go to Menu Bar: Select > Save Selection. The Save Selection dialogue box will pop up, simply hit OK.
Step 4
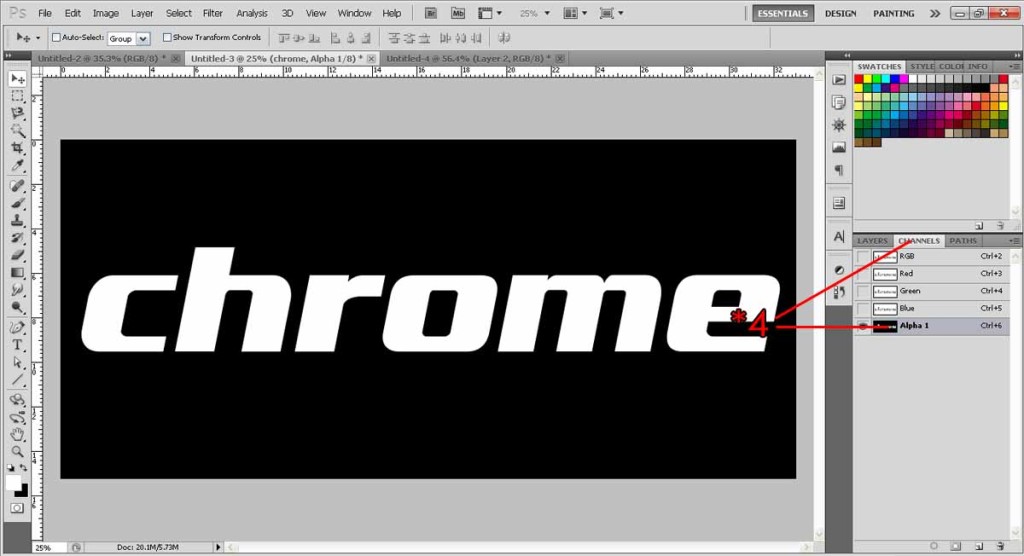
Deselect your outline by pressing Ctrl+D (Cmd+D). Go to the Channels Palette and click on Alpha1 (that’s your saved selection). If you don’t see a Channels Palette, go to Menu Bar: Window > Channels.
Step 5
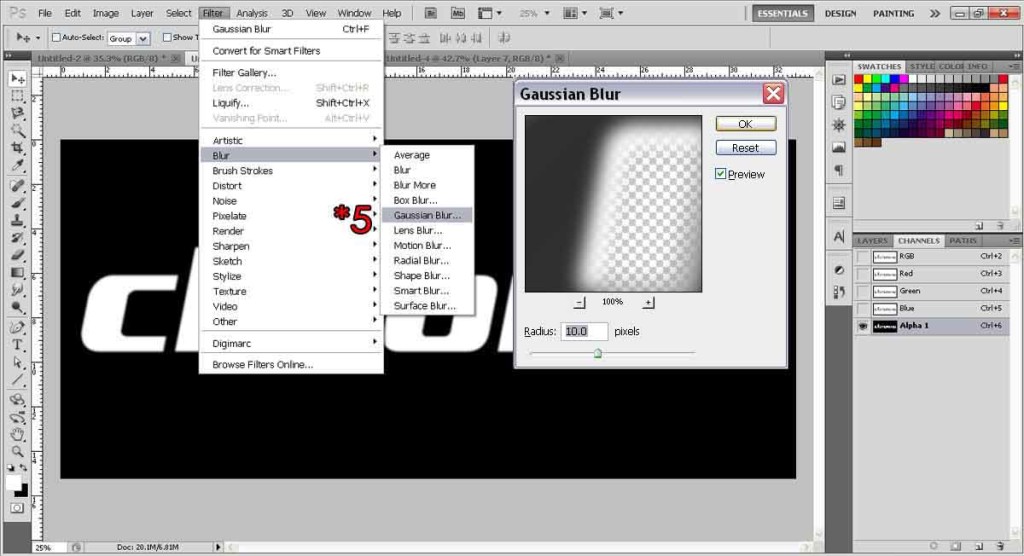
Go to Menu Bar: Filter > Blur > Gaussian Blur and set the radius to 10 pixels.
Step 6
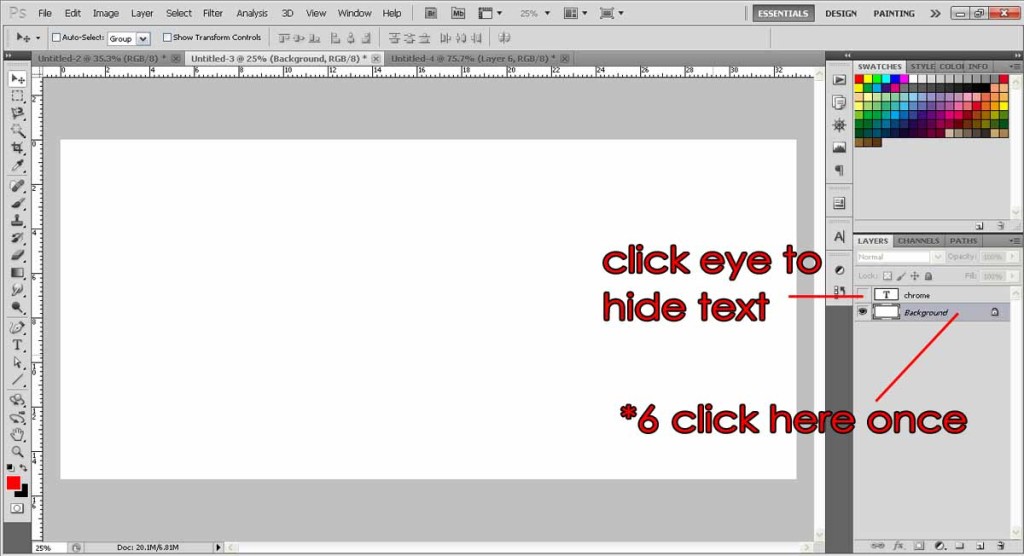
Go back to the Layers Palette and click on the Background layer once to make it active. Then hide the text clicking on the eye icon.
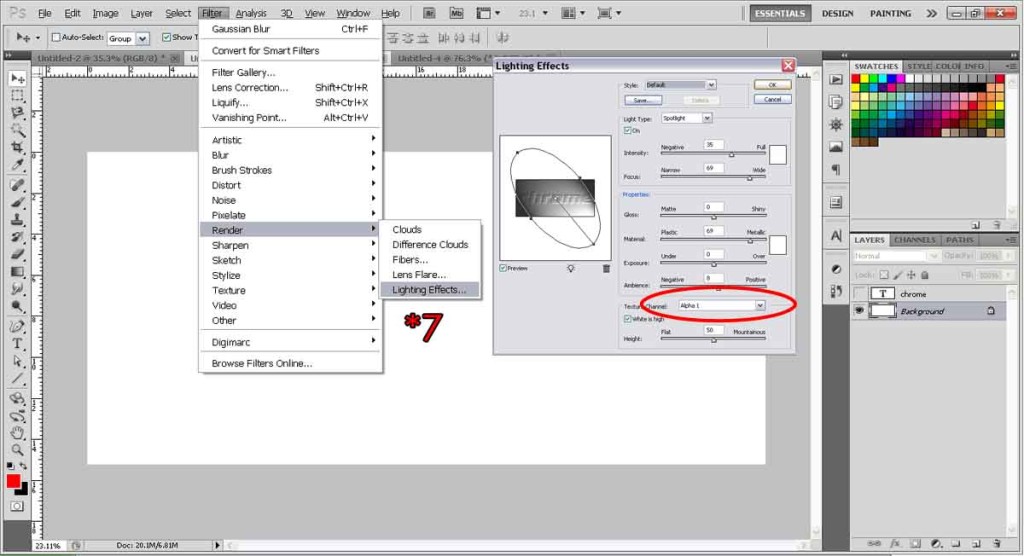
Step 7
With the background layer selected, go to Menu Bar: Filter > Render > Lighting Effects. When the Lighting Effects dialogue box pops up, the only thing we need to change is right at the bottom, Texture Channel: Alpha 1. After that, hit OK.
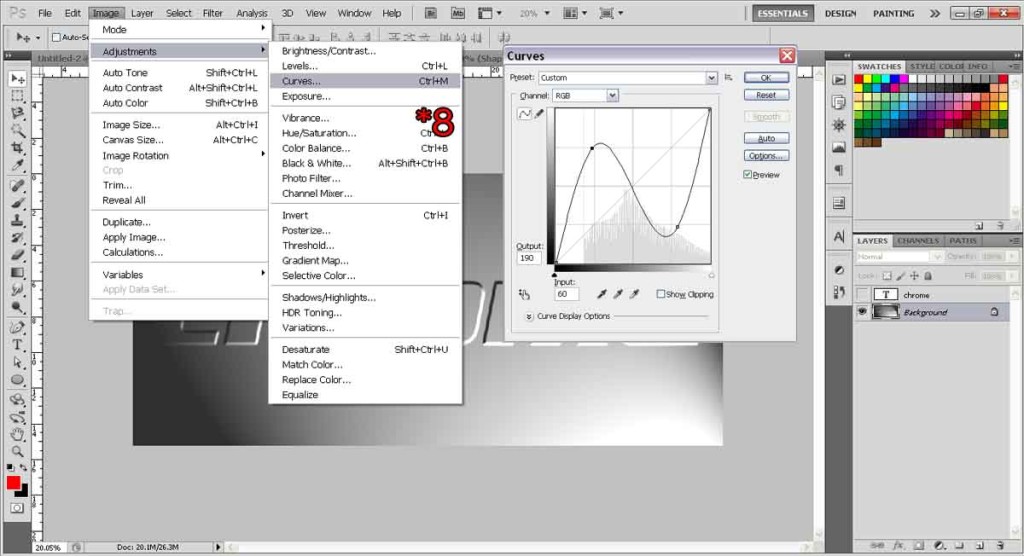
Step 8
Go to Menu Bar: Image > Adjustments > Curves. Make the S-shaped curve like I did in the example, don’t worry it’s easy. Simply click on the line twice, but at different places, this will create 2 dots. Simply drag one dot to the bottom right and one to the top left. Hit OK when done.
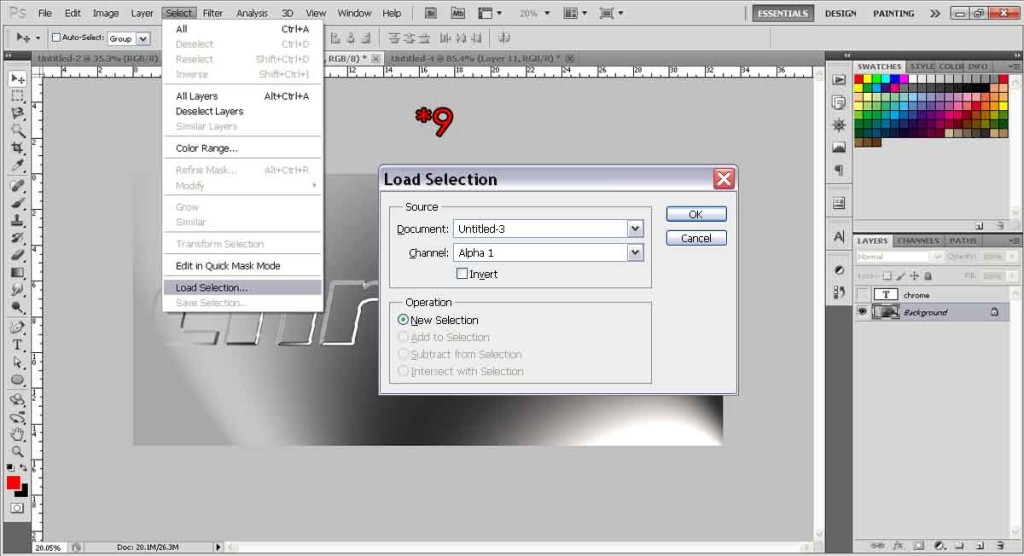
Step 9
Go to Menu Bar: Select > Load Selection. The Load Selection dialogue box will pop up, Alpha 1 should already be chosen as your source by default. If not, then simply select it from the Channel menu. Hit OK.
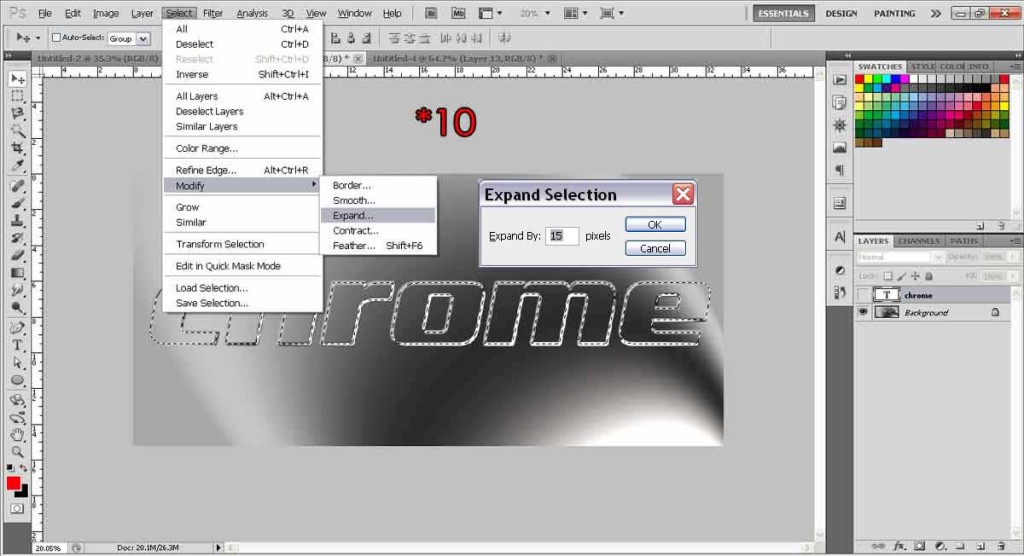
Step 10
Go to Menu Bar: Select > Modify > Expand. Fill in 15 pixels. Hit OK. Then press Ctrl+J (Cmd+J).
Step 11
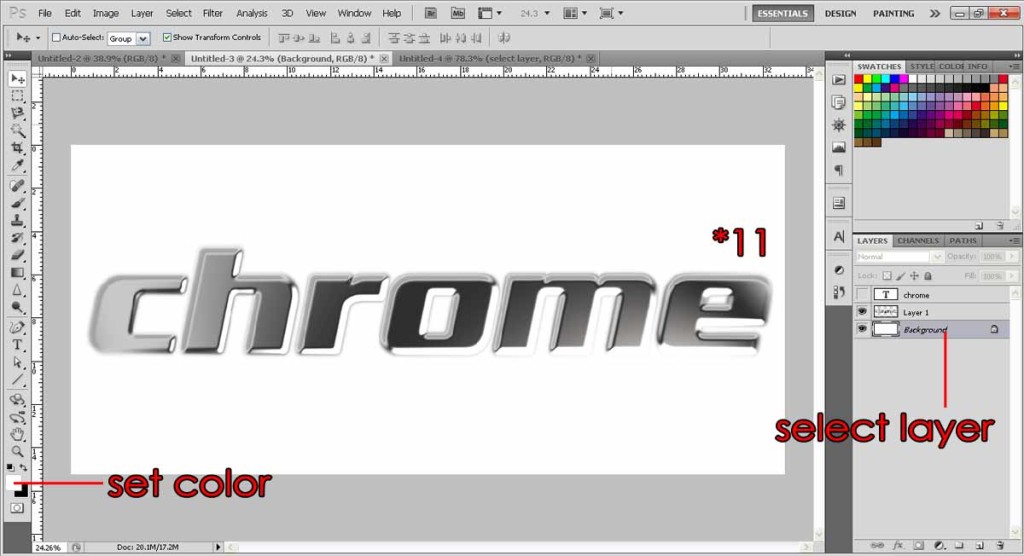
Now set the foreground to your desired background color. Then select the Background Layer, and press Alt+Backspace (Opt+Delete) to fill your background to the color you set, in this case, white.
Step 12
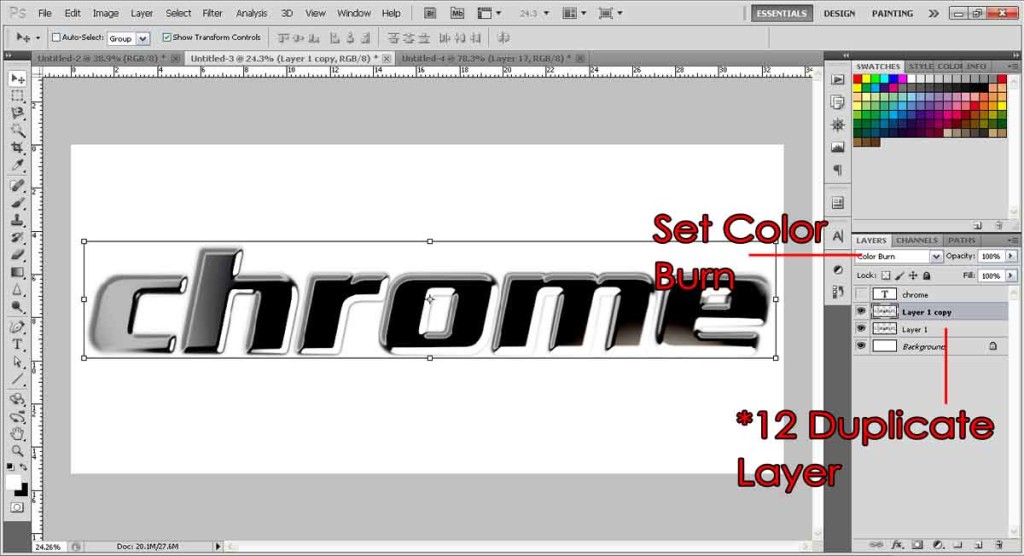
Right click on the design layer (called Layer 1 in the example) and “Duplicate Layer”. Set the Layer 1 copy blending mode to Color Burn.
And your cool chrome text is ready.

Need Help With Photoshop or Looking for Professional Support?
Whether you're just getting started with Photoshop or need expert-level assistance, we're here to help! Contact us for personalized Photoshop tutorials, project support, or creative services.
Get in touch today to take your skills or projects to the next level.
CONTACT US NOW📘 Want to Master Photoshop Faster?
🎁 Get Your FREE PDF E-Book "Top 10 Photoshop Tricks Every Designer Must Know" Now – Packed with expert tips, shortcuts, and techniques to boost your creativity & workflow.
👉 Download Your FREE PDF E-Book NOW!