


In this tutorial, you’ll learn how to create a soft light look in Photoshop. This tutorial is all about adding subtle lighting, coloring, and recovering details from your photo. The tutorial is suitable for beginners who want to create their own beautiful style of coloring from scratch. Follow me to learn how to add beautiful soft looks with the use of techniques & tools in Photoshop to your images.
This effect will basically add a hint of coloring to highlights & shadows, reduced contrast to make sure you have enough details on photos & soft lighting on the entire image.
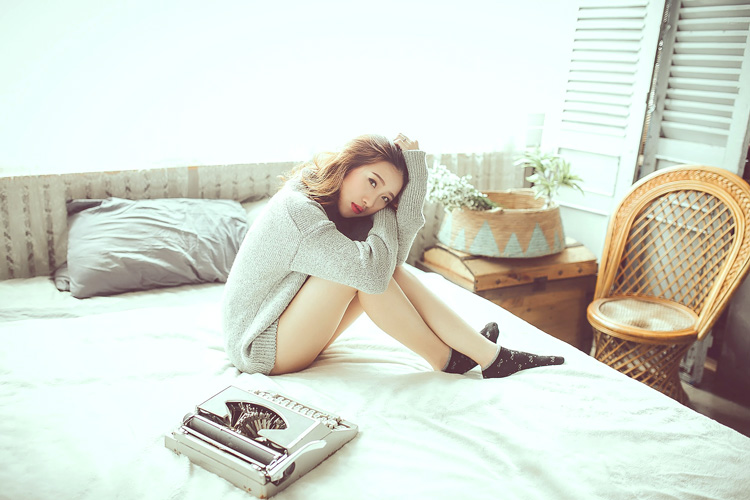
Step 1 – Open the Sample Image
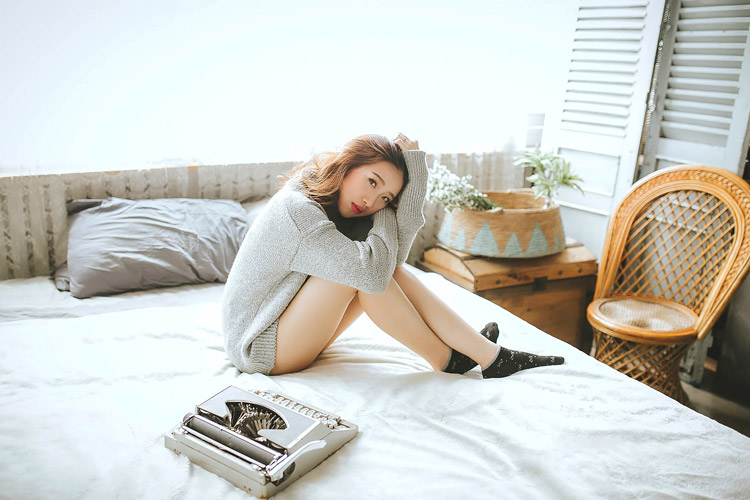
First, download the sample image in Photoshop from Unsplash & open it up in Photoshop. Go to File > Open and open the image in Photoshop as shown below. You can see the image looks bright & have a good amount of contrast as well. We’ll add soft coloring (which you can change at any time) and reduce the contrast to rescue details of the image.

Step 2 – Lift Shadows
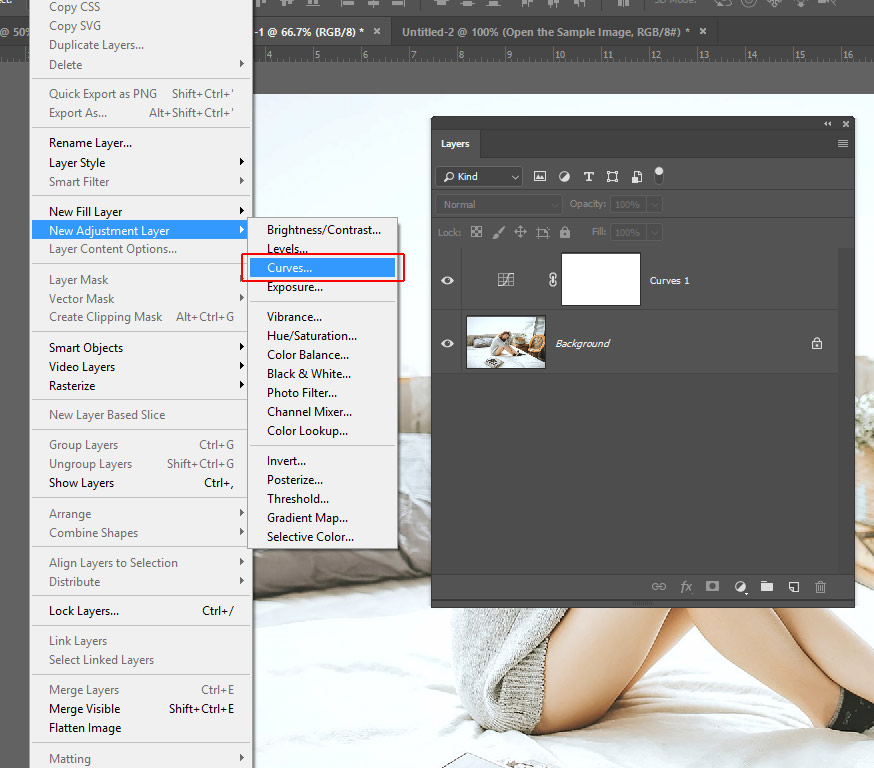
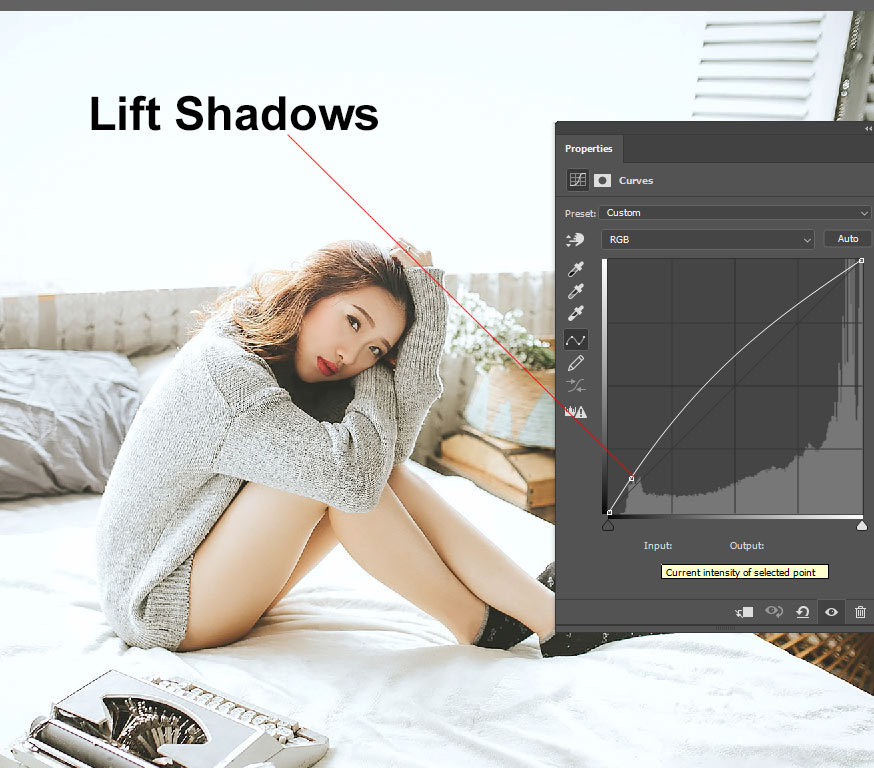
Although, this image has mostly highlights but it does have some shadow region like model hair. We’ll lift shadows to even out the exposure in the image as the highlights are too bright compared to shadows. To do this, create a Curves adjustment layer by selecting Layer > New Adjustment Layer > Curves.
Add a point to Shadows region and lift the shadows to add more info to the darker areas of the image. You can see the settings below.
Step 3 – Target Darker Areas
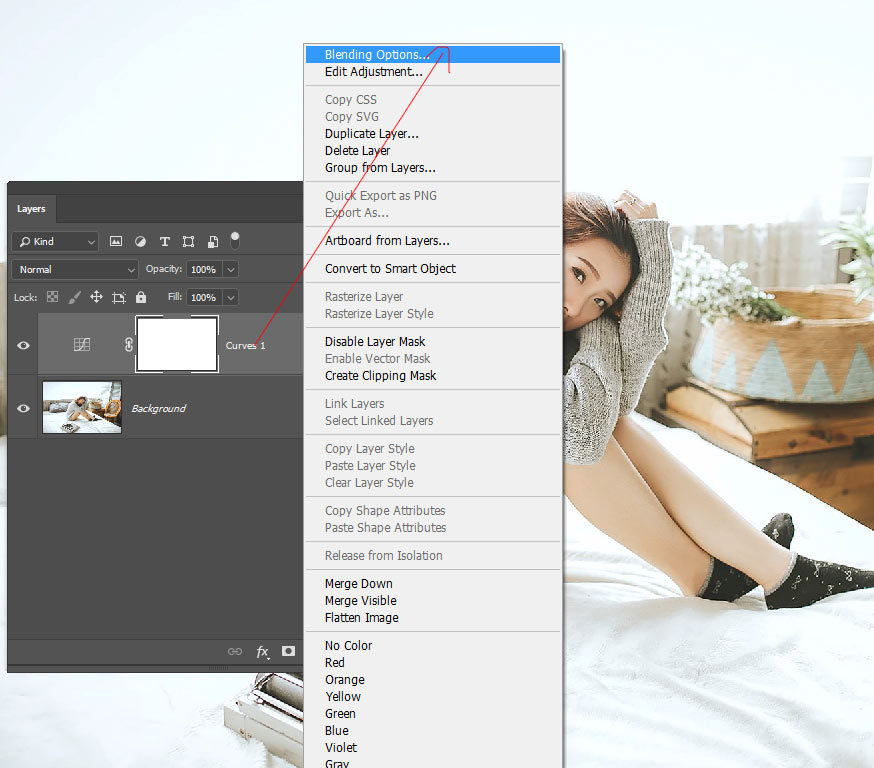
Now we’ll have the Curves to affect only darker areas of the image. Usually, when you lift shadows or any tones using Curves it kinda affects rest of the tones well. I don’t want to affect other tones and want to keep the effect of Curves to shadows only. The Blend-If can help blend effect based on highlights & shadows and we gonna use this. Right-click on the Curves layer and choose Blending Options.
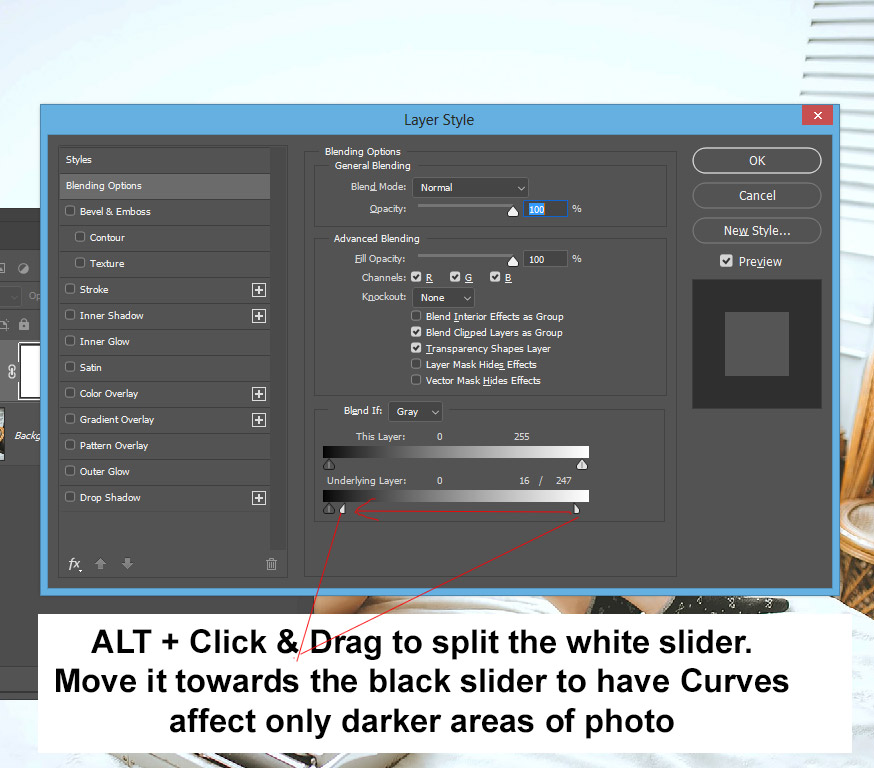
In the Blend IF > Underlying Layer, split the white slider by Holding Down ALT + CLICK & drag it towards the black slider & this will force Curves to affect only Shadows while keeping other tones intact.
Here you can see the results so far, notice the soft look has started appearing:
Step 4 – Add Hint of Coloring to Bright Areas
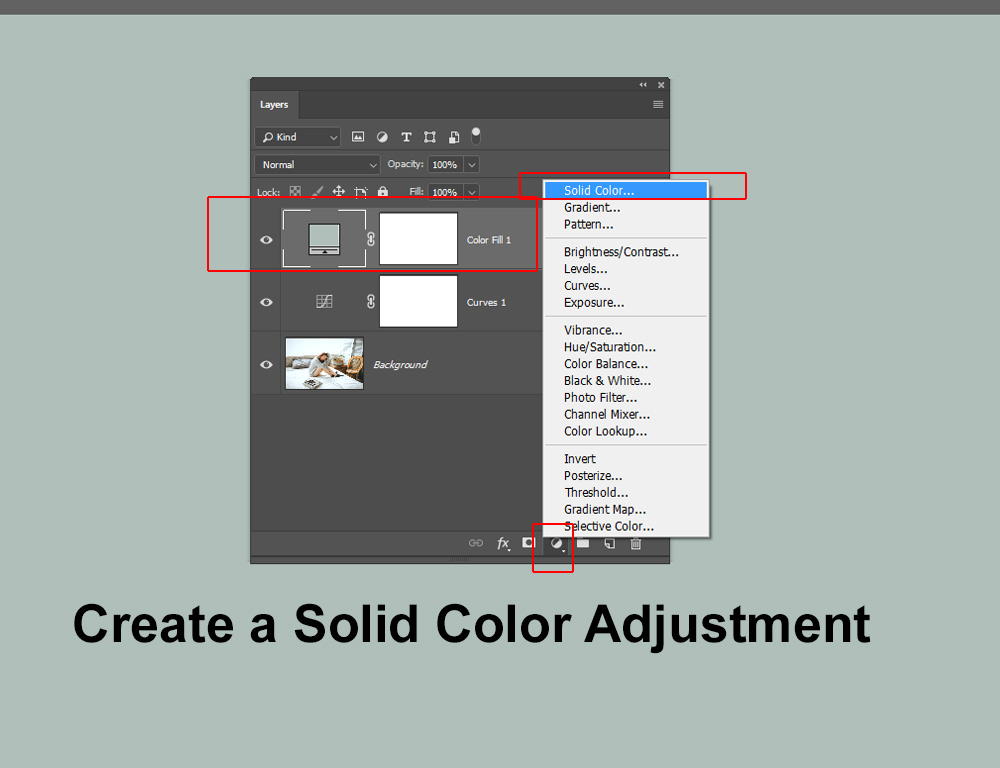
Now we’ll add coloring to bright areas of the image and it will be very subtle & not like flashy color grading. That’s why this effect is perfect for weddings, & family photos. Create a Solid Color Adjustment Layer by clicking on the third icon at the bottom of the layer panel.
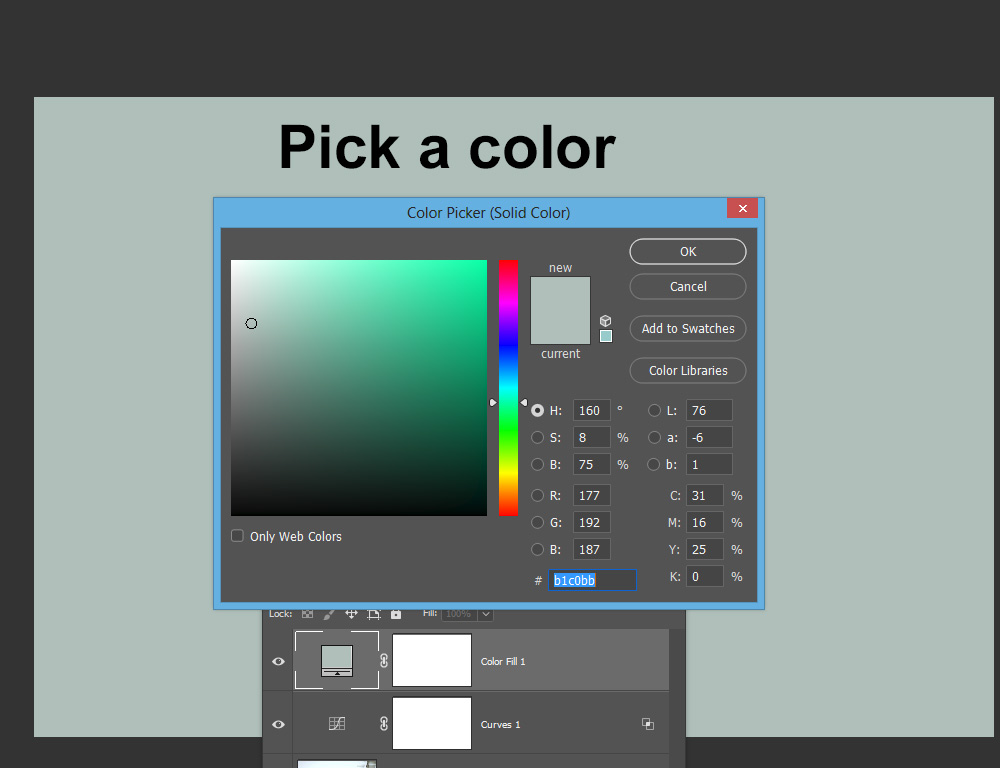
Now choose a bright color, don’t worry about the color just pick any color, and later you can change it at any time. I chose #b1c0bb.
Change the blending mode to Soft Light and this blend mode will give an uplifted & clean look to the image as you can see in the image below.

I want the hint of coloring to be visible on Highlights, to do this we’ll use Blend-IF. Open the Blending Options of Solid Color by double-clicking on this layer. This time split the black slider and move it towards the white slider to make the Solid Color appear only on the Highlights.

Step 5 – Subtle Coloring
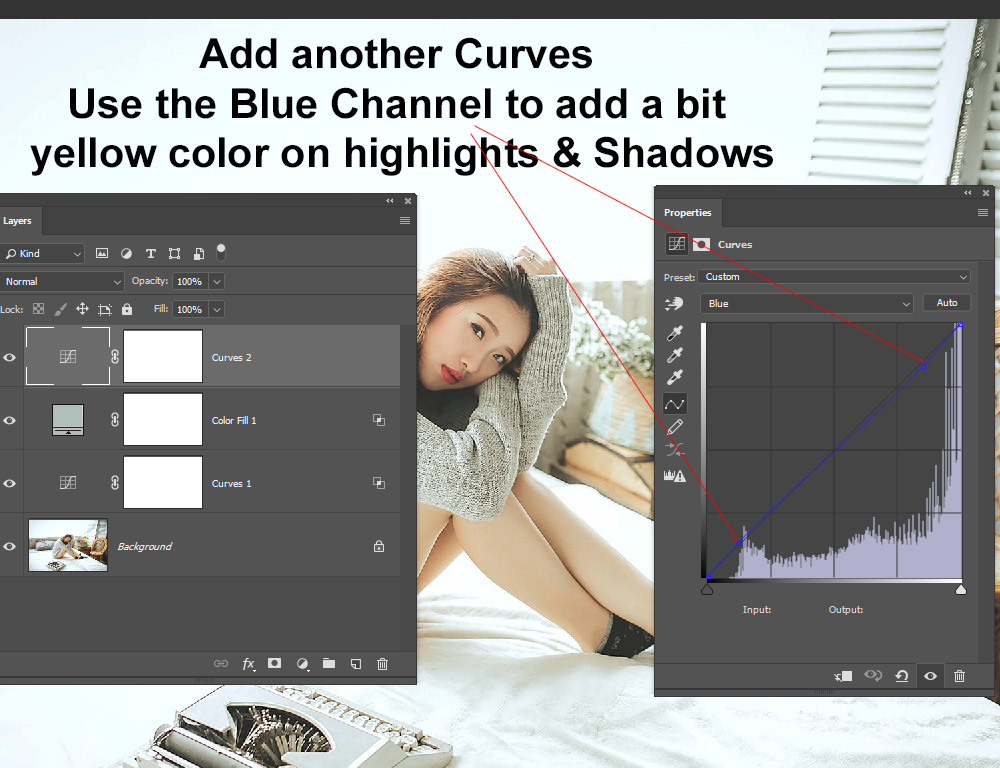
Lastly, what we can do is we can add subtle coloring to different areas of the image and you can even try to fix exposure (if you have unbalanced exposure) of the image as a finishing touch. Using the Curves, I added a bit (not noticeable) yellow color to highlights & shadows. Just a bit not much as you can see how I moved the points in the settings.
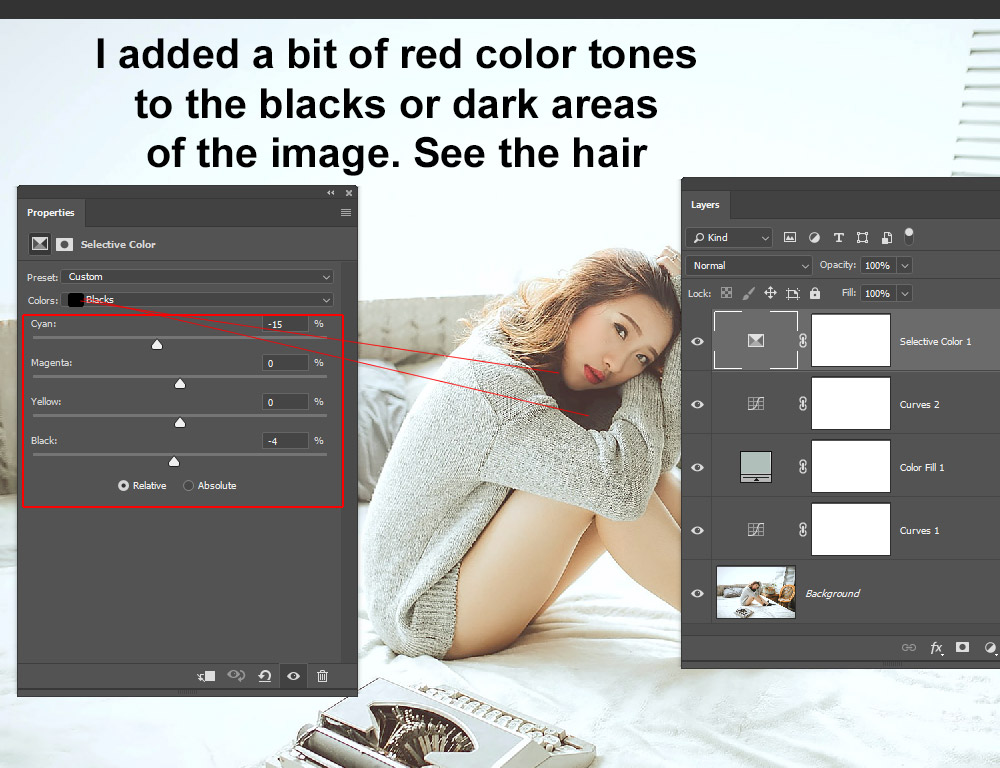
Go to Layer > New Adjustment Layer > Selective Color and I added subtle red color tones to darker areas of the image such as hair or any other part which is darker.
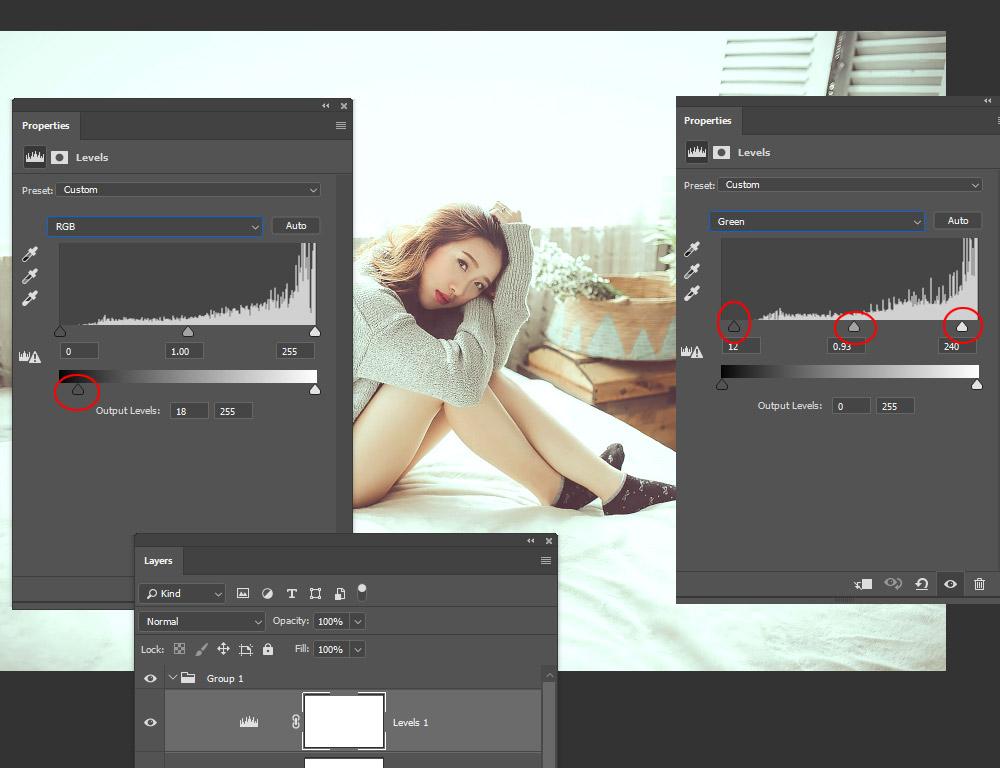
I used Levels, first, I used RGB to lift shadows again which you can see in the settings (left of the image). Then I added subtle magenta tones to Shadows, Midtones (trying to cancel green tones a bit), but with highlights, I am adding green tones.
Step 6 – Final Results
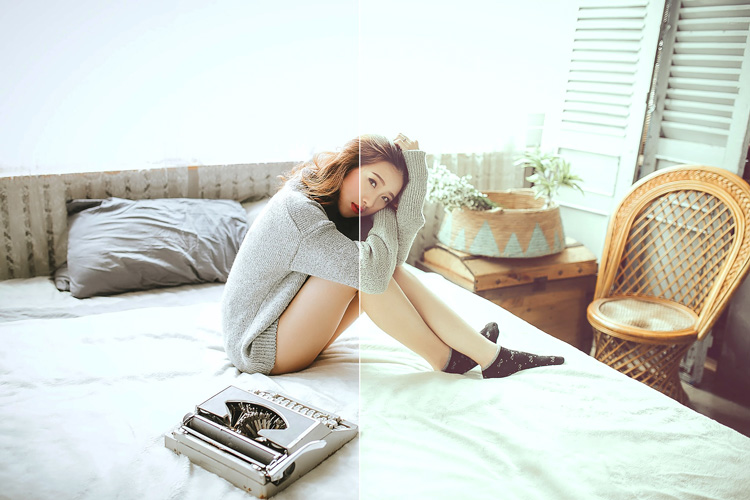
Here are my final results with soft & airy coloring:
If you want to change the color of Solid Color that we added in Step 4, you can do this by double-clicking on the Solid color and then change the color that you find cool with your images.

Here are the before & after results:
I hope you enjoyed the tutorial. This soft & quieter feel look will surely make your images feel fresh just like you fresh out of the bath. You can try this effect on weddings, family, indoor, and any photo that is on the side of brightness. If you have questions let me know in the comment section below.
Need Help With Photoshop or Looking for Professional Support?
Whether you're just getting started with Photoshop or need expert-level assistance, we're here to help! Contact us for personalized Photoshop tutorials, project support, or creative services.
Get in touch today to take your skills or projects to the next level.
CONTACT US NOW📘 Want to Master Photoshop Faster?
🎁 Get Your FREE PDF E-Book "Top 10 Photoshop Tricks Every Designer Must Know" Now – Packed with expert tips, shortcuts, and techniques to boost your creativity & workflow.
👉 Download Your FREE PDF E-Book NOW!

