
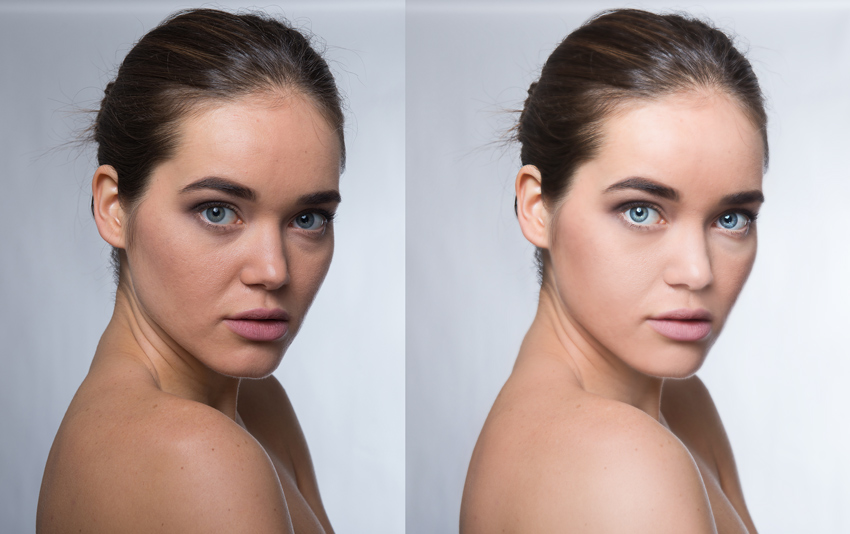

In this tutorial, you’ll learn how to smooth skin in Photoshop without making it blurry and fake. The most important thing about retouching is patience. You have to be patience to achieve good results as it involves focusing on small details which make a big difference. You’ll also learn how to retain skin textures, use dodge & burn, skin coloring and much more.
Step 1 – Duplicate Image
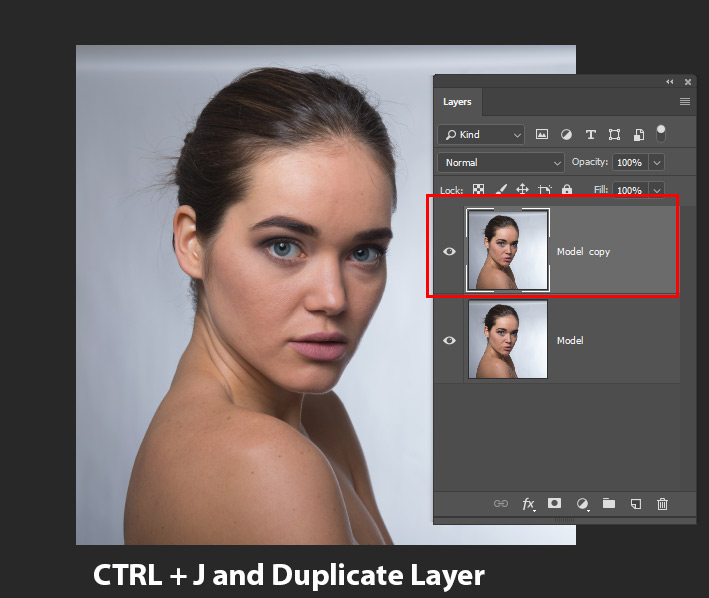
First, thing that you want is to duplicate the original image that you are working on. This will make sure that we are not destroying the original layer and even later we can use the original image to bring back details.
The image I am using is from Adobe Stock and most of you may not have any subscription so I’d recommend using any of your images and follow along with the tutorial.
Press CTRL + J to duplicate the layer and name it “Model Copy”.
Since we will add filters to the image, so every time you run a filter on the image, make sure it is converted to Smart Object. You can do this by right-clicking on the image and choose “Convert to Smart Object”.
I did the same below with the Model Copy Layer.

Step 2 – Increase Exposure
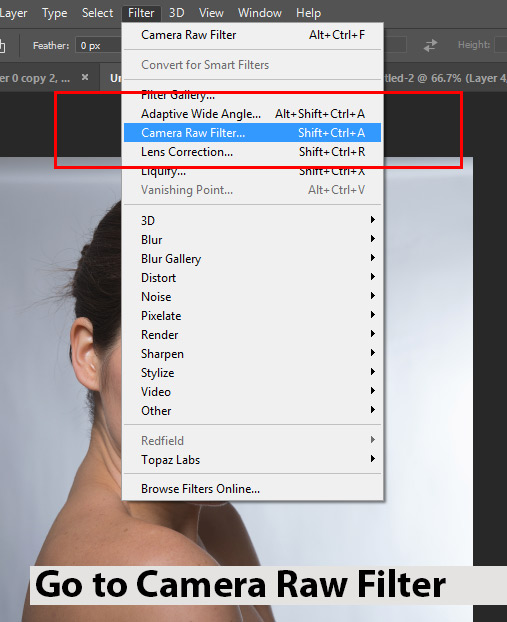
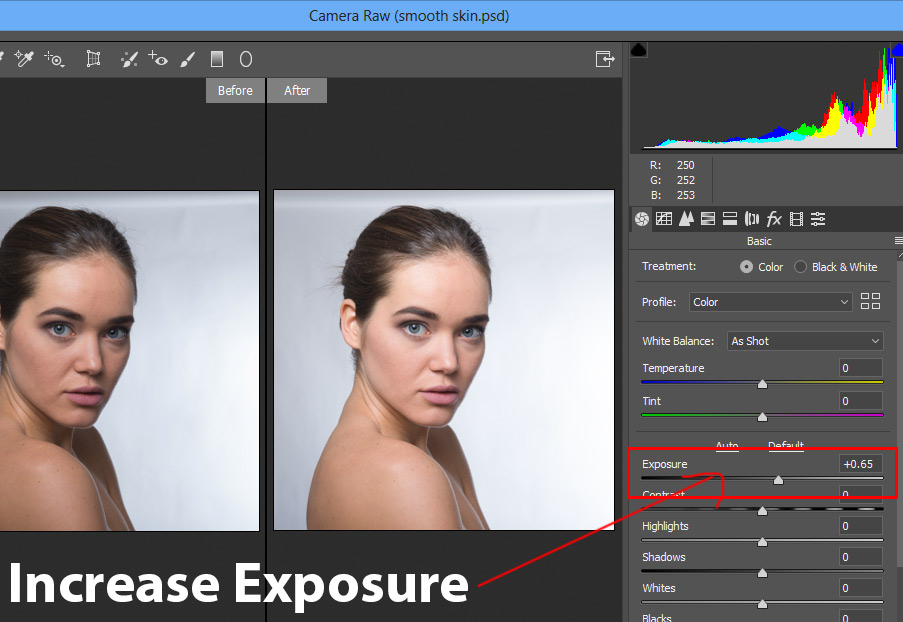
You may be surprised to see how much improvement you can get on those images that are a bit on the side of underexposed. My image falls under this category, go to Filter > Camera Raw and increase exposure a bit.
Increase the exposure by +0.65
Results with improved skin tones:

Step 3 – Smooth Skin
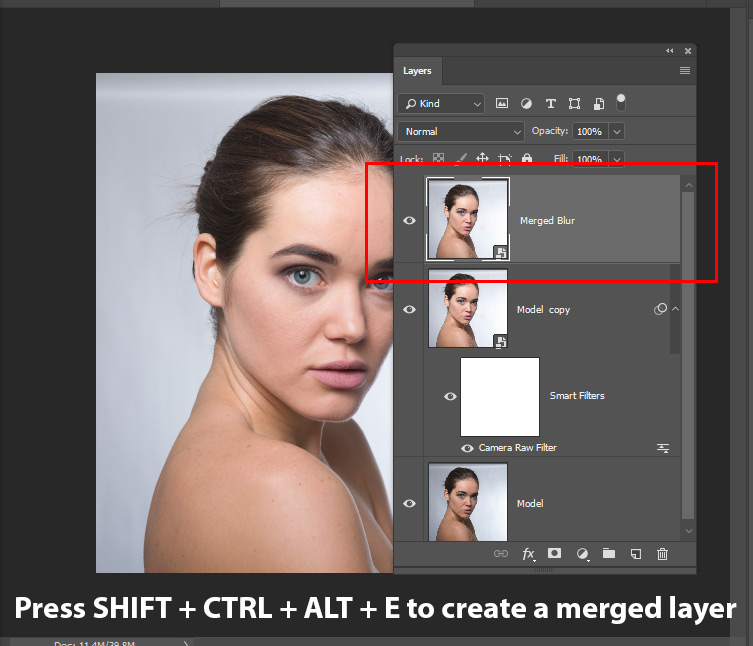
To smoothen the skin we will run a blur filter on the image. Before we do that press CTRL + SHIFT + ALT + E to create a merged layer and name it “Merged Blur”.
Go to Filter > Blur > Gaussian Blur and set the radius to a value until you start seeing the skin is blurring. 4.5px Value works for me.
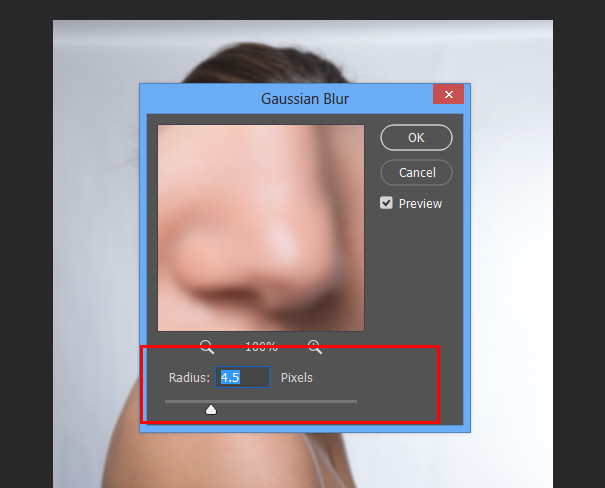
Here you can see the blur effect:

Step 4 – Fine-Tune Blur Effect
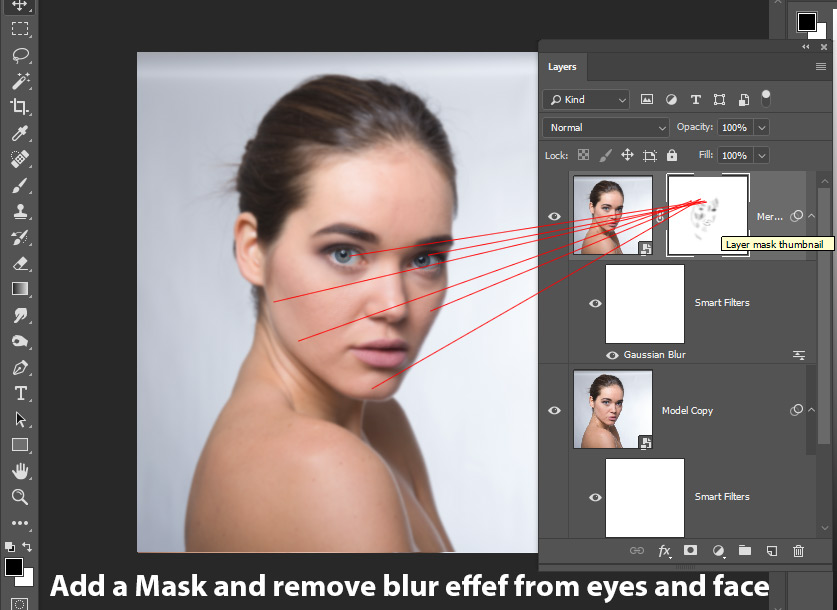
Now we can fine-tune the blur effect on the model skin using a layer mask. Add a mask by selecting Layer > Layer Mask > Reveal All.
Remove the blur effect on certain areas on which you think that it is making the skin too blurry. You can see how I removed the effect using a soft round black brush with low opacity & flow settings:
Step 5 – Bring Back Skin Details
Now we’ll bring back skin details by creating a skin texture using the original image. Duplicate the original layer one more time by pressing CTRL + J.
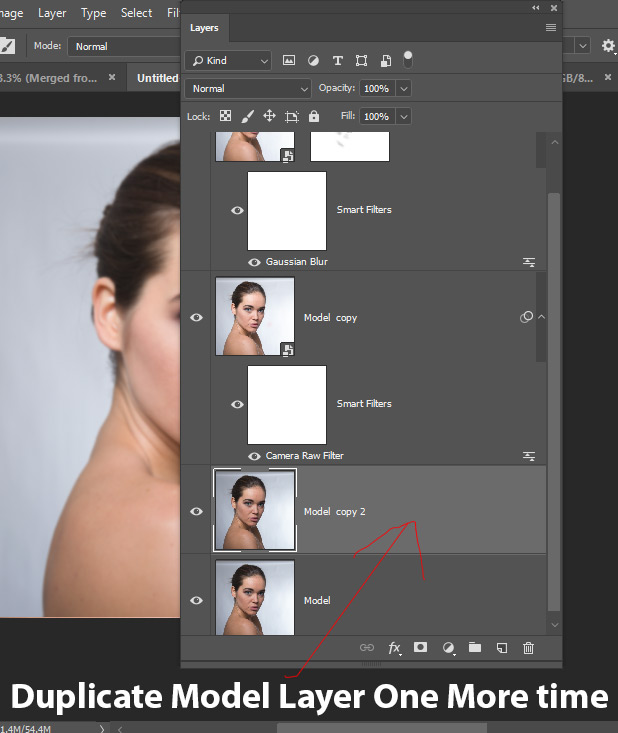
Put this layer on top of the layer stack:

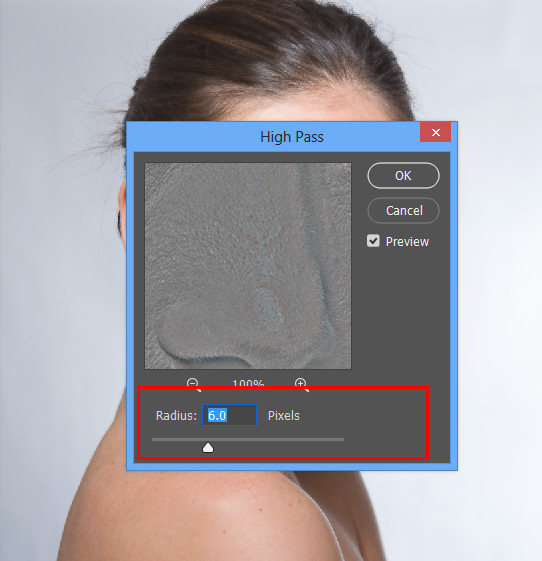
Run a High Pass Filter of 6.0px on this layer by selecting Filter > Other > High Pass.
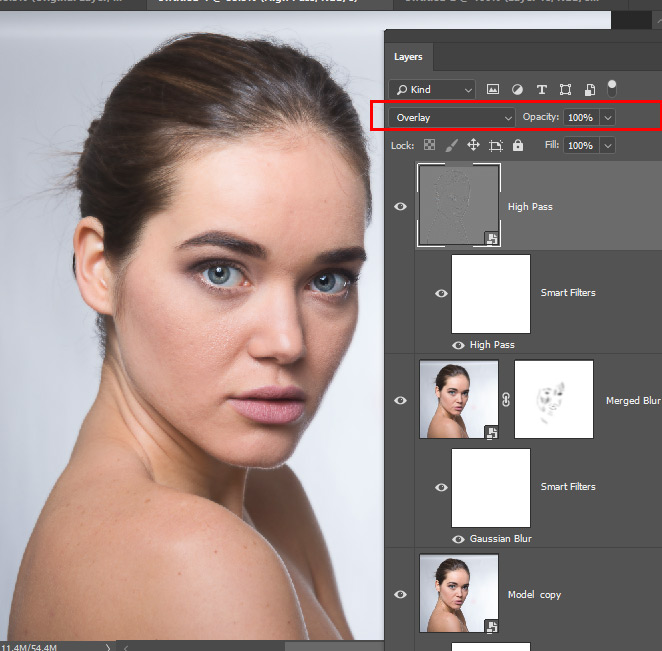
Change the blending mode of this layer to Overlay and you can see we have skin details back.
Just as we did to fine-tune the blur effect and we can do this for High Pass filter as well. Add a mask to High Pass layer by selecting Layer > Mask > Reveal All. Then remove the effect from certain parts where you think sharpness is too much.
By masking the effect you’ll reveal the layer underneath which is a blur layer and that will add soften effect to the skin. It kinda becomes a combination of smooth and sharpens skin.

You can keep going back & forth on the layer masks of blur and high pass layers. Try to reveal or hide the effect to get the best possible results.
Step 6 – Add Sharpness to Different Areas
Now we’ll add sharpen effect to other areas as well especially which are out of focus such as hair, hair strands, ear, and eyes.
To do this, duplicate the High Pass layer and delete the existing layer mask.
Go to Layer > Layer Mask > Hide All to add a black layer mask to the high pass copy layer.
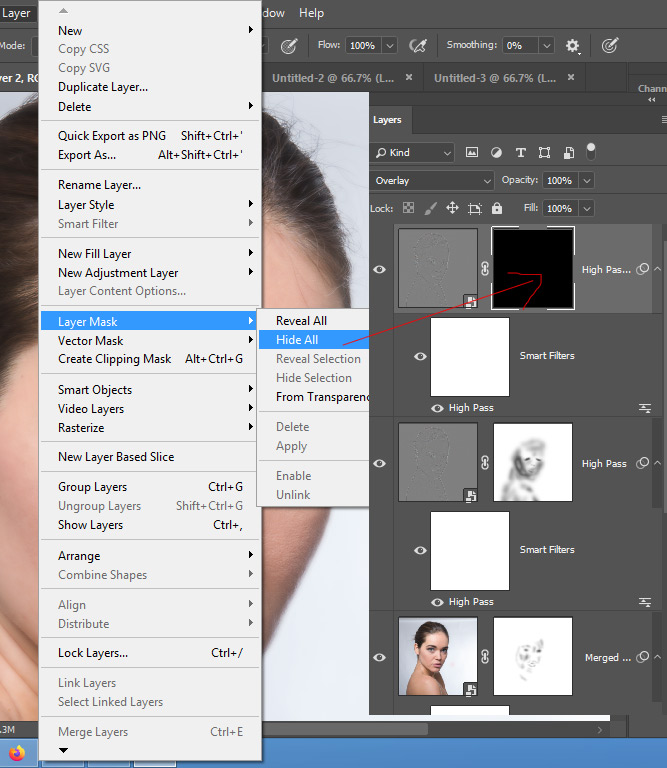
Now use a soft round black brush and start revealing the high pass effect on those areas in which you think needs more sharpening such as eyes, hair, eyes and other skin parts.

Step 7 – Paint Color to Soften Skin
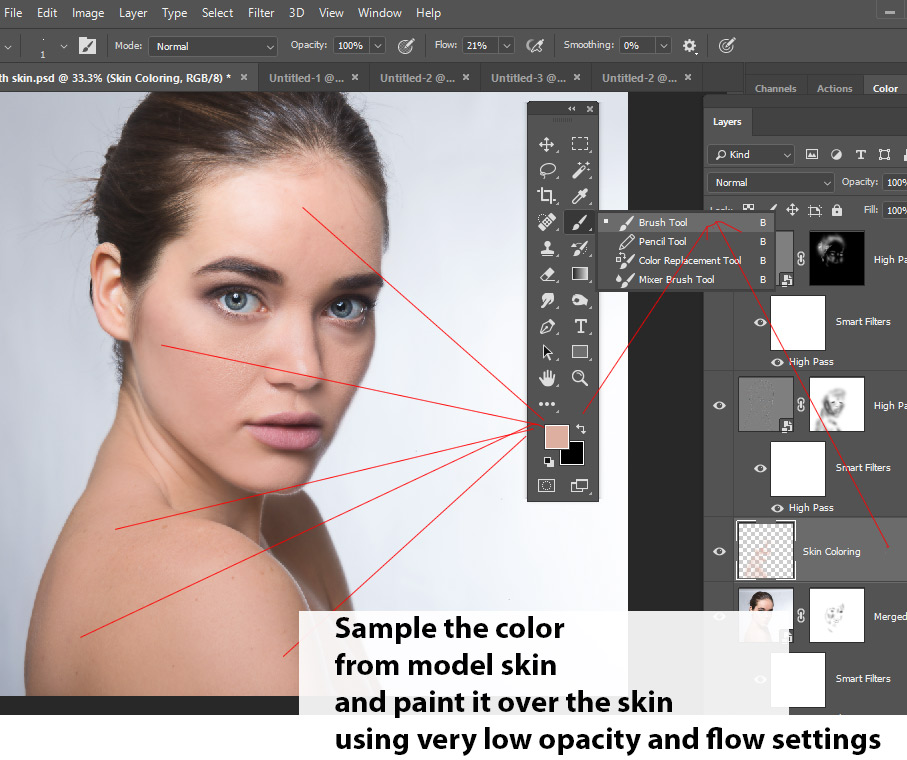
Create a new layer by pressing CTRL + SHIFT + N and make sure to put this layer below both of the sharpening layers. Name it “Skin Coloring”.

Now sample a color from the skin that is not too bright or darken. Then use a soft round brush with low flow settings and paint on the model skin to soften it. You can see in the below image where I painted.
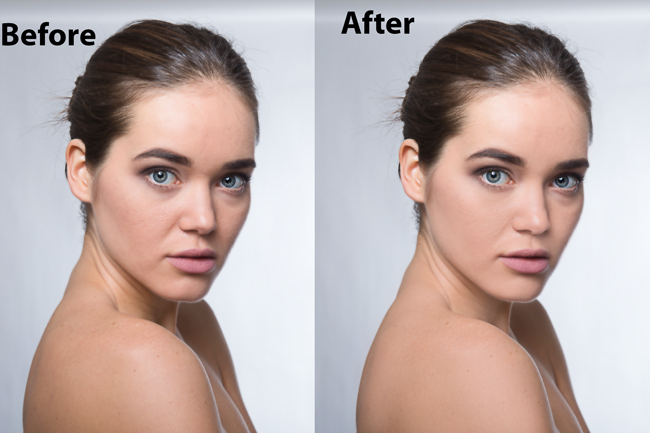
Here you can see drastic improvement after painting color on the skin:
Step 8 – Dodge & Burn
Create a new layer by pressing CTRL + SHIFT + N and go to Edit > Fill and fill this layer with 50% Gray Color. Change the blending mode from Normal to Color Dodge

Now select the Dodge Tool by pressing (O), set the Range to Midtones & Exposure to 14% or less, start lightening up the brighter parts of the image. I painted it on the forehead, cheek, over the nose, eyes, bit on the hair and ear.

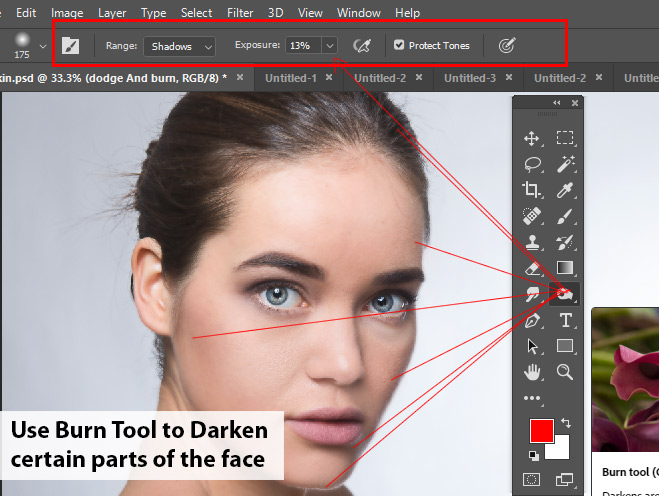
Now select the Burn Tool, set the Range to Shadows & Exposure to 14% or less, start darkening image parts which are darken as I used the Burn Tool under the nose, under her chin, on the left and right chick, eye brows, bit on the hair.
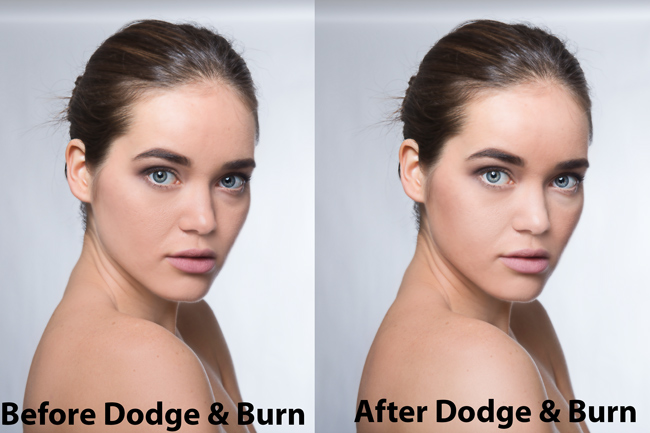
Here you can compare the before and after results. You may notice that I even painted on the rest of the body using the same settings of Dodge and Burn tool.
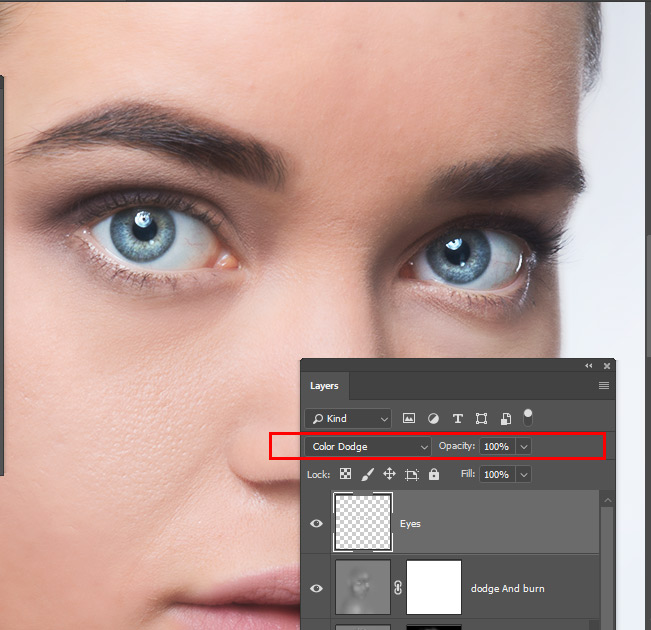
Step 9 – Sharpen Eyes
In the end, I want to draw more attention to the eyes so I tried to pop out the color of the eyes. To do this, paint using a dark cyan color using a soft round brush and do this on a new layer.
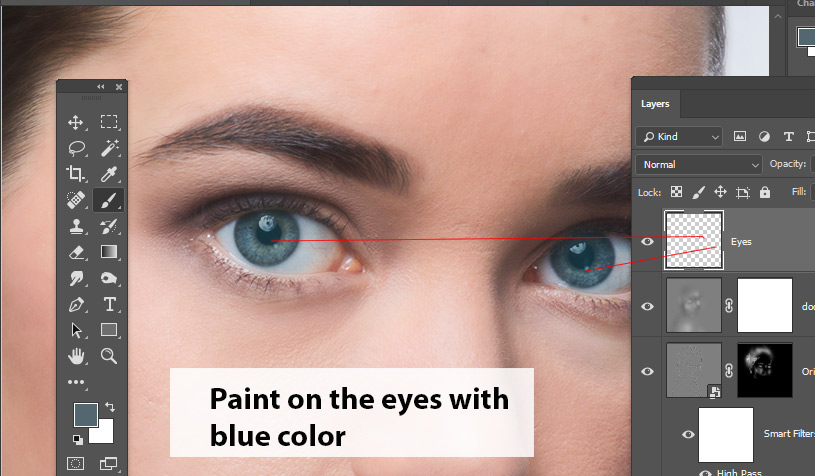
Change the blending mode to Color Dodge and this will pop out the color of the eyes.
Step 10 – Remove Blemishes
I don’t think this image needs the removal of blemishes but if you think you can use the Spot Healing Brush Tool.
Create a merged layer by pressing CTRL + SHIFT + ALT + E. Now you can start removing the blemishes using the Spot Healing Brush Tool and make sure Type is selected to Content Aware on the Options Bar before you start removing blemishes and spots from the skin.

Here you can compare the results from Step 1 to Step 9:

I hope you enjoyed the tutorials and learned how to smooth & soften the skin in Photoshop using the range of techniques mentioned above. Don’t forget to leave a comment in the comment section below.
Need Help With Photoshop or Looking for Professional Support?
Whether you're just getting started with Photoshop or need expert-level assistance, we're here to help! Contact us for personalized Photoshop tutorials, project support, or creative services.
Get in touch today to take your skills or projects to the next level.
CONTACT US NOW📘 Want to Master Photoshop Faster?
🎁 Get Your FREE PDF E-Book "Top 10 Photoshop Tricks Every Designer Must Know" Now – Packed with expert tips, shortcuts, and techniques to boost your creativity & workflow.
👉 Download Your FREE PDF E-Book NOW!
