

It’s no wonder that if you use Photoshop’s Filter Gallery in a creative you can simulate plenty of effects in no time. In this tutorial, we’ll take a look at how to simulate a sketch effect in Photoshop. The key factor here is to use blend modes, filters, and brushes in a precise manner leading to a natural, hand-drawn pencil sketch effect in Photoshop.
Create Sketch Outlines
Step 1
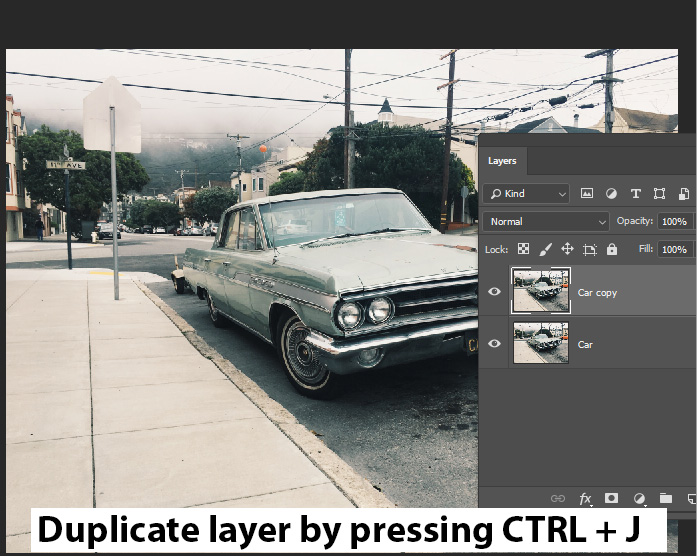
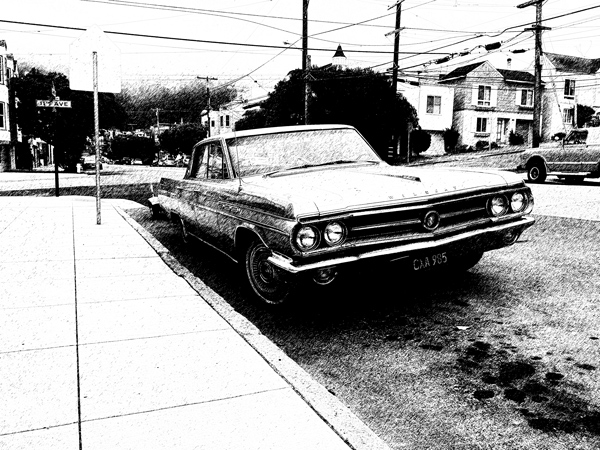
First, we need to create sketch outlines to start with this effect. I am using this Car image and we’ll turn into a painting sketch. If you want to follow along with the tutorial then you can download the image here.
Open the image in Photoshop by selecting File > Open and open the image.
Now duplicate the image as we don’t want to destroy the original one. You can duplicate the layer by pressing CTRL + J.
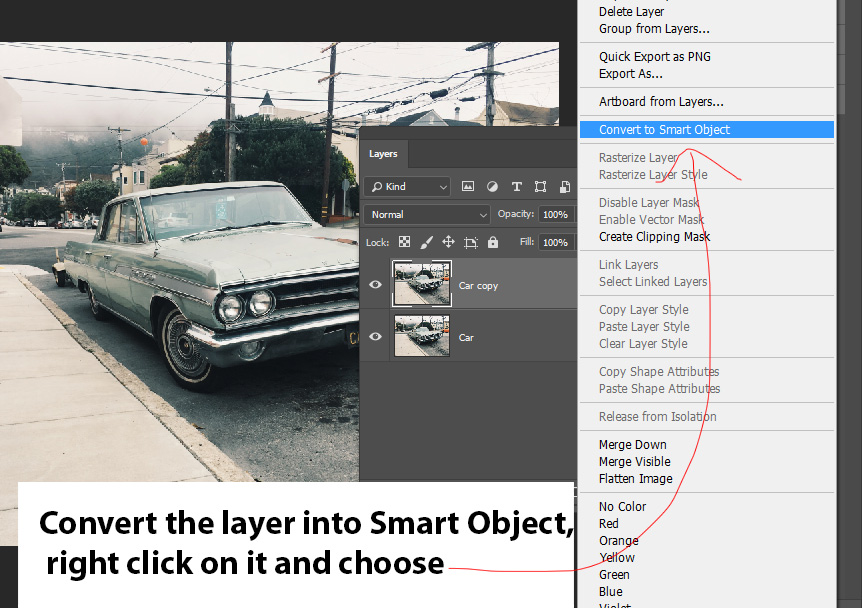
Before we apply any filter to the layer we need to convert it to Smart Object as it will allow us to go back at any time in case if you want to edit Filters later. Right-click on the layer, choose “Convert to Smart Object”.
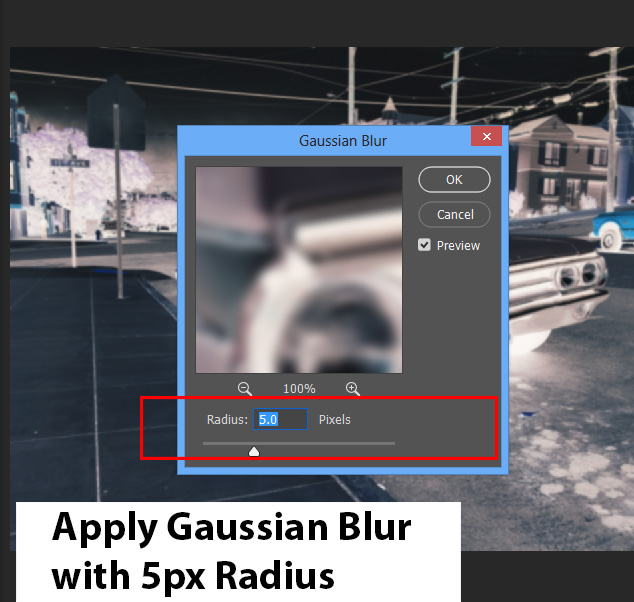
Step 2
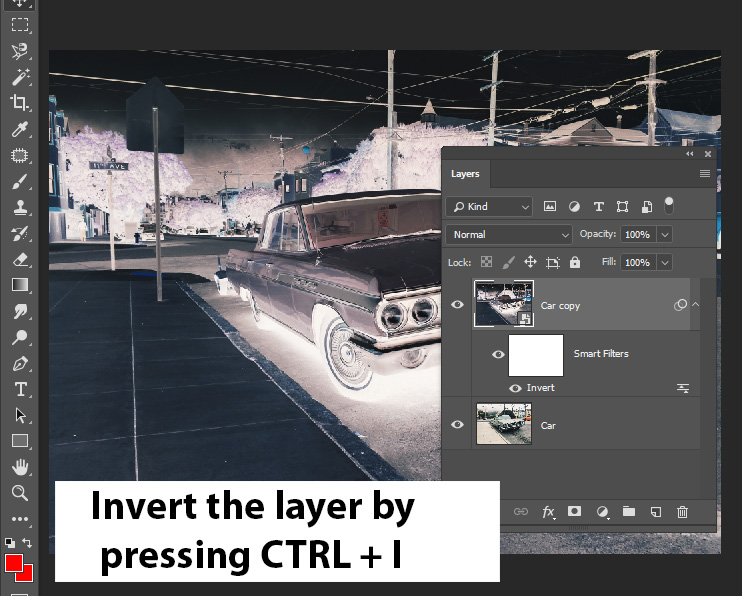
Now invert the layer by pressing CTRL + I.
Now go to Filter > Blur > Gaussian Blur with 5px Radius.
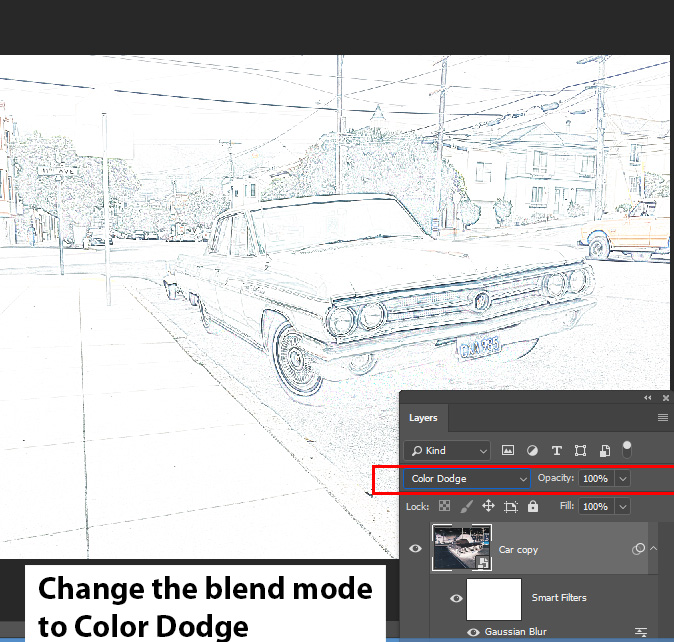
Change the blending mode to Color Dodge and this will wash out everything in the image and only leaves the outlines visible in the image.
Step 3
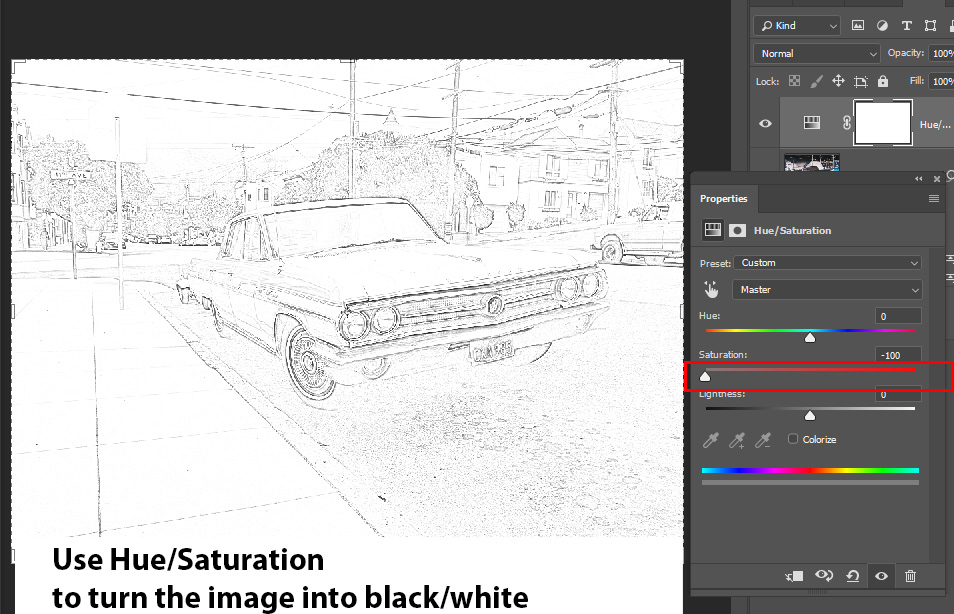
Go to Layer > Adjustment Layers > Hue/Saturation and use the Hue/Saturation adjustment layer and desaturate the image by moving the Saturation Slider all the way to left.
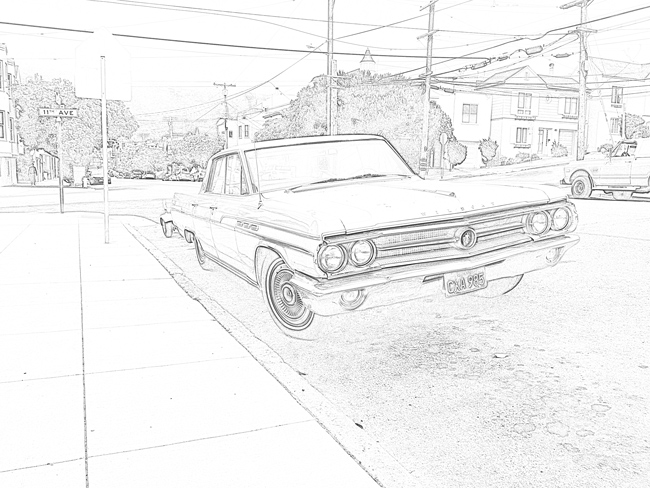
Here you can see sketch outlines:
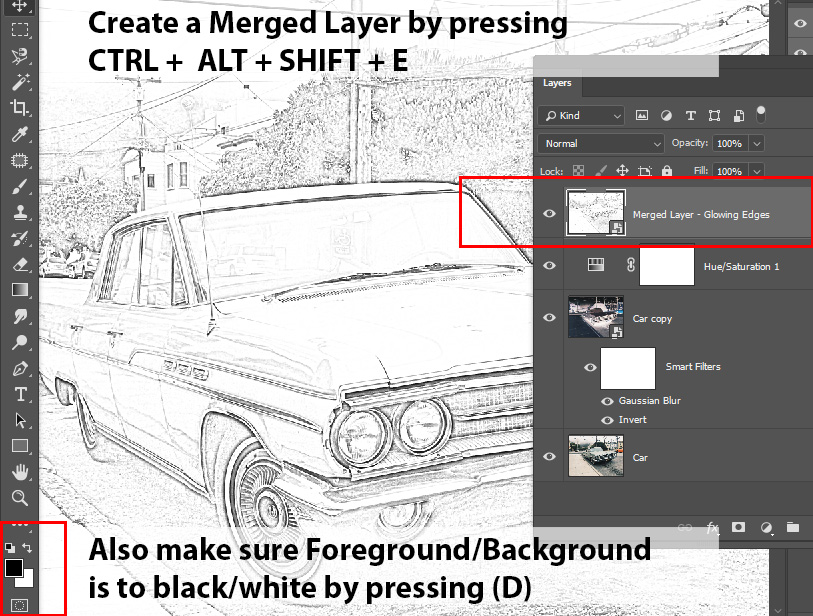
Step 4
Create a merged layer by pressing CTRL + SHIFT + ALT + E and name it “Merged Layer – Glowing Edges”. Also, make sure Foreground/Background color is set to black/white by pressing (D) on the keyboard.
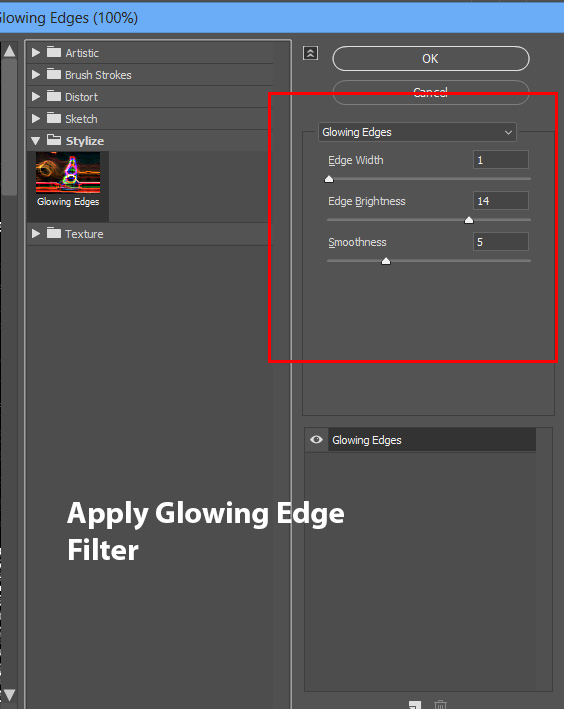
Now we will apply the Glowing Edge filter to add little tiny textures to the image. It’s important if you see a sketch it has a lot of tiny brush dots. Go to Filter > Filter Gallery > Glowing Edges and use the settings below.
Now change the blending mode to Overlay and blend this layer with the existing one. If you notice on the image below you’ll see more texture is added to the image.

Create Sketch Shading
Step 5
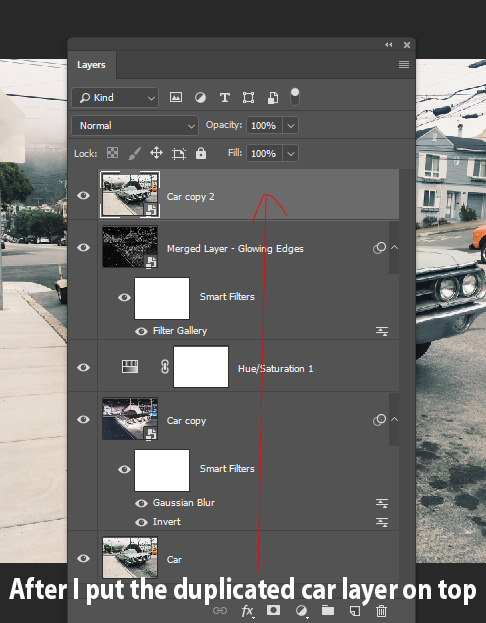
One we have the outlines of the sketch in place we can move forward and start working on the shading. First, copy the car layer one more time by pressing CTRL + J and put it on the top of the layer stack.

Here you can see I put it at the top:
Now you have to convert the layer to Smart Object and go to Filter > Gallery > Graphic Pen.
Enter the following settings and you can choose the stroke direction that is totally on your preferences:

Change the blending mode to Multiply.
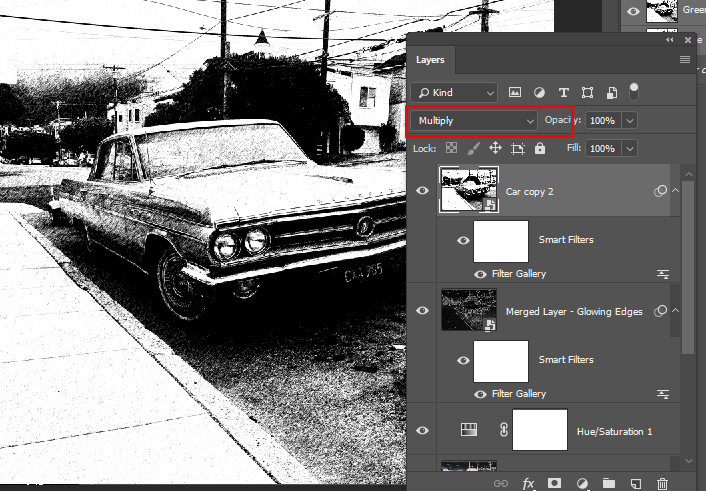
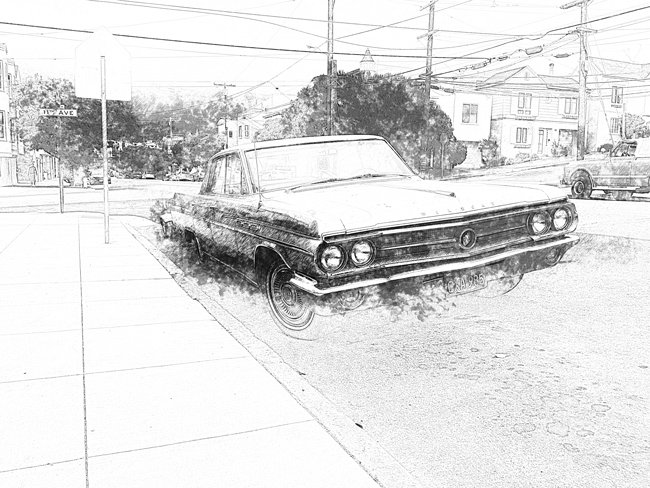
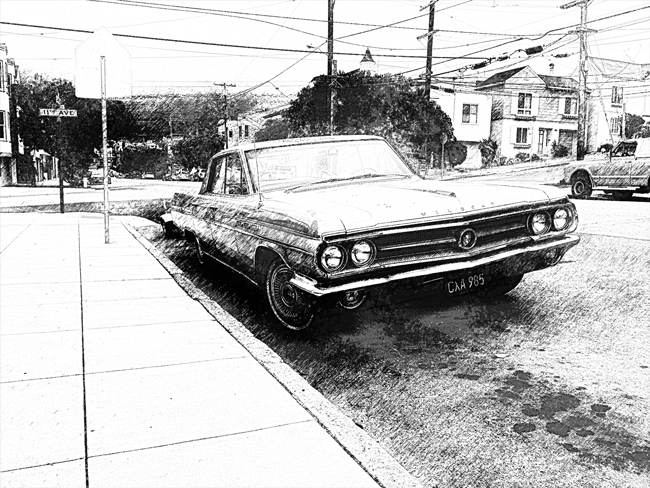
Here you can see our sketch is ready:
Use Sketch Brushes
Step 6
You can leave it here if you want to but if you want to add realism to it then you must add brushes strokes to the image.
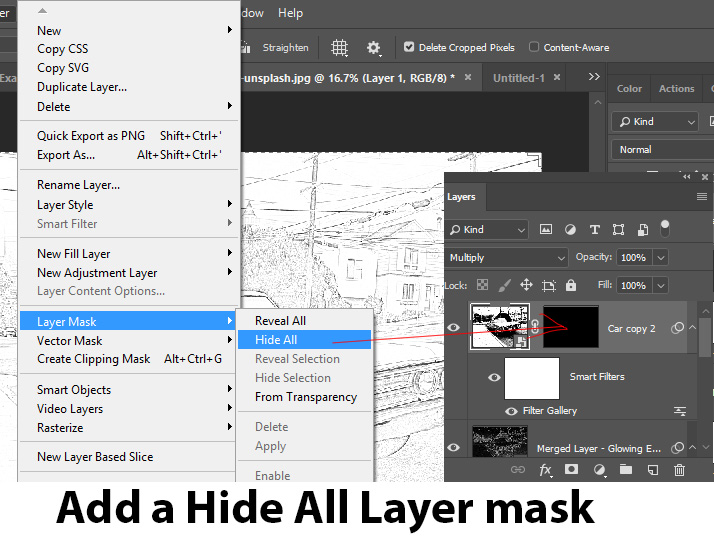
Add a Hide All Layer Mask by selecting Layer > Layer Mask > Hide All. This will hide the car copy 2 layer on which we applied Graphic Pen Effect.
Now pick a brush that is similar to sketch brushes or you can download sketch, charcoal brushes and many more from Google. I am using the default brush that comes with Photoshop and it’s under Wet Brushes named KYLE Bonus Chunky Charcoal.
Select the brush, set the brush opacity and flow to low settings, and set the foreground color to White.
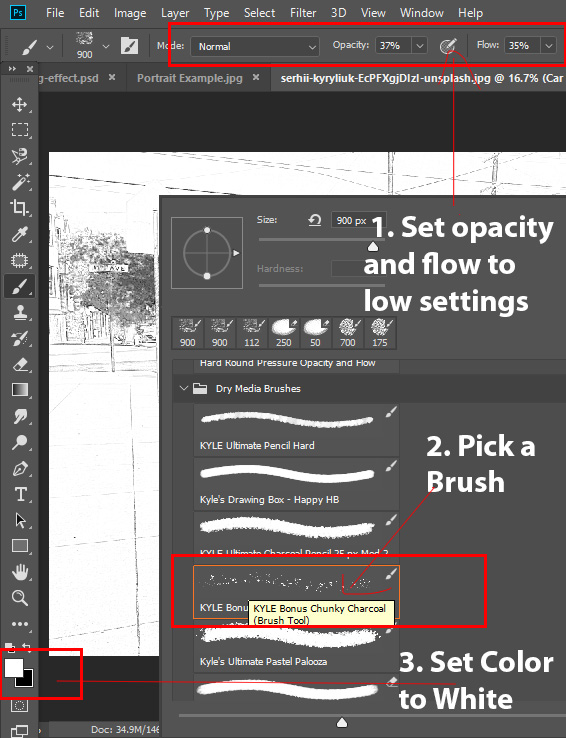
Now use the brush and apply the brush strokes on the layer mask to reveal the image. Use different opacity and flow to achieve lighter and heavier brushes. For lighter brush stroke stick to 30% opacity & flow or less, for medium brush strokes, use 50% and for heavier brush strokes use more than 50% opacity & flow.

Here you can see how I am doing:
Lighter strokes:
Medium brush strokes:
Heavier brush strokes:
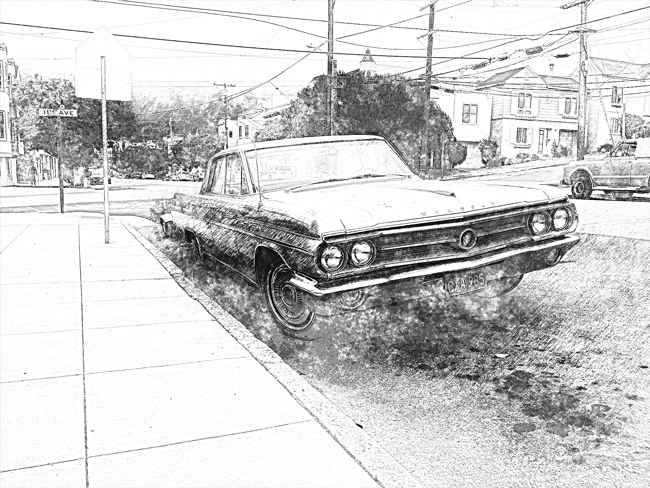
Darken the Outlines Further
Step 7
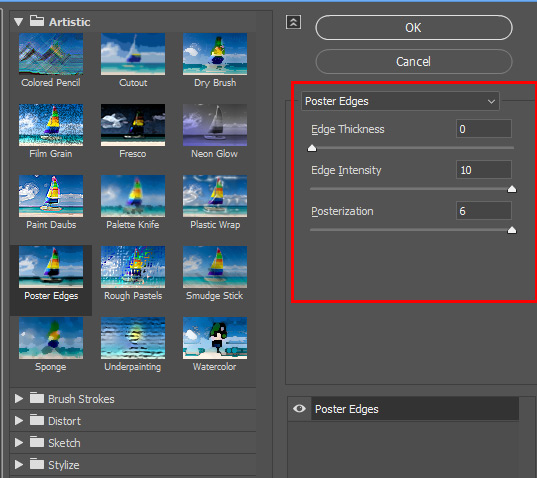
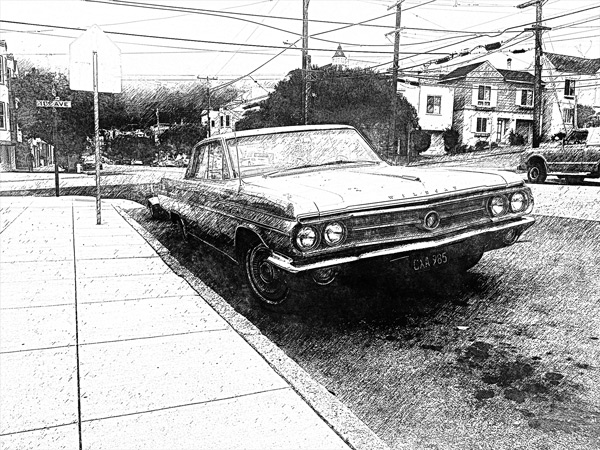
Finally I use the Poster Edges with the following settings to create more darken outlines. I created a merged layer by pressing CTRL + SHIFT + ALT + E.
Go to Filter > Filter Gallery > Poster Edges and input the following values:
If you want, you can reduced the effect of Poster Edges by reducing down the opacity of the layer.
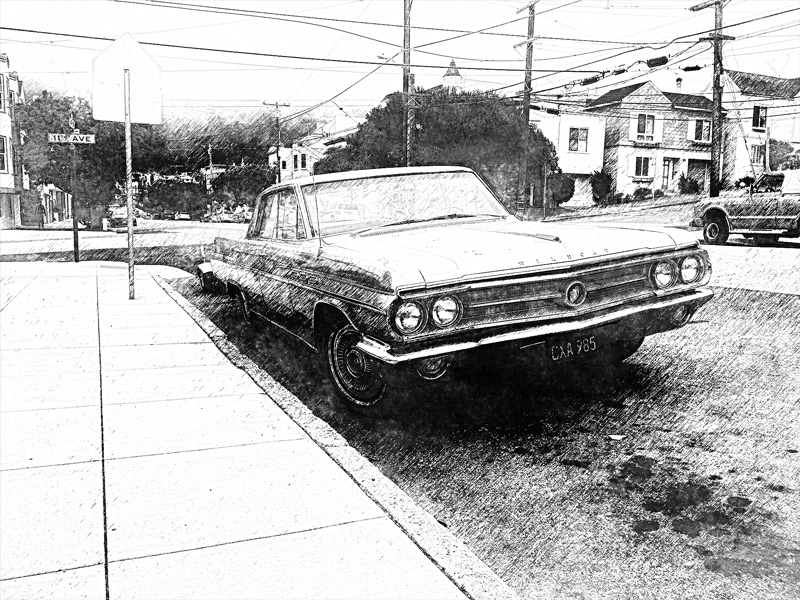
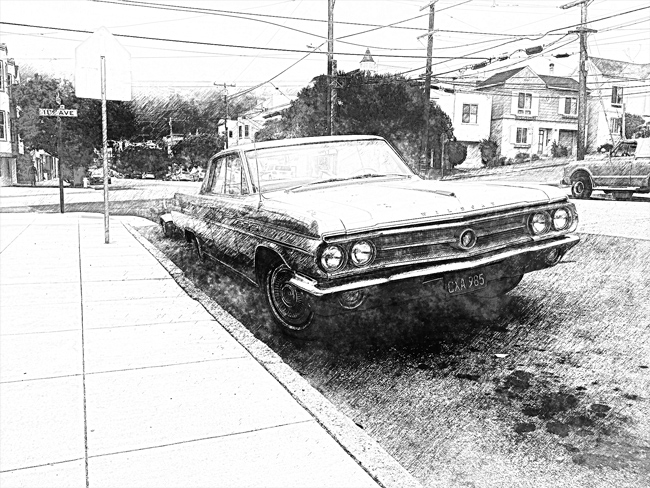
Final Results:
Use Blend Modes to Create Color Version
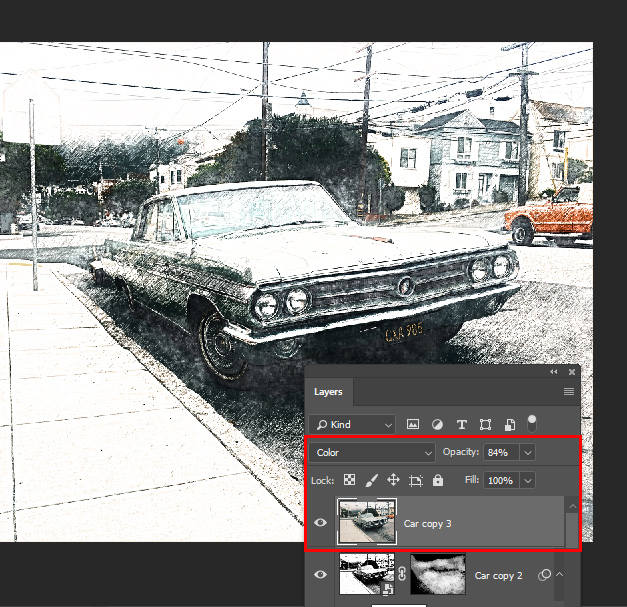
Step 8
To create a color version, duplicate the original layer and put it on the top and change the blending mode to Color and play around with the opacity.
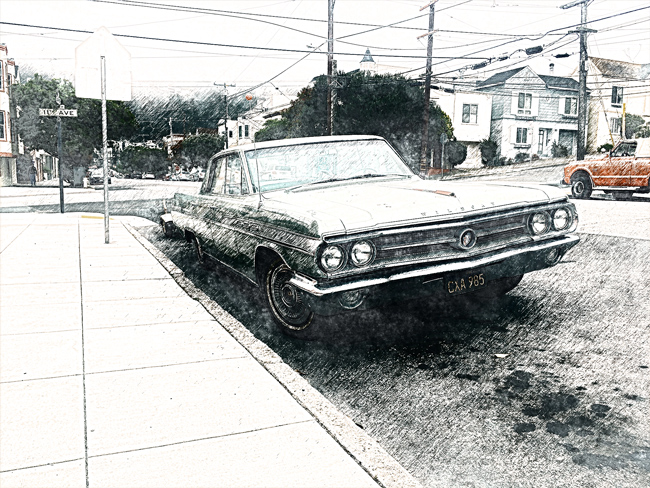
Colored version:
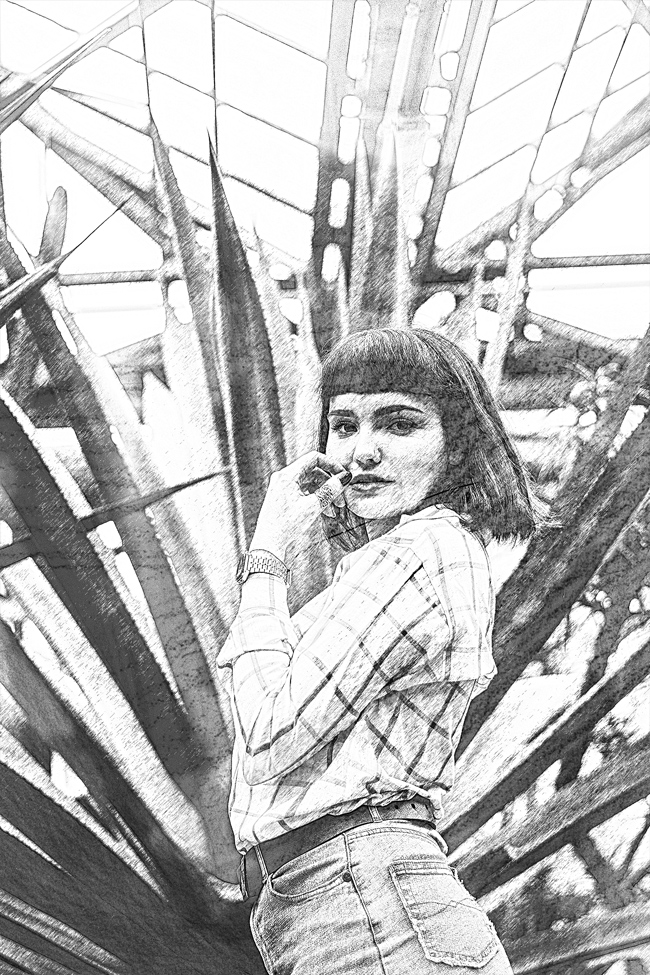
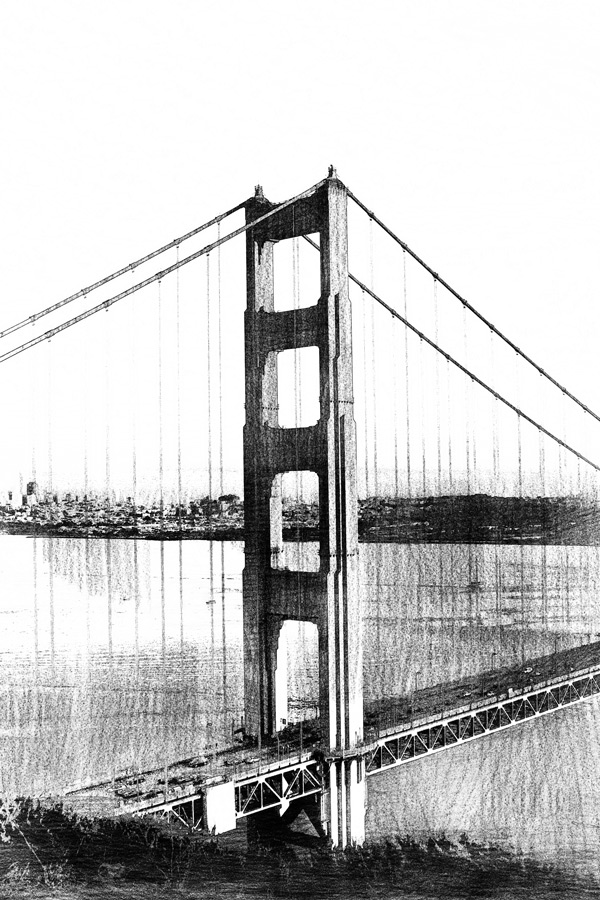
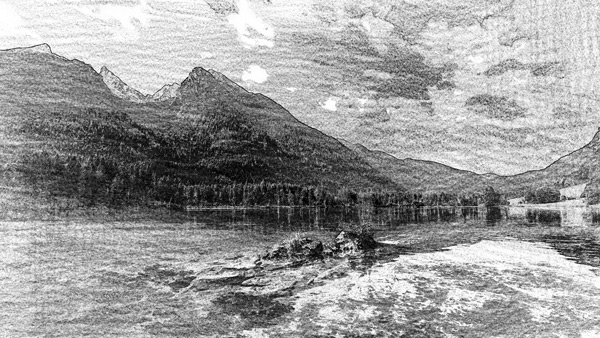
More examples:
Example 1:
Example 2:
Example 3:
I hope you enjoyed the tutorials and don’t forget to leave a comment in the comment section below.
Need Help With Photoshop or Looking for Professional Support?
Whether you're just getting started with Photoshop or need expert-level assistance, we're here to help! Contact us for personalized Photoshop tutorials, project support, or creative services.
Get in touch today to take your skills or projects to the next level.
CONTACT US NOW📘 Want to Master Photoshop Faster?
🎁 Get Your FREE PDF E-Book "Top 10 Photoshop Tricks Every Designer Must Know" Now – Packed with expert tips, shortcuts, and techniques to boost your creativity & workflow.
👉 Download Your FREE PDF E-Book NOW!

