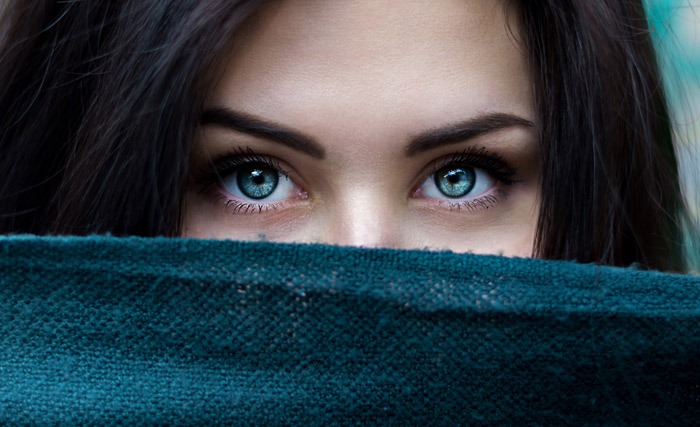
In this tutorial, we’ll be enhancing eyes using some retouching techniques in Photoshop. Basically, we’ll add highlights to the eyes, then add sharpening to bring out the details and finally taking care rest of the remaining parts.
Tutorial Resource
Step 1
I am using this image and the same can be downloaded from the above-mentioned link.
As you can see that the eyes are pretty flat out and look dull. Eyes have details but it is faded, highlights are dim and there is no sharpness in the image.
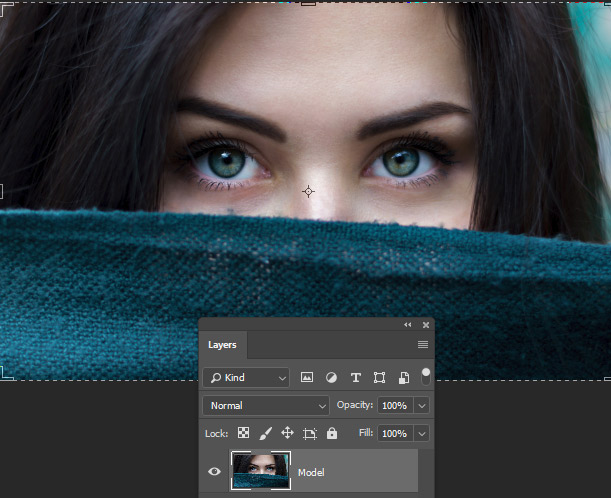
Step 2
First thing first that is adding highlights to the eyes. To do we’ll use Blend If to add highlights to the eyes brighten parts.
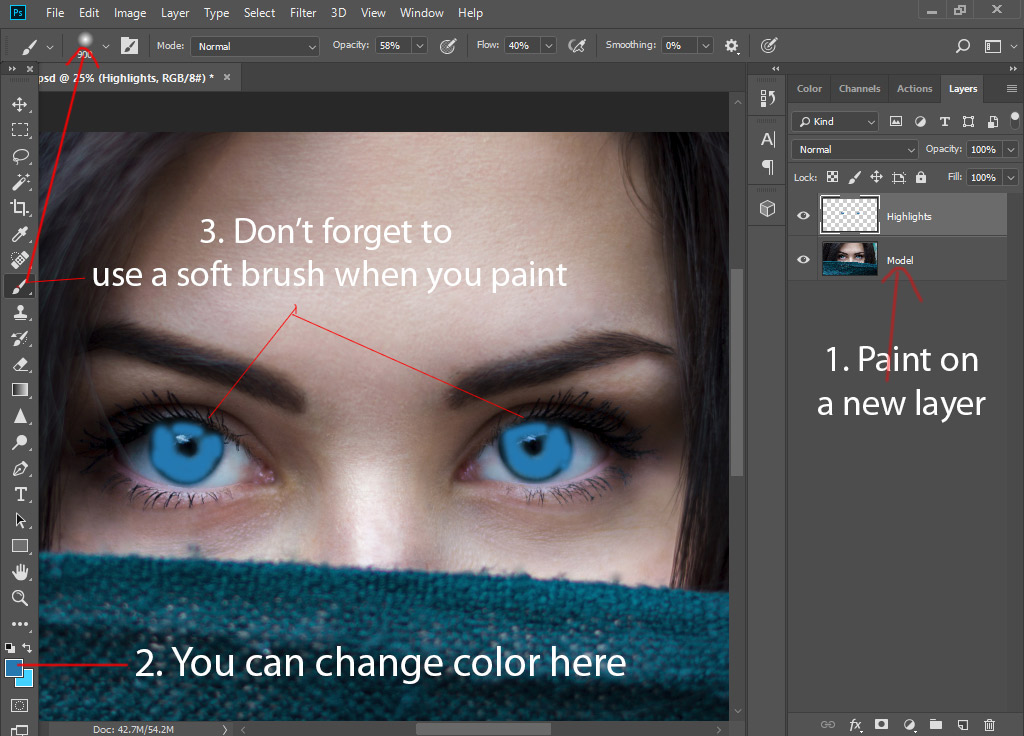
1. Hit CTRL/CMD + SHIFT + N and create a new layer and name it “Highlights”.
2. I am picking a blue color that is #1f7ab4 as it is matching with the eyes. But you can pick any color if you want coz later you can alter the colors using Hue/Saturation.
3. Don’t forget to use a soft round brush by clicking on the brush picker in the Options bar as you brush on the eyes.
Step 3
In order to make the color visible only to the highlights, we’ll use Blend If.
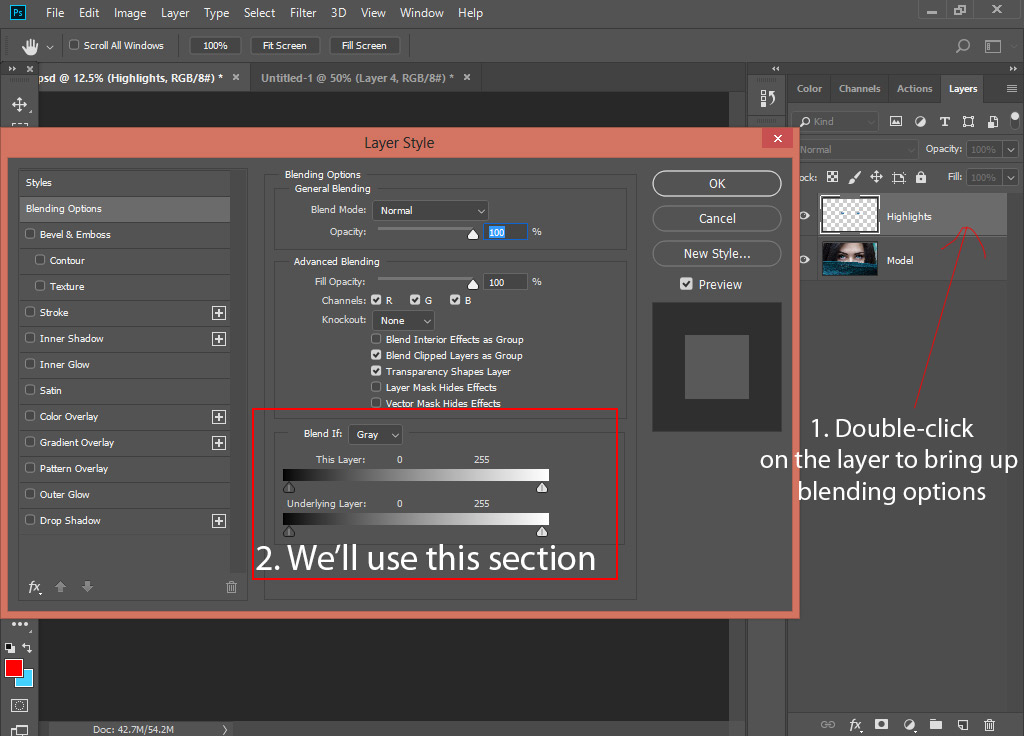
1. You need to access Blending Options dialog box by double-clicking on the layer (don’t click on the name of the layer).
2. You can see the Blend If section that we are going to use highlighted in a rectangle.
Step 3A
Now you need to split the black slider of Underlying layer. To do so, hold down ALT/OPTION KEY and then drag this black slider to right.
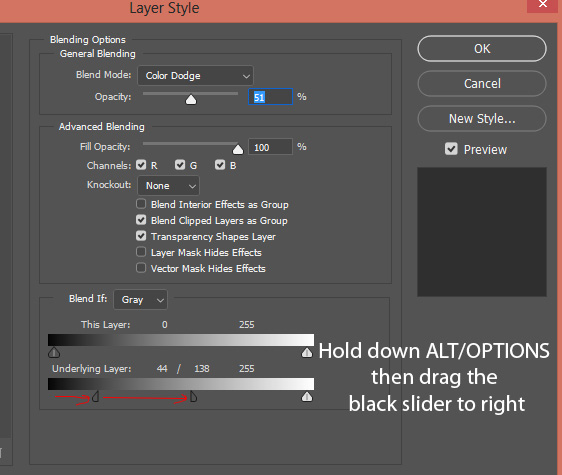
As you drag the slider it will split it two half sliders as you can see in the above image. You need to move them to right to make the color, that we’ve painted in the “Highlights Layer”, visible only on highlights of the eyes.
Bottom line here is that as you drag the black slider to right that means you are telling Photoshop to make the layer parts (Highlights Layer) visible only on the highlights of the underlying layer (Model Layer). See the below image for effect as you understand it with yourself.
Make sure you watch the image while dragging the slider. Click Ok to accept the changes and here you can see the results:
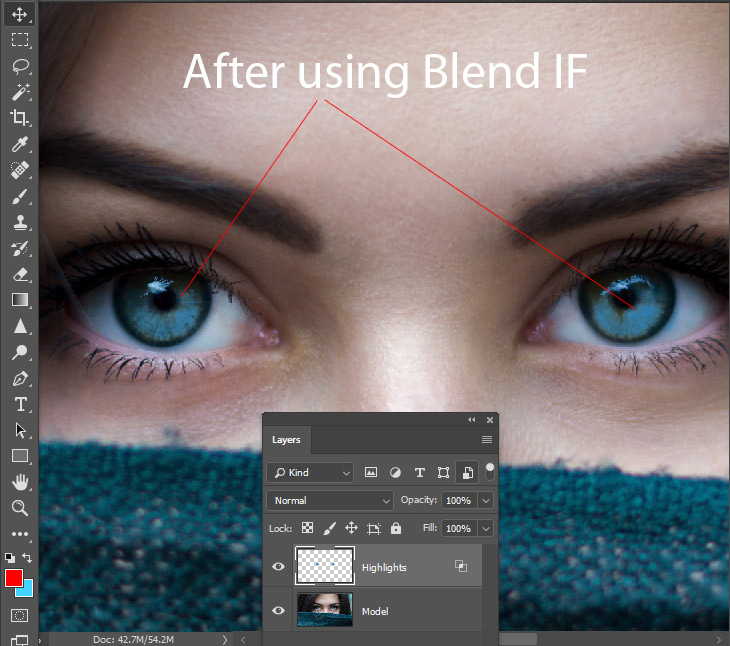
As you can see that color is now visible only on the highlights of the eyes.
Step 4
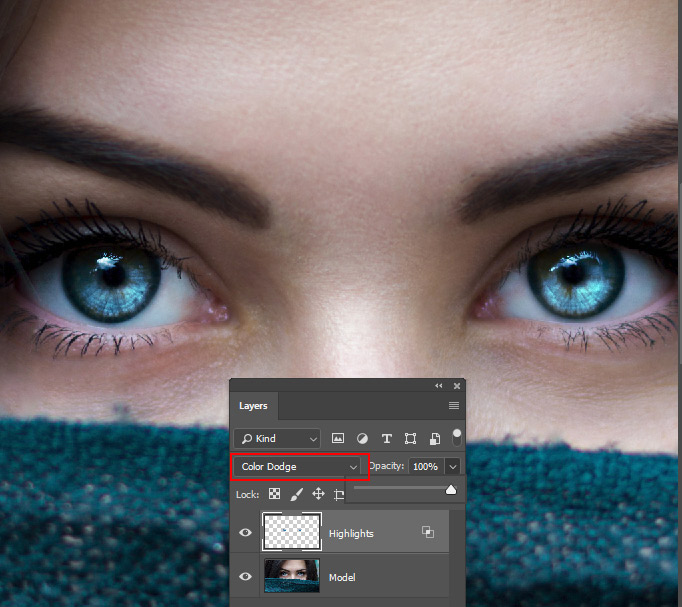
Change the blending mode to Color Dodge. If you want you can adjust the Opacity in order to reduce the effect on eyes. I reduced the opacity to 50% as I don’t want the highlights to look drastic but you keep it to 100% if you like.
Step 5
Now we’ll do some sharpening on the image using High Pass Filter. To do so, first, we need to create a merged layer so we can add sharpness to this image.
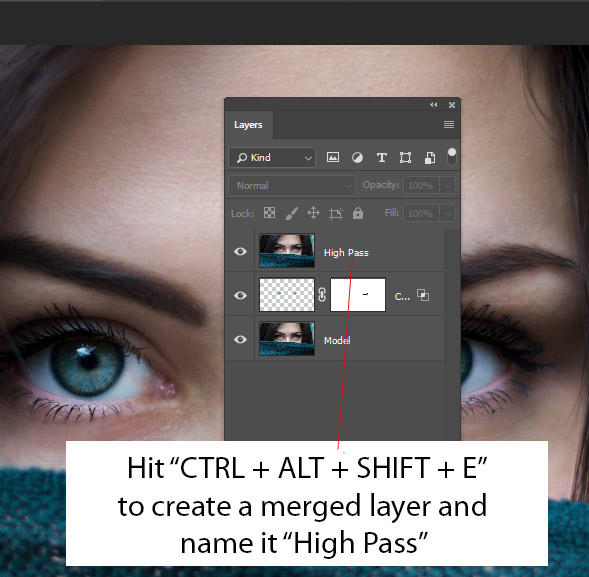
Hit CTRL/CMD + ALT/OPTION + SHIFT + E to create a merged layer and name it “High Pass”.
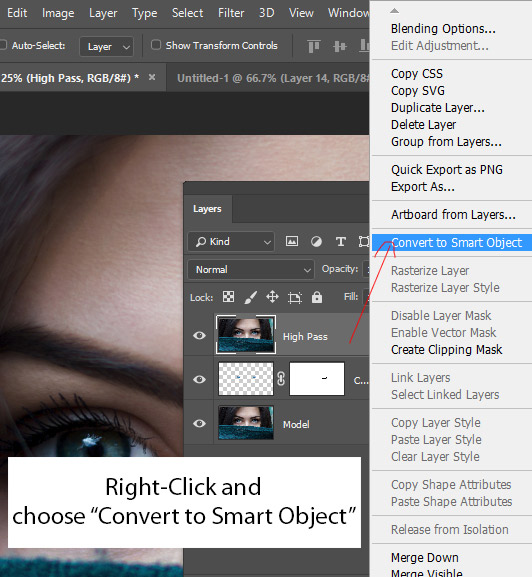
Before we apply a filter to the image we must convert it to Smart Objects as it allows us to alter the settings of a filter at any time.
Right-click on the layer and choose “Convert Smart Object”.
Step 6
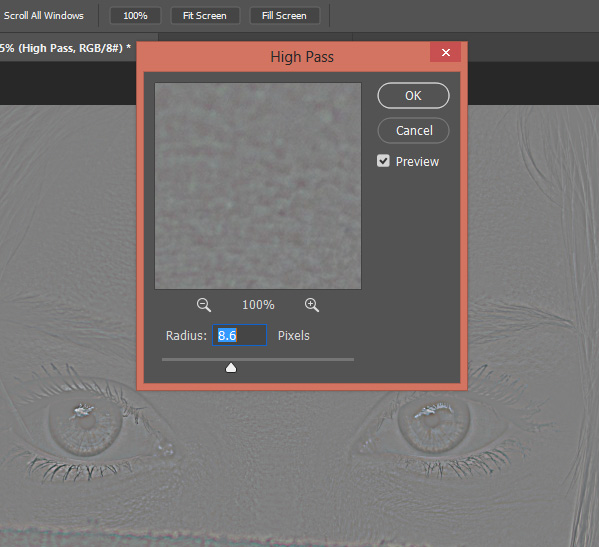
Now to go Filter > Other > High Pass and the High Pass filter will ask the Radius Value.
I put in 8.6px as I can see the eyes details starts to pop up.
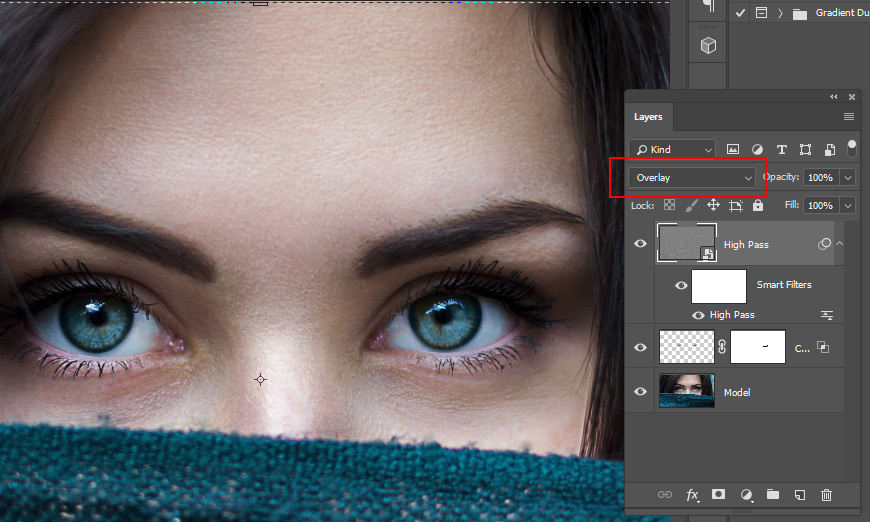
Change the blending mode of High Pass Layer to Overlay. You can notice the sharpness on the skin including eyes.
Step 7
I want to add sharpness only to eyes not the rest of the parts. I am going to hide the parts using a black layer mask.
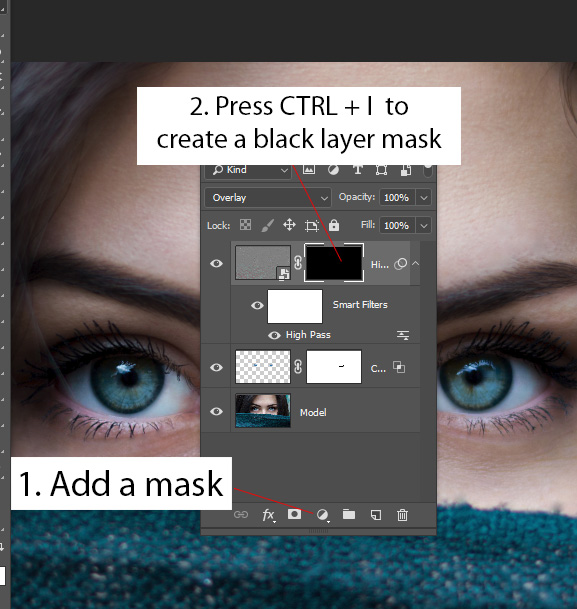
1. Add a mask by clicking on Add Layer Mask Icon that is located in the layer panel.
2. Now CTRL/CMD + I to inverse the layer or create a black layer.
Step 8
Now we’ll reveal the sharpening effect only on the eyes.
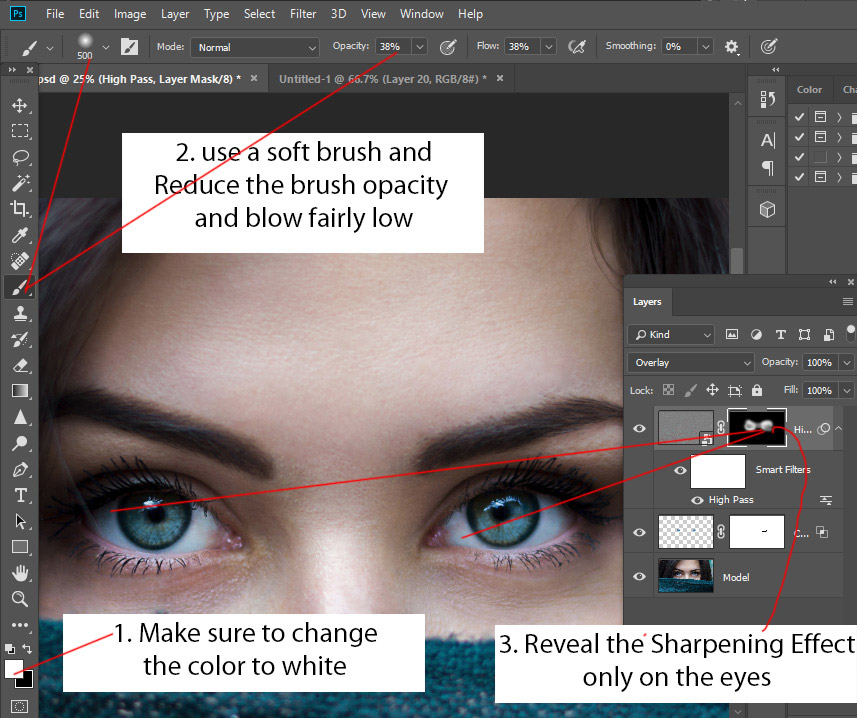
1. Change the foreground color to White using Foreground/Background Color Box.
2. Pick a soft round brush and reduce the opacity & flow to fairly low around 30%-40%.
3. Now brush on the eyes to reveal the effect and to sharpen the eyes. Make sure you’ve selected the Layer Mask as you paint on the eyes instead of a layer. You can see the White Borders around the layer mask when it is activated.
Step 9
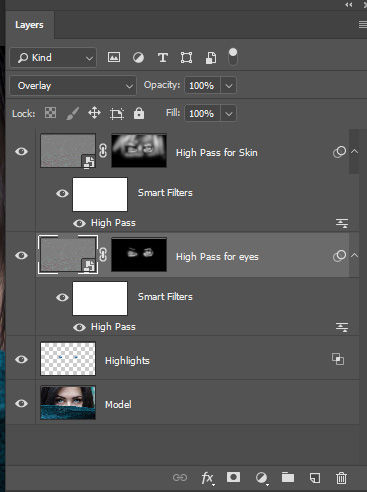
I added sharpness on the skin as well using the High Pass filter and the process is the same as we did sharpening on the eyes.
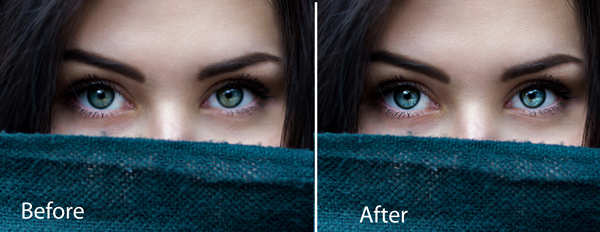
Here you can see before and the final effect:
Here you can see how the layer panel is arranged:
Thanks for following along! I hope you enjoyed this tutorial and see you next time till then keep Photoshopping!
Need Help With Photoshop or Looking for Professional Support?
Whether you're just getting started with Photoshop or need expert-level assistance, we're here to help! Contact us for personalized Photoshop tutorials, project support, or creative services.
Get in touch today to take your skills or projects to the next level.
CONTACT US NOW
