

Going after that soft vintage look in Photoshop? In this tutorial, you’ll learn how to create a matte effect in Photoshop. The matte effect gives your photos a gentle, muted, and timeless feel. This effect is inspired by analogue films and it depicts a soft washed out and muted look. This effect can be easily replicated in Photoshop using the adjustment layers and Camera Raw filter. Let’s get into it!
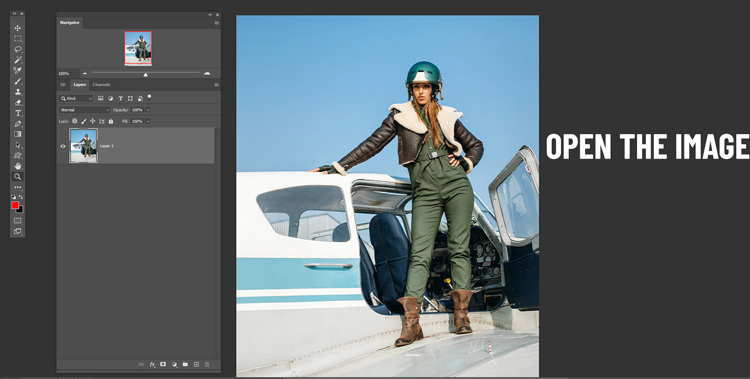
Step 1 – Open the Sample Image
It should go without saying that you have to choose the right image for any photo effect that you are trying to replicate. Without the right photo, it would be very hard to get the effect right. For matte effects, I would look at the images having high contrast generally those images that are a bit on the brighter side. Because, we gonna wash out the contrast, and if you choose a photo that doesn’t have enough contrast and on top of that, you decrease the contrast, it would definitely ruin the image.
Take a look at the image below, this is a perfect image with high contrast and brightness.
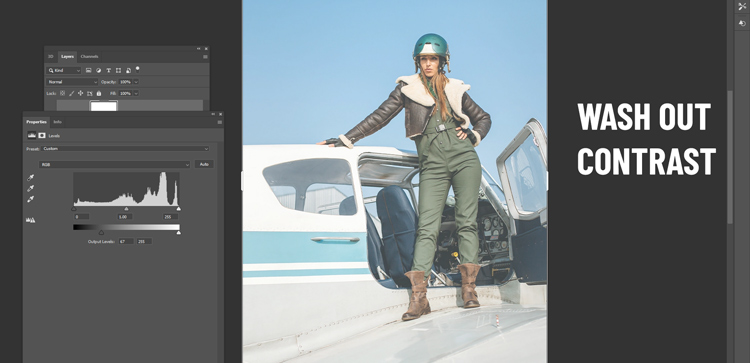
Step 2 – Wash Out Contrast
To get a soft feel, you need to lift the shadows of the image. You can do that by washing the contrast using adjustment layers.
Go to Layer > New Adjustment Layer > Levels and move the black slider to the right until you start seeing a faded effect starts to appear in the photo. Don’t go all the way to the right, just stay inside the grey area where you see the shadows are starting to fade away as you don’t want to lose all the details in shadows.
If you are confused with this step, it simple words it means we are giving a soft look to the image.
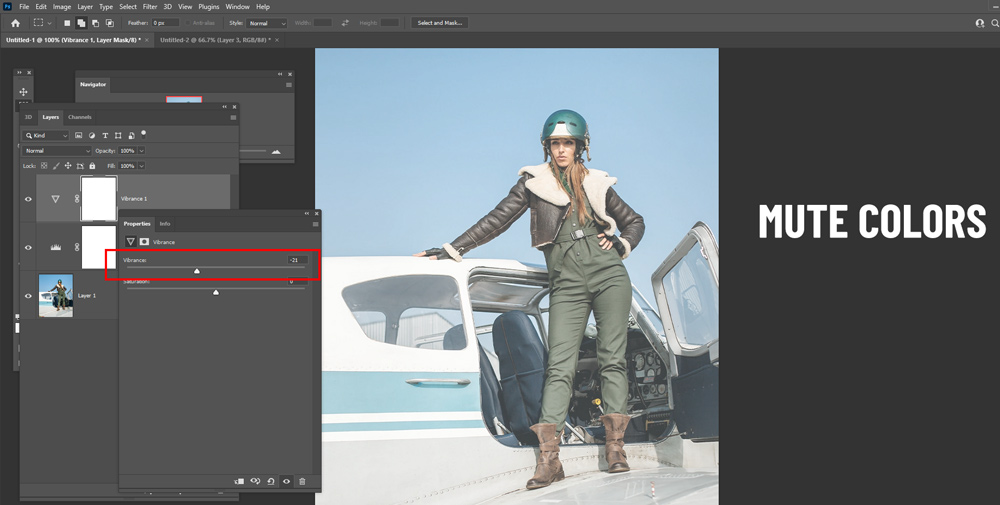
Step 3 – Mute Colors
The matte effect features muted color tones and it is obvious with a soft look. In vintage photos, the colors seem to be muted a bit, I’d say a muted color palette goes well with the vintage effect and that’s why it is necessary to mute colors.
To remove the colors a bit, go to Layer > New Adjustment Layer > Vibrance and remove the colors by decreasing the Vibrance value to -21.
I am choosing Vibrance instead of saturation because I don’t want to mute all the colors in one go instead, I’d prefer subtle muted color tones in my photo.
Step 4 – Add Color Overlay
The vintage effect goes well with warm tones added on top of the image. It can be achieved by adding a color overlay using the adjustment layer.
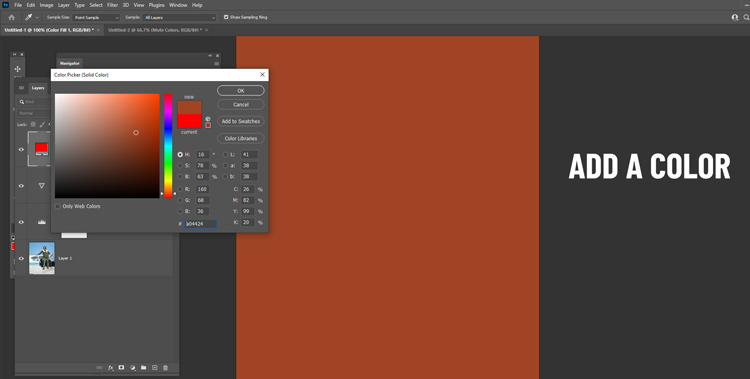
Go to Layer > New Adjustment Layer > Solid Color and I chose the color #d83d2d. You can choose the color that you’d like to go with.
Change the blending mode to Screen & adjust the opacity to 46%.
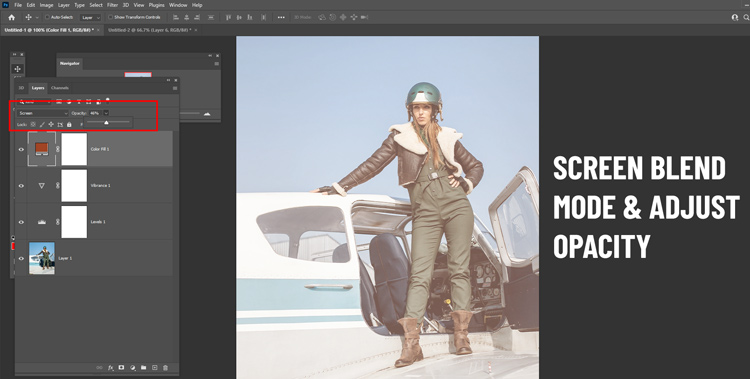
You can play around with the color using the Solid Adjustment layer. Just double-click on the layer and change the color such as warm amber tones would be a great choise. As you can see, we have a color overlay applied to the image.
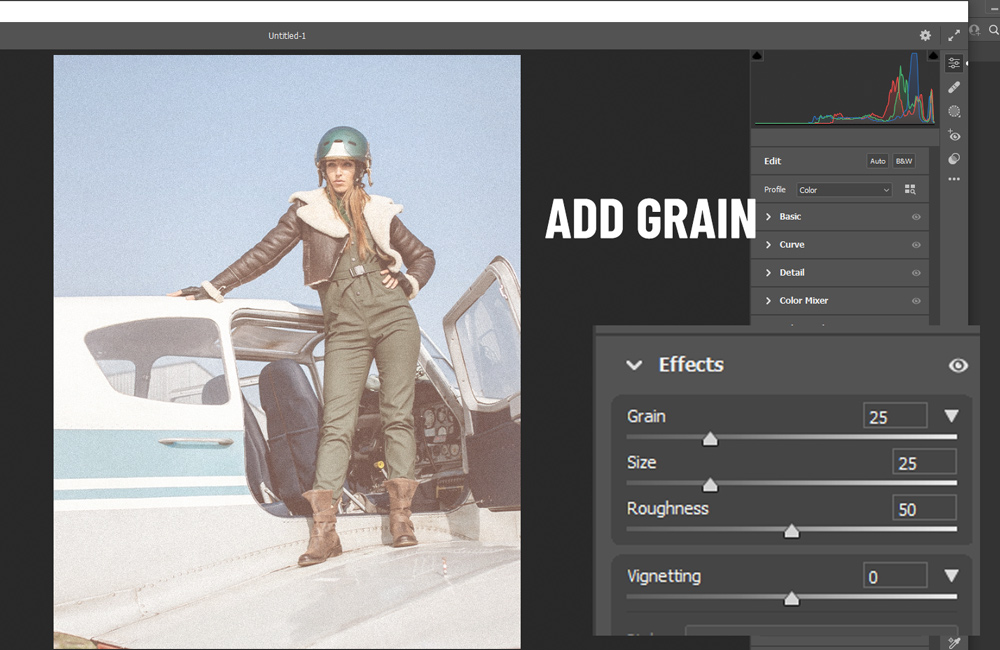
Step 5 – Add Grain
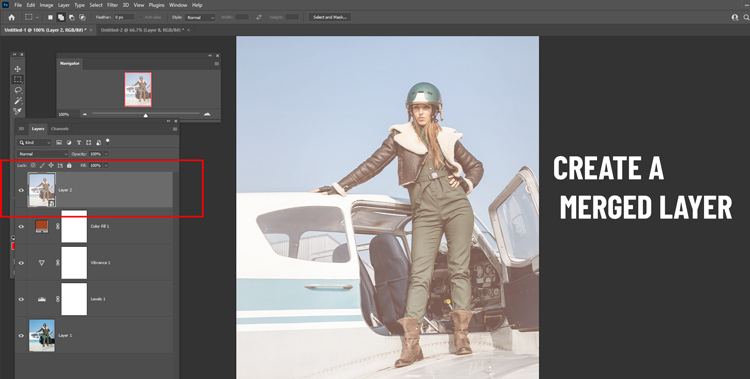
This step is optional, I used the Camera Raw Filter to add a bit of grain to the image. First, create a merged layer of all layers by pressing CTRL + ALT + SHIFT + E.
Go to Filter > Camera Raw Filter:
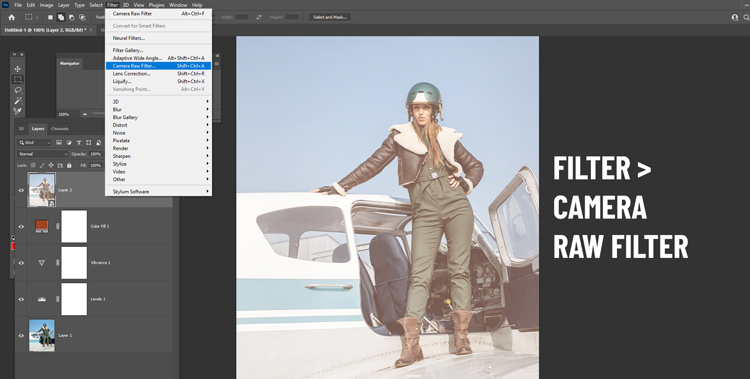
In the Effect panel, increase the grain value to add grain to the image. You can see we have grain added to the image giving an artistic look to the image.
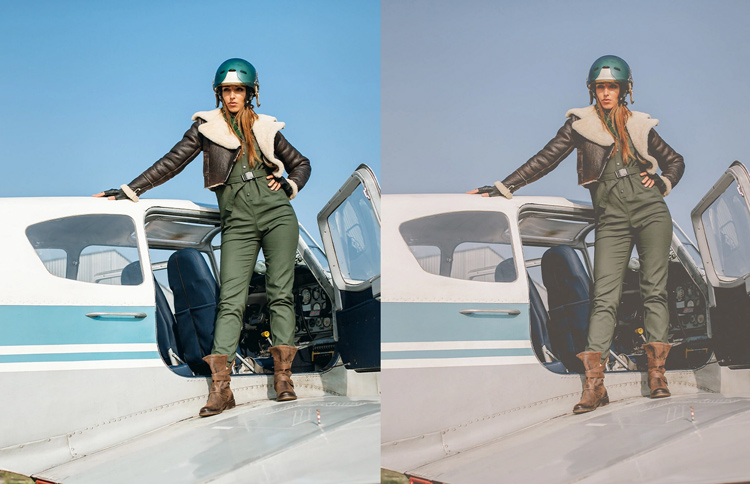
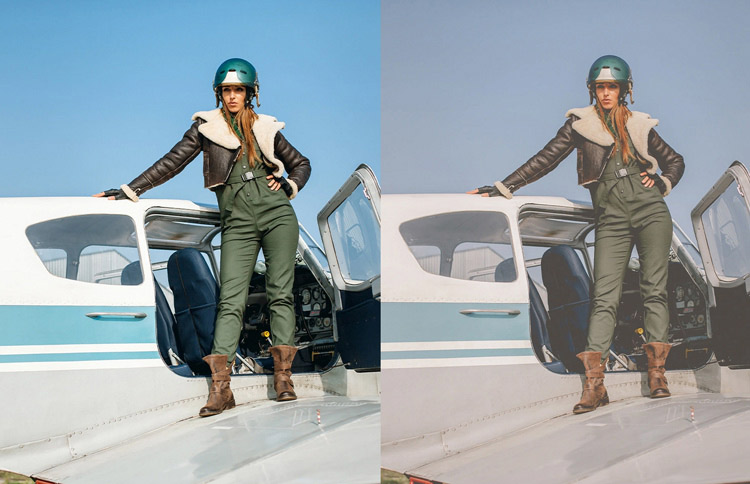
With the help of little tweaks, I managed to end up with the image below. You can compare the before and after results.
Thanks for following the tutorial and I hope you enjoyed it. Let me know if you have questions in the comments below.
Need Help With Photoshop or Looking for Professional Support?
Whether you're just getting started with Photoshop or need expert-level assistance, we're here to help! Contact us for personalized Photoshop tutorials, project support, or creative services.
Get in touch today to take your skills or projects to the next level.
CONTACT US NOW📘 Want to Master Photoshop Faster?
🎁 Get Your FREE PDF E-Book "Top 10 Photoshop Tricks Every Designer Must Know" Now – Packed with expert tips, shortcuts, and techniques to boost your creativity & workflow.
👉 Download Your FREE PDF E-Book NOW!

