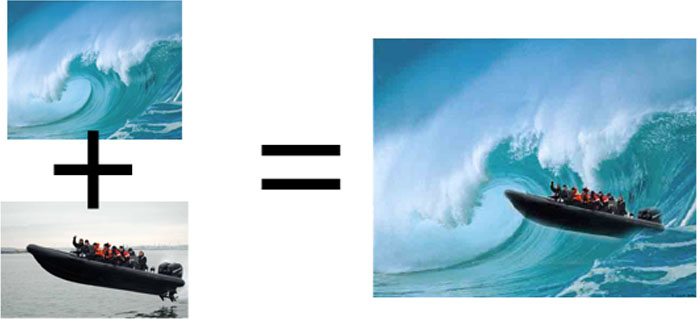
One of the main highlights of Photoshop is the ability to blend photos and images together, using a variety of tools, such as Layer Masks. In this tutorial we will be learning how to blend two photos together with Photoshop.
Preparation:
Obviously the very first thing you need to prepare are your choice of images or photographs. Depending on what kind of image you want to portray, usually you will need a picture to be the ‘background’ and the rest to blend into the background.
This tutorial was done on Adobe Photoshop CS5. Other versions may vary slightly.
Step 1:
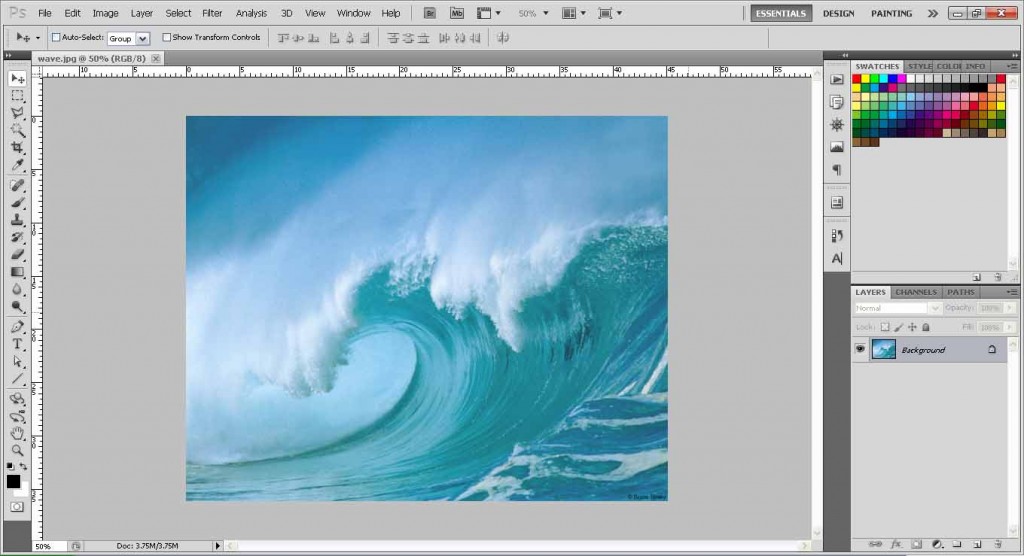
Open your background image by going to Menu Bar: File > Open > select image, or simply drag the image into the Photoshop workspace.
Step 2:
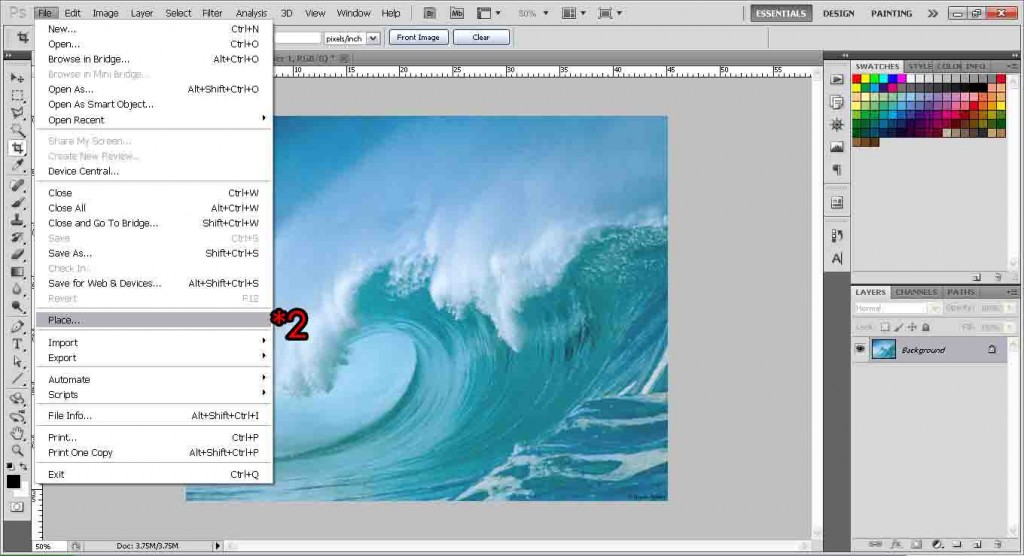
Let’s add the image we want to blend in. Go to Menu Bar: File > Place > select image.
Step 3:
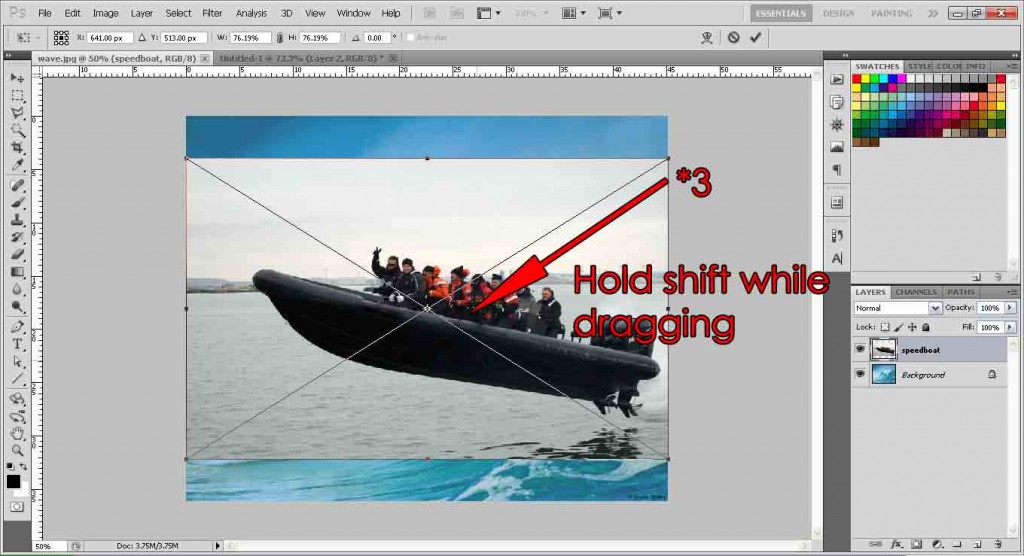
Your image should appear, in a transform state. Here, you will transform your image according to your preference, eg if you want it bigger, scale up, or smaller then scale down, or you can rotate it to match the background, etc. Right now we’re going to make the boat slightly smaller to make the waves look really big! Grab any one of the corners, and hold shift while dragging down (to keep the scaling in proportion). Press Enter when you’re done transforming it.
Step 4:
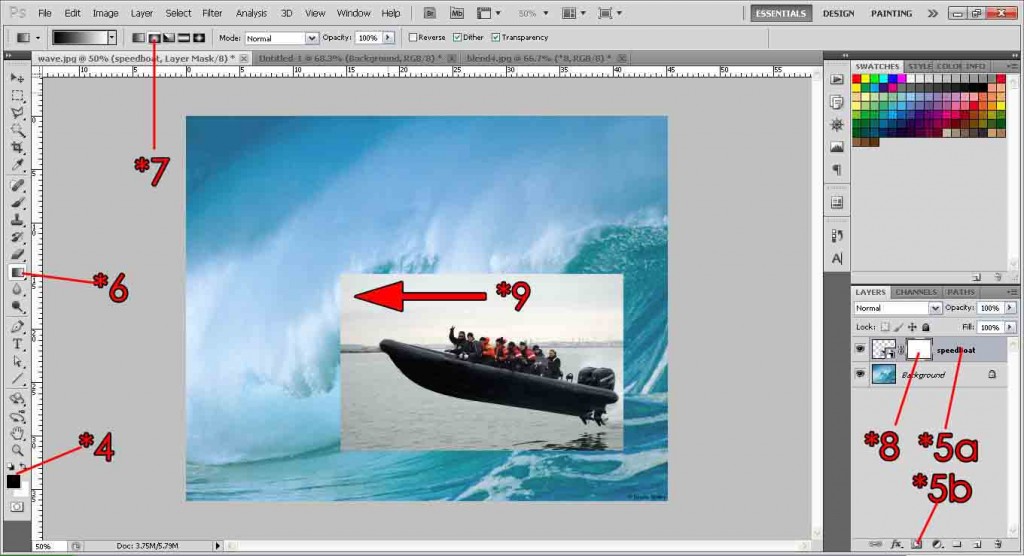
Make sure the Foreground Color is black and Background Color is white. If it is not, simply click once on the canvas (the area that you’re working on. Which is the picture), and press D. This should reset them to their respective black and white.
Step 5a:
Make sure the second image layer we placed is selected.
Step 5b:
Click the Layer Mask Button.
Step 6:
Click the Gradient Tool. If its the paint bucket tool, hold for more tools and select gradient tool.
Step 7:
Select gradient style shown in the example above.
Step 8:
Make sure the layer mask is selected as we want to put the gradient on it.
Step 9:
Click and drag on the image to apply the gradient. It doesn’t matter how you drag or how it looks now because we’ll be editing that in a second. Just apply the gradient once and let’s move on to the next step.
Step 10:
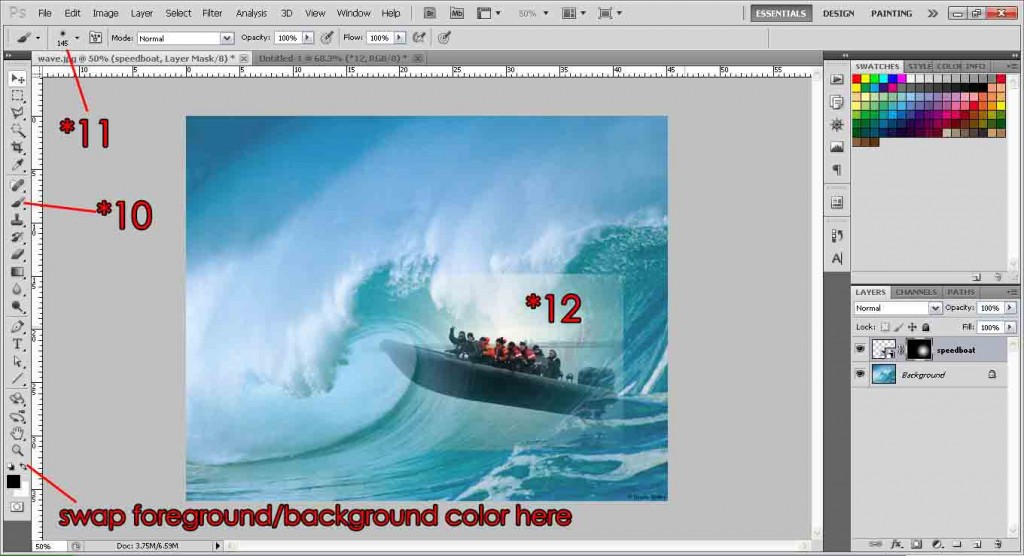
Now select the Brush tool. Again, hold down for more tools if it isn’t the brush tool.
Step 11:
Select a large soft-edge brush from the brush drop-down menu.
Step 12:
Okay here’s where we edit the image blending. Using the brush tool, paint over the parts of image where you want to edit. What color your foreground and background is will determine what happens.
Foreground Color Black = Reveals more of the background, and ‘erases the front image’.
Foreground Color White = Reveals more of the front image and ‘erases the background’.
So right now I will be using Foreground Black to paint around the boat to remove everything except the boat.
Then I will swap to Foreground White, and paint inside the boat and anywhere else I want to show. Adjust your brush size accordingly, you might need to decrease the size to get into the smaller harder-to-reach places. If it is not working make sure the layer mask is selected, not the image. See the example below. Make sure the layer mask (the right box in the speedboat layer) is selected. The reason is that you’re painting over the gradient layer mask. If you did not select the layer mask, you find that you will be painting black and white on your pictures itself!
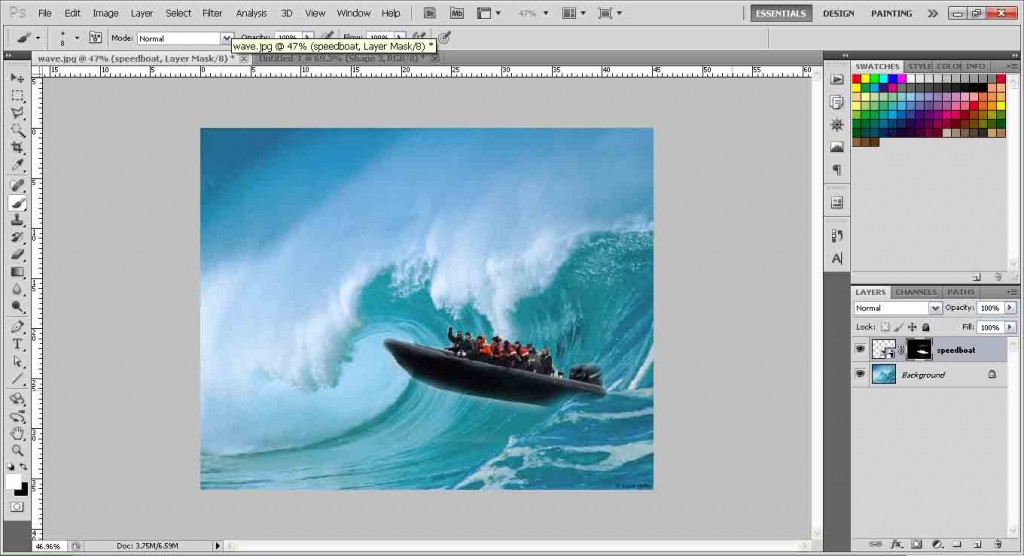
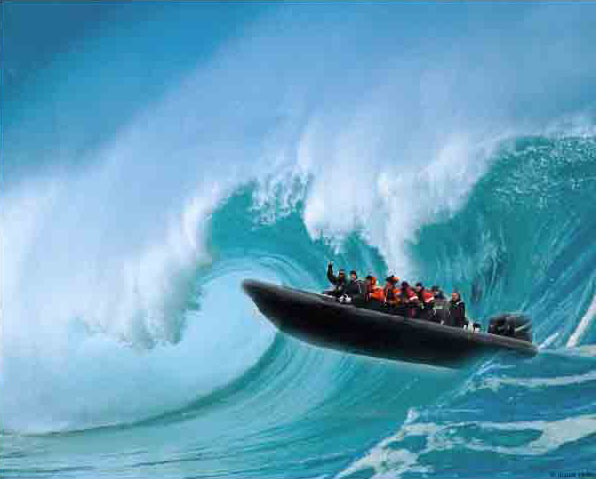
Once you’re done, you should get a nice blended image like this!
Need Help With Photoshop or Looking for Professional Support?
Whether you're just getting started with Photoshop or need expert-level assistance, we're here to help! Contact us for personalized Photoshop tutorials, project support, or creative services.
Get in touch today to take your skills or projects to the next level.
CONTACT US NOW📘 Want to Master Photoshop Faster?
🎁 Get Your FREE PDF E-Book "Top 10 Photoshop Tricks Every Designer Must Know" Now – Packed with expert tips, shortcuts, and techniques to boost your creativity & workflow.
👉 Download Your FREE PDF E-Book NOW!


