

In this tutorial, I’ll show you how to create a bokeh effect in Photoshop. We’ll use a city photo for creating bokeh effect and then we’ll use rainy texture to add rain effect. At the end, we’ll use adjustment layers to finish up the final effect. Read on and enjoy!
Tutorial Resources
Choosing Stock
Step 1
Open up the city image in Photoshop by selecting File > Open and open it up.
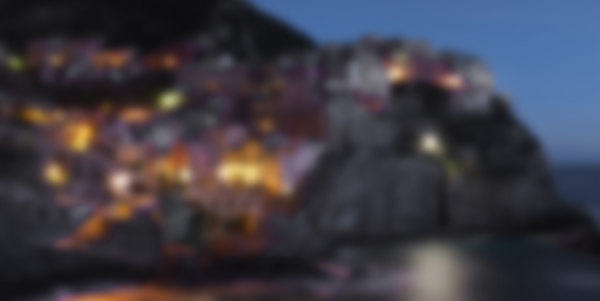
I’m using city image for this tutorial but you can choose your own image and it can be a city, street, village and kind of window view with a lot of lights. There is one thing to remember only choose those photos that have lots of lights and it should have night scene as well. Here is the image of city or village which I’m using:
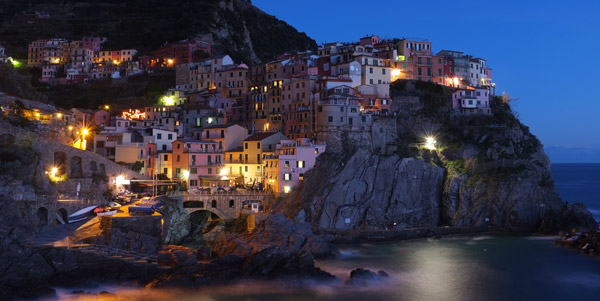
You can notice that city have perfect lights and it is best fit for bokeh effect.
Create the Bokeh Effect
Step 2
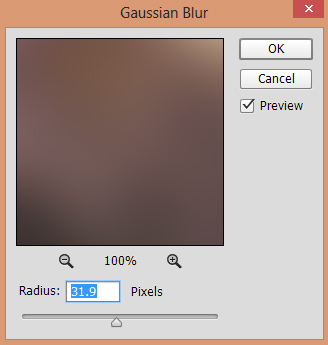
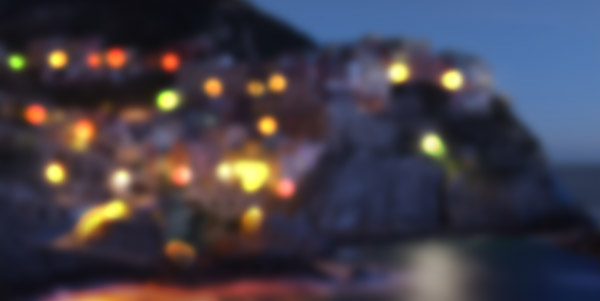
Convert the city layer into Smart Objects. Go to Filter > Blur > Gaussian Blur and set the Radius to 31.9 pixels. As we already know in bokeh effect only the colorful lights are more visible and background is barely visible. The Gaussian Blur filter will help us to achieve that and feel free to experiment with the blur but don’t overdo it.
Results with bokeh effect:

Step 3
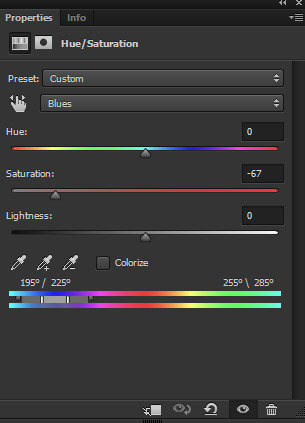
Now we are going to enhance the effect using adjustment layers, by adding more lights and using rain texture. Go to Layer > New Adjustment Layer > Hue/Saturation and choose Blues. Now reduce the blue color by bringing down the Saturation to -67.
The aim here is to reduce the blue color from the sky.
Results:
Step 4
Due to Hue/Saturation we have reduced saturation on the city as well and I don’t want that. To fix this, I masked the effect of Hue/Saturation on the city and keep it visible only on the sky. So select the layer mask of Hue/Saturation and using soft, basic black brush mask the effect.
Results :

Step 5
On a new layer, I painted the light on the city using dark blue, yellow, green and red colors. Don’t forget to use soft round brush for painting lights and name this layer ‘lights’.

Set the blending mode of the lights layer to Color Dodge 100%. Here are the results :
Step 6
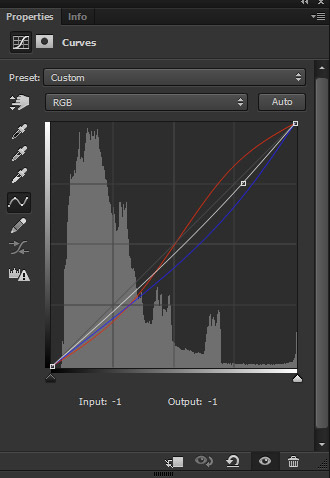
I used a Curves adjustment for adding basic coloring to photo. Here are the settings for Red and Blue channel:
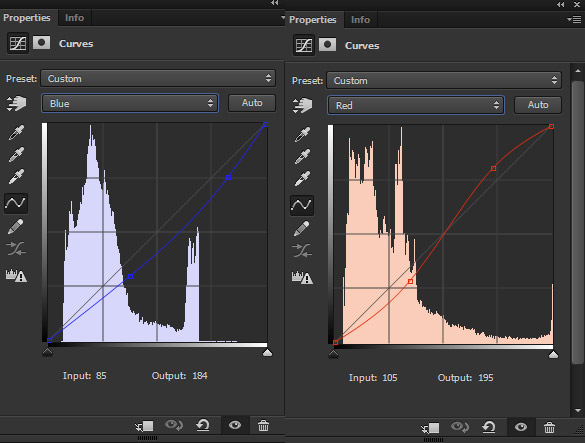
Using RGB channel I reduced the brightness little bit.
Results:

Add the Rain Textures
Step 7
Place the rain 1 texture to main document by selecting File > Place Embedded. Don’t forget to use Transform Tool (CTRL + T) to make the rain texture fit nicely with the document.
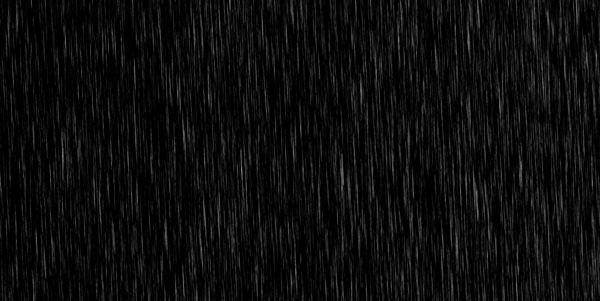
Set the blending mode of rain 1 texture to Screen and lower the opacity to 41%.

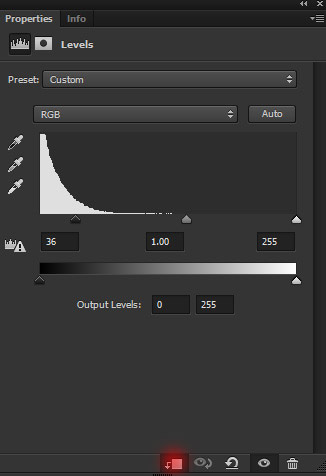
Step 8
Make a Levels adjustment layer and set it as Clipping Mask (press the red icon). Now drag the black slider to right to increase the contrast of the rain 1 texture or to control its visibility.
Results:

Step 9
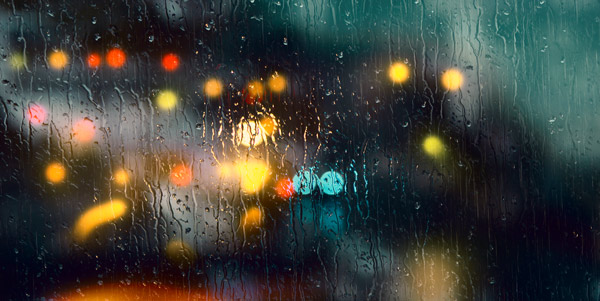
Now we’ll create a rainy window effect using rain 2 texture.
Place the rain 2 texture to the main document and create a rainy window effect.
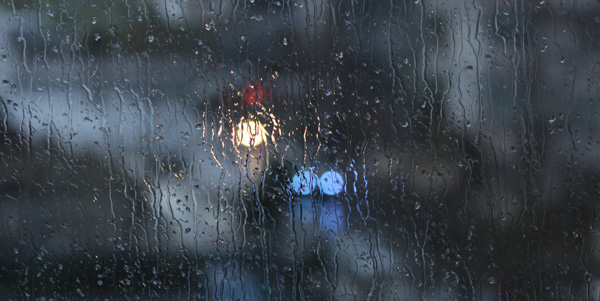
Set the blending mode to Screen 100%.
Final Adjustments
Step 11
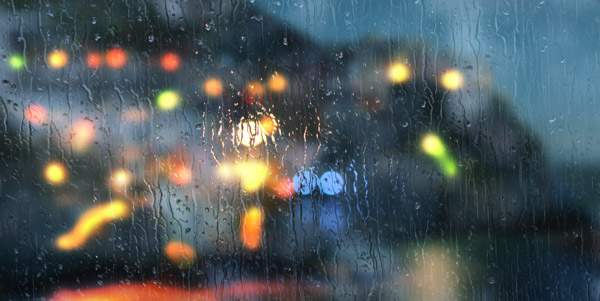
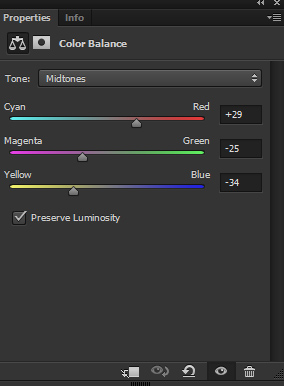
Make a Color Balance adjustment layer and alter the Midtones values. I aim to add yellow and red colors to photo but feel free to add the colors according your way. Just alter the values of midtones or maybe each tones to get the results.
Results:
Step 12
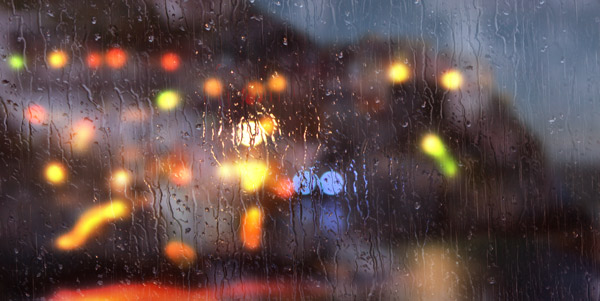
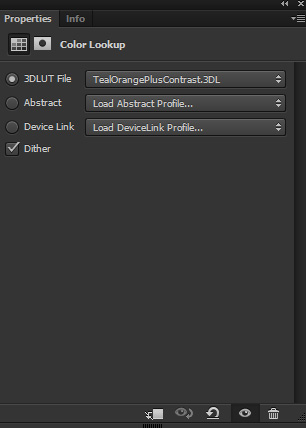
Finally, I used the Color Lookup adjustment with Teel Orange Plus Contrast filter. Feel free to experiment with different color lookup files.
Here are the final bokeh effect:

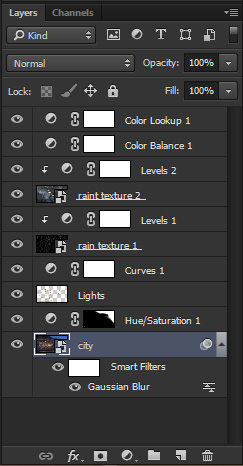
Here you can see how the layer panel is arranged:
Conclusion
Thanks for following the tutorial and I hope you enjoyed the steps. If you really like the tutorial then do share it with the world. If need any help then do let me know through comments. Have a great day!
Need Help With Photoshop or Looking for Professional Support?
Whether you're just getting started with Photoshop or need expert-level assistance, we're here to help! Contact us for personalized Photoshop tutorials, project support, or creative services.
Get in touch today to take your skills or projects to the next level.
CONTACT US NOW📘 Want to Master Photoshop Faster?
🎁 Get Your FREE PDF E-Book "Top 10 Photoshop Tricks Every Designer Must Know" Now – Packed with expert tips, shortcuts, and techniques to boost your creativity & workflow.
👉 Download Your FREE PDF E-Book NOW!

