

In this Photoshop tutorial, I’ll show you how to create a Lomography photo effect in Photoshop. Lomo images often have unusual blue, green and yellow tints, we can easily replicate this in Photoshop. We’ll begin by increase the brightness of the image and then we’ll use the Gradient Map to replicate the Lomo photo effect in Photoshop. At the end of the tutorial, you’ll have two versions of the Lomo photo effect.
Tutorial Resources
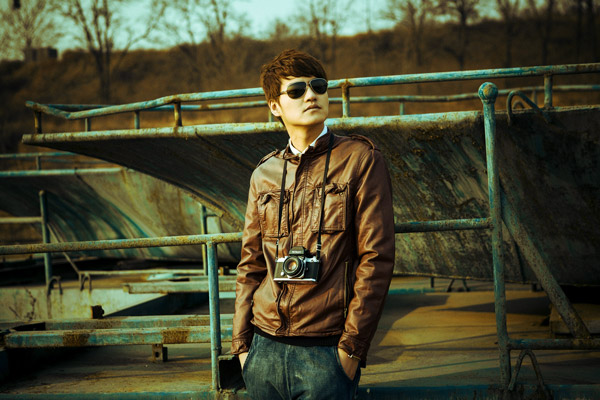
Alternative Version
With high yellow tints:

Step 1
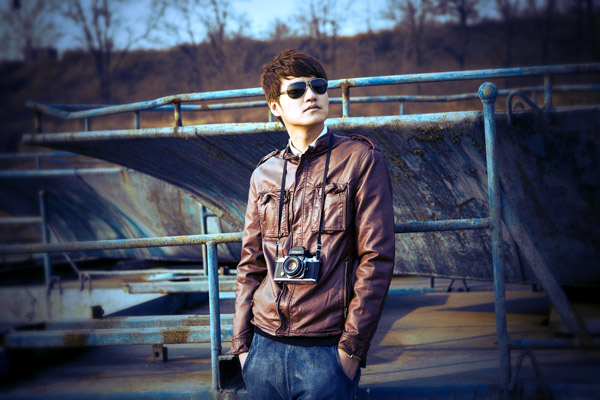
Open up the guy image in Photoshop by selecting File > Open and then select the guy image to open it up.
Here is the image opened in Photoshop!
Step 2
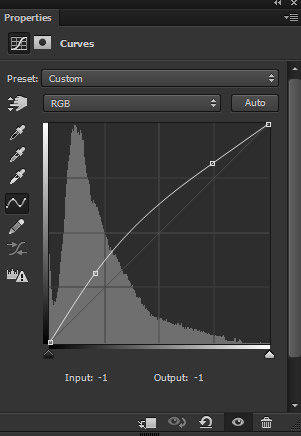
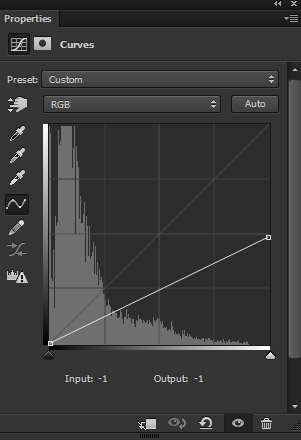
Make a Curves adjustment layer by clicking on the third icon at the bottom of layer panel or go to Layer > New Adjustment Layer > Curves. Now brighten up the image by making positive bend using two anchor points. Here are the values for Curves:
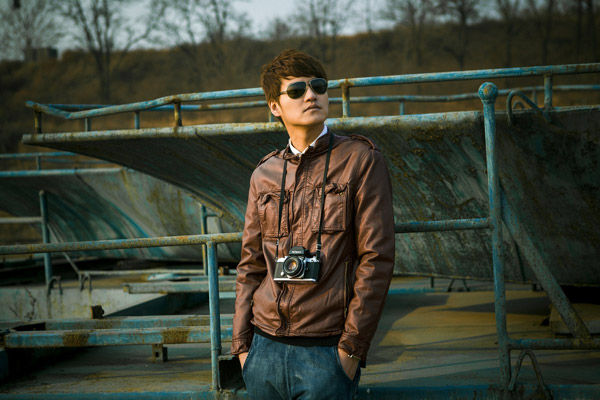
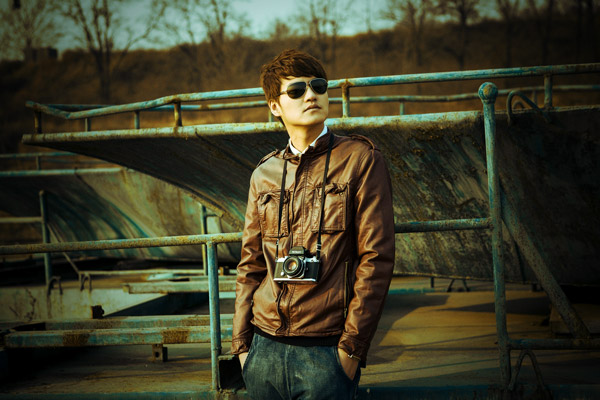
Results with more brightness:
Step 3
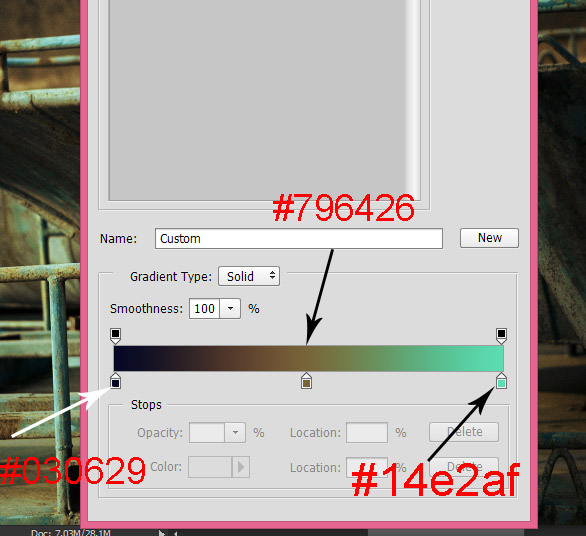
Make a Gradient Map adjustment layer, then alter the gradient flow from a dark blue (#030629) to a mid yellow (#796426) to vibrant green (#1432af). These colors will be applied to the shadows, midtones and highlights part of the image. This Gradient Map adjustment layer is for achieving second alternative version with yellow tints.
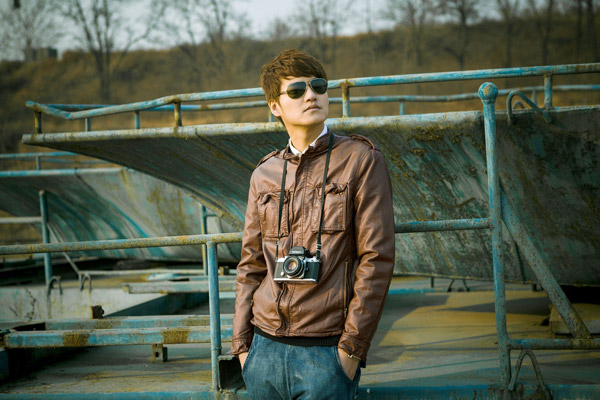
Set the blending mode of the Gradient Map to Overlay and reduce the opacity to 70%. Here are the results:
Step 4
Lomo has often had vignette and blur edges. We are going to achieve a vignette in this step. Add a Curves adjustment layer and reduce the brightness using the following settings.
On the layer mask of Curves, I masked the effect in the middle and leave the dark effect at the corners. Use a soft basic, black brush for masking the effect. Here are the results after masking the effect:
Step 5
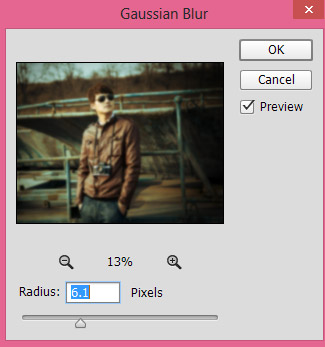
Press CTRL + ALT + SHIFT + E to merge all layers into a single layer. Convert the newly merged layer into Smart Objects. Go to Filter > Blur > Gaussian Blur, use 6.1 pixels radius value to apply blur to the image.
Select the Smart Filter layer mask and mask the effect in the middle. Keep the blur effect at the corners.
Here are the results:

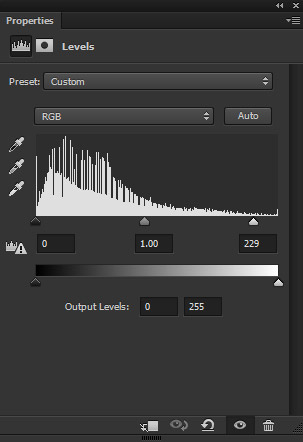
Step 6
In this step we’ll achieve the effect as shown in this post feature image. Make a Levels adjustment layer above all layers. Set the RGB settings as shown blue.
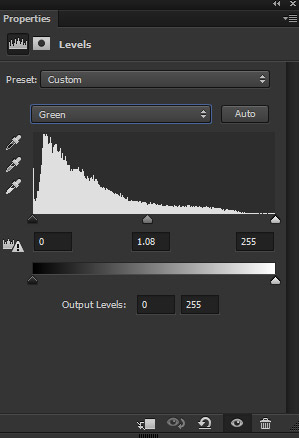
Set the Green little bit as shown below:
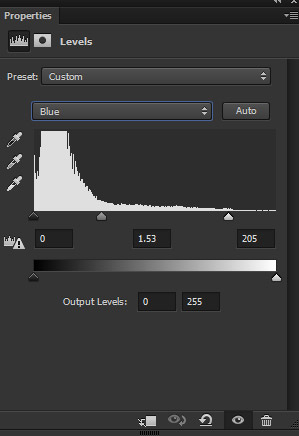
Set the Blue as shown below to get the final
effect:
Final results:

Layer panel arranged:

Conclusion
Thanks for following the tutorial and hope you like the tips for creating a Lomography Photo effect in Photoshop. Do let me know if need any help. Have a great Photoshopping day!!
Need Help With Photoshop or Looking for Professional Support?
Whether you're just getting started with Photoshop or need expert-level assistance, we're here to help! Contact us for personalized Photoshop tutorials, project support, or creative services.
Get in touch today to take your skills or projects to the next level.
CONTACT US NOW📘 Want to Master Photoshop Faster?
🎁 Get Your FREE PDF E-Book "Top 10 Photoshop Tricks Every Designer Must Know" Now – Packed with expert tips, shortcuts, and techniques to boost your creativity & workflow.
👉 Download Your FREE PDF E-Book NOW!

