

In this tutorial, I’ll show you how to fix exposure in Photoshop. We’ll use Shadow/Highlights filter to recover details from shadows that are too dark and from highlights that are too bright. You’ll go through 2 examples of underexposed and overexposed images. I’ll show you how to fix them. So let’s get started!
Step 1 – Convert the Image into Smart Object
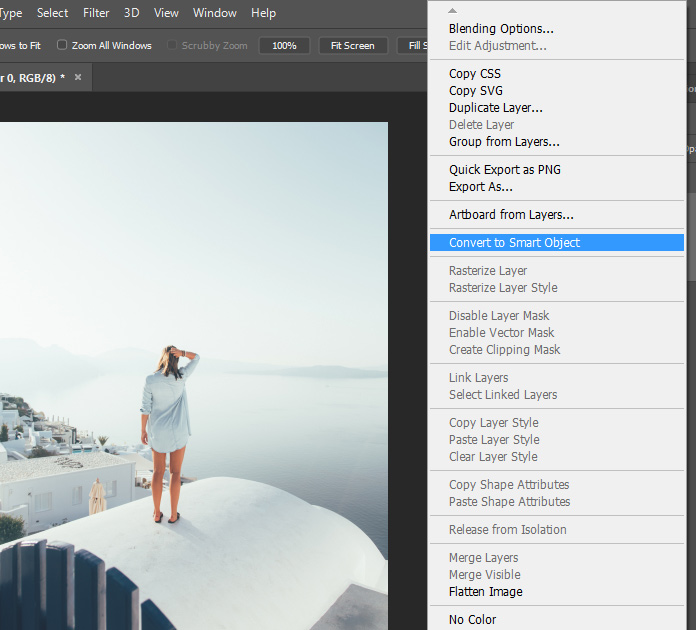
Shadow/Highlights can destroy your original image and we don’t want that. For that, you need to convert your image into a Smart Object.
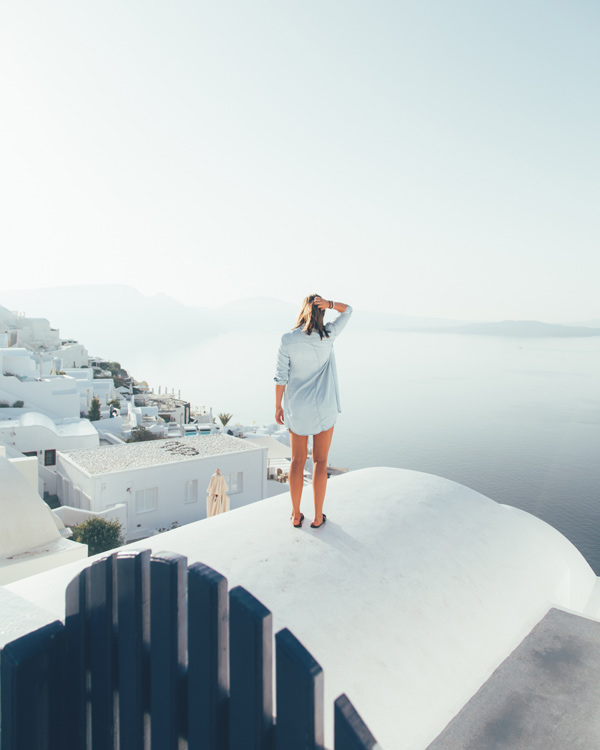
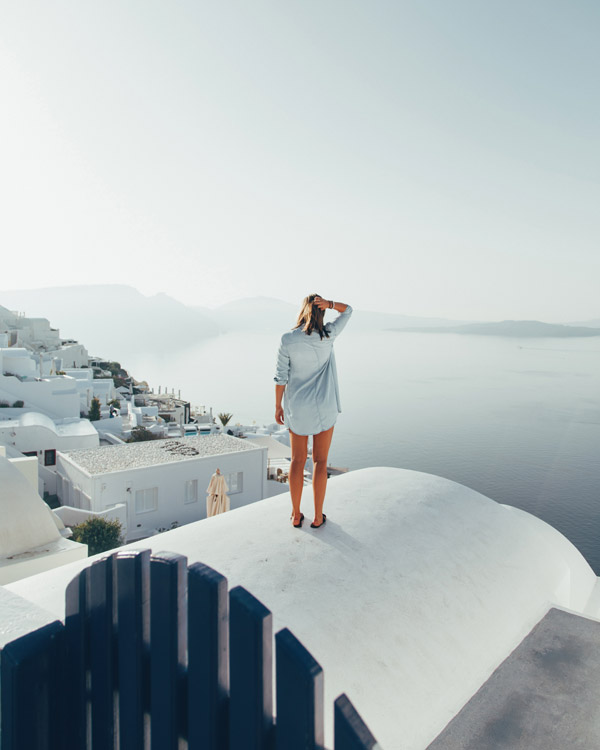
I am using this image which you download it here.
You can see that the image is overexposed meaning highlights are too bright and lacking details.
To convert the image into a Smart Object, right-click on the image and then choose Convert to Smart Object.
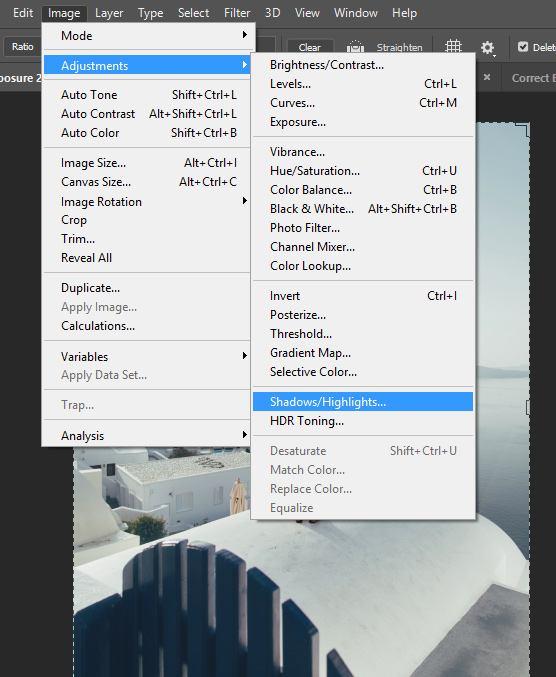
Step 2 – Use Shadow/Highlights Filter
It’s a filter but it is in the adjustments. To access this filter, go to Image > Adjustment > Shadow/Highlights.
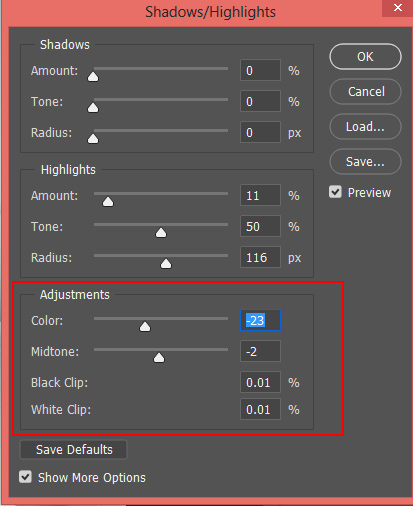
Once you clicked on it, Shadow/Highlights dialog box will appear. You can see that I only used the Highlights Section because we are working on highlights.
I used the Highlights Section you can see the settings below.
Amount Slider is set to 11%. I don’t want to use a fairly large amount value as I know it is enough for my image.
Tone Slider is set to 50% to affect only midtones. You can either go for higher values since we are targeting highlights but it works for me.
Radius is set to 116px. Higher value is recommended just notice the image when you use a higher value to see if it is giving your a smooth blending results.

Amount: This slider darken and brighten the highlights & shadows of the image. If you use Shadow Section, it will brighten the shadows of the image which we don’t want. If you use Highlight Section it will darken the highlights which we want.
Tone: You can take tone as a range for the amount to be applied from shadows to highlights. Low value limits the amount effect to darken region whereas high values limit the amount effect to brighter region.
Radius: It controls how the areas affected by Highlight Amount/Shadow Amount slider will blend with the surrounding. Generally, Higher values always preferable as it creates smoother and natural-looking transition.
Results:
If you see the results you’ll notice there is now much more detail in the highlights.

Step 3 – Fixing Color and Contrast
There are two more sliders that can come handy if you want to fix the color and contrast of the image.
Color: This slider can desaturate/saturate image colors as you can see I used it to remove red color from model skin and hair. If your image color looks too saturated or having fade color after darkening the highlights you can use this slider to either add or fade color in your image.
Midtones: This slider can fix contrast between shadows and highlights. I didn’t use it as I don’t have to but you can use it if your image contrast looks flat.
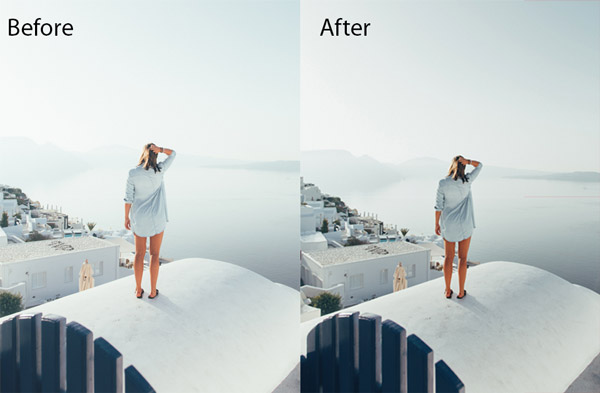
See the results:
Here you can compare before and after results:
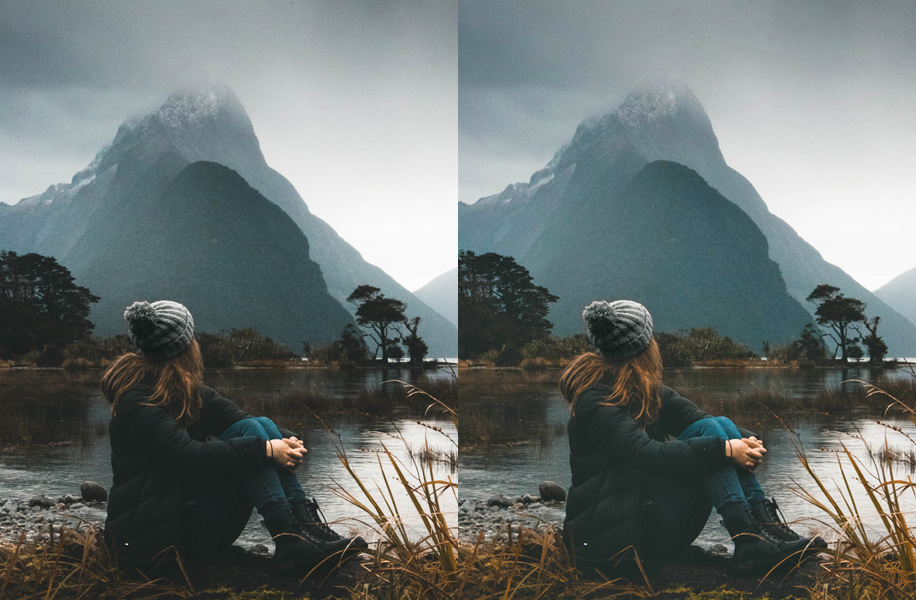
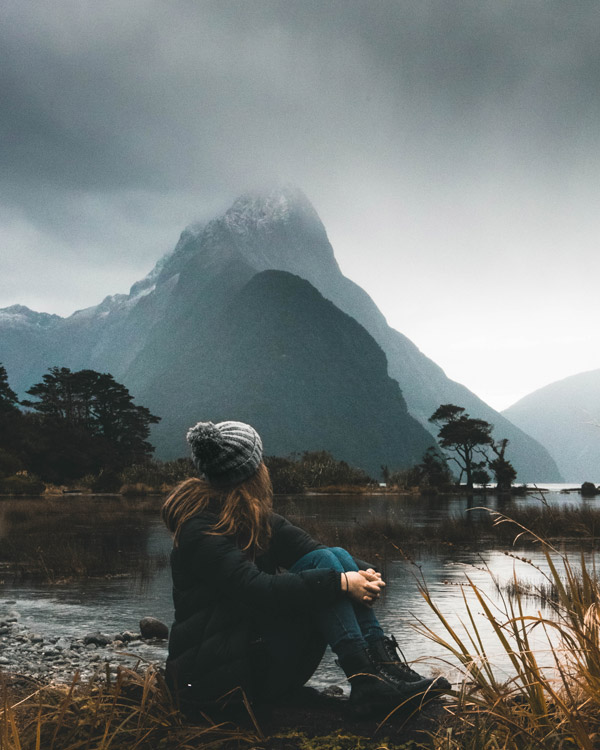
Step 4 – Fixing Underexposed Image
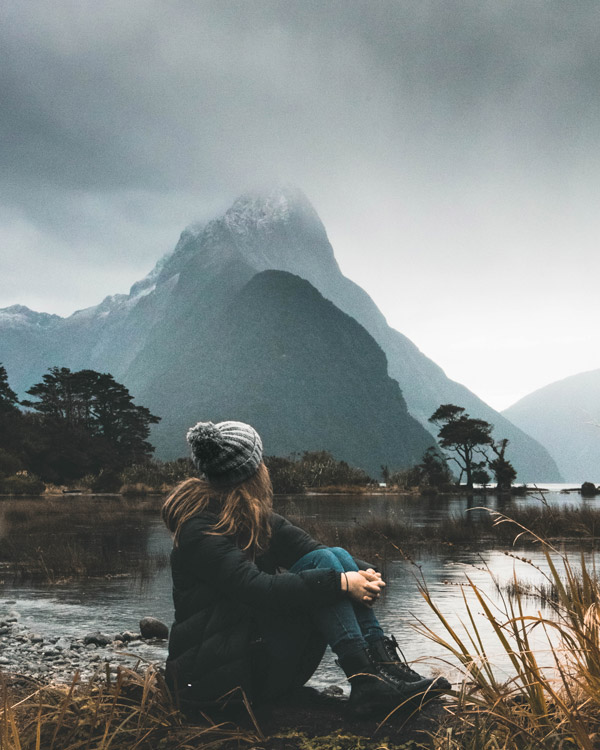
Here is another image that is underexposed and you can see the shadow region is lacking details. I want to brighten up the shadows.
Step 5 – Using Shadows Sliders
Now we’ll do the opposite to recover details on Shadows. Go to Image > Adjustment > Shadows & Highlights.
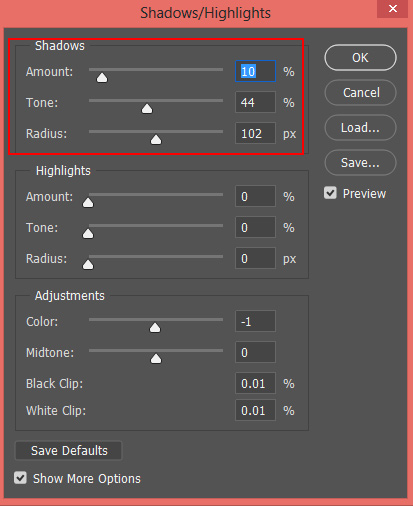
I used the same value for Amount Slider but I reduced to Tone Range 40% to limit the brightening effect only to the shadows so we can brighten them up.
Radius value remains the same as well.
Results below:
Step 6 – Add Color & Contrast
In the above example where we were fixing overexposed image, we didn’t have to use Midtone slider as the contrast was ok. But for this image, I have used it to reduce contrast to add details to shadows as well as the color slider to add saturation to colors.
See the settings below:

Results:

Step 7: Masking the Effect
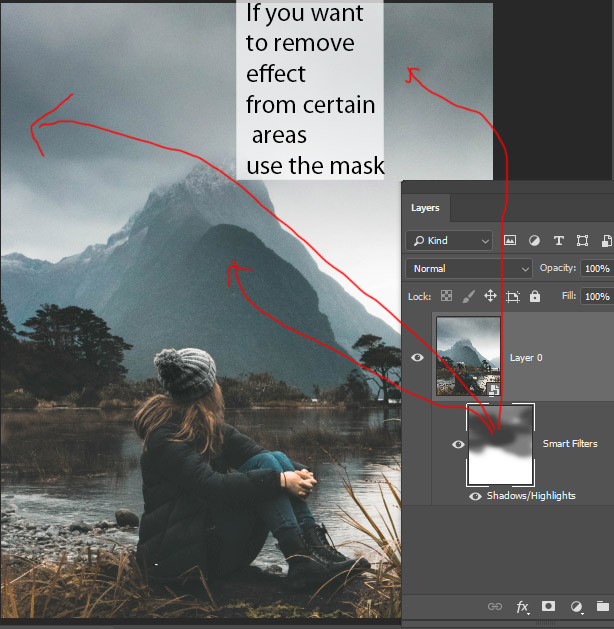
So, guys, this is not possible to achieve perfect and correct exposure in the photo. Even though we used the Tone slider to limit the effect to darken or brighten region but it will affect other areas of the image to some degree. For example, we applied the effect only to the shadows as we want to pop more details in there but as you can see to some degree highlights are also affected.
To fix this, you can use the layer mask of the filter. Just use a soft black brush and remove the effect from the region where you don’t want such as I removed it from the sky and from the mountain.
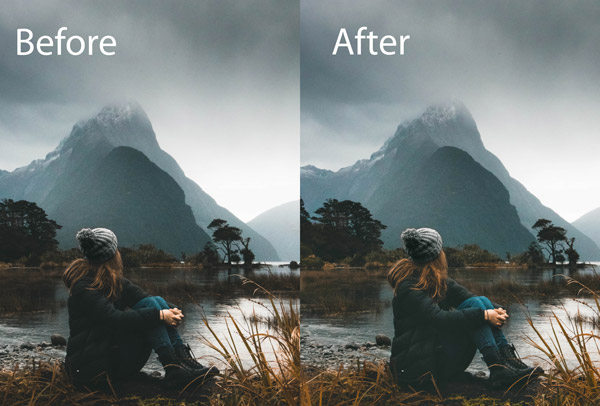
Here you can see before and after results:
I hope you enjoyed the tutorial and learned about fixing exposure using Photoshop!
Need Help With Photoshop or Looking for Professional Support?
Whether you're just getting started with Photoshop or need expert-level assistance, we're here to help! Contact us for personalized Photoshop tutorials, project support, or creative services.
Get in touch today to take your skills or projects to the next level.
CONTACT US NOW📘 Want to Master Photoshop Faster?
🎁 Get Your FREE PDF E-Book "Top 10 Photoshop Tricks Every Designer Must Know" Now – Packed with expert tips, shortcuts, and techniques to boost your creativity & workflow.
👉 Download Your FREE PDF E-Book NOW!

