

In this tutorial, you will learn how to add vintage effects to your photo. You’ll learn how to apply vintage coloring, realistic noise & textures, a subtle light effect that will give your photos a classic look. From landscapes to portraits you can apply this effect on almost every image so let’s get into it!
Step 1 – Open An Image
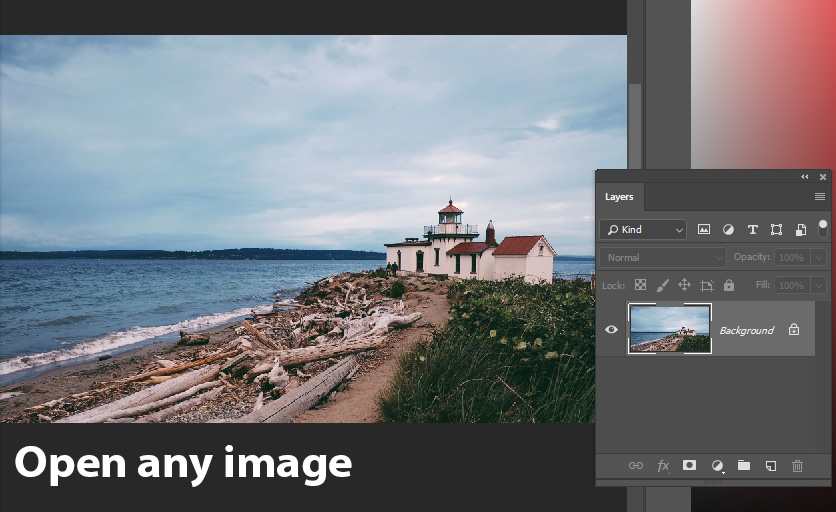
Let’s open an image in Photoshop by going to File > Open and you can use any of images here. If you want to follow along with the tutorial you can download the image here which I am using for this tutorial.
Here you can see I’ve opened the image:
Step 2 – Wash Out Details
It’s obvious that in vintage photos there are almost no details. We need to destroy details of the photo but I also agree you don’t want to do this on your other images.
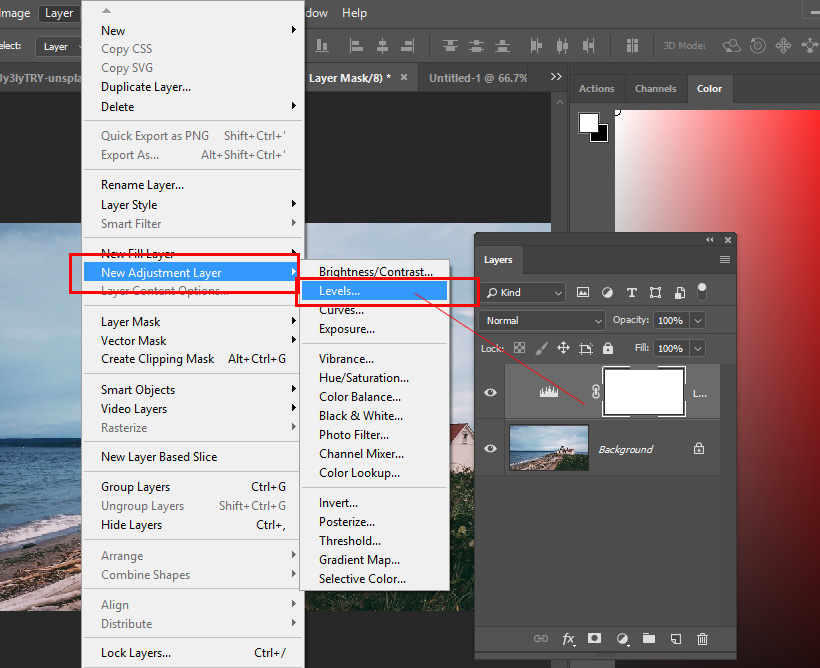
Create a Layer > New Adjustment Layers > Levels and create a Levels Adjustment Layer.
See the settings below to destroy the details of the image. I destroyed shadow and highlights details by using black and white sliders. You can do the same using the settings below.
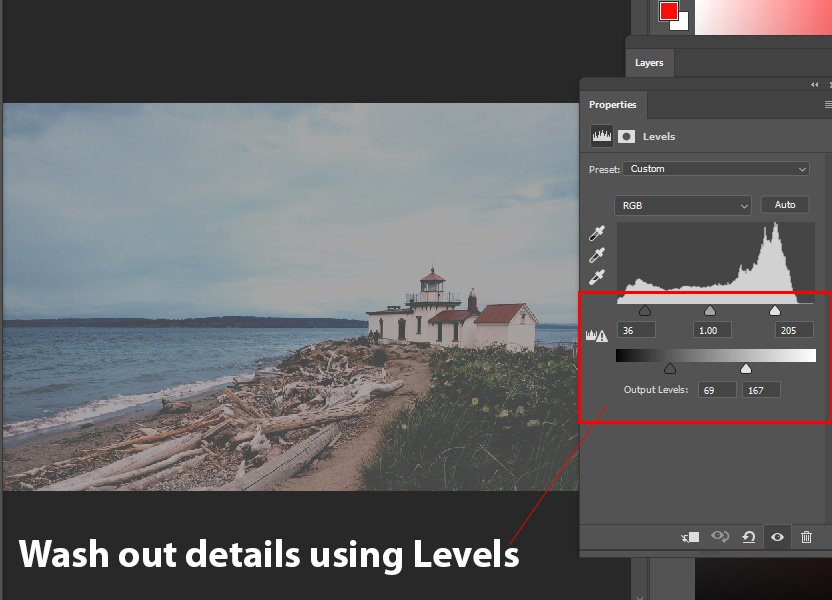
Here are the results:

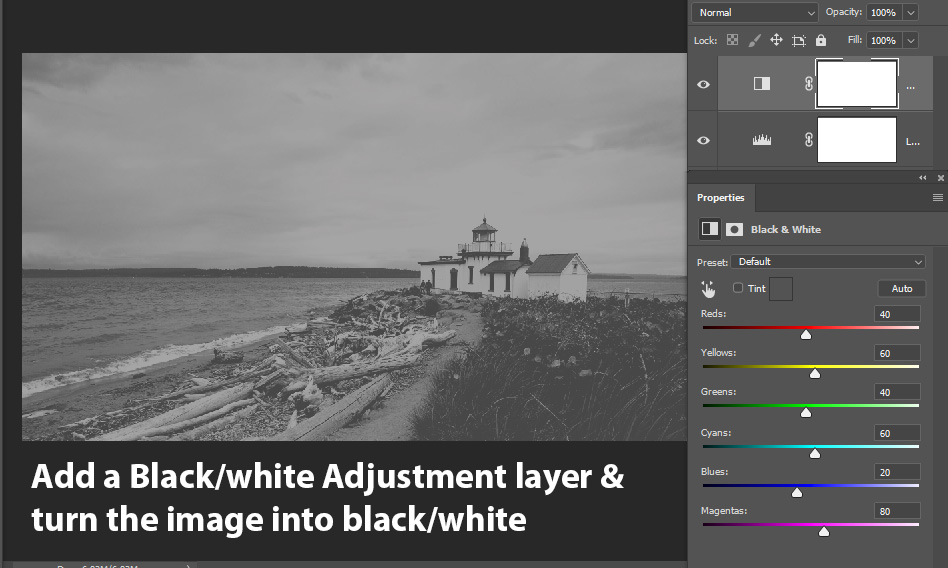
Step 3 – Turn Image Into Black/White
In vintage images, there is no color or almost no color. We are going to replicate the same here by desaturating the image. All you have to do this is go to Layer > New Adjustment Layer > Black & White and desaturate the image.
If you want you can also reduce the opacity of Black & White layer to add some coloring back to the image.
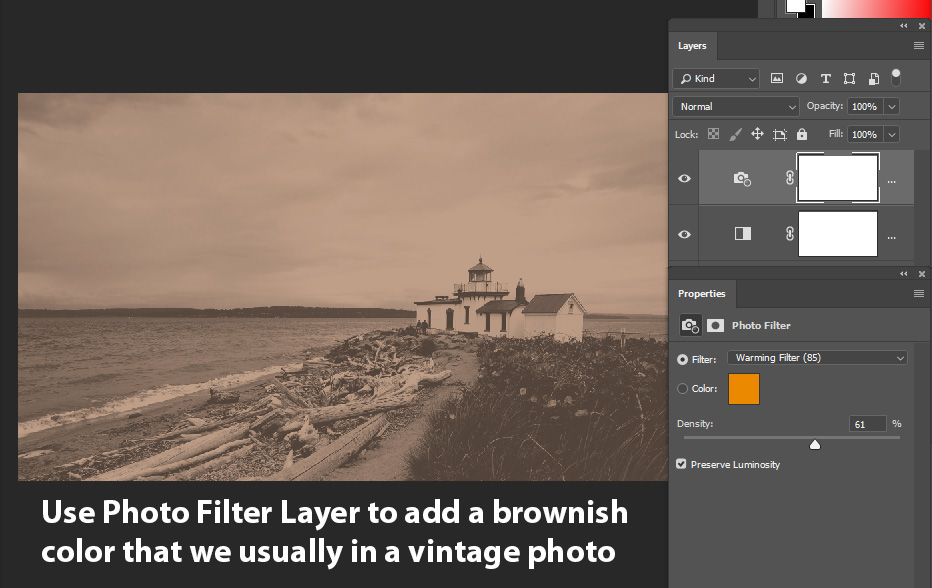
Step 4 – Add Coloring
To add coloring and give the image analog and classy look you can add a brownish color to the image. This color tends to be on almost every vintage image that’s why we are adding this.
To do this, go to Layer > New Adjustment Layer > Photo Filter and use a Warming Filter (85) and increase the density to 61%.
Step 5 – Add Vignette
The vignette effect can bring more attention to your subject and it’s worth it if you have a portrait image but in my case subject is a lighthouse. There are a lot of ways to create vignette effects but we’ll use a simple method to create this powerful effect.
Go to Layer > New Adjustment Layer > Gradient Fill. Select a Radial Gradient and make sure to change the Scale Setting to 248% and Check Reverse Option as well.
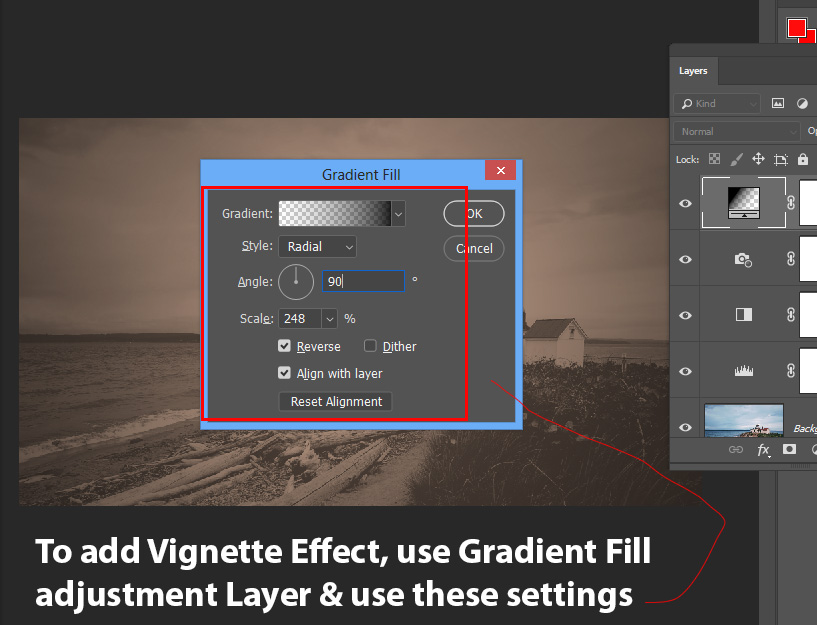
I reduced the opacity of Gradient Fill to 20% to reduce the intensity of the Vignette effect. You can play around with the opacity of the layer.
Step 6 – Add Noise or Texture
This is the final step of the tutorial and we’ll add noise to the image. I am using Noise filter to add noise, you can do the same but if you want you can also use a texture as well.
Press CTRL + SHIFT N to create a new layer and name it “Noise”.
Go to Edit > Fill and fill this layer with 50% Gray Color and change the blending mode to Overlay.

Now go Filter > Noise > Add Noise and add a suitable amount of noise to your image. Remember every image needs a different amounts of noise so pick the appropriate amount of noise. Before adding a Noise Filter make sure you converted the image into a Smart Object.
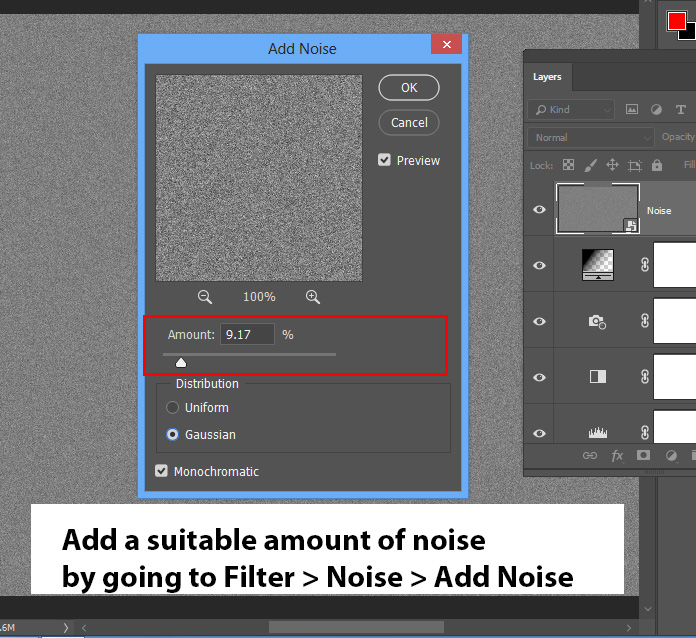
Change the blend mode to Overlay & reduce the opacity to 40%. You can see the noise is giving a decent texture to the image.

Go to Filter > Blur > Gaussian Blur and add 0.3px Radius Value to blur noise and make it natural & photographic.

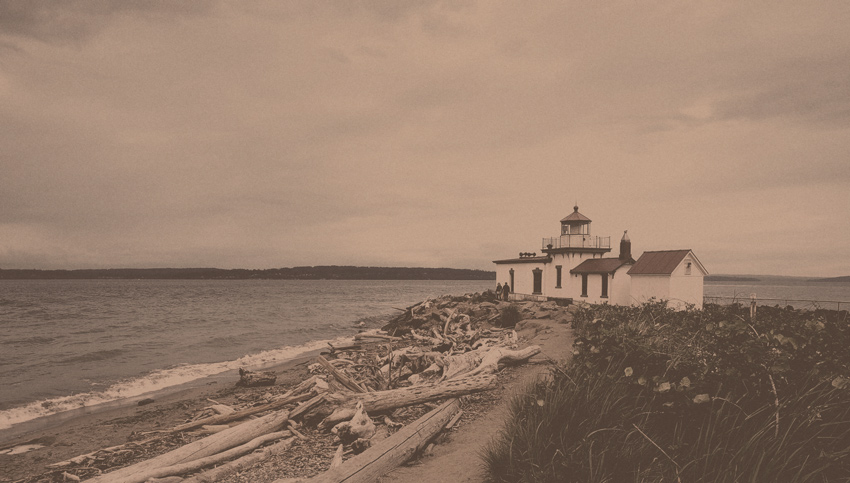
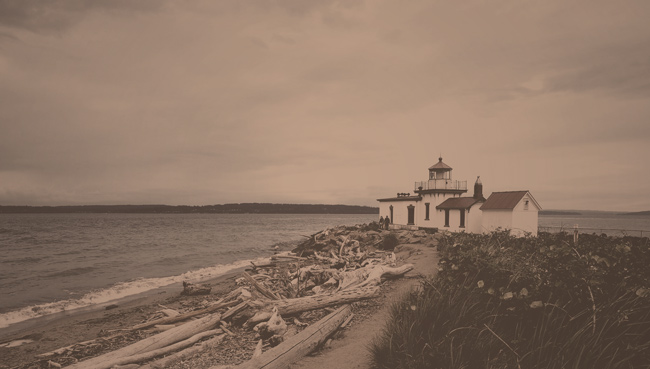
Here are my final results:

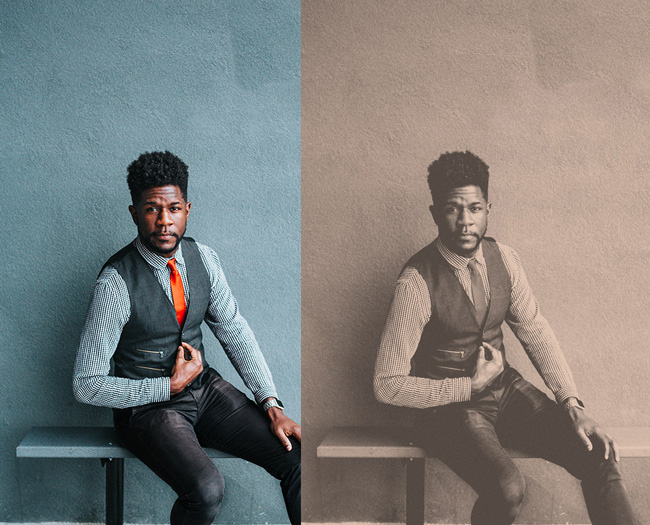
Here are some more examples:
Example 1:

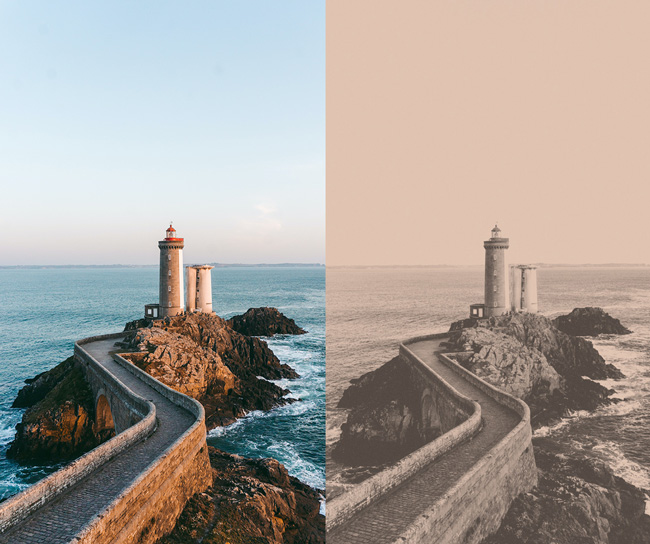
Example 2:
Example 3:
Need Help With Photoshop or Looking for Professional Support?
Whether you're just getting started with Photoshop or need expert-level assistance, we're here to help! Contact us for personalized Photoshop tutorials, project support, or creative services.
Get in touch today to take your skills or projects to the next level.
CONTACT US NOW📘 Want to Master Photoshop Faster?
🎁 Get Your FREE PDF E-Book "Top 10 Photoshop Tricks Every Designer Must Know" Now – Packed with expert tips, shortcuts, and techniques to boost your creativity & workflow.
👉 Download Your FREE PDF E-Book NOW!
