

In this tutorial, you’ll learn how you can enhance your portrait photo or any other image using Photoshop. I’ll give you some tips and tricks for improving light and contrast so the image can pop out beautifully. We’ll use adjustment layers, Camera Raw filter and blend modes for this effect. I’ll also show you how to change the light direction in an image, then create light effects accordingly.
Tutorial Resources
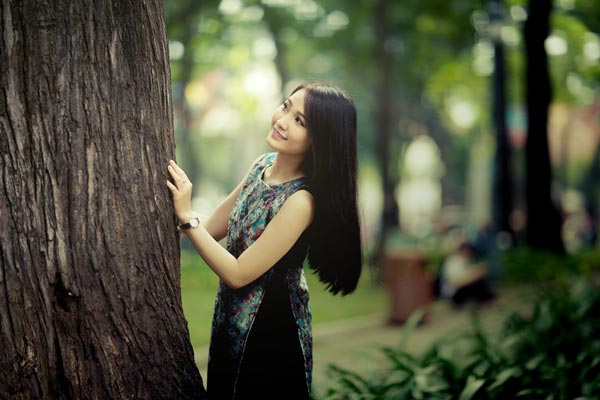
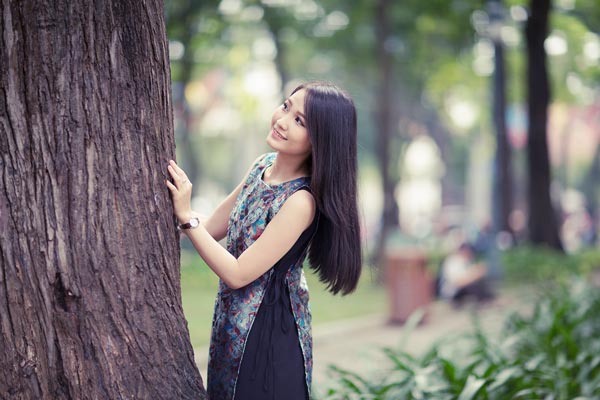
Step 1
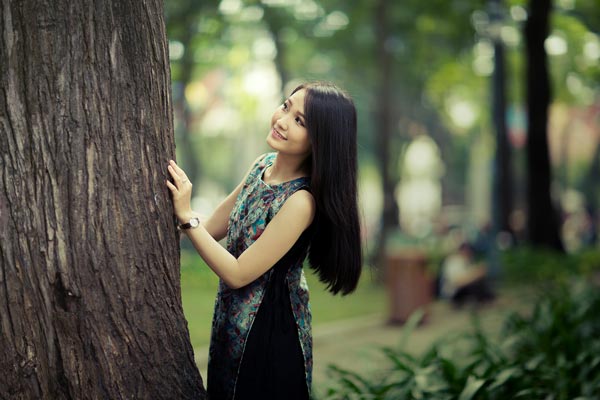
Open up the image in Photoshop. Remember to use the photo which has good light and contrast like the image shown below.
Step 2
First, we are going to boost the contrast using Curves adjustment layer. Also, we’ll add the Blue color tones to the image using Blue channel.
Go to Layer > New Adjustment Layer > Curves.
Use the RGB Channel to increase the contrast and then use the Blue as well.
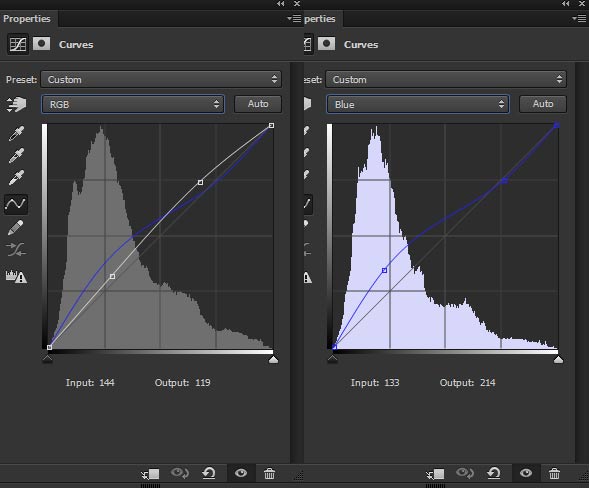
You can see the results with boosted contrast and added blue color tones to the image.
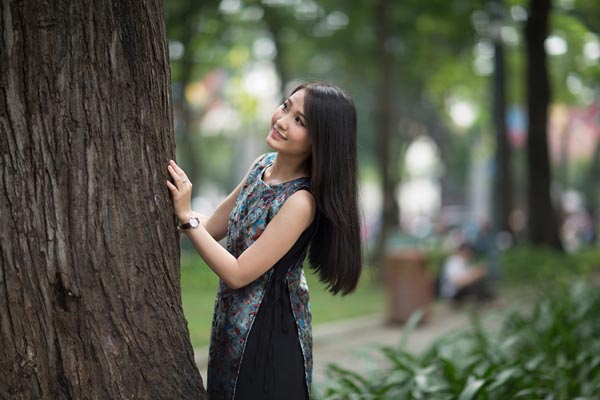
Step 3
Create a Solid Color adjustment layer and choose a lighter yellow color, I chose #ffe493 color. The aim here is to brighten up the yellow tones in the image and it will also subtle the effect of the blue tones which we created in the last step.

The blending mode allows a layer to blend with layers under it and we’ll blend the effect of the Solid Color using blend mode. Set the blending mode of the Solid Color to Overlay and lower the opacity to 32%.
As a result, you can see the image is lighten up pretty much and blue color tones are affecting to shadow areas or darker areas.
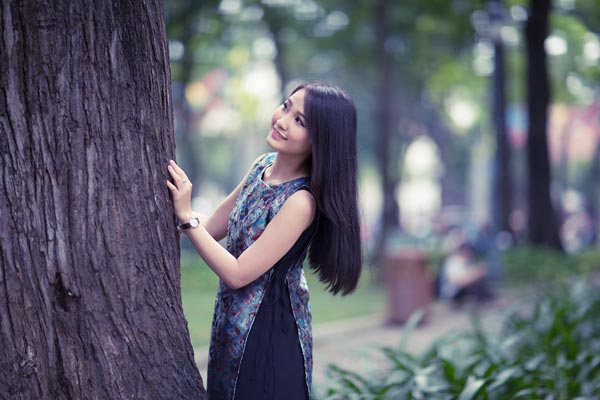
Changing Light Direction
Step 4
Now we’ll change the light direction in the image. The aim is to darken the bottom right corner and lighten up the left top center where the girl face is. For that, we’ll use the Gradient Fill with default black/white color diagonally.
First, create a Gradient Fill layer and then alter its settings like the direction of the gradient. Do remember I used the default settings except for Angle values.
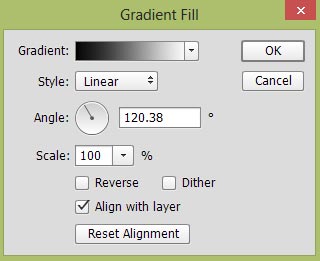
Lower the opacity of Gradient Fill to 22%. You can notice the changed light direction in the below image.
Final Adjustments
Step 5
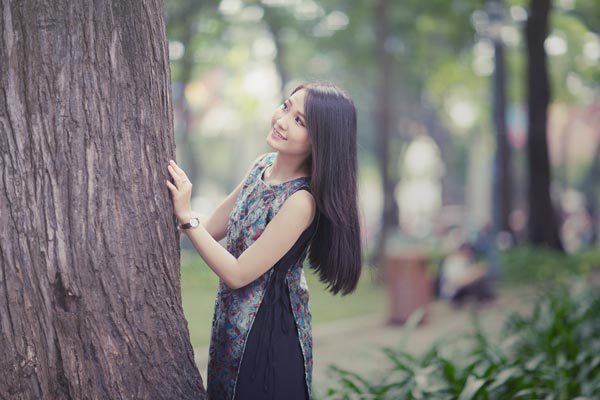
Instead of applying bunch of adjustment layers, we can make many adjustments in the image with just only using Camera Raw filter. We’ll use this filter for the final effect.
First, merge all layers into a single layer by pressing CTRL + ALT + SHIFT + E. Then go to Filter > Camera Raw and use the settings below. Remember to play around with the settings which you want. Sometimes dragging the sliders (anyone) accidentally give you much better results which you can’t even think. I recommend to everyone do experiment with it, not only with this but you should keep experimenting in Photoshop.
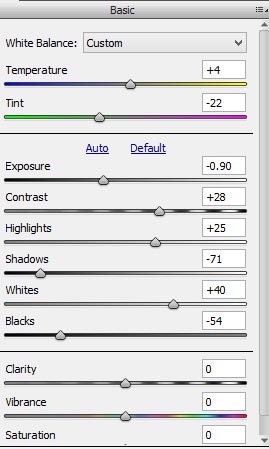
You can see what we’ve achieved using Camera Raw:
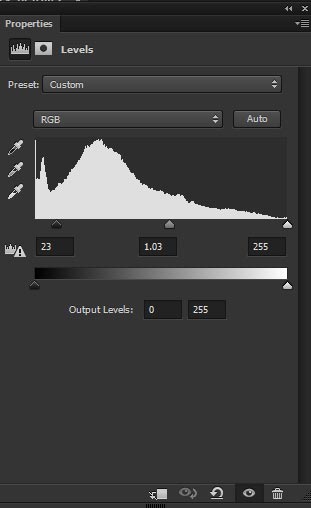
Step 6
We can do a lot more in order to enhance effect further. Create a Levels adjustment layer and then drag the black slider to right in order to darken shadow further. If you want to light up the image then you can experiment with the gray and white slider.
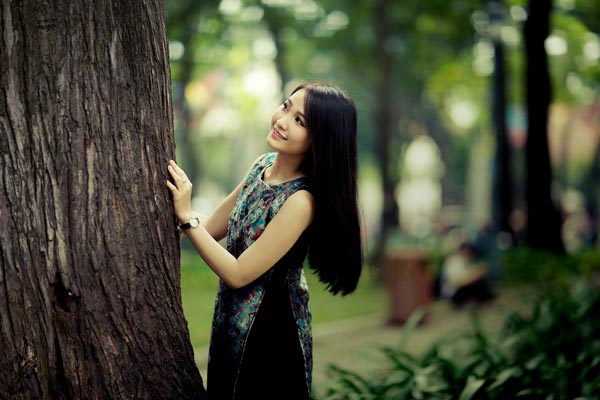
Results:
Step 7
Finally, I’ll finish the effect by adding the soft glow of the light just on the left of the girl’s face. There are a lot of techniques when it comes to creating the light effect in Photoshop, but in this tutorial, I’ll show you the basic and effective one.
Press CTRL + SHIFT + N to create new layer and change its blend mode to Screen.
Pick a lighter yellow color (#ece5bb), using a soft, basic brush paint the light glow as shown in the image below.
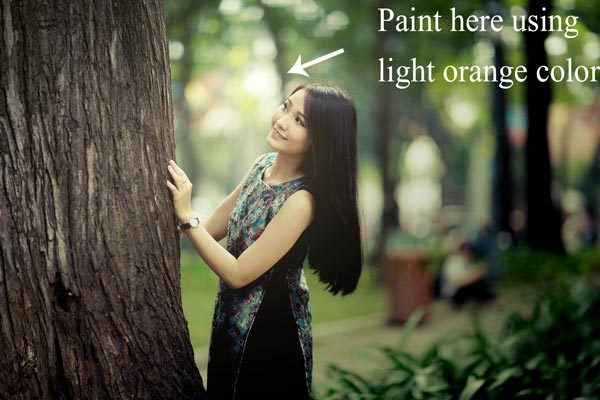
If you are happy with the amount of the glow then you can quit here. But I’d like to lower the glow by reducing the opacity of the layer in which you painted the glow to 70%.

Conclusion
You can notice Curves and Levels adjustment layer plays a major role when it comes to enhancing the images. But when you use it properly with filters it can give you amazing results. Hope you like the tutorial and please do share the tutorial with the world.
Need Help With Photoshop or Looking for Professional Support?
Whether you're just getting started with Photoshop or need expert-level assistance, we're here to help! Contact us for personalized Photoshop tutorials, project support, or creative services.
Get in touch today to take your skills or projects to the next level.
CONTACT US NOW📘 Want to Master Photoshop Faster?
🎁 Get Your FREE PDF E-Book "Top 10 Photoshop Tricks Every Designer Must Know" Now – Packed with expert tips, shortcuts, and techniques to boost your creativity & workflow.
👉 Download Your FREE PDF E-Book NOW!
