

Learn how to edit a night scene in Photoshop & give it a magical, cinematic feel in no time. This tutorial will show you how you can add coloring, light effects, split toning using a range of techniques. You’ll learn a ton of things about color grading such as how to manipulate colors using adjustment layers, creating glows, target a color without affecting others & much more.
Step 1 – Look at The Image details
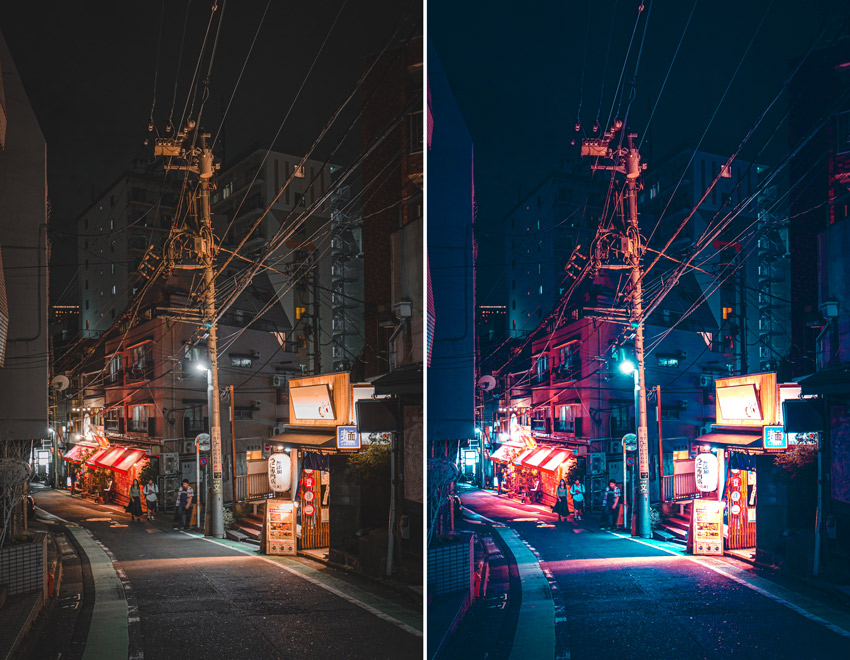
I am using a street image from Unsplash which you can download if you want to follow along. No need to mention a night scene is recommended here because most of the magical & dreamy stuff looks dope at night. This scene is basically inspired by milky-way coloring, I know there is no milky-way scene even no starry sky but you might have come across some images of milky-way depicting the same colors such as cyans in shadows & illuminating reds in highlights.
I really like the lights in the image calm, soothing & golden coloring. Not much colors in shadows region, I opened it in Photoshop by selecting File > Open.

Step 2 – Begin Coloring
I couldn’t help myself and started coloring right away. Sometimes I see any image my mind just starts processing the coloring, mood, and lighting in the image in seconds. The best way to start coloring your image either using Color Balance or use Selective Color Neutral Settings.
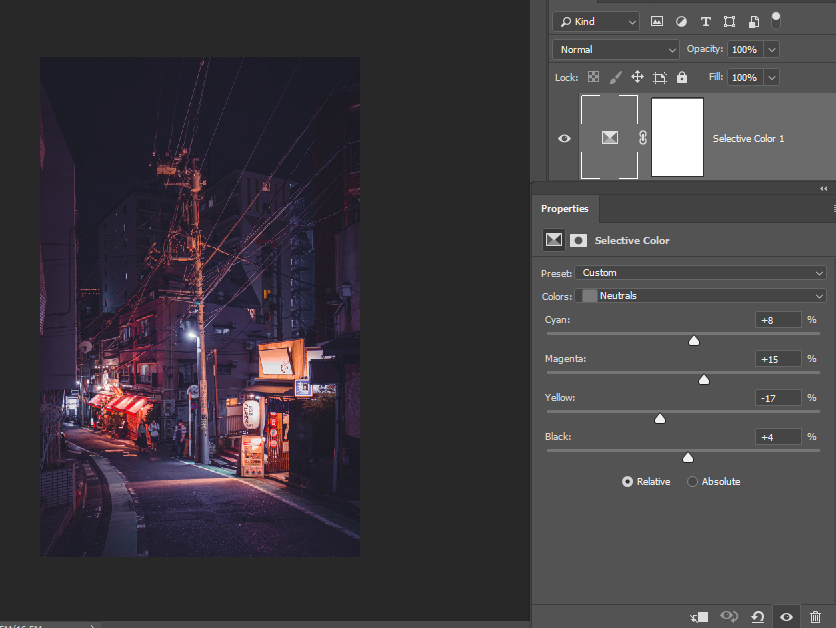
Go to Layer > New Adjustment Layer > Selective Color & select Neutral. Input the following settings and you can see with these settings we have added a magenta coloring. I am still thinking about colors and you can do the same just don’t worry about the final results and enjoy the process.
Step 3 – Increase Brightness
I brighten the image a bit & this is the thing that I usually do I can’t stress that enough. Not only it will prep your image for further editing but help you get some details back.
I am neutral here and I am not targeting specific parts of the image. I created a Curves adjustment layer and added a point in the middle to brighten the image.

Step 4 – Coloring Midtones & Highlights
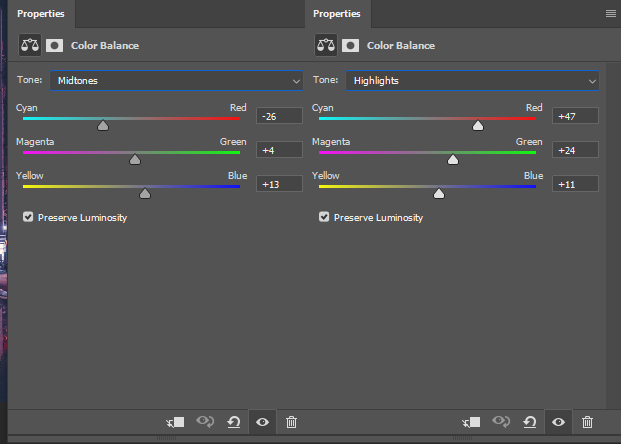
Till this step I know I have a picture of coloring that I want in the image. That is adding cyan to shadows and popping out the red colors in lights. I want to keep the reds illuminated and want to add cyan toning almost like a teal color to the shadows that we usually see in a night mood.
I created a Color Balance adjustment layer, as you can see in Midtones I added cyans and in highlights, I added red color there. In Reds, you can also see mostly are highlighted such as red color light reflecting on the pole & wires, light reflection on shops, and some reflection on streets. That’s why I am targeting reds to target highlights.
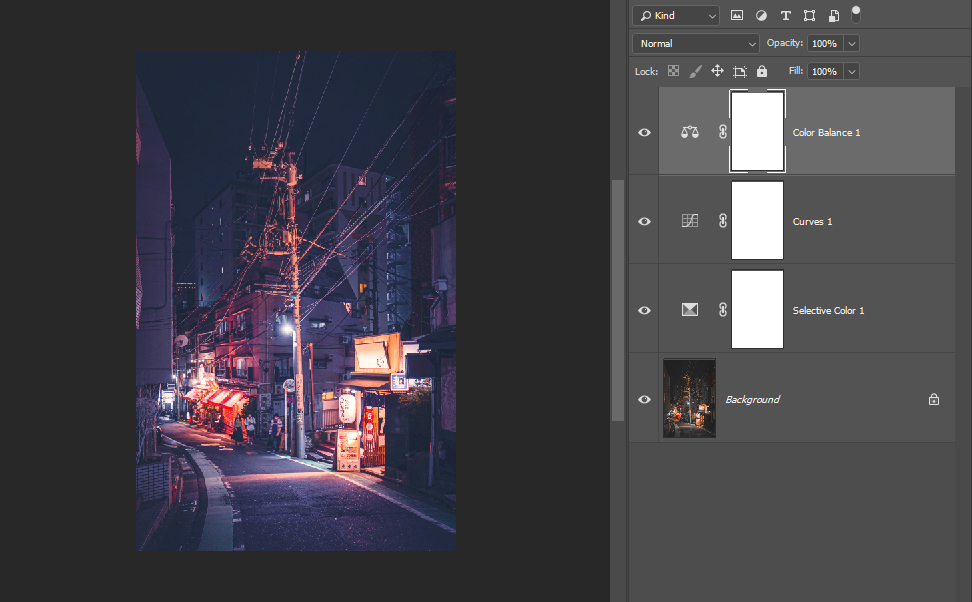
Results so far:
Step 5 – Adobe Camera Raw
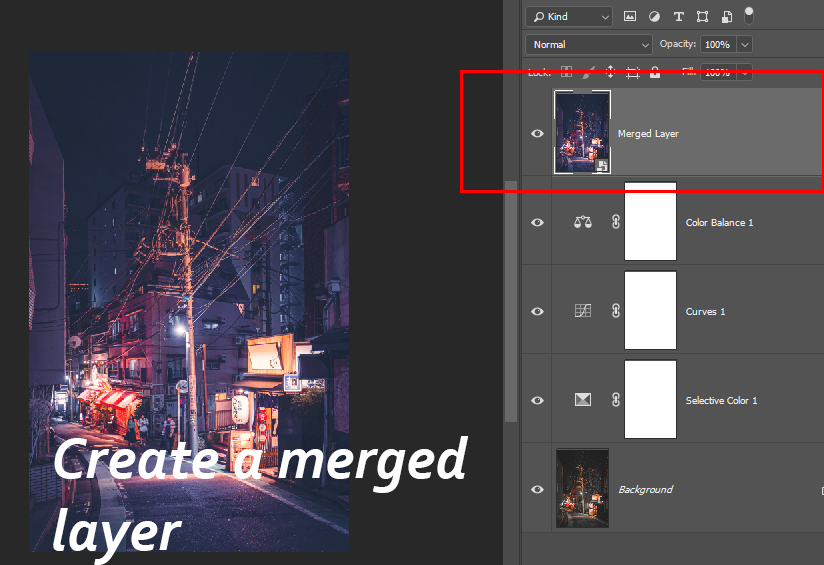
I have been playing a lot with Camera Raw Filter lately and I am loving it. It has many controls to play with and it can do almost all adjustment layers work alone. Create a merged layer of all layers by pressing CTRL + SHIFT + ALT + E and name it “merged layer”.
Go to Filter > Camera Raw Filter. I reduced the Temp to -14.

Next, I changed the Hue of Blues & Aquas. One thing I’d like to point here whenever you go to HSL Adjustments Layer don’t mess around with Oranges, Reds & Yellow unless you know what you are doing. The reason why I am telling this is that these colors can affect skin tones if your image has people in focus & you don’t want to mess up with their skin tones.
However, you can play around with sliders to see how it is affecting skin tones in my case I don’t have to worry much about it because people are barely visible. Mostly, Orange’s Hue, Saturation & Luminance affect skin tones. You can see in the below image I haven’t touched them.
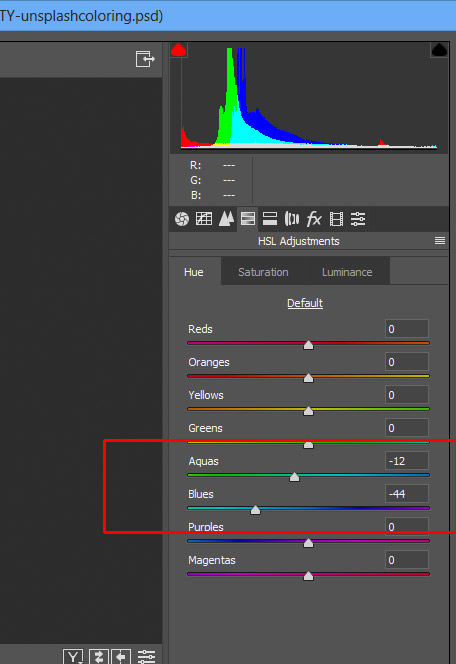
Next, I used Split Toning to add cyan coloring to highlights. This will also affect my reds which are highlights in the image but don’t worry we can take care of this later.
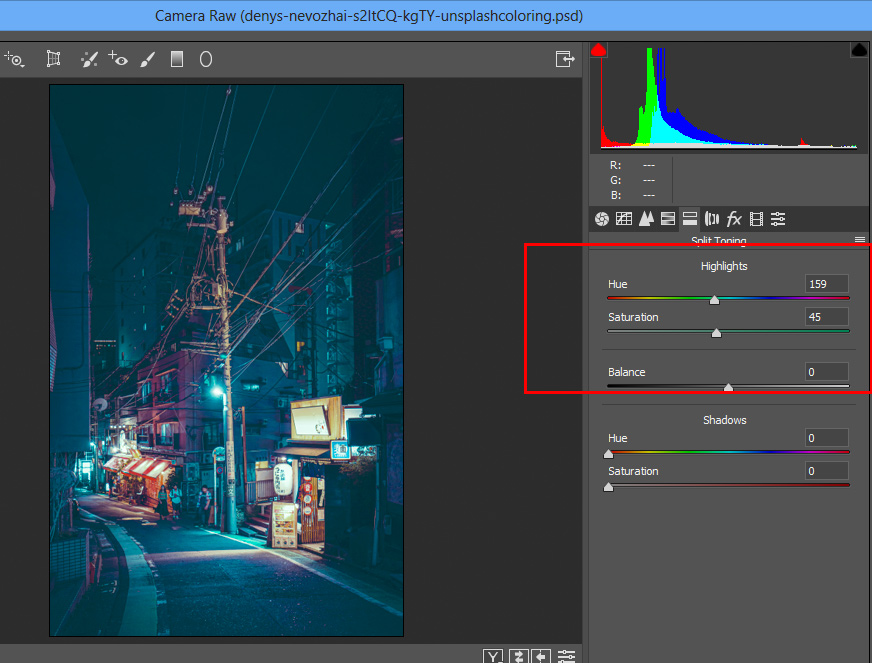
Results so far after using Camera Raw Filter:

Step 6 – Working on Highlights
I am happy with coloring in shadows but want my highlights to popped out. First, I created a Color Balance and increased Reds to +59.
Next, I created a Levels Adjustment Layer. I selected Reds as I said already these are highlights in my image and dragged the white slider towards left to increase brightness on reds to really pop them up. You can see highlights look decent in the image below.

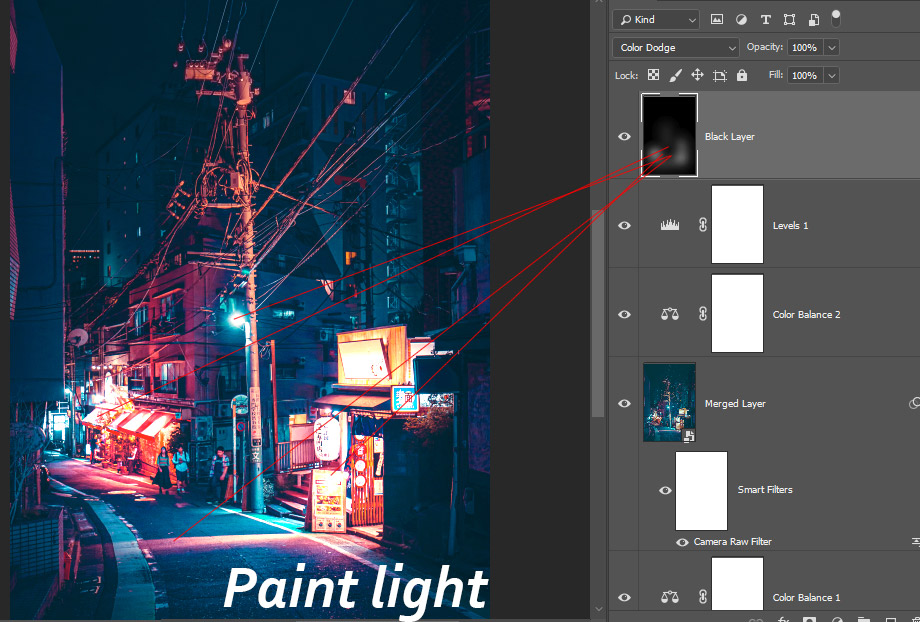
Step 7 – Black Layer Lighting
So black layer lighting, as you already know about, is my lighting technique to create light effects. You need to create a new layer and fill it up with black color. Change the blending mode to Color Dodge.

Use a soft round brush with white color to paint light on the shops or wherever you see a light source. Make sure when you paint light on a black layer, brush opacity & flow must be around 20% or less to avoid harsh contrast.
Here are my final results:

I hope you have gathered a ton of information from this tutorial. Next time when you add coloring to your images don’t worry about the final results just enjoy the process & who knows you’ll be stunned by the time you finish coloring. Make sure to leave a comment in the comment section & keep Photoshopping!
Need Help With Photoshop or Looking for Professional Support?
Whether you're just getting started with Photoshop or need expert-level assistance, we're here to help! Contact us for personalized Photoshop tutorials, project support, or creative services.
Get in touch today to take your skills or projects to the next level.
CONTACT US NOW📘 Want to Master Photoshop Faster?
🎁 Get Your FREE PDF E-Book "Top 10 Photoshop Tricks Every Designer Must Know" Now – Packed with expert tips, shortcuts, and techniques to boost your creativity & workflow.
👉 Download Your FREE PDF E-Book NOW!

