


In this tutorial, you’ll learn how to edit a landscape photo in Photoshop. For this tutorial, we’ll be turning a landscape in the sunset hour mood with some golden highlights over the sky and the lake. You’ll learn how to make an adjustment in different areas of the image like highlights, midtones, and shadows. Moreover, we’ll also learn how to enhance contrast, make color changes, work with highlights & shadows and much more.
Step 1
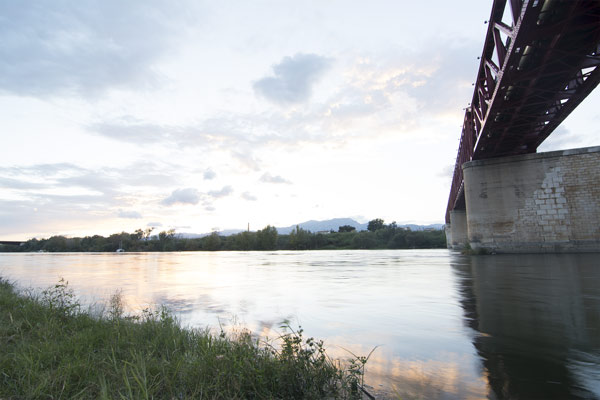
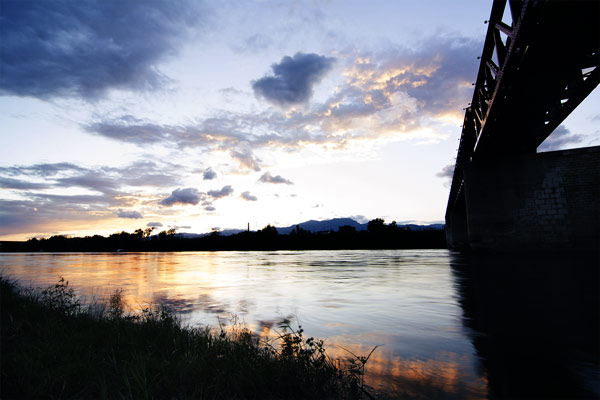
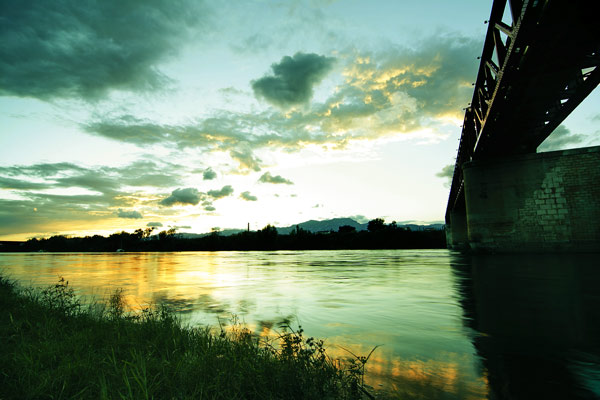
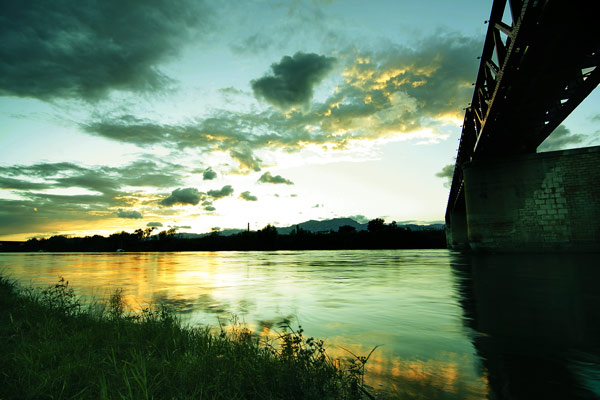
I am using this landscape photo in Photoshop. The image which I am using provided by Andrei in his tutorial on PSD Box. You can download the image directly from here and the images are in very high resolution so you can even work in a very large document.
Open up the DSC_1825 file in Photoshop. When you open this file, Photoshop will first open it up on the Camera Raw filter since it is in the NEF file format. Don’t make any changes right now, just click on the open button.
Step 2
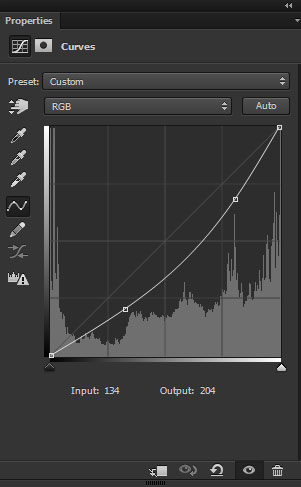
First, I’ll darken the brighter areas of the landscape. In order to do that, go to Layer > New Adjustment Layer > Curves and add a point on the highlights areas as shown below. Now make a negative bend to darken the image.
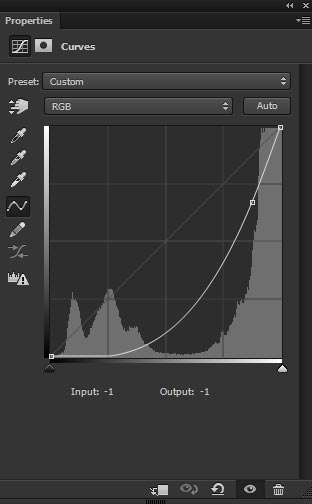
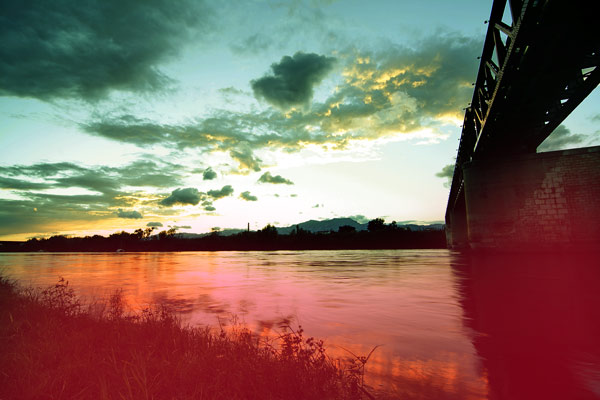
You can notice that with increased contrast clouds are now more visible and dark, but I don’t want this effect on the bottom parts of the image. I am going to erase the dark effect there using the layer mask of Curves. Use a soft black brush and mask the dark effect on the highlighted area.

After masking:
 Step 3
Create a new layer by pressing CTRL + SHIFT + N. Set the foreground color to #6b4526 and use the soft, basic brush to paint some light over the sky, lake, and bushes. You can see the instruction in the below image.
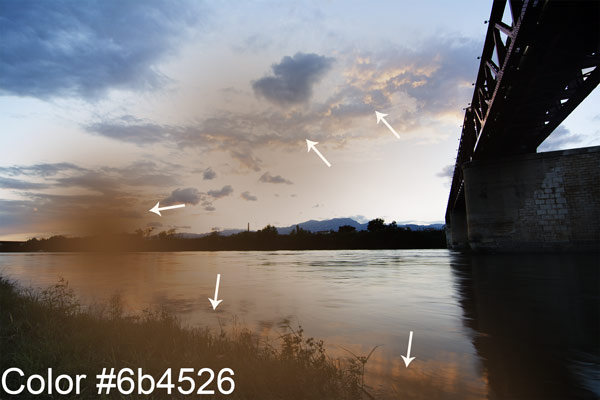
Change the blending mode to Color Dodge and lower the opacity to 20%.
Step 4
Create a Gradient Map adjustment layer and set the color flow from dark blue to dark orange. You can see the color codes in the below image. Remember I used the default gradient with only two colors.
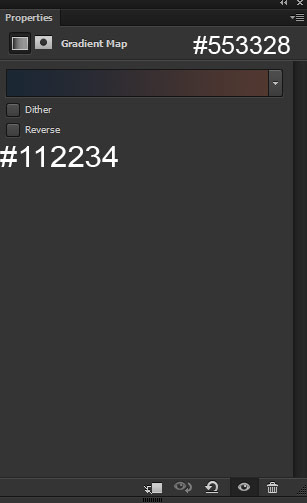
Set its blend mode to Soft Light 100% and this will further boost the contrast and brightness of the image and will blend colors into the image as well.
Step 5
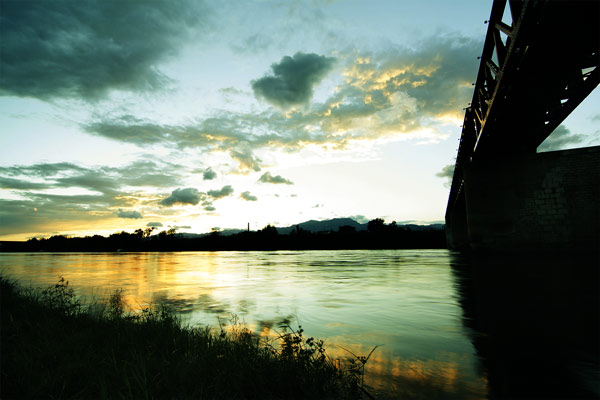
I want the Cyan and Yellow color combination on the landscape but right now we are having blue and yellow colors tones. In order to add cyan and yellow tones we need to change the color. To do that, make a Curves adjustment layer and use the settings for Red and Blue.
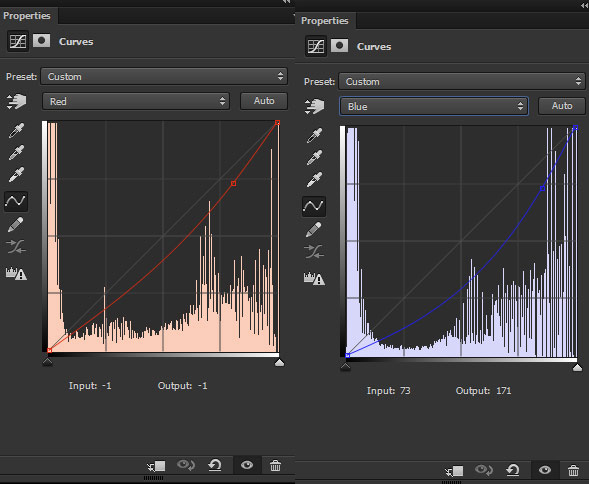
You can see that we just changed the color of the entire image.
Step 6
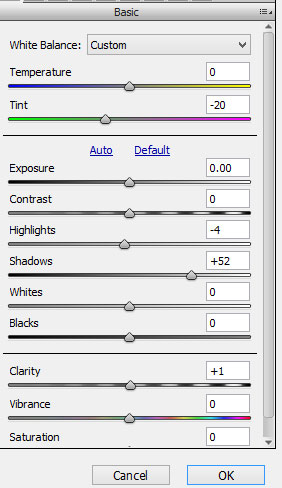
Make a single layer of all layers created so far by pressing CTRL + SHIFT + ALT + E. Go to Filter > Camera Raw and input the settings below. In the settings, you can notice mostly I reduced the tint which will add the green color and then I also increased the brightness on the shadow areas of the image. You can do so by dragging the Shadows slider to the right as you have already seen it.
You can see the results and you can also notice that we’ve increased brightness on the darker parts of the landscape.
Step 7
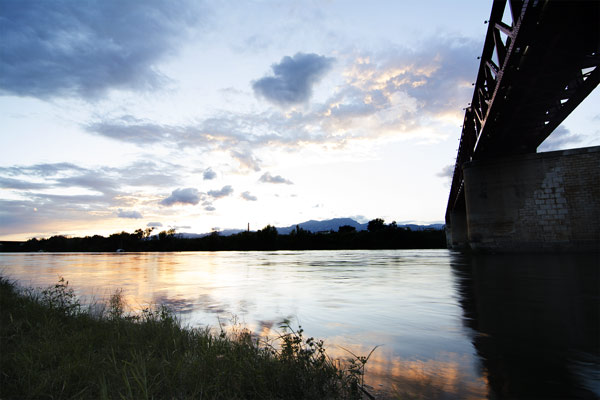
Finally, I used the Curves adjustment layer to increase the contrast on the sky. If you want you can skip this step and but I further want more contrast on the sky, therefore, I’m using it.
On the layer mask of the Curves, I erased the effect mostly on the bottom highlighted parts. Use a soft black brush for masking the dark effect. Also, I reduced the opacity to 75% of the Curves.
Final outcome of the tutorial:
Conclusion
Thanks for following the tutorial and I hope you enjoyed the lesson. If you want you can further add some color to the image using the Color Balance adjustment layer. If you like the tutorial then do share it with the world using social media icons.
Need Help With Photoshop or Looking for Professional Support?
Whether you're just getting started with Photoshop or need expert-level assistance, we're here to help! Contact us for personalized Photoshop tutorials, project support, or creative services.
Get in touch today to take your skills or projects to the next level.
CONTACT US NOW📘 Want to Master Photoshop Faster?
🎁 Get Your FREE PDF E-Book "Top 10 Photoshop Tricks Every Designer Must Know" Now – Packed with expert tips, shortcuts, and techniques to boost your creativity & workflow.
👉 Download Your FREE PDF E-Book NOW!

