

Learn how to add a dual lighting effect to your images in Photoshop. I’ll show you how you can change the color of highlights using adjustment layers, use precise masking to show color exactly where you want to, and use Blending options to fix color leaking in background. This tutorial won’t take you long to master dual lighting effects so let’s get into it.
Step 1 – Perfect Lighting Image
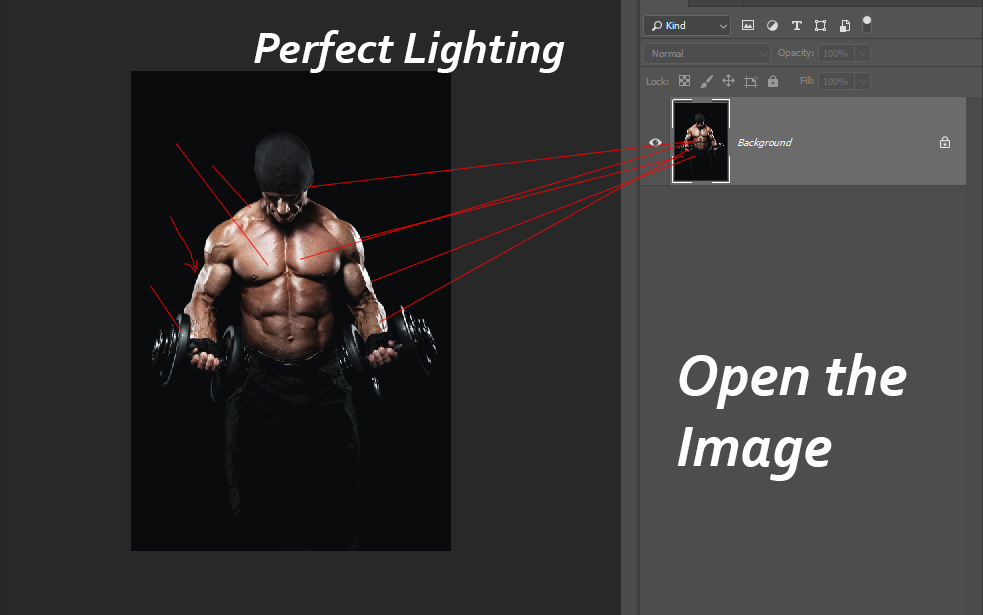
I am using an athlete image here for this tutorial and if you want to follow along you can download this image here. You might want to use the image which has perfect lighting especially the highlights defined in your subject.
You can capture image shots in studio and use all lighting such as rim lighting, main light source,and capture athlete surrounded in all lighting conditions possible.
Here is the image opened in Photoshop:
Additionally, you can use the dodge & Burn tool to further define dark and highlights in the image if you want to.
Step 2 – Add First Color
Now we’ll target the highlights of the image and add coloring there. To do this, we’ll use the Gradient Map, go to Layer > New Adjustment Layer > Gradient Map.

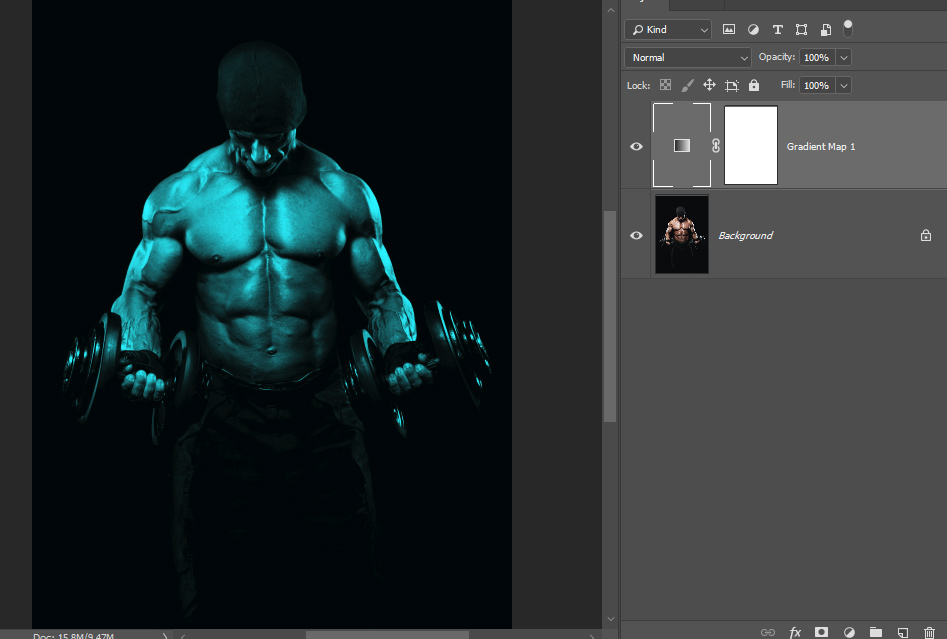
Double-click on the Gradient to bring up Gradient Editor Dialog Box. The first thing, you wanna do is to make sure the Black/White gradient is selected and it’s a default gradient preset present at the 3RD position in the first row. Click on it to select it now click on the color stopper and then click on the Rectangular Color Box to choose a color. Once you clicked on it, pick a color and I am choosing a bright cyan color for coloring.

Click ok and here you can see we have cyan color added to the image:
Step 3 – Add Second Color
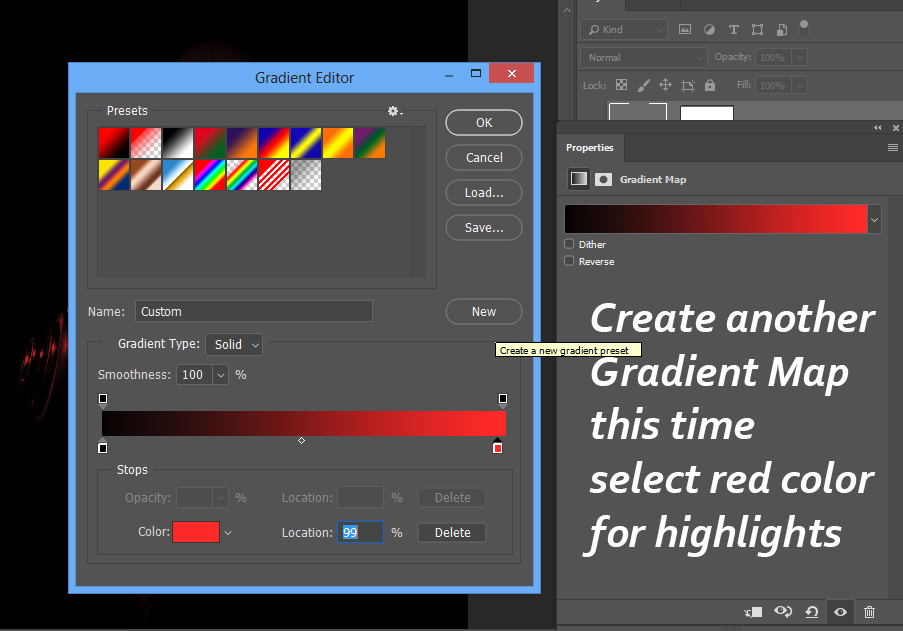
Create Gradient Map again and this time we’ll choose a bright red color for our highlights. We’ll add this color to highlights to create a dual coloring light effect using a mask.
You can see the settings below:
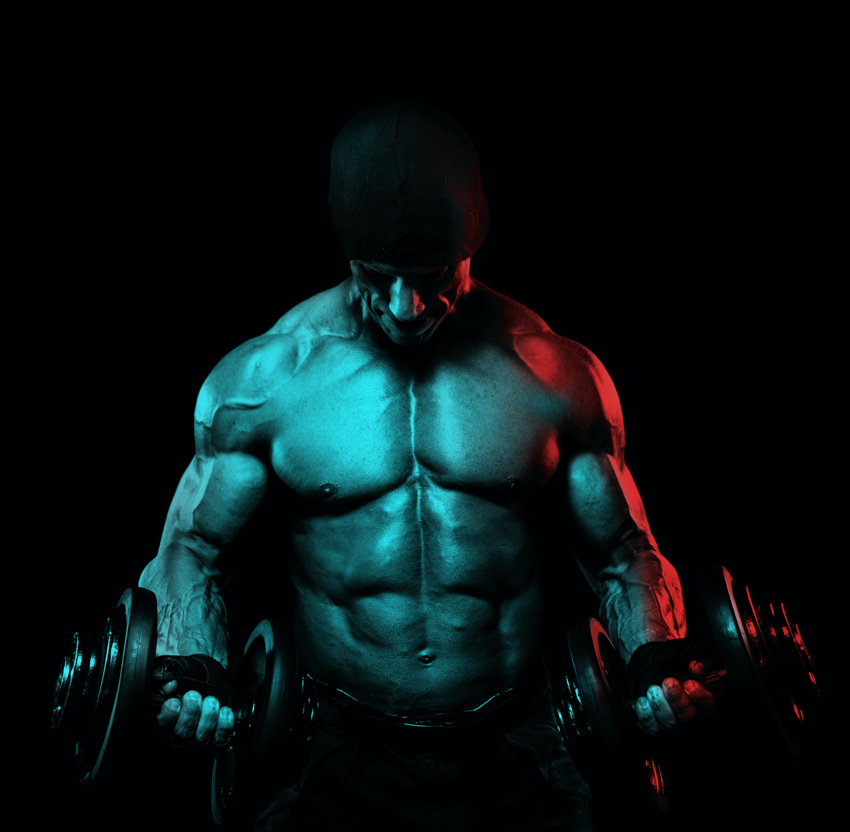
This is how the image looks so far after adding red color:

Step 4 – Selective Masking
All adjustment layers come with a built-in layer mask which is white. We need to turn into to black and to do this, press CTRL + I to convert this layer into a black layer mask. Which means the second Gradient Map adjustment layer is no longer visible.

Now we’ll reveal the red color on some parts where you want to create a dual coloring effect. To do this, pick a soft round brush with white color & start revealing the red color only on the highlights. You can see I revealed the color on the face, bicep, front delt, neck, forearm, & dumbbell.
I am thinking here that a red color light is coming from the right and reflecting all those body parts which are close to the right side. You should aim for this as well, please also noticed how I carefully I revealed it on the chest and on the inner parts of the dumbbell to create an effect like light is coming from the right side of the image.

Step 5 – Fix Color Leaking
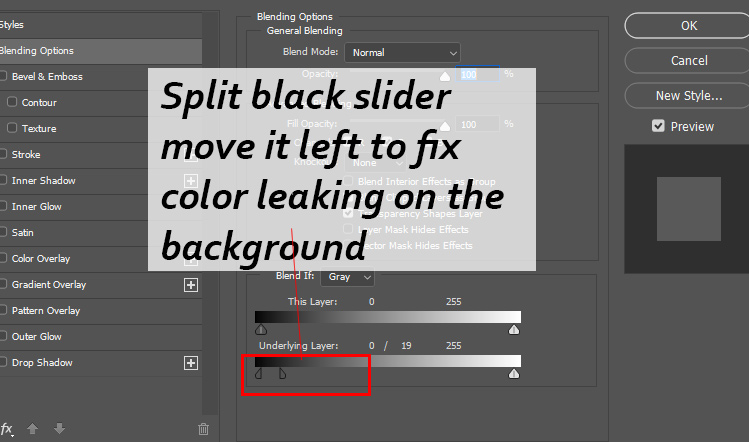
You may notice that while masking Gradient Map 2 color leaking on the background. It doesn’t look good at all and we can fix this in no time using Blend IF. We can tell Photoshop that do not make Gradient Map 2 visible on the dark and limit it to only highlights where we painted using the mask.
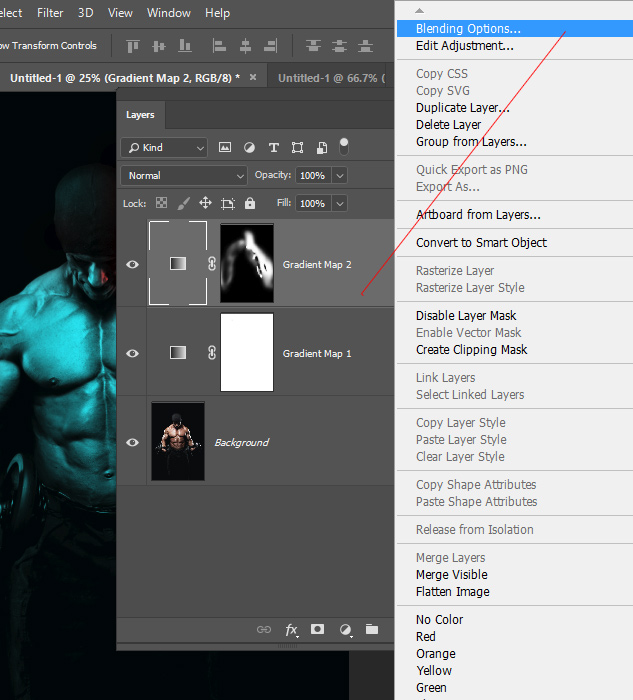
To access Blending Options, right-click on the Gradient Map 2 layer and choose “Blending Options”.
In the Underlying Section, split the black slider by holding down the ALT Key + Click & Drag to right and this will make sure that Gradient Map 2 will only be visible on highlights.
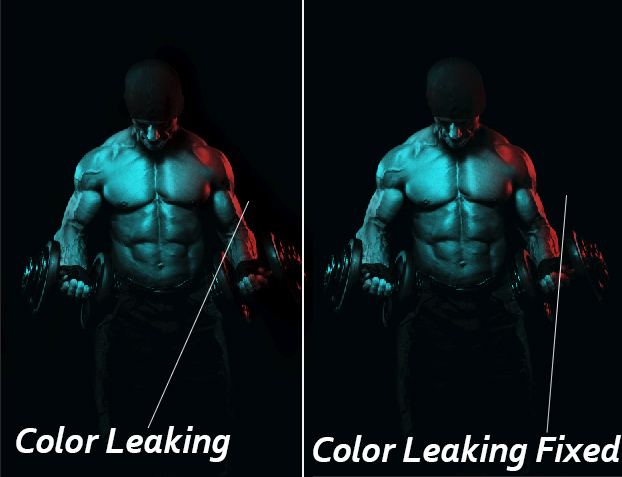
Here you can see we have light leaking fixed now:
Step 6 – Making Lighting Stronger
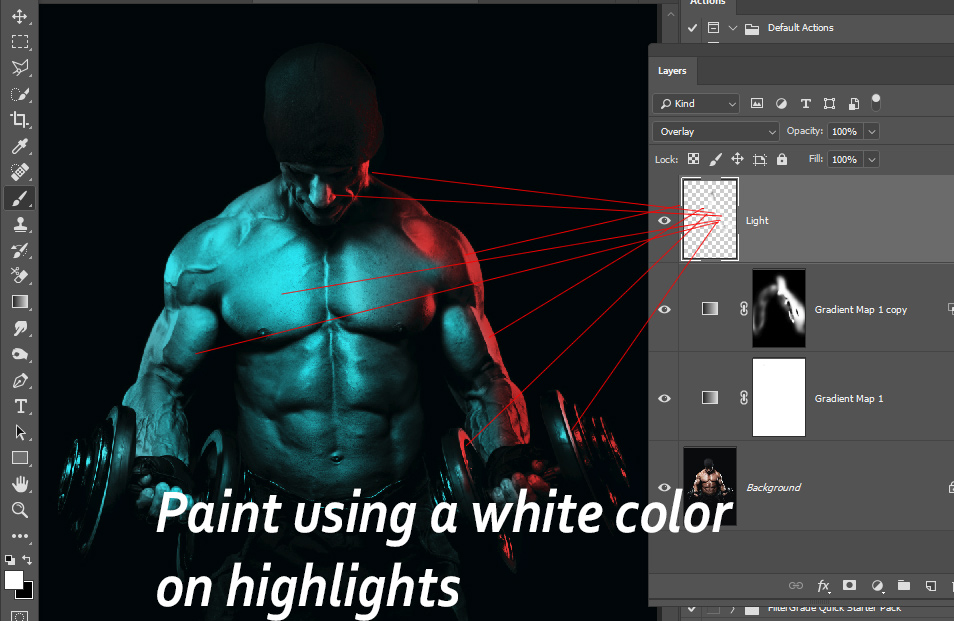
Last thing that I did is made the light stronger and more intense using Overlay blending mode. To do this, create a new layer by pressing CTRL + SHIFT + N and change its blending mode to Overlay.
Now paint using a soft round brush with white color on highlights. Don’t overdo it and make sure you set the brush opacity & flow around 30%-40%.
Here are can compare results from step 1 to step 6:

I hope you enjoyed the tutorial and learned how to add a dual light effect to your images. Do let me know if you have any questions regarding the tutorial by commenting in the comment section below.
Need Help With Photoshop or Looking for Professional Support?
Whether you're just getting started with Photoshop or need expert-level assistance, we're here to help! Contact us for personalized Photoshop tutorials, project support, or creative services.
Get in touch today to take your skills or projects to the next level.
CONTACT US NOW📘 Want to Master Photoshop Faster?
🎁 Get Your FREE PDF E-Book "Top 10 Photoshop Tricks Every Designer Must Know" Now – Packed with expert tips, shortcuts, and techniques to boost your creativity & workflow.
👉 Download Your FREE PDF E-Book NOW!

