

In this tutorial I’ll show you how to create a double exposure effect in Photoshop. The double exposure effect can be achieved through combining multiple stock images, experimenting with blend modes and using adjustment layers. We’ll also learn how to make transition between multiple images and blending them nicely using the layer mask.
Jump To Your Favorite Section:
- What is Double Exposure?
- 5 Pro Tips For Creating a Double Exposure
- How to Create a Double Exposure in Photoshop (Written Tutorial)
What is Double Exposure?
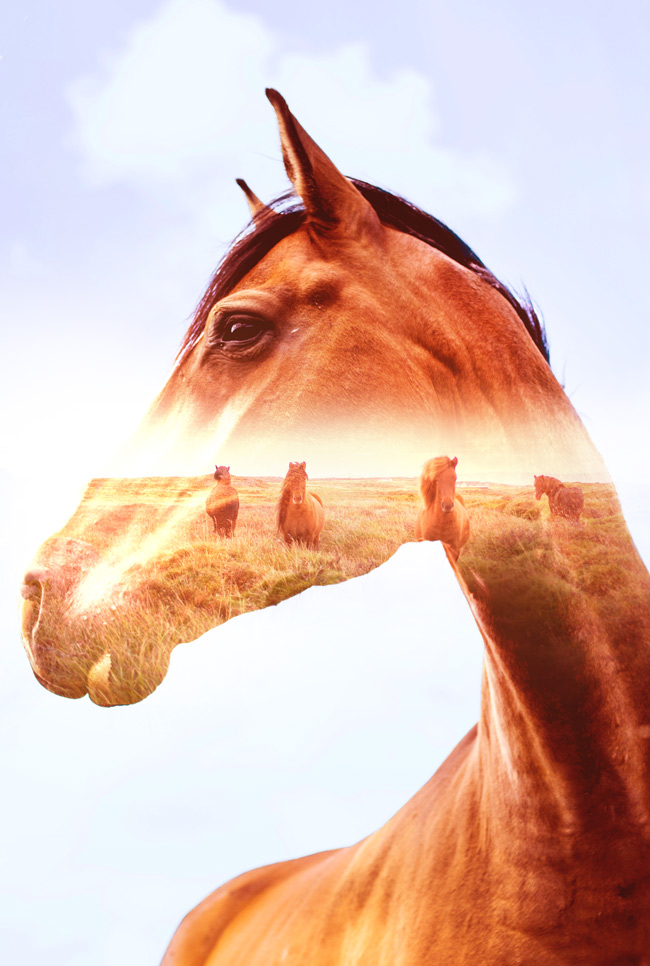
Double Exposure photography is a technique that involves combining two or more exposures to create a single image. The combination of two exposures or images is a great way to get creative. Whether you are looking to create powerful effects or you want to wow your client, multiple exposures can make it happen.
Once you understand the process you can integrate one photo to another photo such as landscapes to portraits, creating levitation, and more conceptual effects. Double exposures have come a long way since the early days of films. With Photoshop, we can quickly blend multiple exposures to help tell a story or express a message.
Here are 5 pro tips for creating a Double Exposure
Tip #1 – Find the Correct Contrast

The contrast between light and dark is really important. You can also use different blending modes to either lights show up or only your darks show up in your image. Contrast is a key difference between the subject and background and it separates images from each other. What you really wanna do is make sure you are choosing the images which have enough contrast between your subject and background so you can create a distinction.
Tip #2 – Underexpose Your Subject
Capture subject images which are dark and background is blown-out as much as possible or aim to get a clean background behind your subjects. Most of the time we will use either Lighten or Screen blend mode to create a multiple exposure effect in Photoshop. So, let’s say we have one image and we are adding more light to that image. If your subject image is really light, to begin with, and we add more light to it then either it is going to be really bright or we are not going to see much information.
Always capture images with dark areas so you can have shadows to play around when you create a double exposure effect so don’t light them up in front.
Tip #3 – Consider a Theme
The theme is really important when creating multiple exposure effects. You can’t pick images randomly and wish that they would compliment each other. The best bet would be to pick the images that are relevant to each other and lead to a story telling. You can think of an image with epic landscapes and rich texture. You may also create conceptual effects like levitation, dense forest to shiny cityscapes and much more.
You can also get a lot double exposure ideas from Pinterest to get the best ideas for your theme.
Tip #4 – Test Before You Create
You can do a lot of tests once you have a particular theme in your mind. You can go out and capture your base images and your layer photos that you are going to merge. Since these days you don’t have to be a photographer to capture images as you can download plenty of images for testing from these 19 Sites with Copyright Free Images and start working in Photoshop in no time.
Once you have selected the images that you are going to merge, you can start working with by retouching a subject, eliminating background and then finally proceeding to the composition stage where you create your own breathtaking artworks.
Tip #5 – Play with Blending Modes
Blend modes are the most powerful tools in Photoshop when it comes to blending images in no time. In Photoshop, you can test a lot of images by just simply changing the blending mode of a layer to find the best possible match for your creative piece.
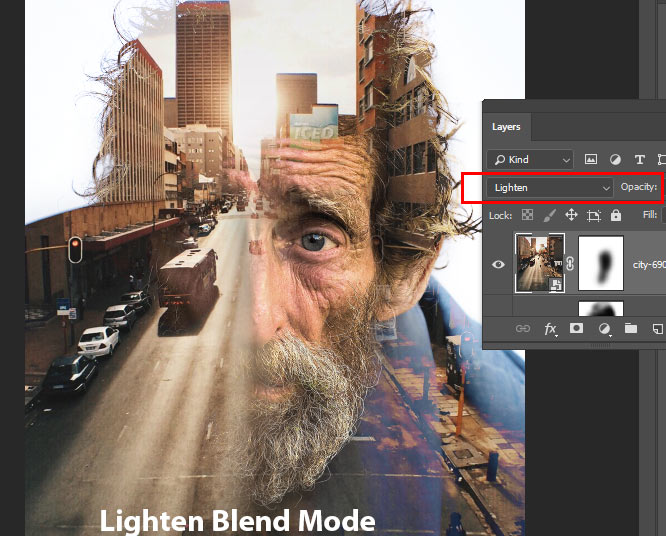
For example before creating this Photoshop tutorial, I played around with the blending modes to get the best possible results.
Lighten Blend Mode:
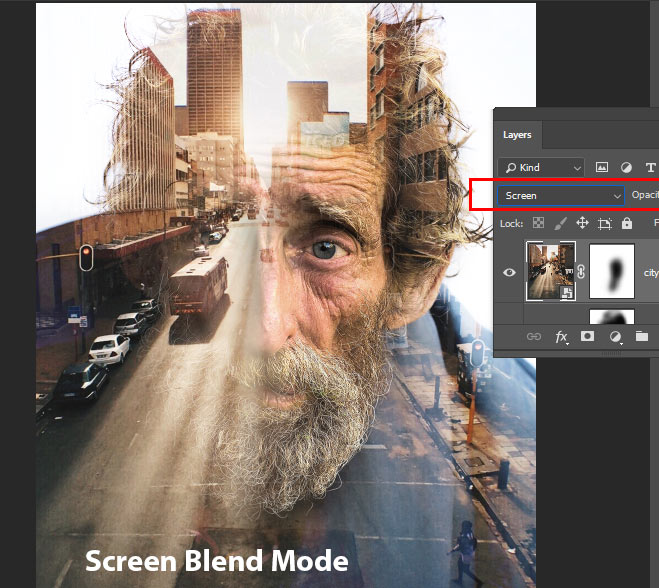
Screen Blend Mode (I used it after testing):
How to Create a Double Exposure in Photoshop
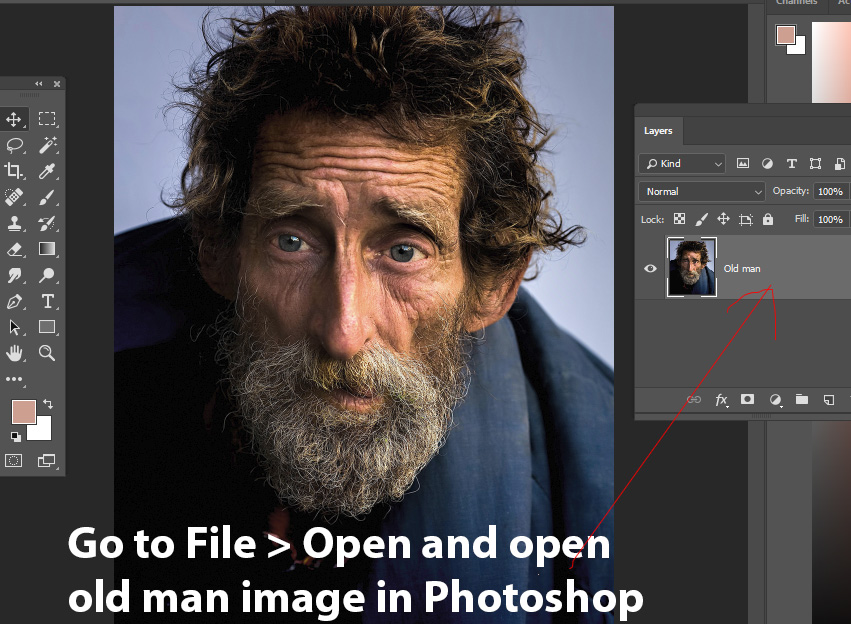
Step 1 – Open the First Image
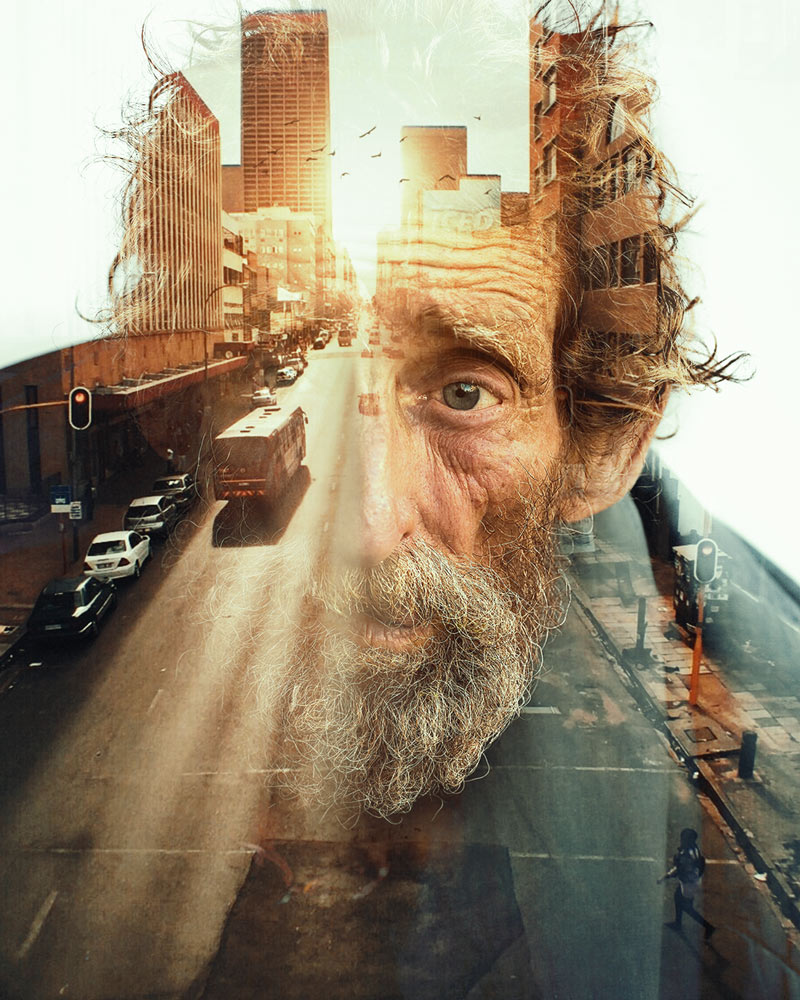
I’m using this Old Man image for this tutorial, but feel free to choose your own. You can also use the image like a silhouette or almost dark, so the blend mode gives you the effect.
Also, make sure whichever image you are using, it should have a solid background that means no details on the background.
Go to File > Open and open the old man image in Photoshop.
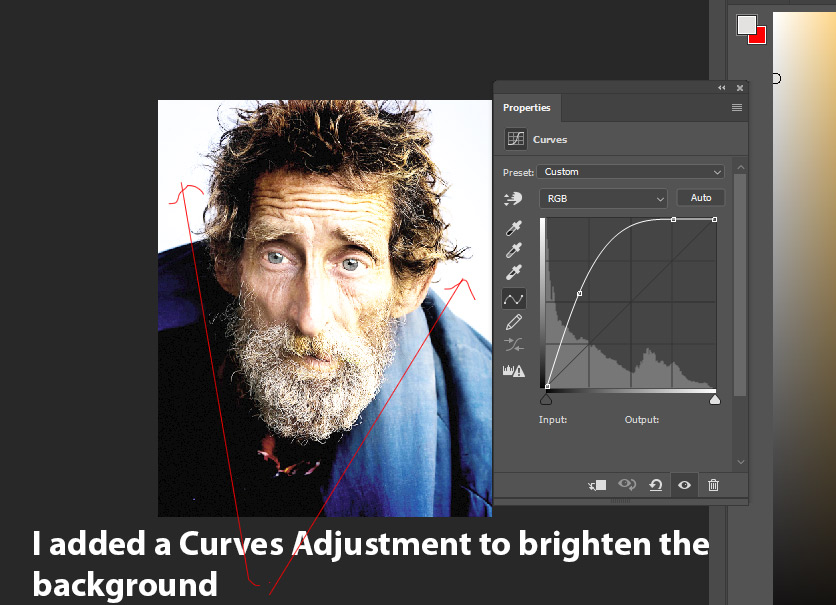
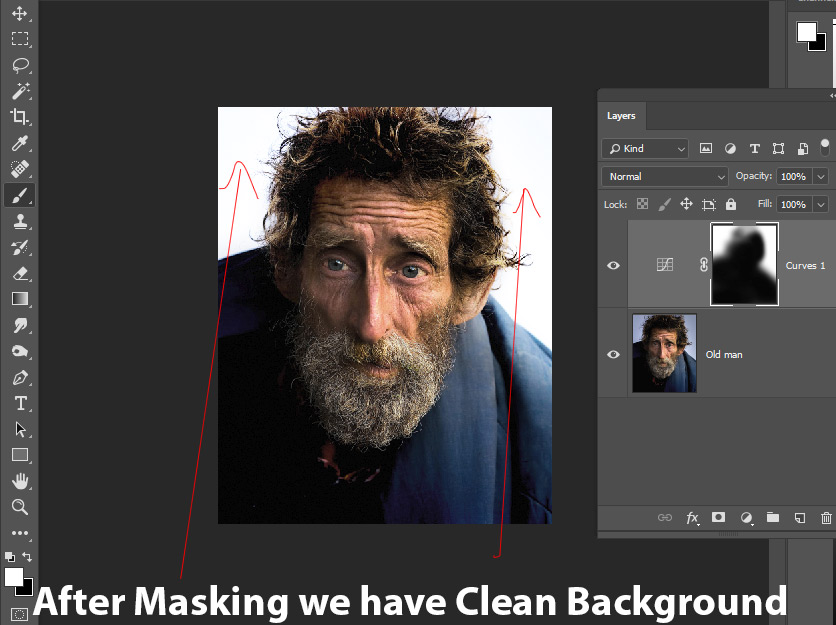
Step 2 – Clean Up The Background
As a said, we should use the image which has neutral background, but using images from free sites always have some issues. In my case the background is solid, but it is not white.
To fix this, use a Curves adjustment layer to increase the lightness of the background.
The aim here is to whiten the background so the city, which we are going to add later, will be only visible on the old man not on his background.
Go to Layer > Adjustment Layers > Curves and use the following settings below:
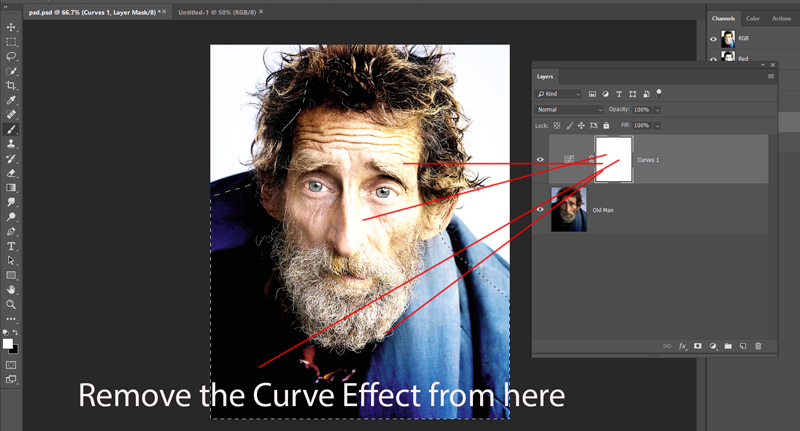
Since we have applied the effect to the entire image and obviously, it will affect the many other parts which we don’t want. The better solution of this is to mask the effect over the image where we don’t want. Remember to leave the brighten effect on the hair as we need some lights here in order to create the light effect.
On the layer mask of Curves, mask the effect on the selected parts. Because we’ve applied the Curves for the background not for the old man. Use a soft round basic black brush for masking.
Here we’ve the white background:
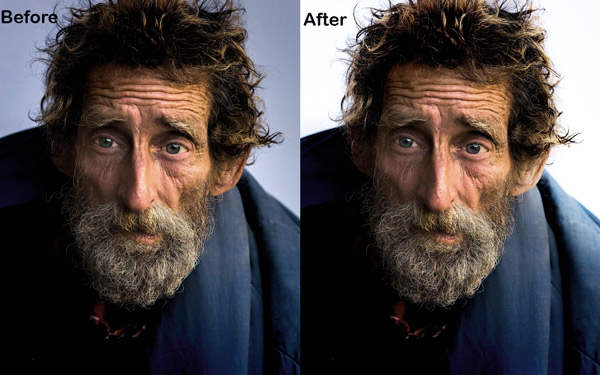
Here you can compare the before and after results:
Step 3 – Add The Second Image
In this step, we’ll create the double exposure effect by adding the City image and then blending it properly using blending modes. Also, this step can be experimental for you as well like you can try adding different photos here to see which photo gives you the best results. So feel free to choose the images which you like and this can be a city, creek, forest and any image.
Place the city image to the main document. Use the Transform Tool (CTRL +T) to enlarge it and make it fit nicely into the main document like shown below.

Change the blend mode of the city layer to Screen.
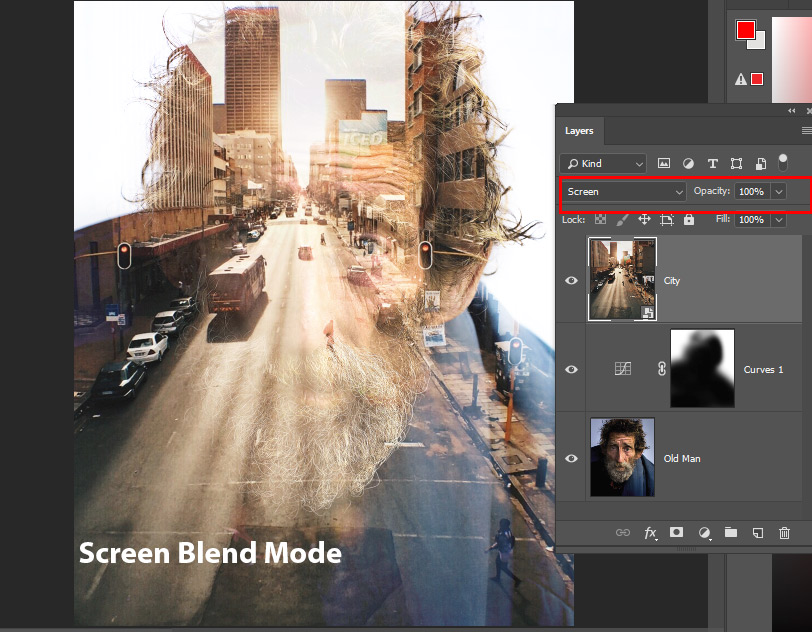
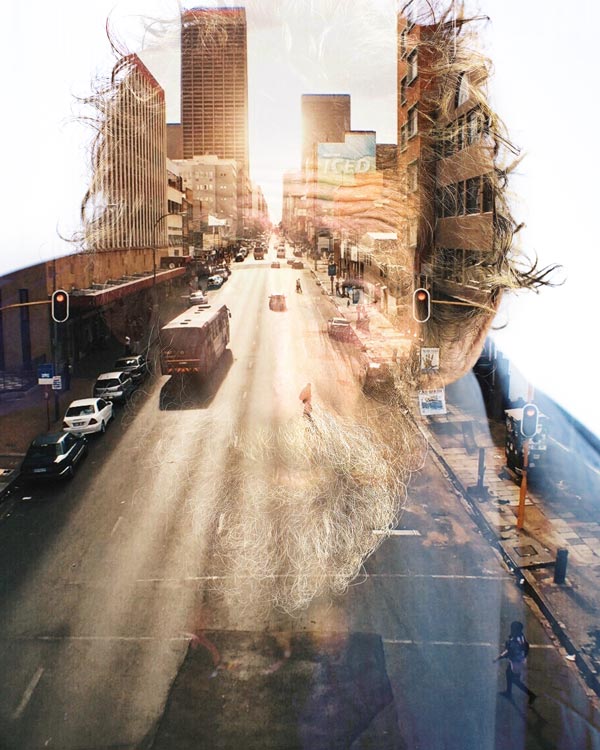
Here we’ve our double exposure effect:
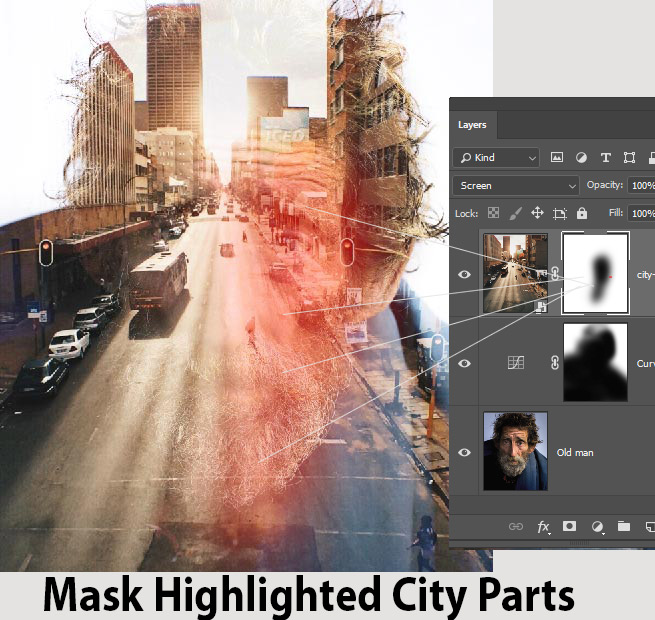
Step 4 – Enhance The Effect
This step is to enhance the effect which we have created so far. We’ll make the image more surrealistic by revealing the beard of the old man.
Go to Layer > Layer Mask > Reveal All to add a mask to city image.
Activate the Brush Tool (B). Set its opacity and flow about 30%. Now mask the highlighted parts of city image as shown below to reveal the old man’s beard and some face parts. This will create a surreal effect like his beard hanging over the road. If you want, you can also go for revealing other parts as well.
Try to achieve a smooth transition between the old man and city image. Don’t rush it and do it patiently.
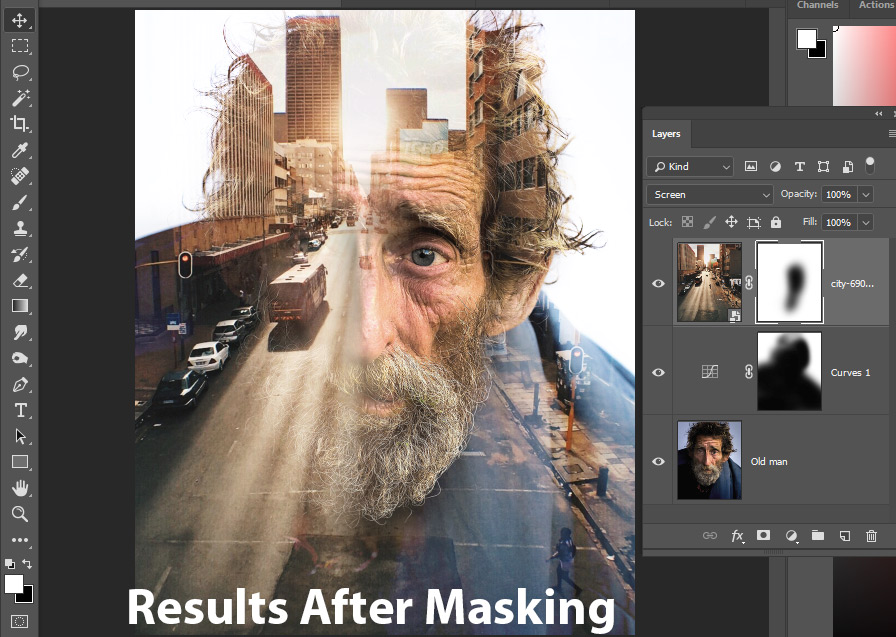
Results:
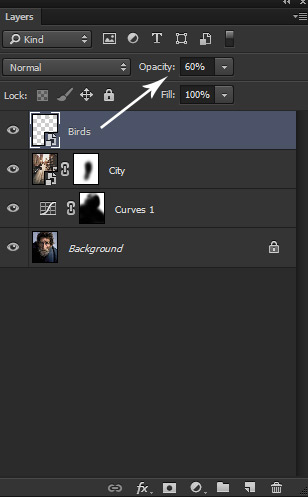
Step 5 – Surrealism
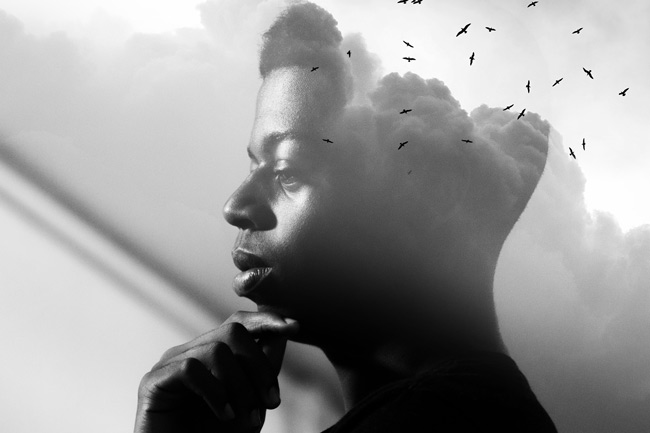
Create a new layer and name it ‘birds’. Load the Birds brushes and paint some birds as shown below. Feel free to paint them wherever you want to.
This will add a surreal effect to the image and make sure to add other elements such as mountains, clouds, forest, trees or anything that gives your image a surreal feel such as I did below by adding birds and it’s look more surreal.

Reduce the opacity of birds layer to 60% and fade them into the lights of the city. This will also help us to blend the birds with lights which we are going to create in the next step.
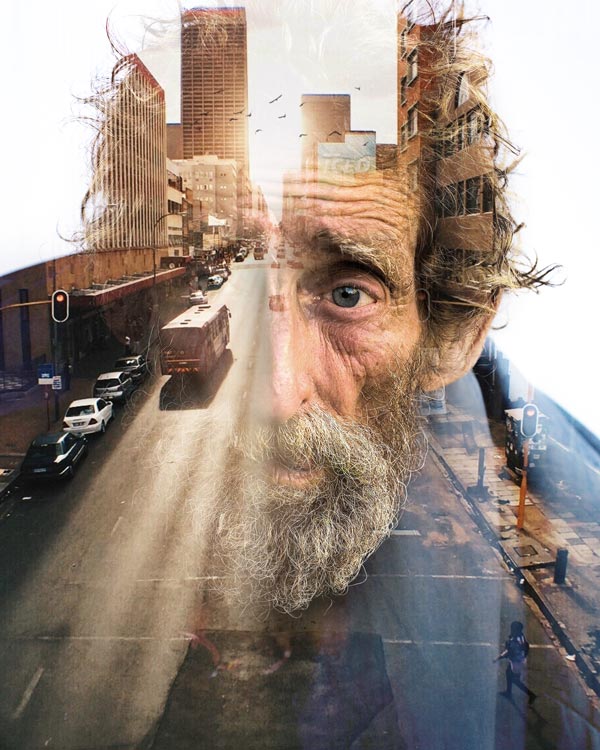
After reducing opacity:
Step 6 – Working With Lights
Create a new layer and name it ‘light’. Set the foreground color to #5a4119. Now using a soft round brush, paint some lights as shown below. Do use a bigger brush for painting the light.
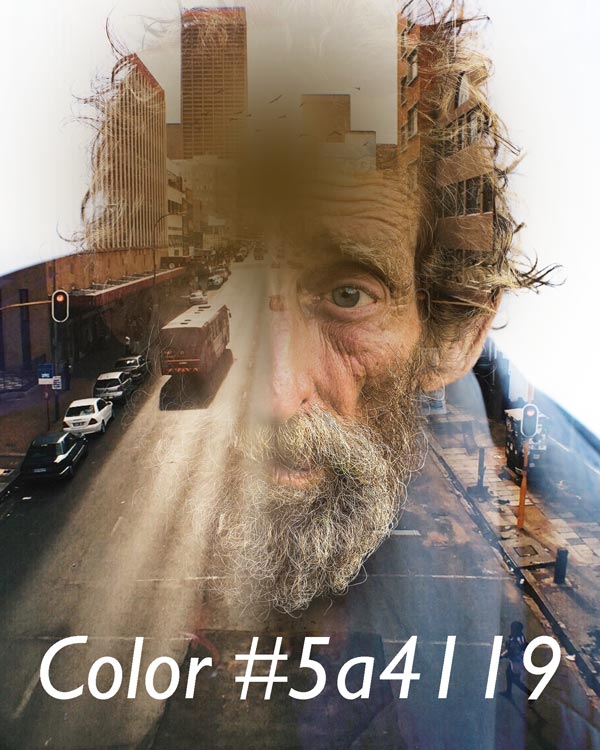
Set the blending mode of the light layer to Linear Dodge and reduce its opacity to 69%.
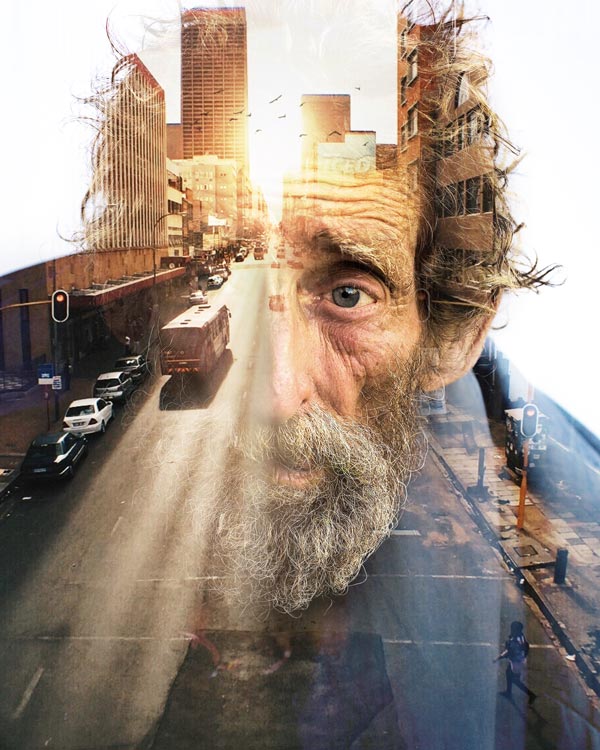
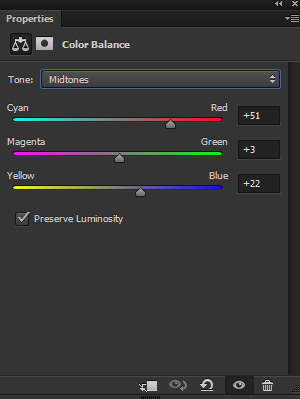
Step 7 – Final Adjustments
Make a Color Balance adjustment layer and make some colors adjustment. Only change the value of Midtones.
Results:

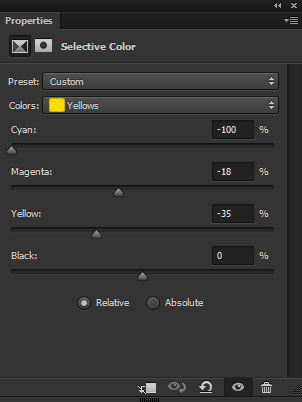
Add a Selective Color adjustment layer and enhance the red colors tones.
Results:
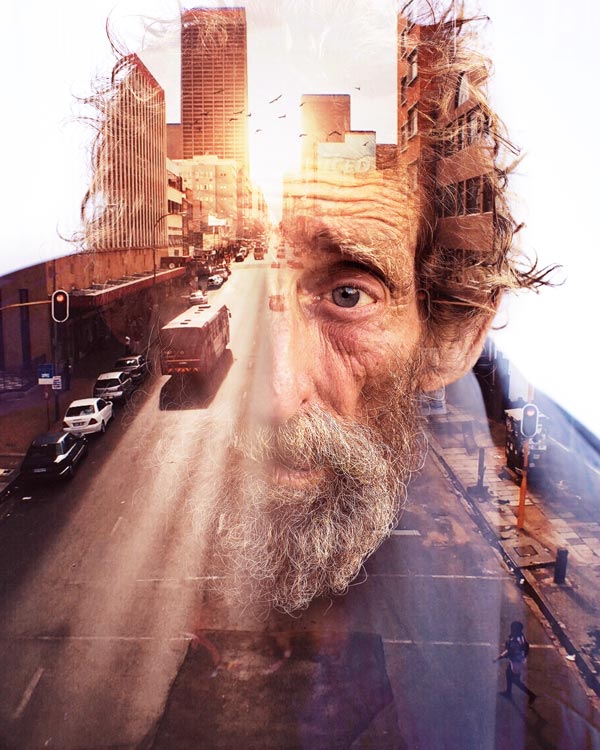
Finally, use Color Lookup adjustment layer and choose the Tension Green file.
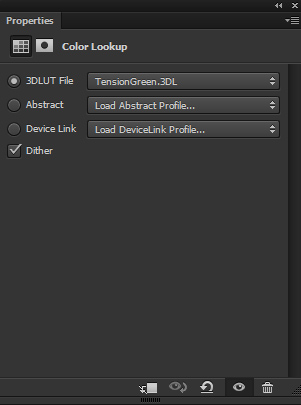
Set the opacity of the Color Lookup to 70%.
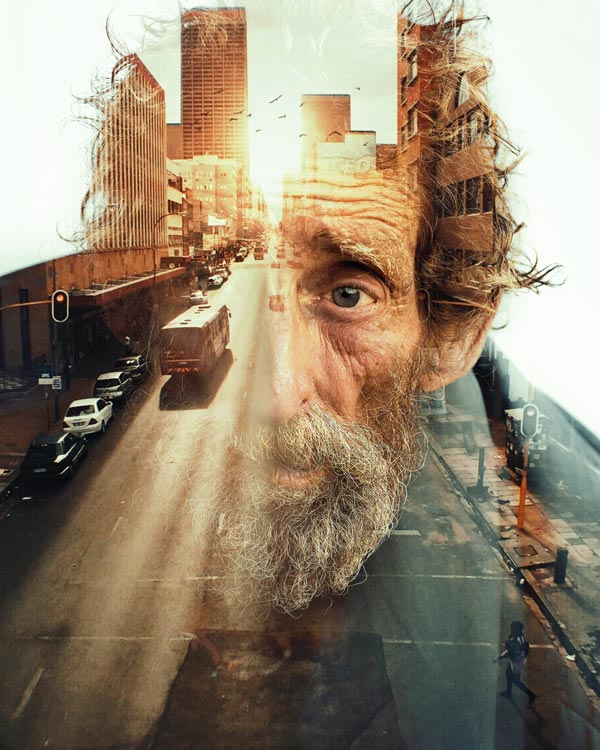
Here are the final results:
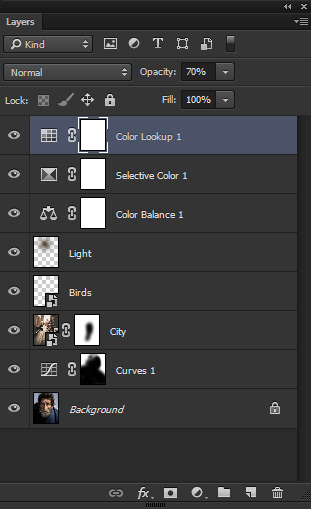
Layer panel arranged:
Conclusion
Thanks for following the tutorial. In order to create a double exposure effect, try to experiment with images, blend them using blend modes and adjustment layers like you have already seen in the above mentioned steps. Do share, like, tweet if you really like it and feel free to let me know if need any help. Have a great day!
Need Help With Photoshop or Looking for Professional Support?
Whether you're just getting started with Photoshop or need expert-level assistance, we're here to help! Contact us for personalized Photoshop tutorials, project support, or creative services.
Get in touch today to take your skills or projects to the next level.
CONTACT US NOW📘 Want to Master Photoshop Faster?
🎁 Get Your FREE PDF E-Book "Top 10 Photoshop Tricks Every Designer Must Know" Now – Packed with expert tips, shortcuts, and techniques to boost your creativity & workflow.
👉 Download Your FREE PDF E-Book NOW!
