


In this tutorial, I’ll show you how to create a dispersion effect in Photoshop. You’ll learn how to use the combination of layers, filters, adjustment layers & brush strokes to create a disintegration effect. It is one of the most popular effect but sometime getting it right is not easy, with the help of step by step instructions, you’ll able to learn how to create disintegration effects so let’s get into it.
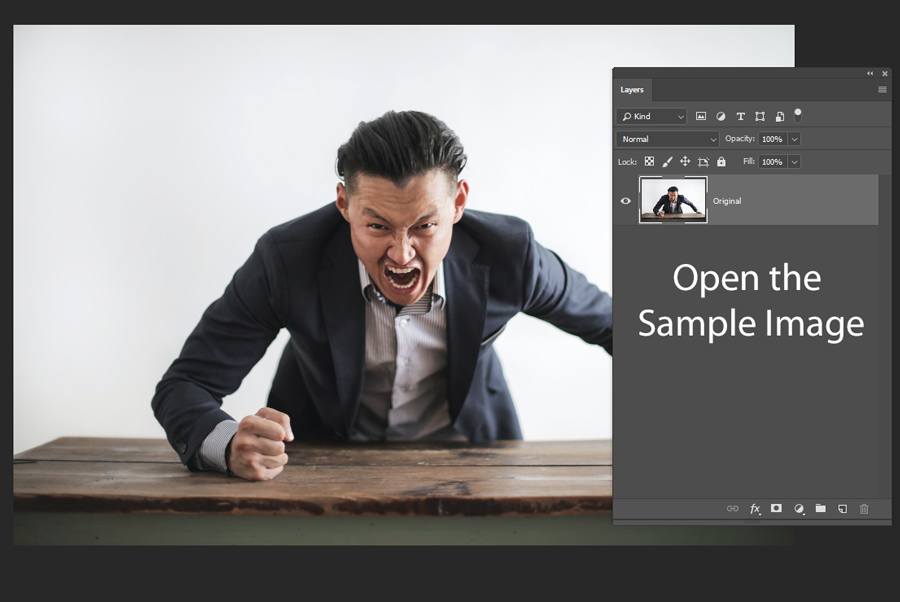
Step 1 – Open the Sample Image
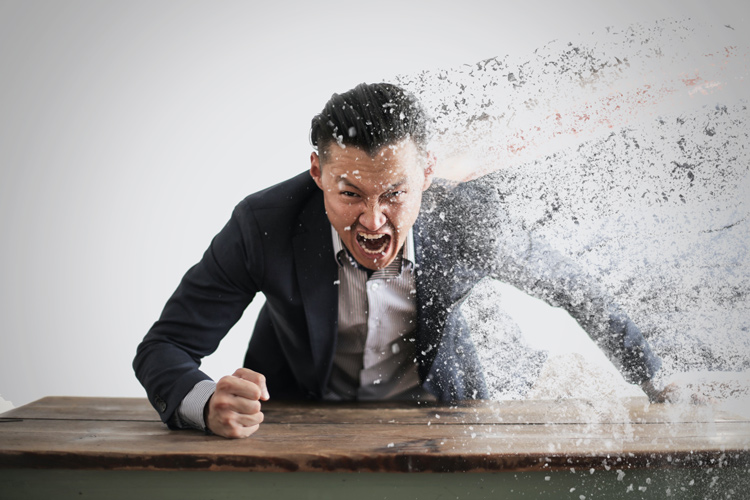
Download the sample image from Pexels and open it up in Photoshop by selecting File > Open as you can see I have opened it in Photoshop:
Step 2 – Separate the Subject
First, we gonna separate the subject from the background. If you notice that my subject background is clean that will help me select the subject without any hassle. Make sure when you use the image for this effect try to get the image that has blown out background.
Because of my background, I can use Magic Wand Tool (W) to select the background in just one click. This tool works by sampling a color, activate it from the Tool panel, and then click on the background to select it. When you click, it will sample the color from the background and select all the matching pixels that are matching with the sampled color. So use it and select the background as shown below.
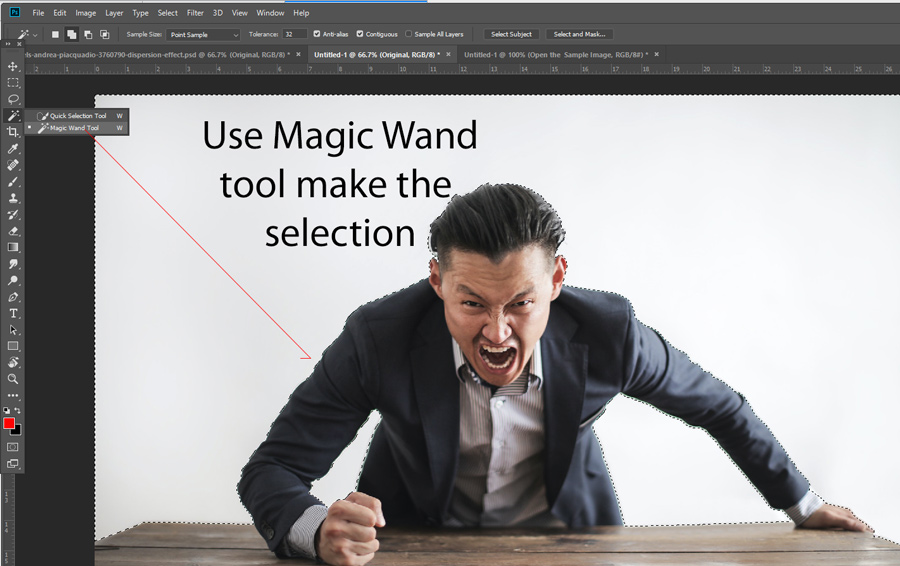
Right now the background is selected, to select the model or subject we need to invert the selection.
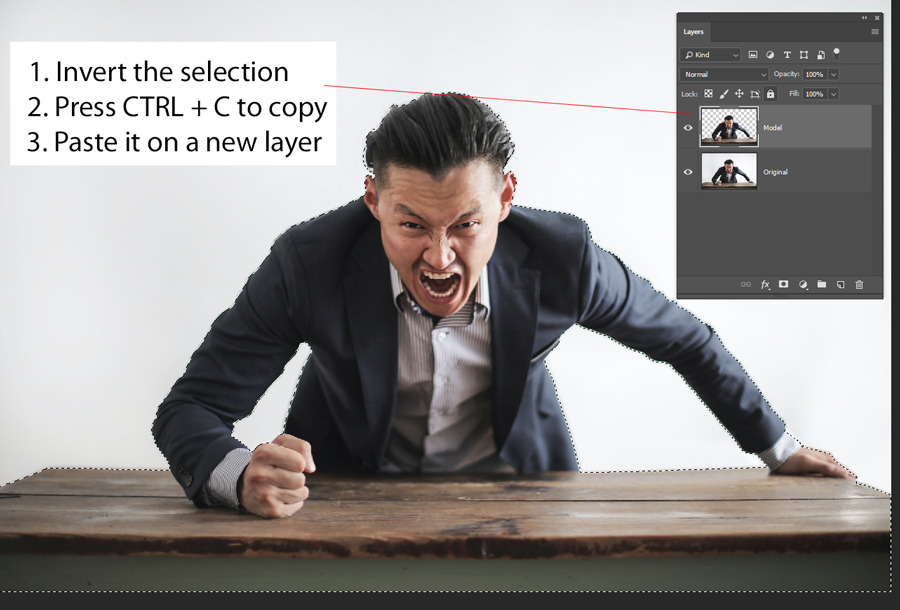
1. Press CTRL + I to invert the selection and select the model.
2. Press CTRL + C to copy the model
3. Create a new layer by pressing CTRL + SHIFT + N & press CTRL + V to paste the selection or model on a newly created layer. Name it this layer “Model”.
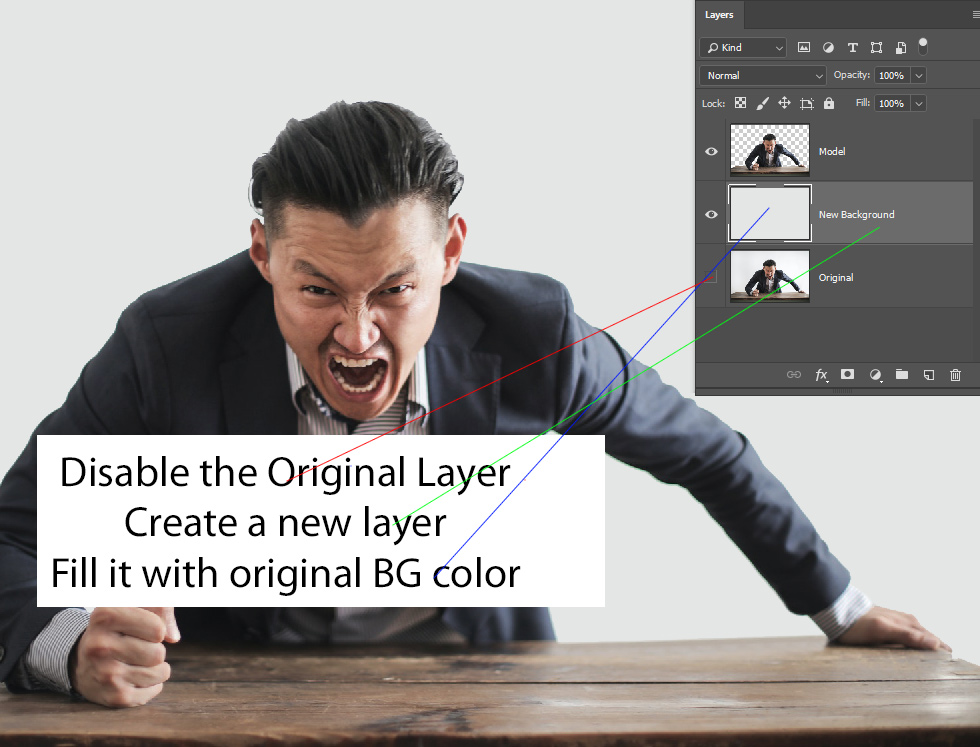
1. Disable the Original Layer as we don’t need that.
2. Create a new layer under the Model layer & name it “New Background”.
3. Go to Edit > Fill & Fill this layer with grey color or you can sample the color from the original layer and then fill it by pressing ALT + BACKSPACE.
Step 3 – Using Liquify Filter
Once you have the model on a new layer, convert the layer to Smart Object by right-clicking on it & choose convert to Smart Object.
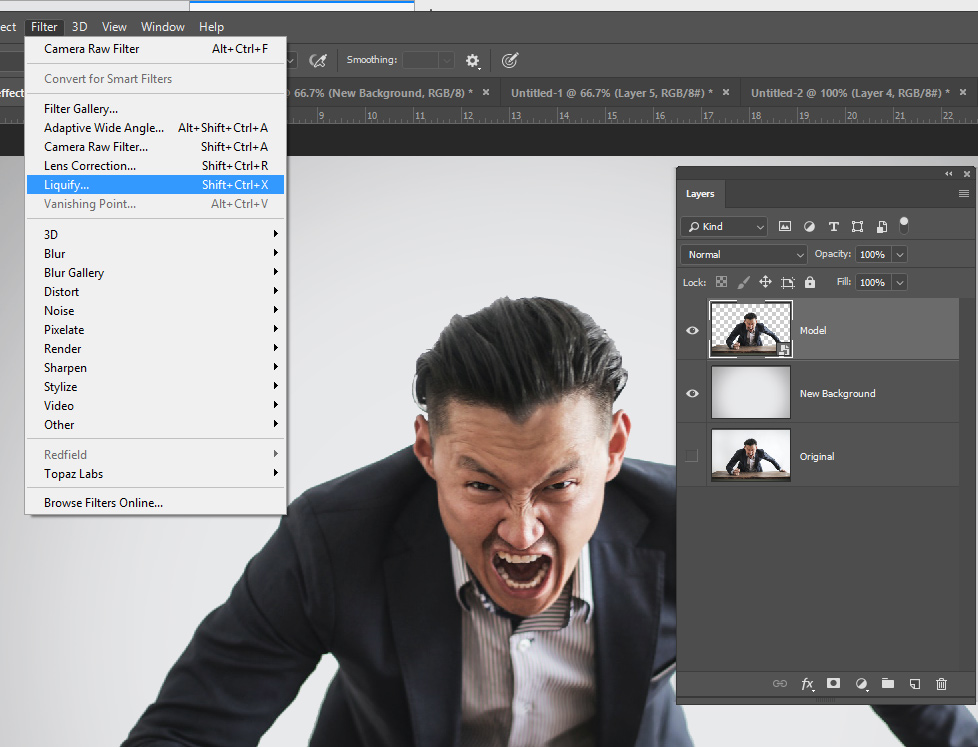
Go to Filter > Liquify:
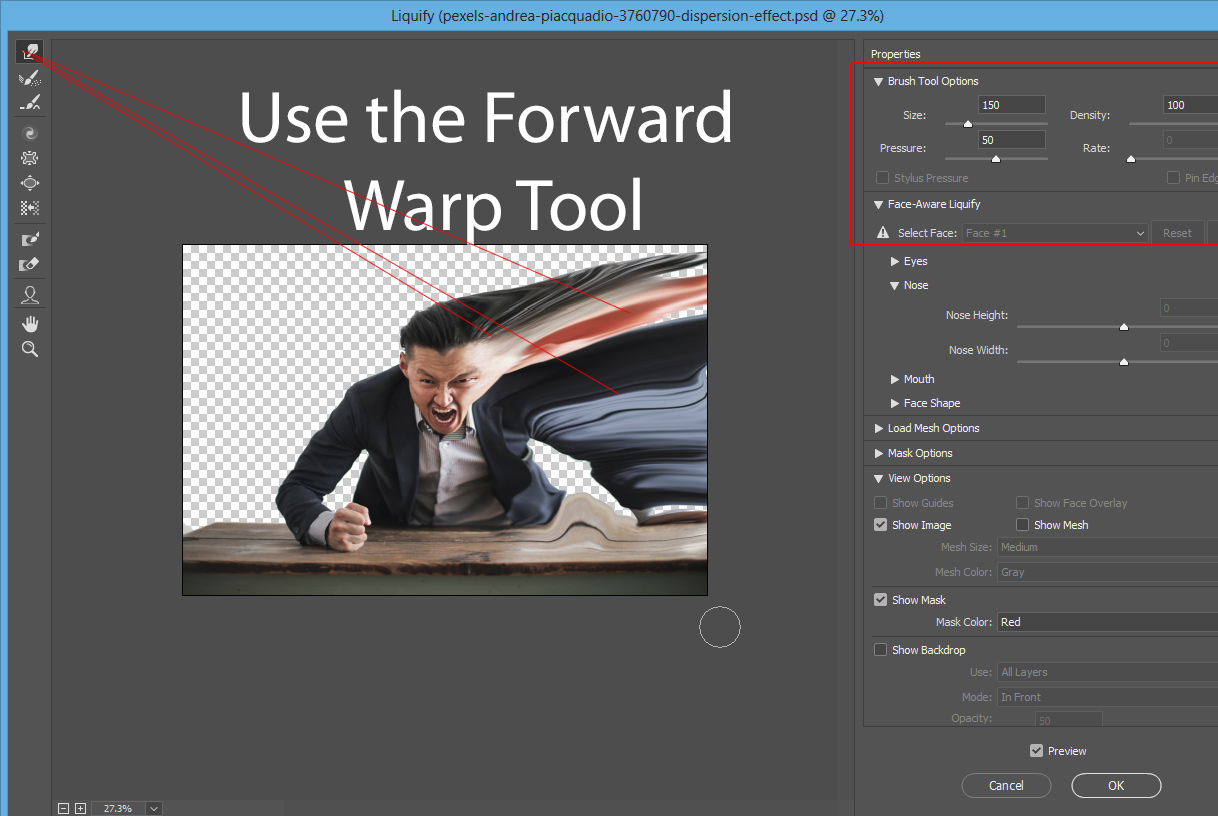
Use the Forward Warp Tool and destruct the shape of our model body. You can take the help of Brush Tool options if you want to speed up the process. You can increase the brush size, density & pressure from there. Modify the shape of the model body as shown below using the Liquify Filter.
Step 4 – Prepping the Image for Dispersion Effect
Now we’ll prep the image to start creating a disintegration or dispersion effect with the use of explosion brushes.
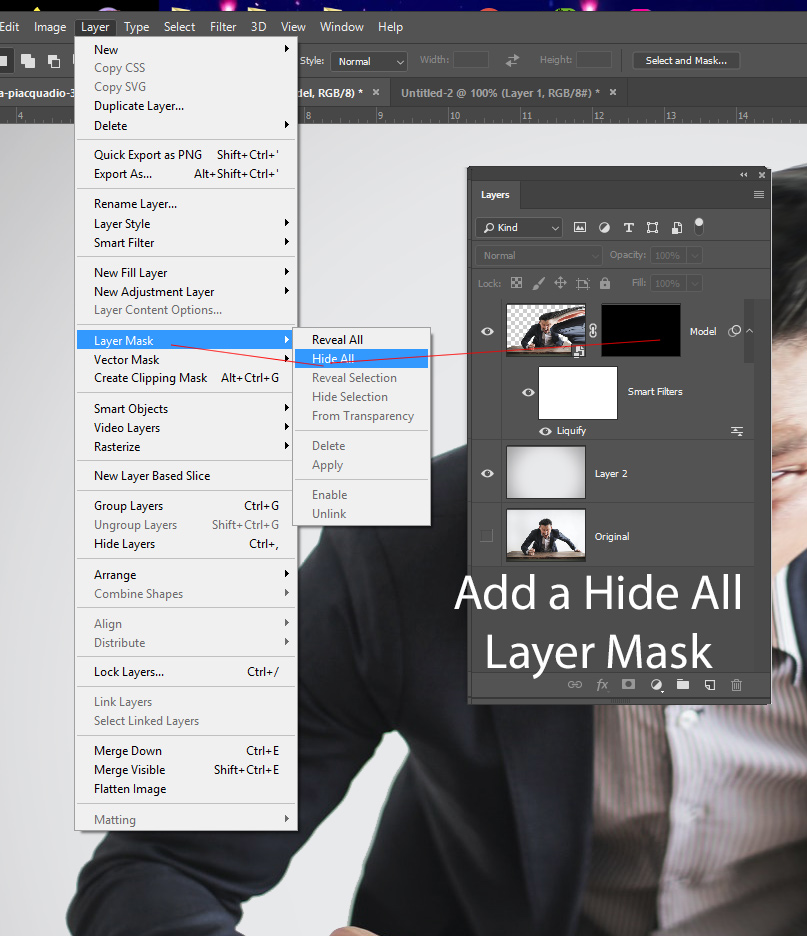
Add a Hide All layer mask to Model layer by selecting Layer > Layer Mask > Hide All. We don’t need this entire model image we just need parts of it to create scattered body parts of the model to create a effect like his body part are being thrown in the air or being vanished/dispersed.
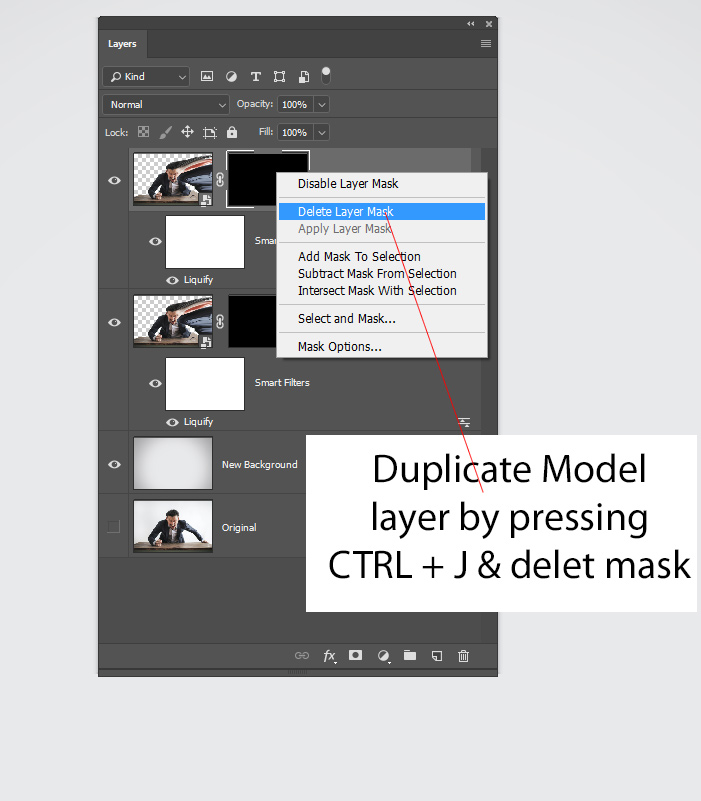
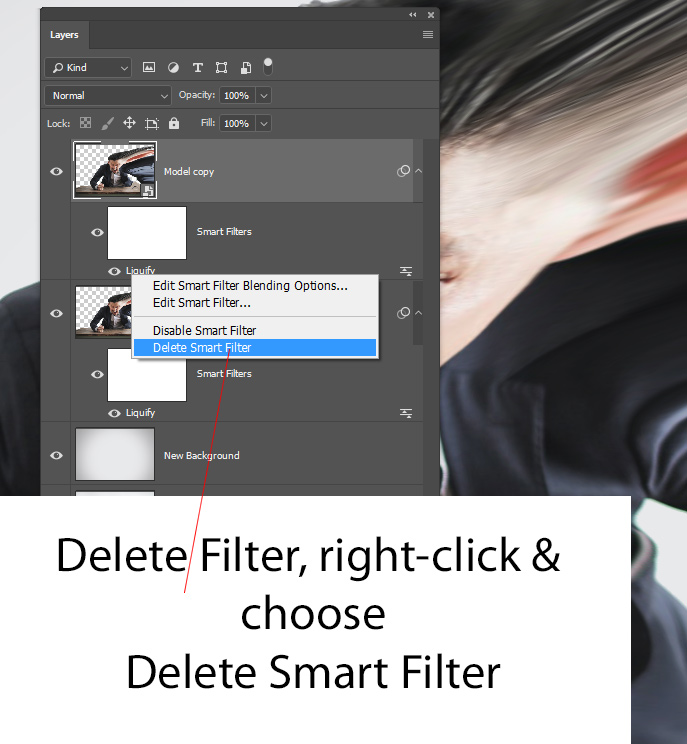
We need one more copy of the Model layer on top of it. Duplicate the model layer and delete the layer mask by right-clicking on it and choose Delete Layer Mask.
Since we applied Liquify filter to this image we need to delete this as well. Right-Click on the Smart Filter and choose “Delete Smart Filter”.
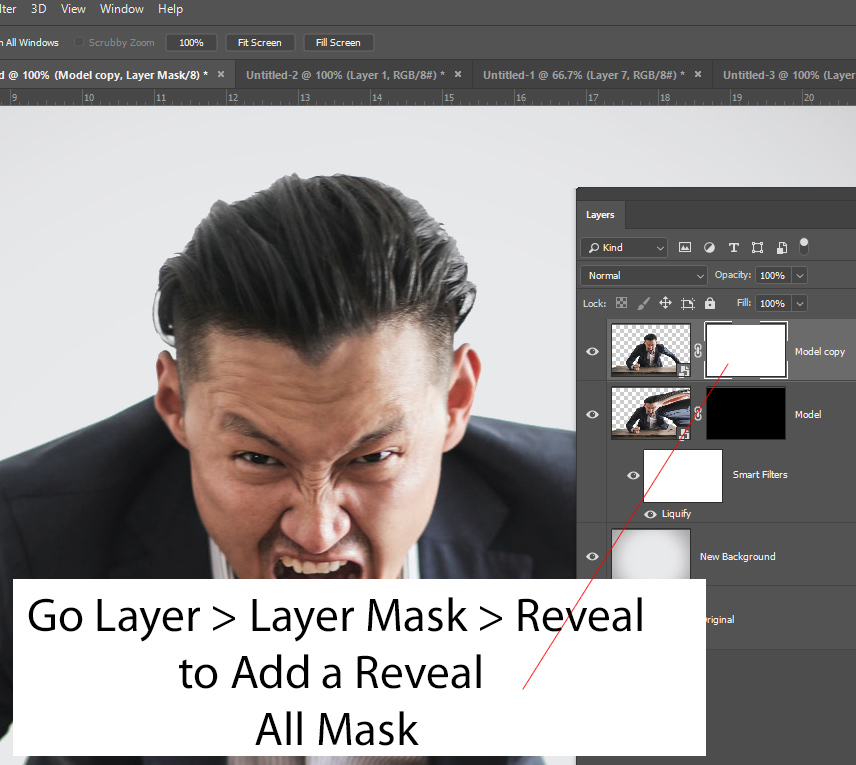
Now go to Layer > Layer Mask > Reveal All to add a white mask to the model.
Step 5 – Create Dispersion Effect
You can use any explosion or debris brushes and import them in Photoshop. First, select the Model copy layer and use one of the explosion brushes to start masking the parts of the model body. Try with the right side of the model and make sure when you paint on the layer mask Foreground color is set to black. You can press (D) to set the foreground color to black.
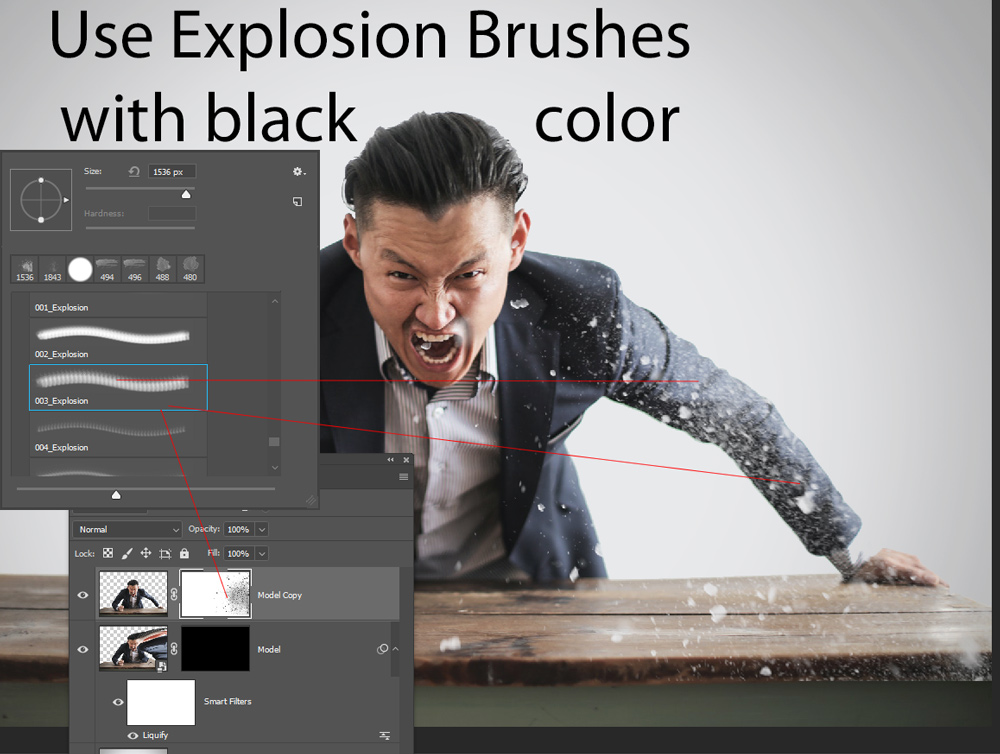
Here are the results after few more strokes:

Now select the Model layer and select the explosion brushes again, this time set the foreground to white and then use the explosion brush to reveal the model parts make them like they are scattered from the body. Think like Thanos has snapped and everyone is reducing into dust.
See the image below for reference:
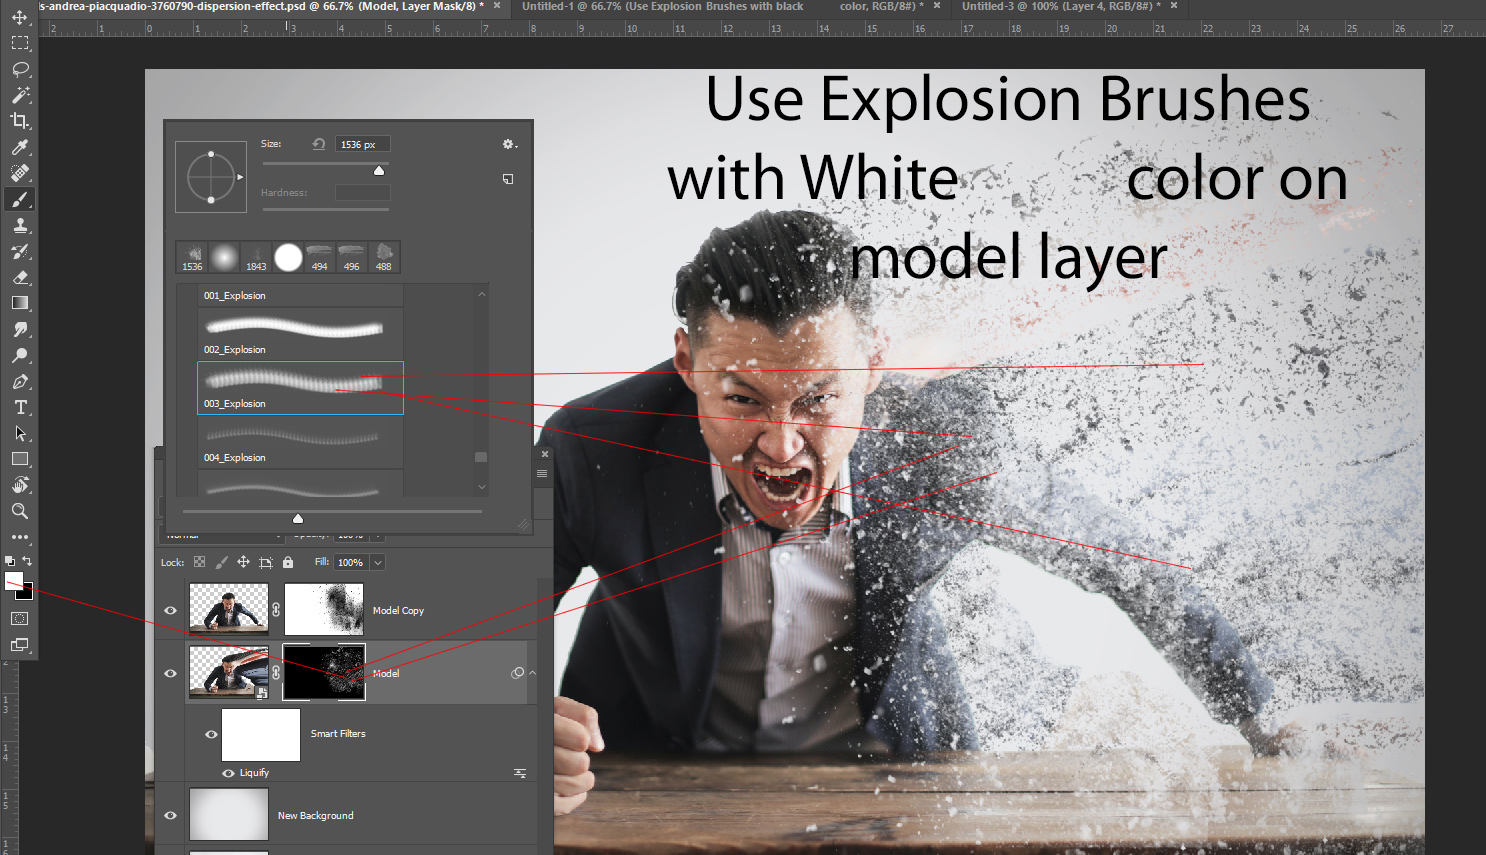
Results so far:
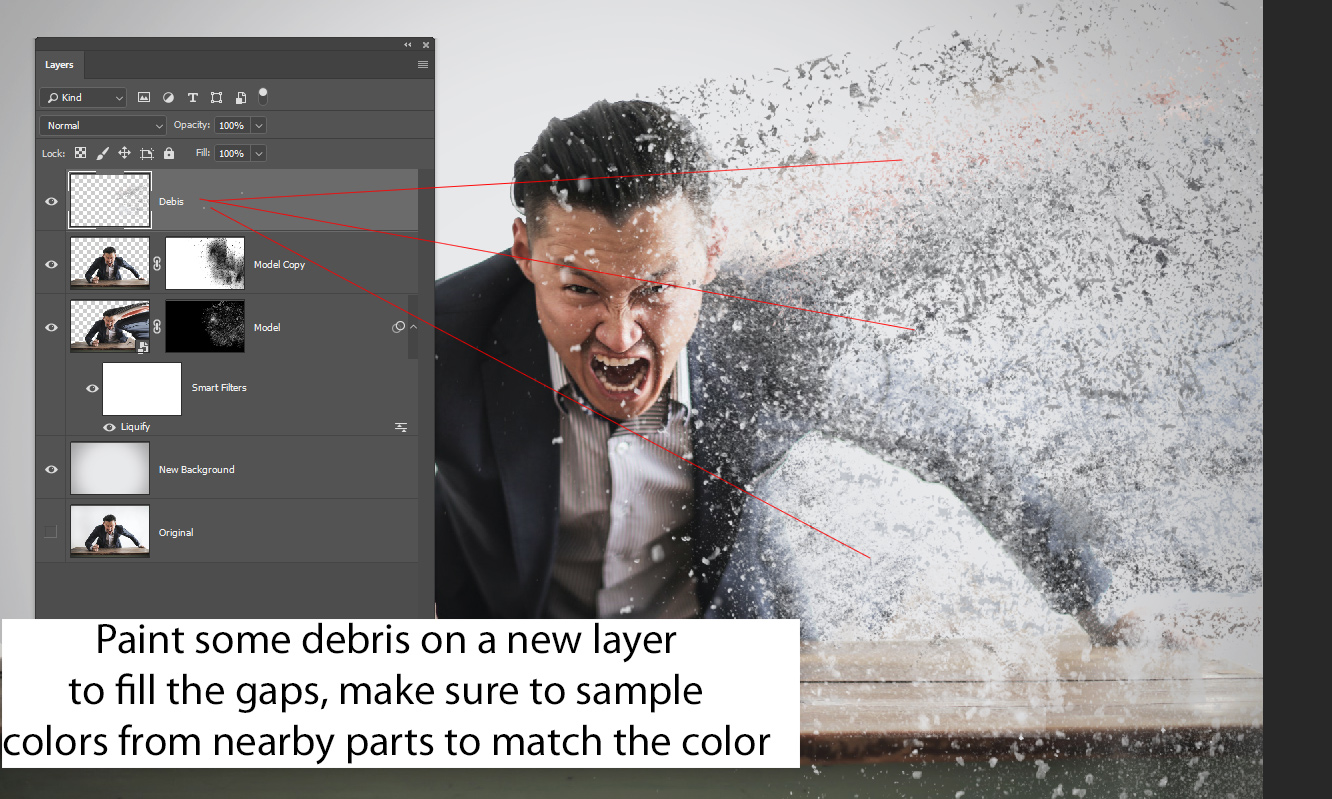
Step 6 – Paint Debris to Fill Gaps
Select different explosion brushes and fill the gap by painting debris on the parts that are totally white. Make sure to sample the color from the scattered parts and then paint the debris using the sampled color. You can see how I did it in the below image:
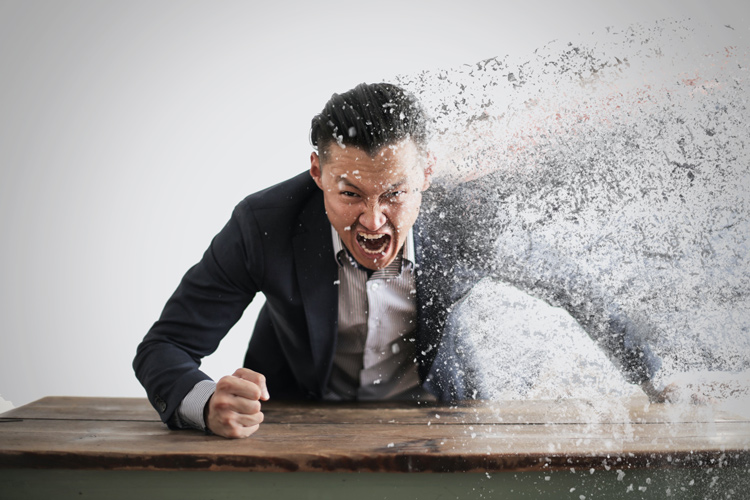
Results so far:
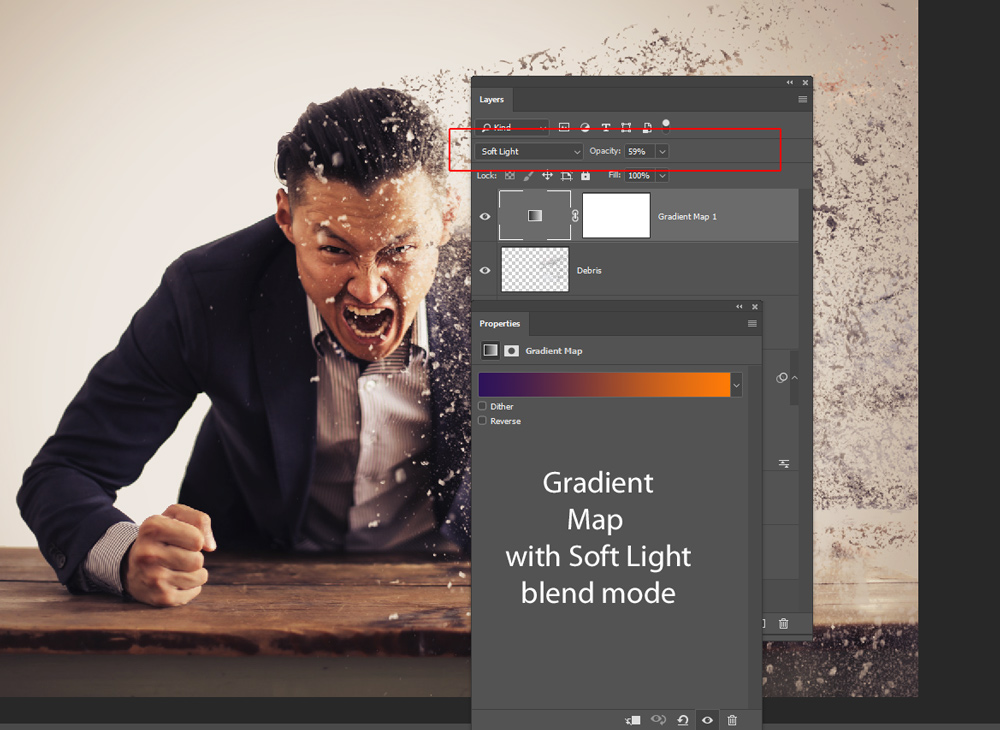
Step 7 – Coloring & Brightness
In the end, I changed the coloring of the image using Gradient Map. Go to Layer > New Adjustment Layer > Gradient Map and use color that you like I used a Purple & Orange color for Gradient Map. I also changed the blend mode of Gradient Map to Soft Light & reduced to opacity 59%.
Go to Layer > New Adjustment Layer > Curves and brighten up the entire image.
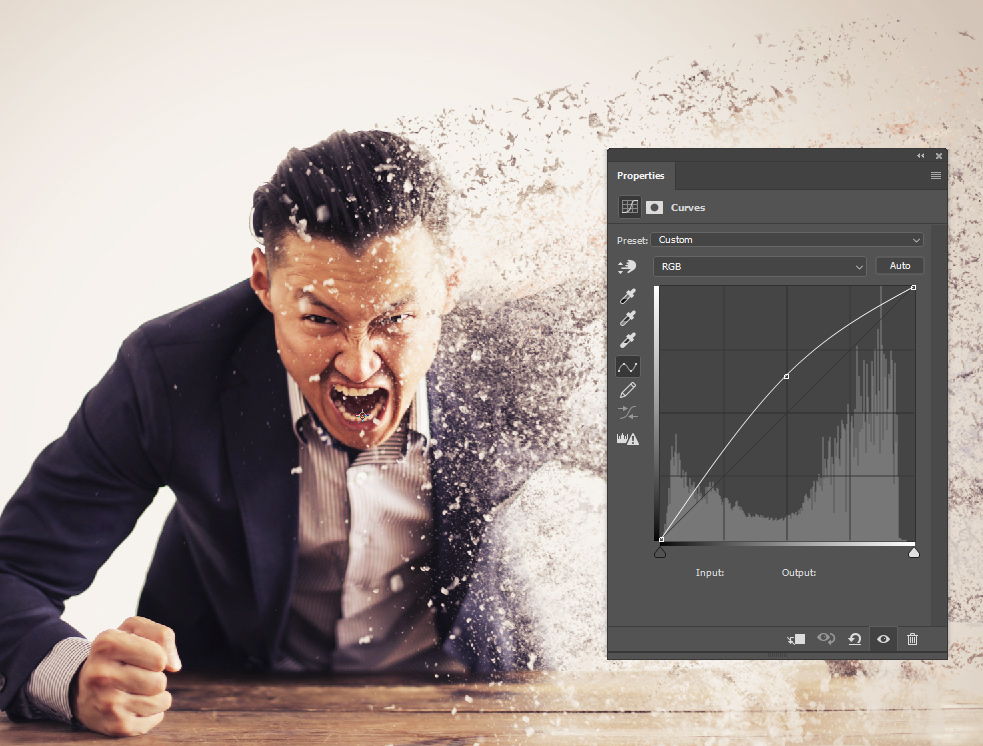
Here are my final results:

Thanks for following the tutorial and I hope you have learned something new today. Let me know if you have questions by commenting in the comment section below.
Need Help With Photoshop or Looking for Professional Support?
Whether you're just getting started with Photoshop or need expert-level assistance, we're here to help! Contact us for personalized Photoshop tutorials, project support, or creative services.
Get in touch today to take your skills or projects to the next level.
CONTACT US NOW📘 Want to Master Photoshop Faster?
🎁 Get Your FREE PDF E-Book "Top 10 Photoshop Tricks Every Designer Must Know" Now – Packed with expert tips, shortcuts, and techniques to boost your creativity & workflow.
👉 Download Your FREE PDF E-Book NOW!
