


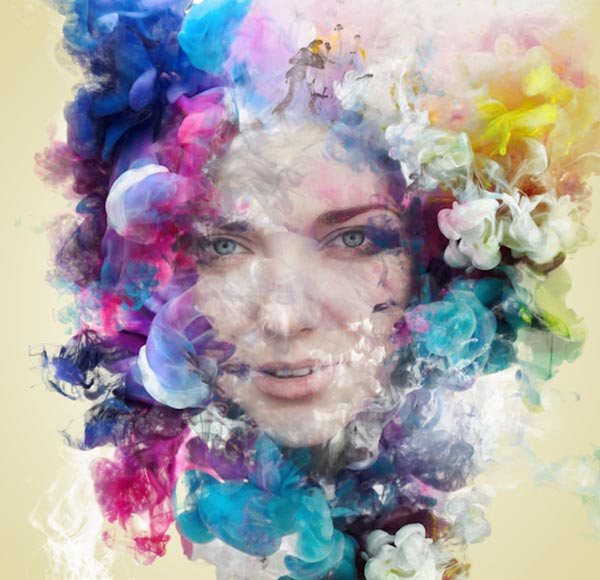
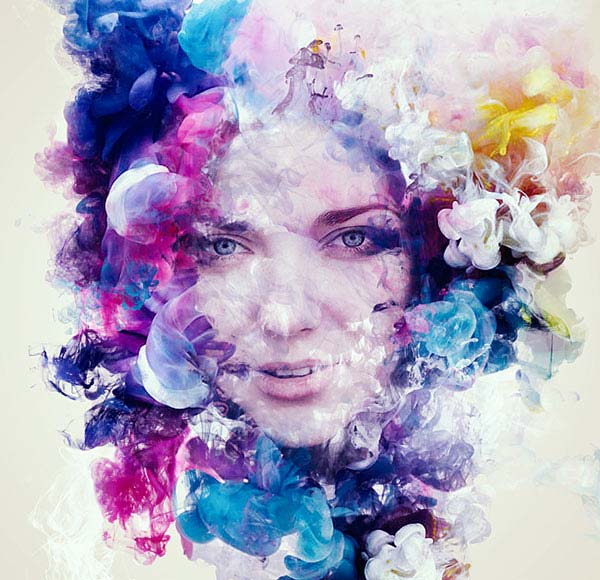
In this tutorial, I’ll show you the process of creating an artistic ink portrait effect in Photoshop. We’ll be using the ink brushes and textures to get this effect. The tutorial is very easy mostly it has the extensive use of layer mask and brushes so even a novice can follow this tutorial as well.
Tutorial Resources
Step 1
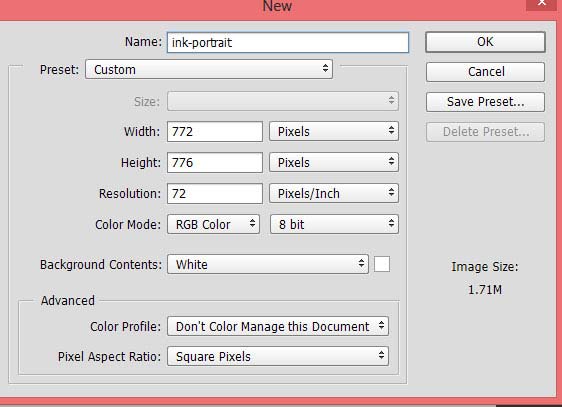
First, create a new document in Photoshop. Go to File > New and use the following settings:
Step 2
Fill the newly created document with gray color. I chose the #b9b9b9 color to fill the document. So first, set the foreground color to gray and then press ALT + Backspace to fill the document.
 ‘
‘
Hit CTRL + SHIFT + N to create a new layer. Use a white soft brush to paint on the middle of the document.

Step 3
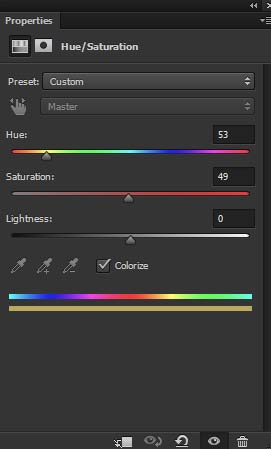
Use a Hue/Saturation adjustment layer to colorize the document color from gray to yellow.
You can make an adjustment layer by selecting Layer > New Adjustment Layer.
Changed background color:

Step 4 – Add the Woman
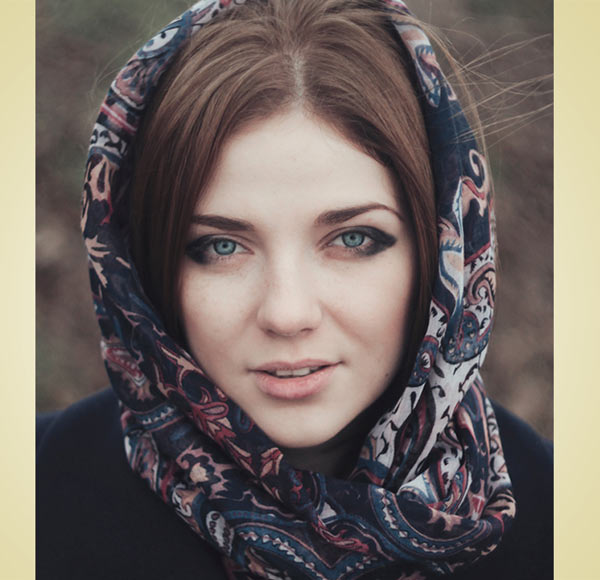
Now add the woman portrait using the File > Place Embedded command. You can use your portrait image here as well.
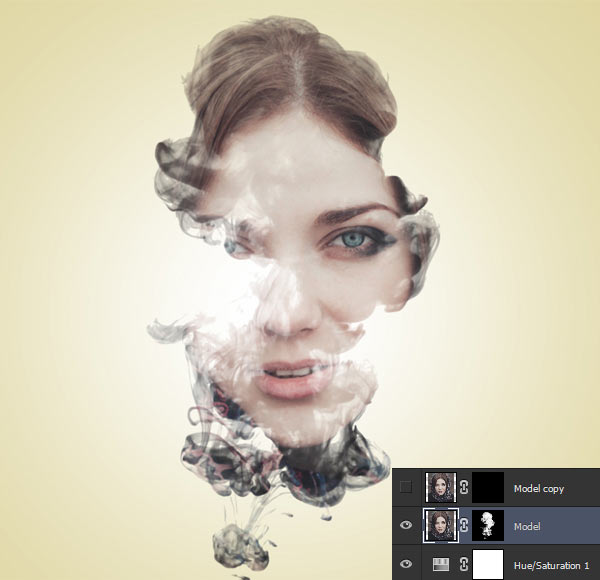
Step 5 – Copy and Hide Model Layers
The trick of achieving this kind of effect is the use of brushes and texture. To use brushes we need to hide the model layer with a layer mask and then we’ll use each layer parts by revealing them with the use of the ink brushes.
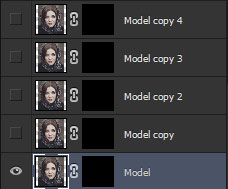
So now press CTRL + J and duplicate the model layer multiple time. Each time add a Hide All mask to model by going Layer > Layer Mask > Hide All.
Once you did it then hide all model layers visibility by clicking on the eye icon. For now, only visible model original layer.
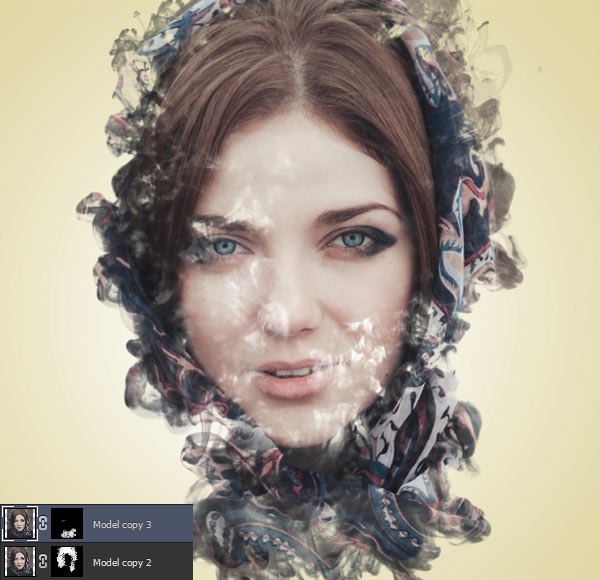
Step 6 – Using Ink Brushes
Load the ink brushes in Photoshop and then use any ink brush to reveal the model. Remember whenever you use the ink brush choose the white color and then paint on the layer mask of the model to reveal the parts.
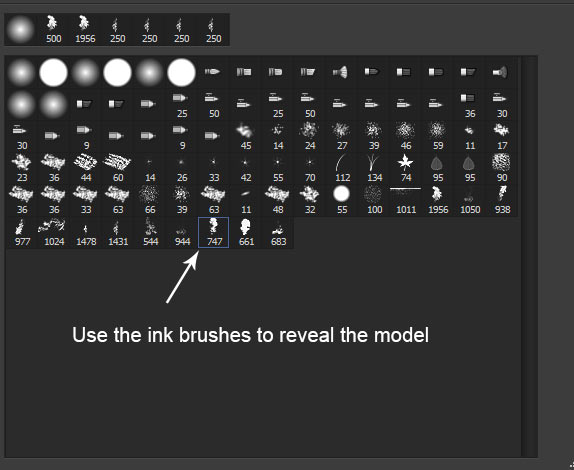
Once you pick the brush, now start revealing the model by painting on the layer mask of the model with white color.
Here you can see how I used the brush:
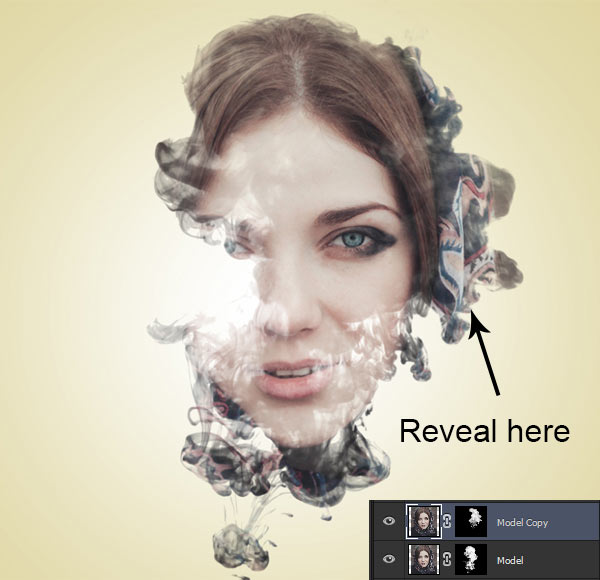
Step 7
Now you need to keep revealing the model using the different ink brushes. There are 13, so choose the different brushes every time and then paint on the layer mask and each time use the different model layer as we have many.
Step 8
Now I painted on the third copied layer of model:
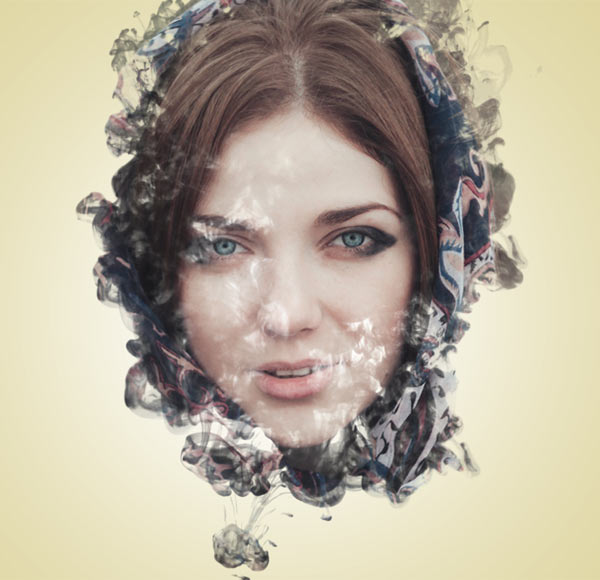
Here I used the fourth duplicate layer of model:
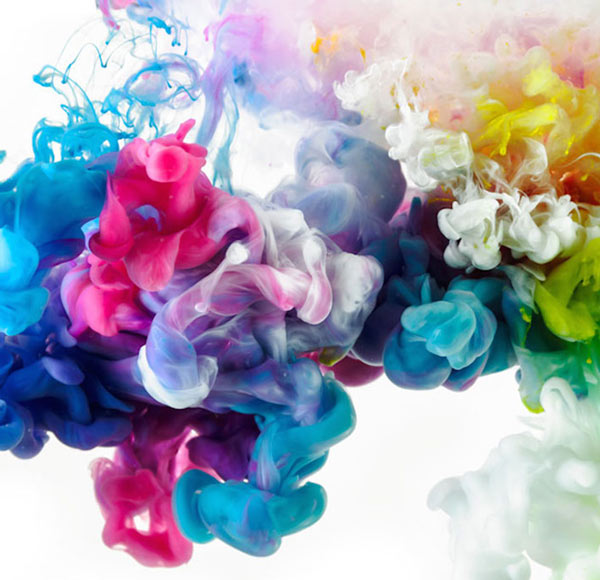
Step 9 – Using the Texture
This step is important as it will add the colors to the portrait. So you should use a colorful ink texture which has ink in water. I found this image on Google as the other free sites don’t have this kind of texture in colors.
So you can search on Google for the texture and you can download a low-quality version which I am using (I have to). Sorry I am not giving you the link.
Put the texture to main document and use the Free Transform Tool (CTRL + T) to resize and rotate it. It depends on which parts of the texture you want to use.
Once you placed the texture, add a Hide All mask to it and then use the ink brushes to reveal it. The process is exactly the same as we did with the woman layer.
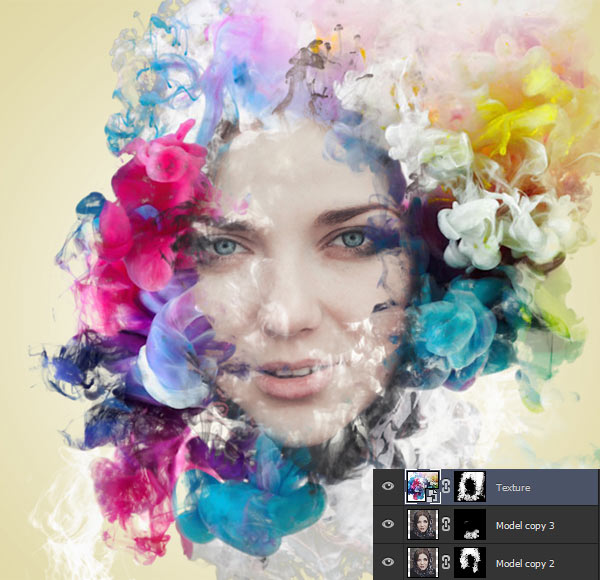
Step 10
I duplicated the texture layer and then I used it on other parts.
Lastly, I used it on the top left side:
So this is how I blend the texture with the woman face.
Step 11
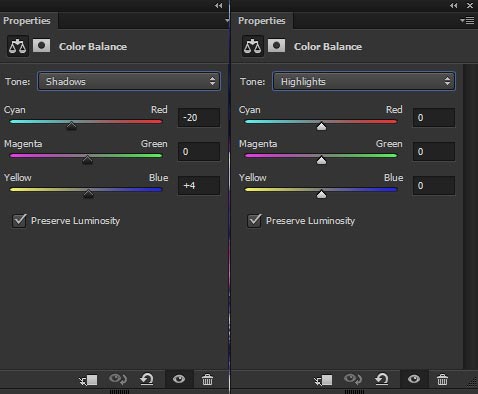
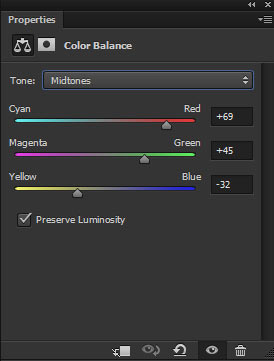
Now I used a bunch of adjustment layers for colors. First, I used the Color Balance adjustment layer to mostly adding the blue tones to portrait. Don’t forget to put this layer on top of all layers.
I used the Color Lookup adjustment to balance the contrast.
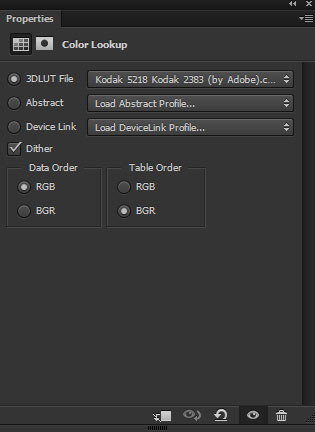
Effect of both adjustments:

Step 12 – Sharpening the Image
You can notice the image looks blurry at the moment. This is probably because we are working on a very low-resolution document.
But adding sharpness to the image will fix it. Merge all layers into a single layer by pressing CTRL + SHIFT + ALT + E and then go to Filter > Other > Custom.
Use the following values for this filter:
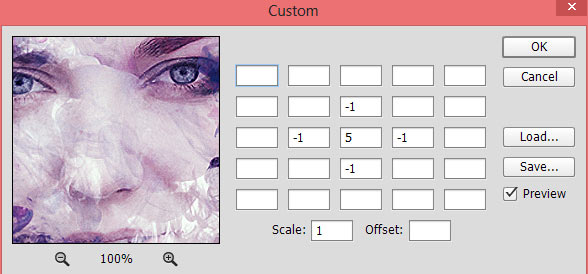
Once you applied the filter you’ll have the following results. Note this filter not only added sharpness to the image but also added a paper like effect. I also reduced the opacity of merged layer to 62% to subtle the effect of Custom Filter.
Step 13
Make a Solid Color adjustment and pick the dark blue color.
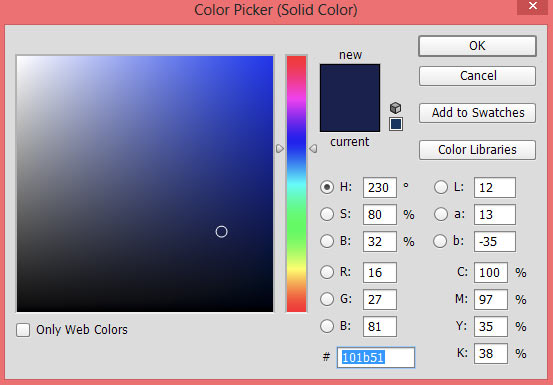
Set the blending mode to Exclusion 70%.
Step 14
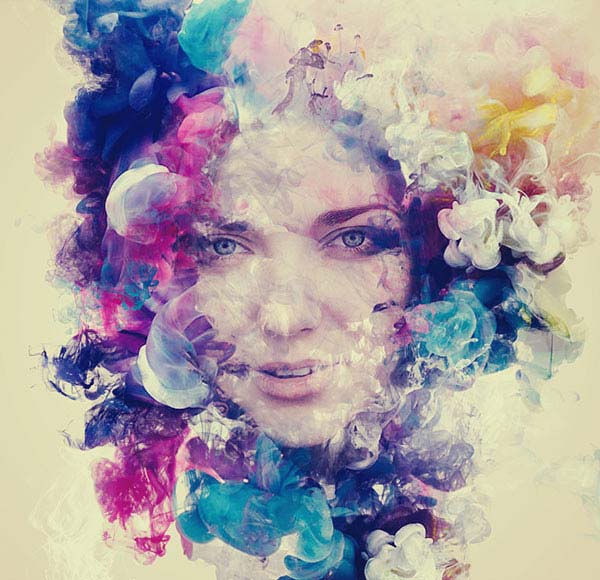
Using the Color Balance I added the yellow tones.
Results:
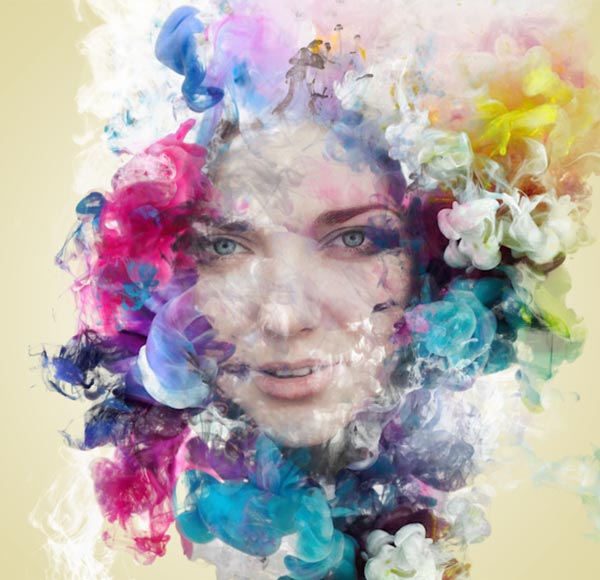
Step 15
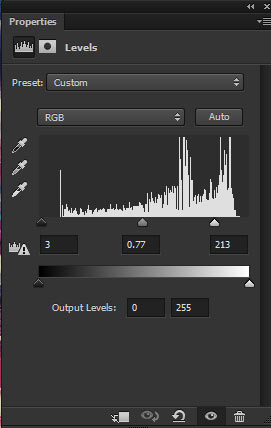
Finally, I used the Levels to pop out the color by increasing the brightness.
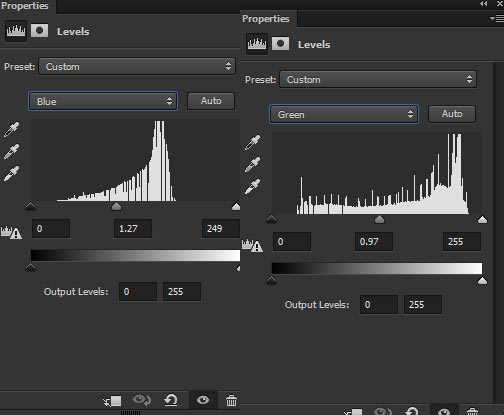
Here I used the Blue and Green channels settings for tweaking the colors:
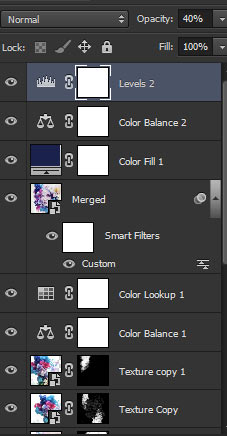
I reduced the Levels opacity to 40%.
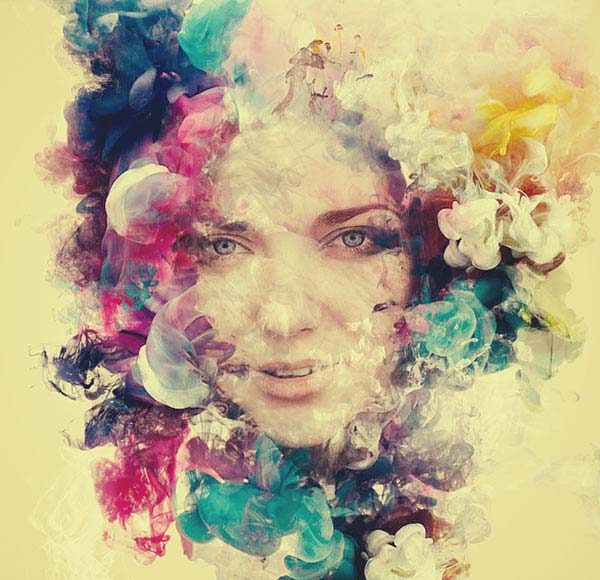
Here we have our ink portrait effect:

Here you can see the remaining layers:
Need Help With Photoshop or Looking for Professional Support?
Whether you're just getting started with Photoshop or need expert-level assistance, we're here to help! Contact us for personalized Photoshop tutorials, project support, or creative services.
Get in touch today to take your skills or projects to the next level.
CONTACT US NOW📘 Want to Master Photoshop Faster?
🎁 Get Your FREE PDF E-Book "Top 10 Photoshop Tricks Every Designer Must Know" Now – Packed with expert tips, shortcuts, and techniques to boost your creativity & workflow.
👉 Download Your FREE PDF E-Book NOW!
