
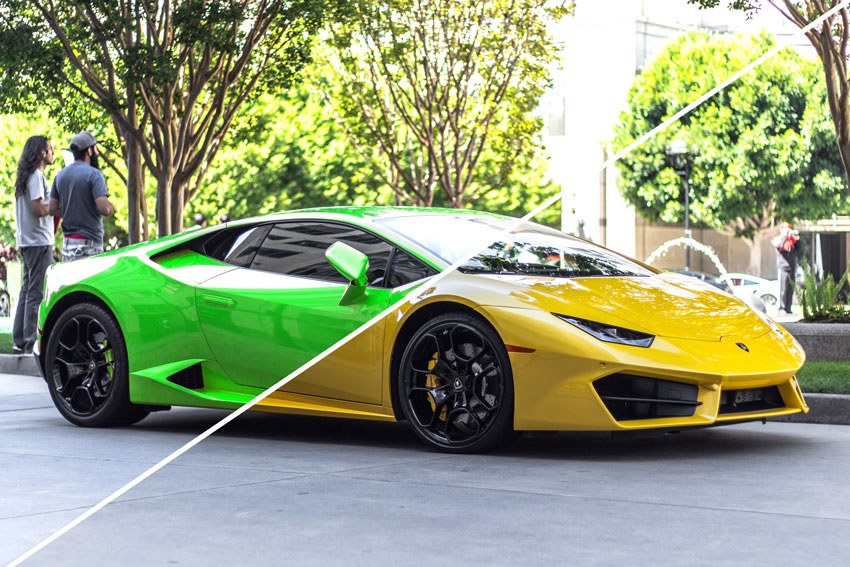

Learn how to change the color of anything in Photoshop using the Hue/Saturation adjustment layer. It’s doesn’t matter whether you are trying to change the color of clothing, products, hair, or any object this skill is for every Photoshop artist. Not only, you’ll change the color but you’ll also learn how to fine-tune coloring to get the best possible results in no time. Without any further ado, let’s dive into the tutorial!
Step 1 – Open an Image
I am using a car image for this tutorial which you can download here. You can use any image you want but make sure it has some rich colors and also it’s a better thing to avoid images that have a similar color to your subject. It’s a yellow card and we’ll change the color of the car into any color using the powerful Hue/Saturation adjustment layer.
You can see I’ve opened the image in Photoshop by selecting File > Open.

Step 2 – Target Color with Hue/Saturation
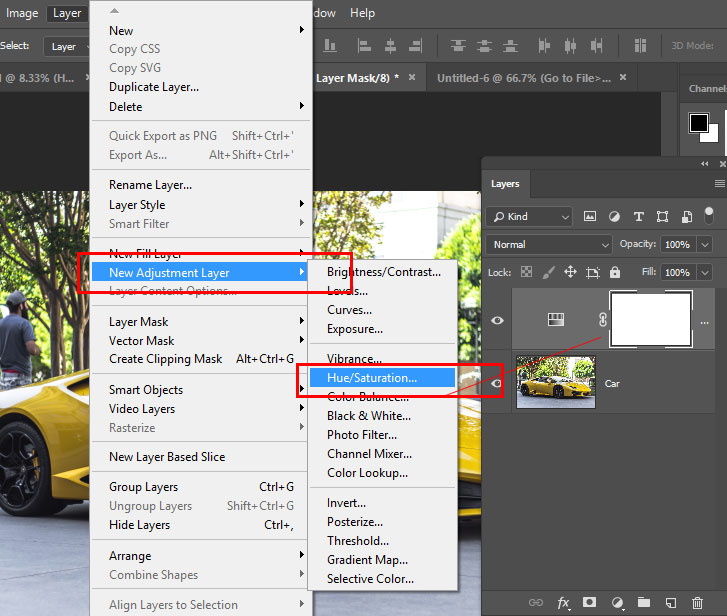
Create a Hue/Saturation layer by selecting Layer > New Adjustment Layer > Hue/Saturation. This will add the Hue/Saturation adjustment layer on top of your layer stack which you can see in the below image.
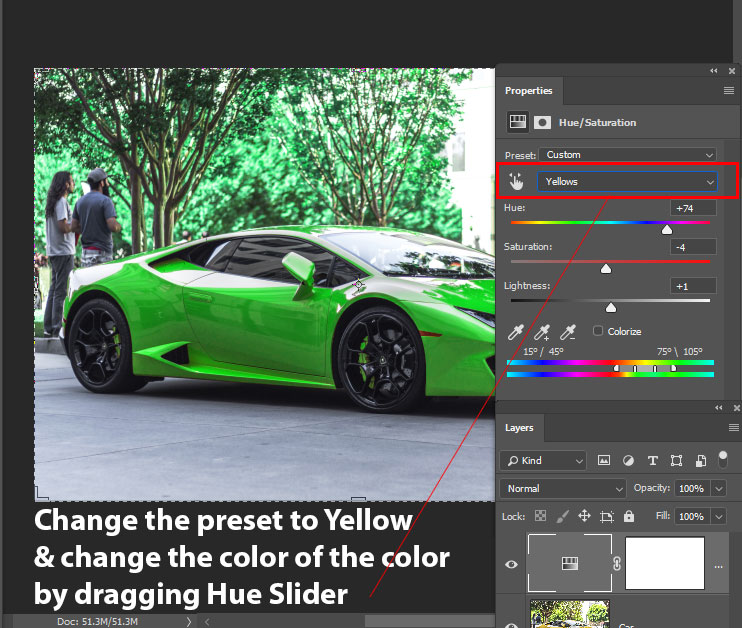
Right underneath the Presets, there is a drop-down list, change it to Yellow. Since the car color is yellow so it’s obvious we should target yellow color and then we’ll change it using Hue slider.
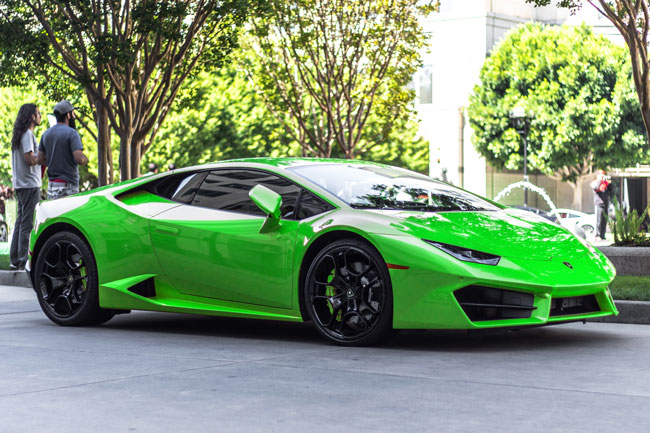
First, select Yellow from Drop Down List and then drag the Hue Slider to change the color of the car. As you can see in the below image I changed the color of the car from yellow to green. You can pick any different color and drag the Hue slider to play around.
Step 3 – Accurate Coloring with Layer Mask
Every adjustment layer comes with built-in with a layer mask and you can see white rectangular shape right-next to the Hue/Saturation layer that shape is a mask. We’ll mask the effect of Hue/Saturation on the background and make it visible only on the car using a mask.
The below image tells you that Hue/Saturation also shifting the color on the background such as trees, grass, and other objects. We need to remove the Hue/Saturation effect from there and we can only achieve this using a layer mask.

Select the Pen Tool (P) and trace the background. You can also use Quick Selection Tool (W) to speed up the thing but using Pen Tool (P) gives you a more accurate selection than any other selection tool & that is why I’ve used it.
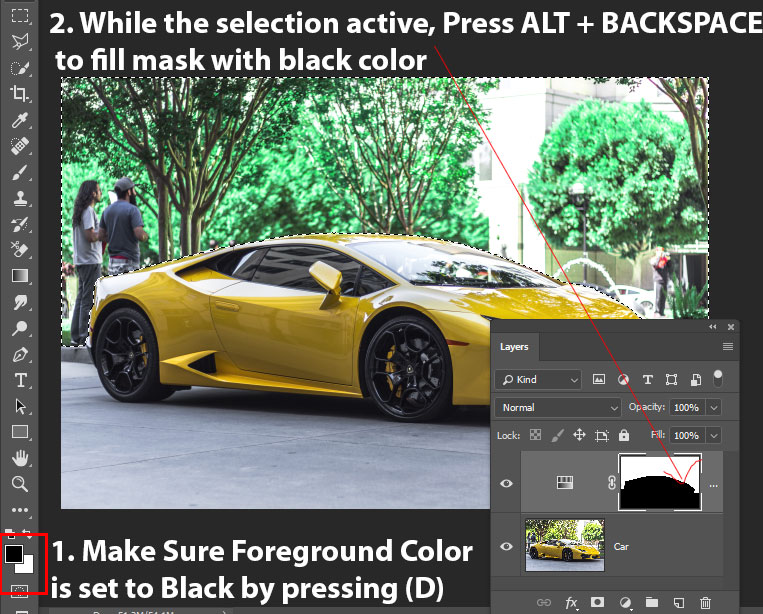
Once you are done tracing the background, click on the Selection Button to create a selection of the background.

Once you press Selection Button, you’ll see the selection is active, we’ll load this selection into the layer mask of Hue/Saturation.
To do this, first make sure Foreground color is set to black by pressing (D) & then press ALT+ BACKSPACE to fill the layer mask with black color.
This will give you the results resemble the below image:
To make the Hue/Saturation effect visible back on the car, you must Inverse the layer mask results by pressing CTRL + I. Alternatively, you can paint on the layer mask of Hue/Saturation using a black color over any areas where you don’t want changes to occur.
Once you inverse the layer mask results you’ll see the color visible only on the car.

Step 4 – Fixing Minor Glitches
If you zoom into the image and navigate around you’ll notice some areas that don’t have any color. We have to fix these parts by manually painting over them using a soft round brush.
You can see in the below image what I’m talking about:

To fix these areas, create a new layer by pressing CTRL + SHIFT + N and name it “coloring”.
Sample the color that is near to this area and then starts painting over them.

Once you fill those areas up, you can change the blending mode to Darken to blend the painted color with the car. Even though these areas are barely visible so you can leave them as it is if you want but painting over them with the combination of blend mode really help fix these type of glitches and mistake.
You can also add a Hue/Saturation to the Coloring layer to change the painted color in case you want to change the color of the car later on.

Final results:
Step 5 – Change the Color At Any Time
Since everything is set now you can always double-click on the Hue/Saturation adjustment layer and play around with the settings to change the color again, and again. Don’t forget to play around with the Hue, Saturation & Lightness slider for best results.

I hope you enjoyed the tutorials and learned how you can use the Hue/Saturation adjustment layer with its full potential. Don’t forget to leave a comment to provide any feedback that you have.
Need Help With Photoshop or Looking for Professional Support?
Whether you're just getting started with Photoshop or need expert-level assistance, we're here to help! Contact us for personalized Photoshop tutorials, project support, or creative services.
Get in touch today to take your skills or projects to the next level.
CONTACT US NOW📘 Want to Master Photoshop Faster?
🎁 Get Your FREE PDF E-Book "Top 10 Photoshop Tricks Every Designer Must Know" Now – Packed with expert tips, shortcuts, and techniques to boost your creativity & workflow.
👉 Download Your FREE PDF E-Book NOW!

