

In this tutorial, I’ll show you how you can create a cartoon effect in Photoshop. We’ll use the combination of filters to replicate digitally created cartoon effect. The key to creating this type of effect is to use Photoshop filter galleries in a creative way that can lead to the illustration effect in your artworks.
While it is a bit on the tricky side to achieve this effect but with the following laid out steps you can create this painting in no time.
Step 1 – Sharpening
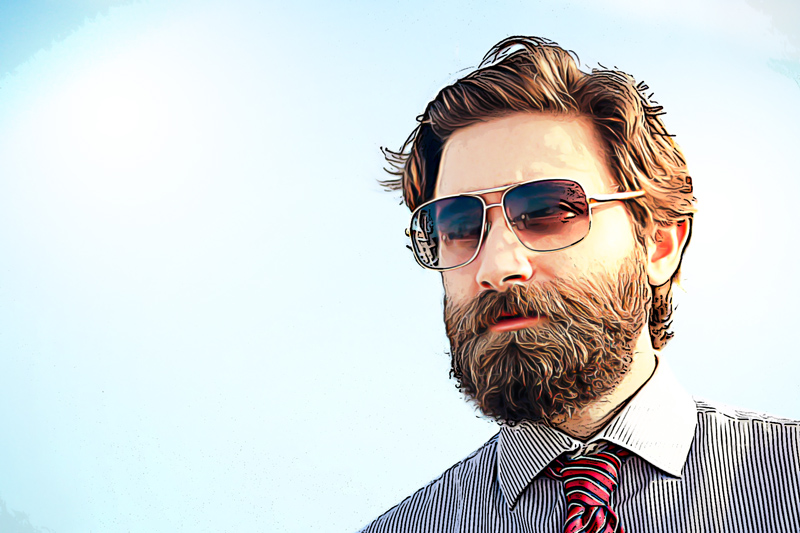
Since we are going to use a lot of filters that can eventually lead to loss of details then we must preserve these details using sharpening methods. I am using this image in Photoshop and you can download here.
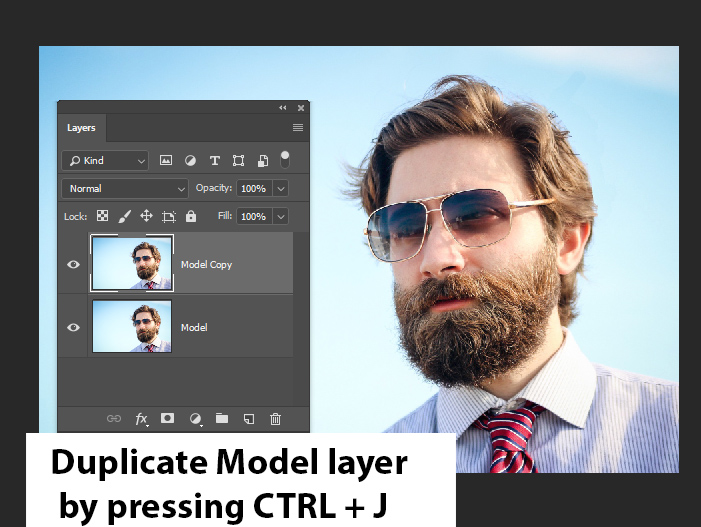
With the image opened in Photoshop, duplicate the model layer by pressing CTRL + J.
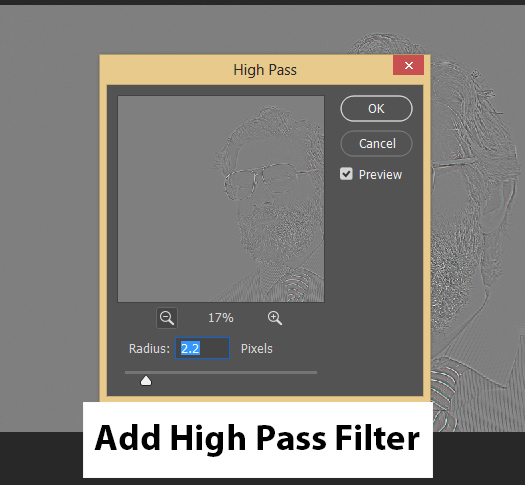
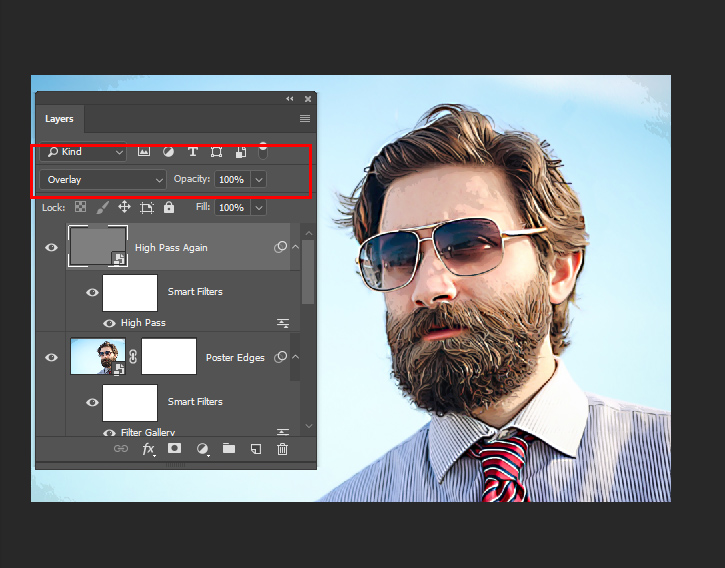
Right click on the Model Copy layer and choose Convert to Smart Object. Now go to Filter > Other > High Pass.
Enter the following value:
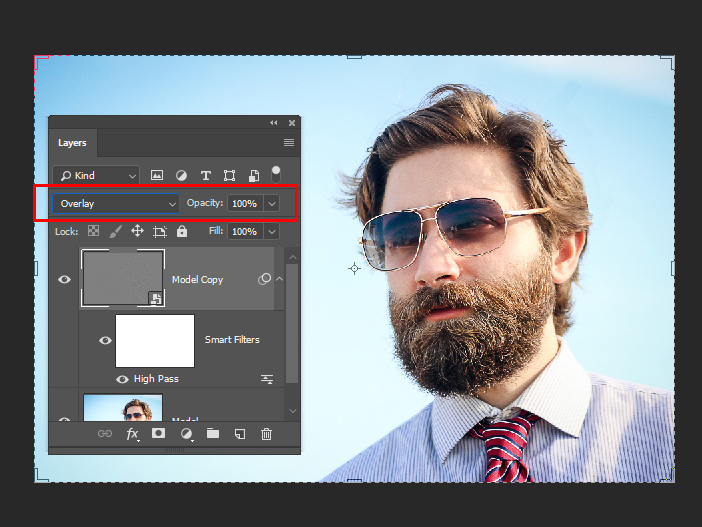
Change the blending mode to Overlay to sharpen the image.
Here you can see the image has sharpened and details are popped out such as beard, hair and skin details.
Step 2 – Create Painting Effect
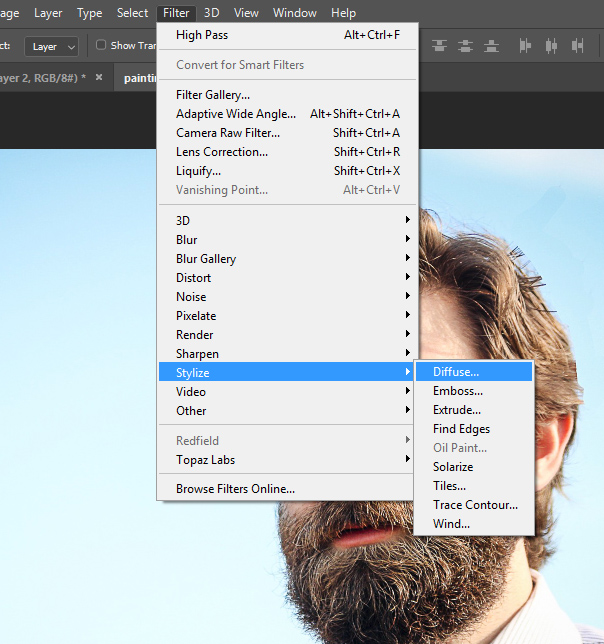
Since the cartoon effect is always on the side of painting then we need to add a painting look to this image. You can use an oil painting filter if you have it but since this filter doesn’t work with most of the Photoshop versions that is why we’ll use Diffuse Filter.
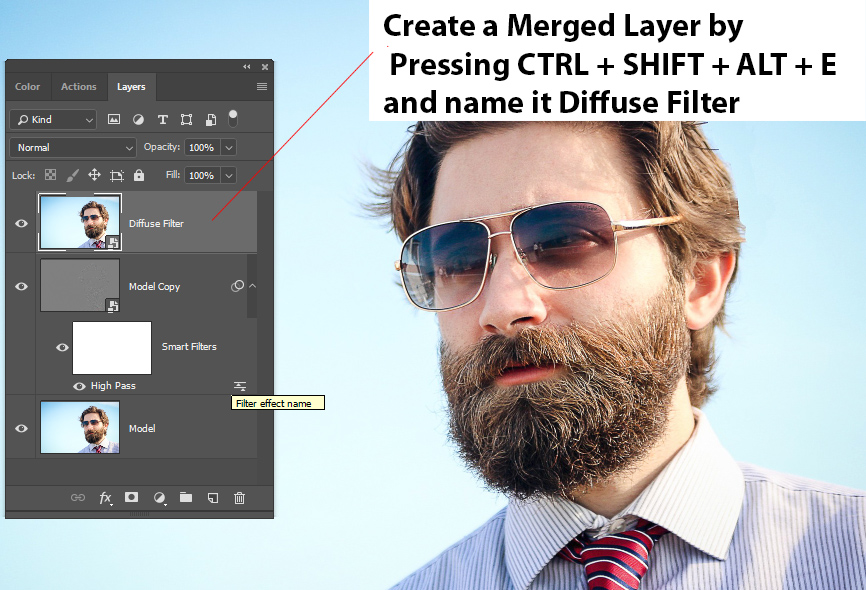
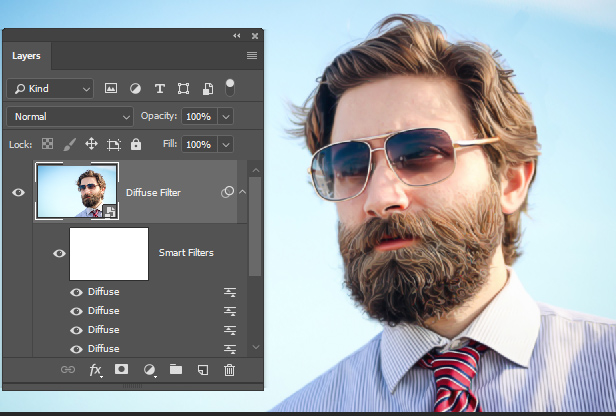
Create a merged layer by pressing CTRL + ALT + SHIFT + E and name it “Diffuse Filter”. Make sure you convert this layer into smart object.
Go to Filter > Stylize > Diffuse.
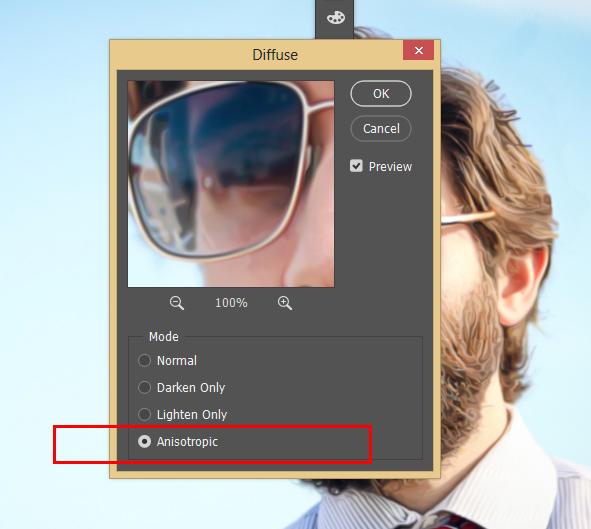
In the Diffuse filter dialog box choose Anisotropic. This will give a painted look to the image.
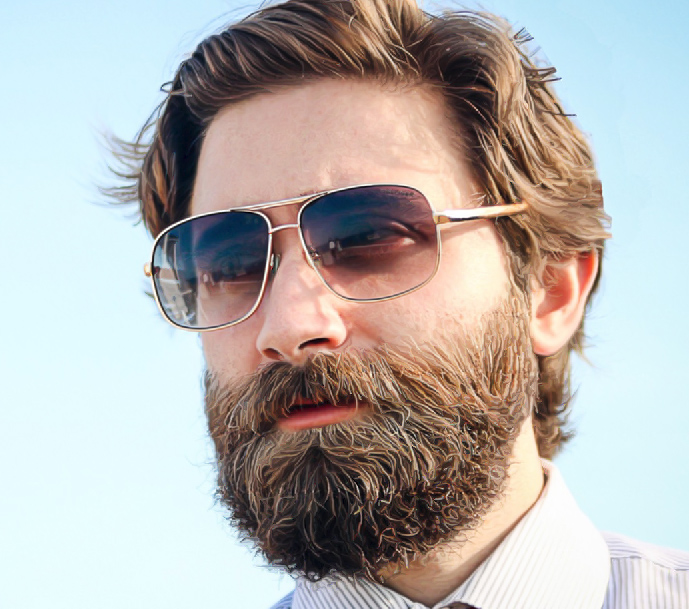
You can see the image is starting to look like painting:
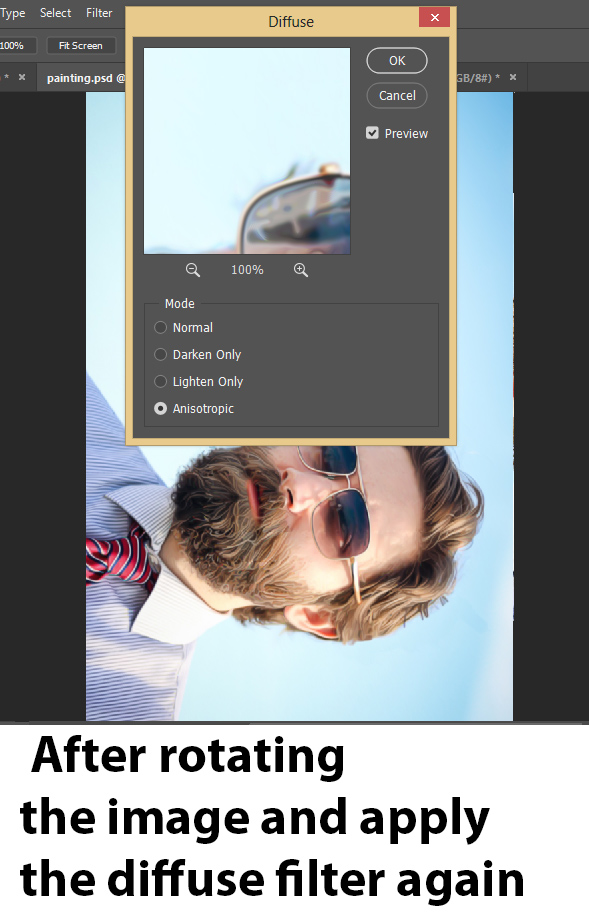
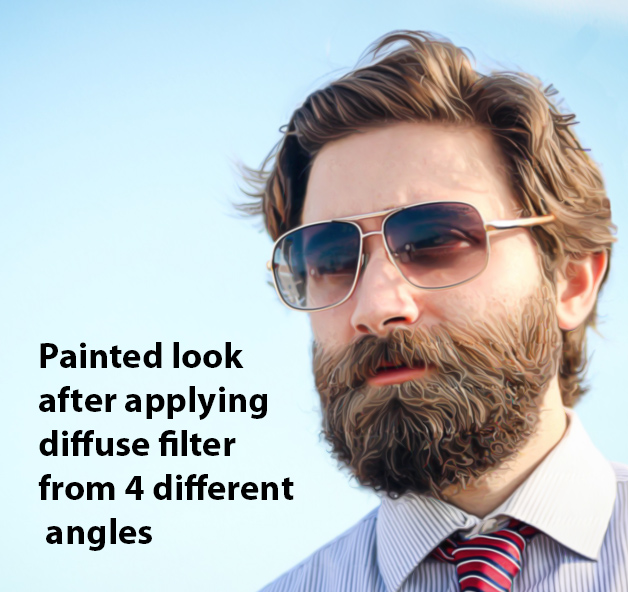
Step 3 – Apply Painting Effect to Different Angles
Now we’ll apply the Diffuse Filter three more times but from different angles. The reason is Diffuse Filter creates ugly seaming throughout the image and to remove it we have to apply the diffuse filter from different angles.
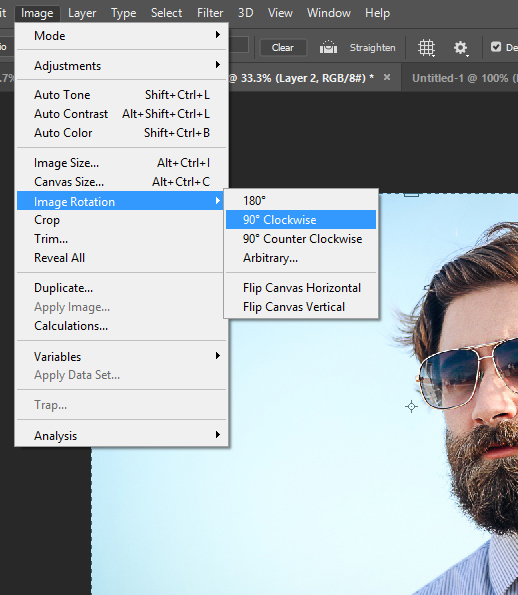
So rotate the image 90 Degree Clockwise by selecting Image > Image Rotation > 90 Degree Clockwise.
Now to go to Filter > Stylize > Diffuse and apply the effect again.
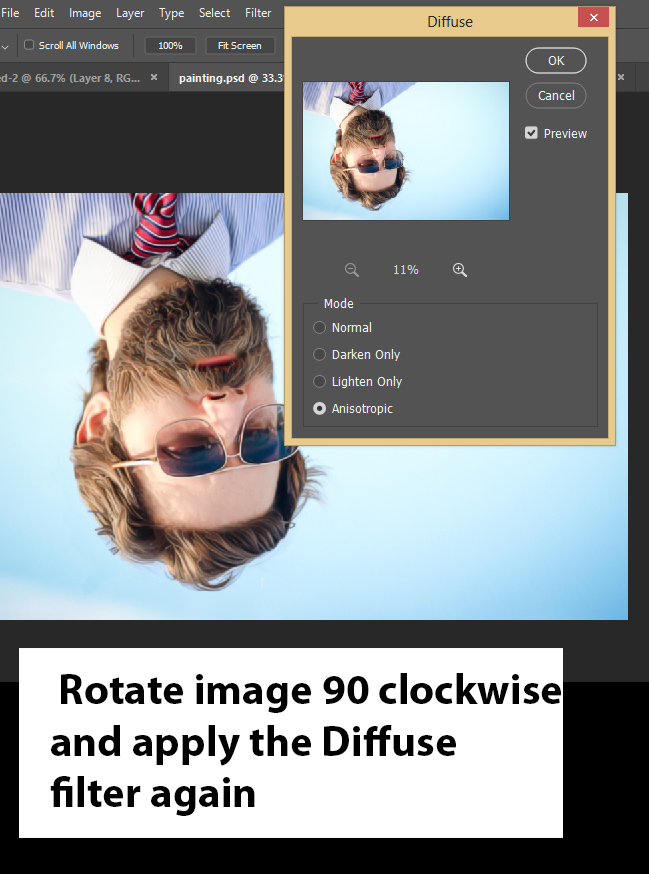
Now again rotate the image 90 degrees clockwise again by using the same method as in the previous step and apply the Diffuse Filter.
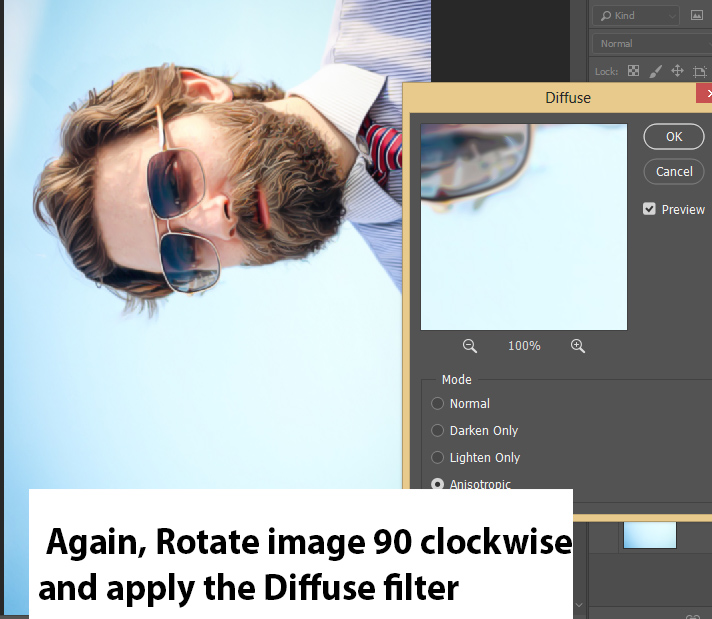
Now rotate the image and apply the filter last time.
Now rotate the image 90 degrees clockwise to get back the original image. Don’t apply diffuse filter this time.
Here you can see how Diffuse filter gave painted brush strokes to the image:
Here you can see my layer stack:
Step 4 – Bring Back the Details
The Diffuse filter has smoothened the image a lot and while applying it we have turned the image on the blurry side.
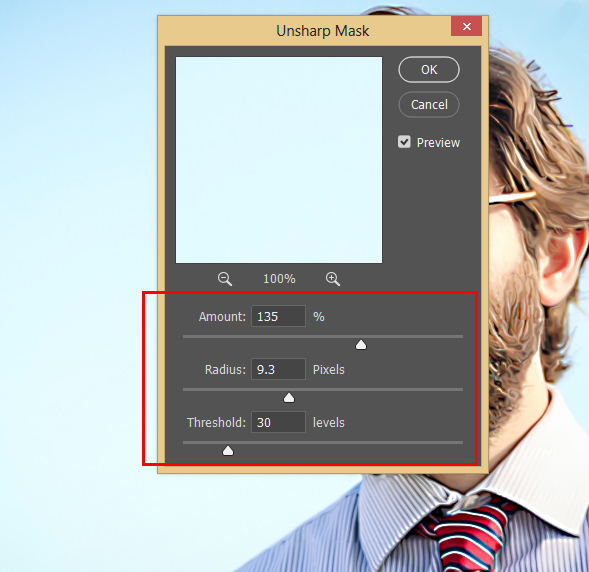
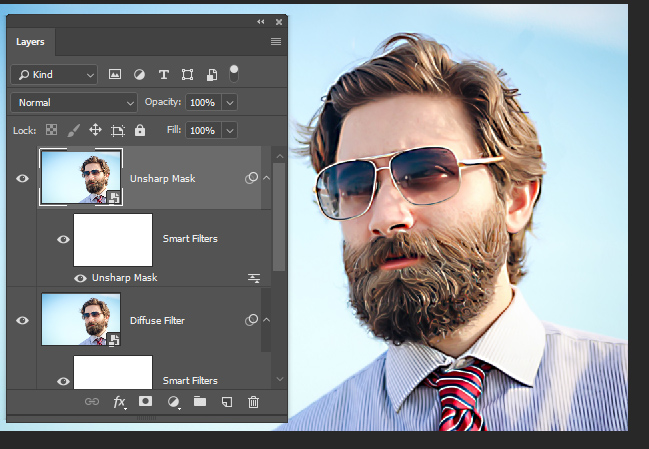
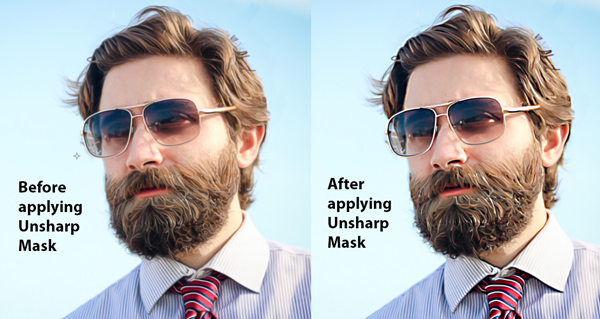
In order to bring back the details we need to sharpen the image. Create a merged layer by pressing CTRL + ALT + SHIFT + E and name it “Unsharp Mask”.
Go to Filter > Sharpen > Unsharp Mask and enter the following values:
Here you can see the results:
Here you can compare before and after results:
Step 5 – Create Sketch Outlines
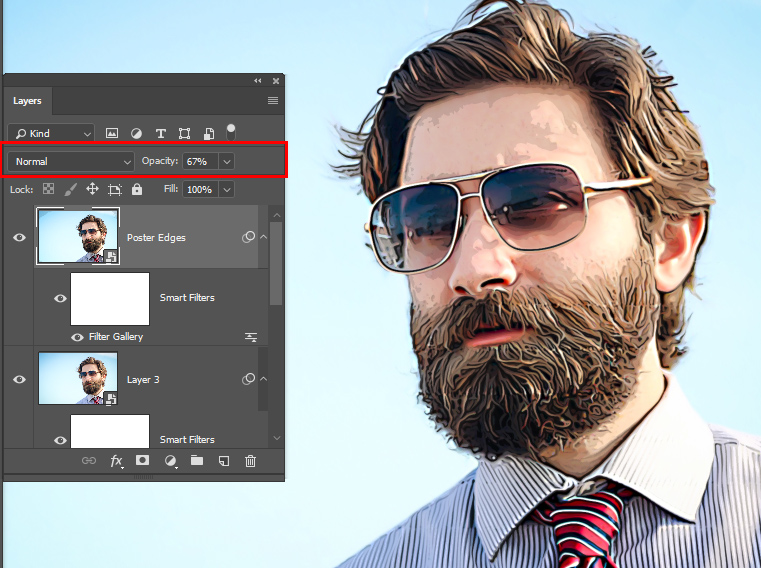
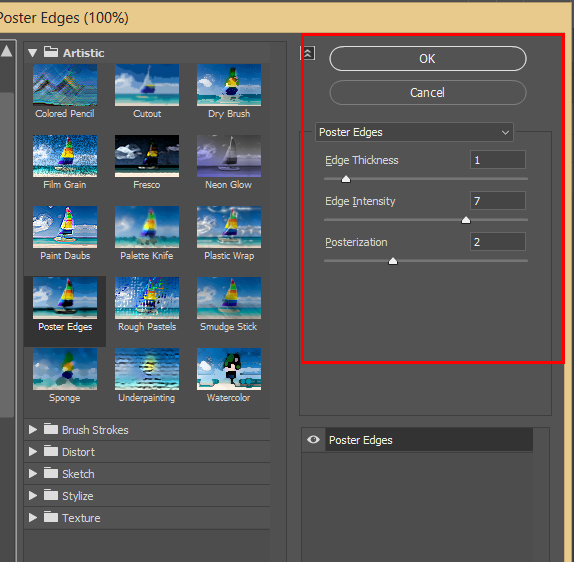
In order to create stetch outline we’ll use Poster Edges Filter. To do this, Create a merged layer by pressing CTRL + ALT + SHIFT + E and name it “Poster Edges”.
Go to Filter > Filter Gallery > Poster Edges and give the following values:
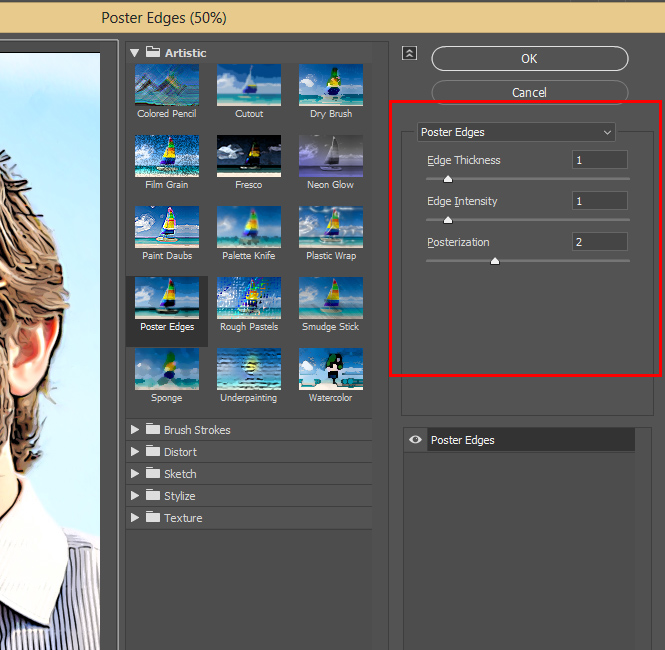
Reduce the opacity of the layer to 67%. This will create an outline around the subject as well as give a painted look to the image.
Step 6 – Sharpen the Image Again
Create a merged layer by pressing CTRL + ALT + SHIFT + E and name it “High Pass”. Now go to Filter > Other > High Pass and enter the following values:
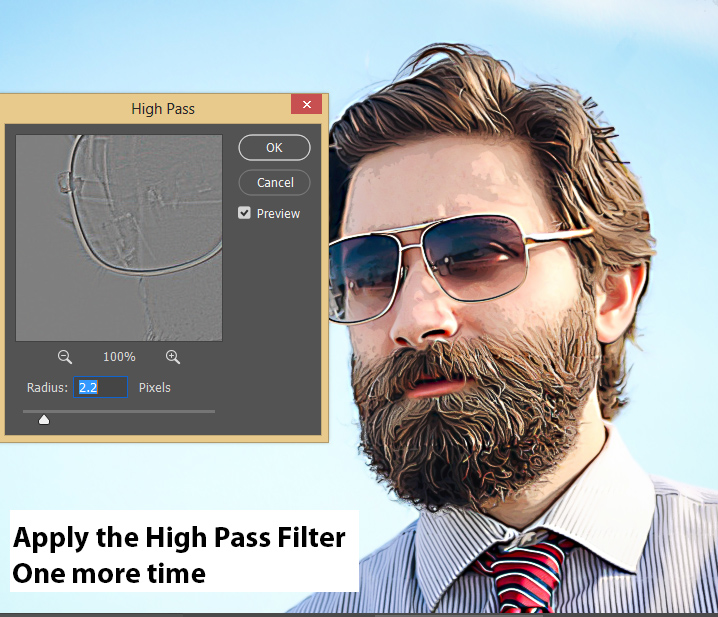
Change the blending mode to Overlay.
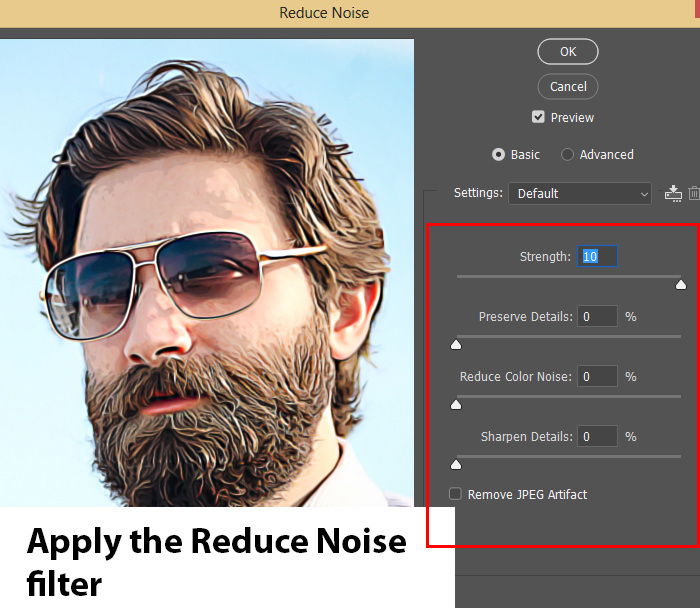
Step 7 -Reduce Noise
Now we need to reduce noise and this will create a soft and smooth effect that we see in a painting effect.
Create a merged layer by pressing CTRL + ALT + SHIFT + E and name it “Reduce Noise”.
Go to Filter > Noise > Reduce Noise and set everything to 0 but leave the Strength to 10
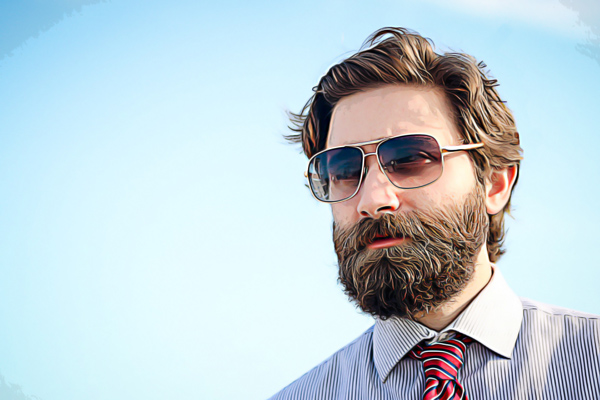
Here you can see a painterly cartoon look and we are almost done:
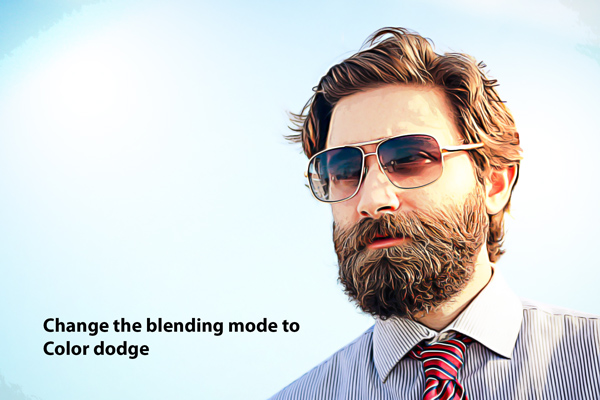
I painted some light using a soft round brush with a dark orange color.
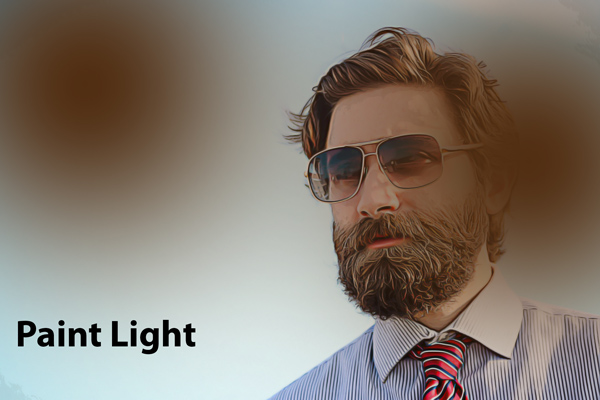
I changed the blending mode to Color Dodge.
Step 8 – Enhance Sketch Outlines
Now we’ll apply the Poster Edges Filter with different settings. This time the Edge intensity settings of this filter will be higher than last time we applied this filter. This will mimic more darken brush strokes on the edges of the subject.
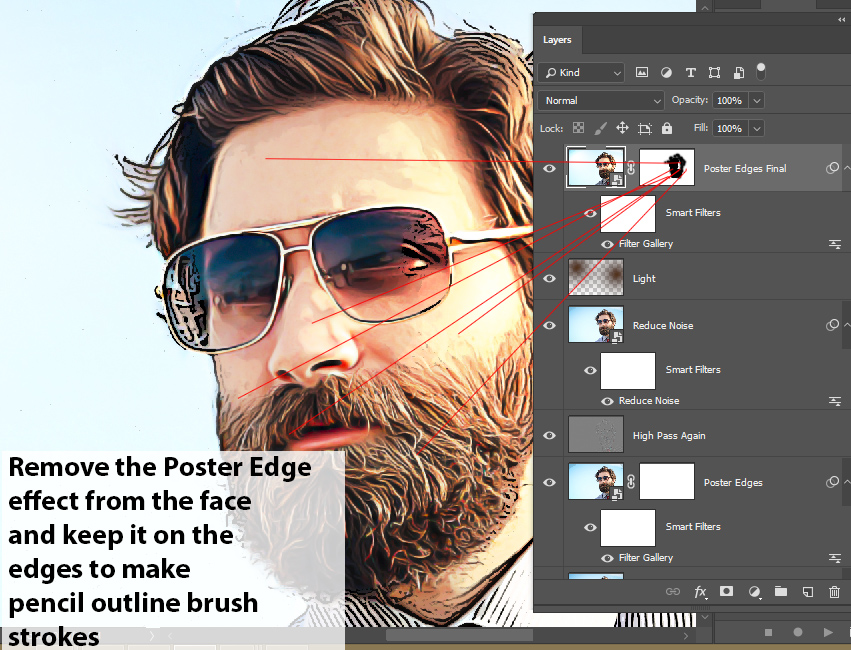
Again, Create a merged layer by pressing CTRL + ALT + SHIFT + E and name it “Poster Edges Final”.
Go to Filter > Filter Gallery > Poster Edges and input the following settings:
Now add a mask by going to Layer > Layer Mask > Reveal All and then remove the effect from the face to make it visible on the edge of the subject to add more thick outline brush strokes there.
Here are the final results:

A Word of Advice
Whenever I applied a filter after Step 1 I always created a merged layer by pressing CTRL + ALT + SHIFT + E and then converted it to Smart Object by right clicking on it and selecting Convert to Smart Object.
Make sure you do the same before applying any filter and especially after step 1.
I hope you enjoyed the tutorials and let me know your thoughts in the comment section below.
Need Help With Photoshop or Looking for Professional Support?
Whether you're just getting started with Photoshop or need expert-level assistance, we're here to help! Contact us for personalized Photoshop tutorials, project support, or creative services.
Get in touch today to take your skills or projects to the next level.
CONTACT US NOW📘 Want to Master Photoshop Faster?
🎁 Get Your FREE PDF E-Book "Top 10 Photoshop Tricks Every Designer Must Know" Now – Packed with expert tips, shortcuts, and techniques to boost your creativity & workflow.
👉 Download Your FREE PDF E-Book NOW!
