


This tutorial will teach you how to add a sunset effect to your photos in Photoshop. First, we’ll create a sunset gradient by selecting sunset color tones and then we’ll apply it to the image. After that, we’ll match the color of whole image using Camera Raw filter.
Tutorial Resources
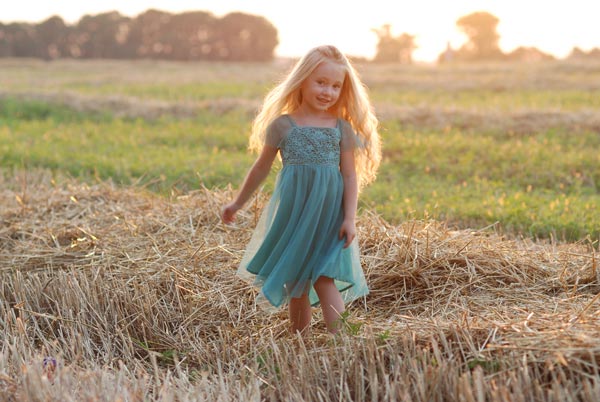
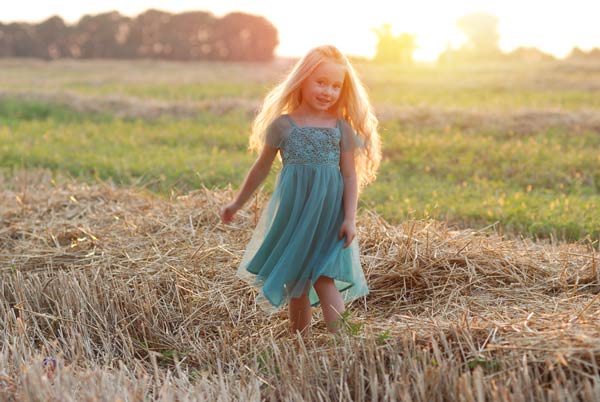
Step 1
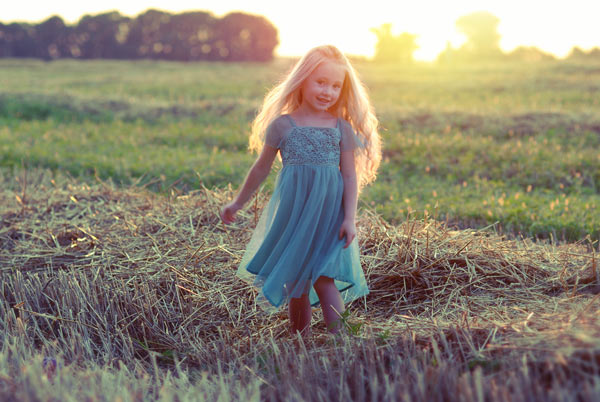
Open the image in which you want to add a sunset effect. It can be yours or you can use the image provided in the tutorial resource section. Here is the image which I am using for this tutorial:
Step 2
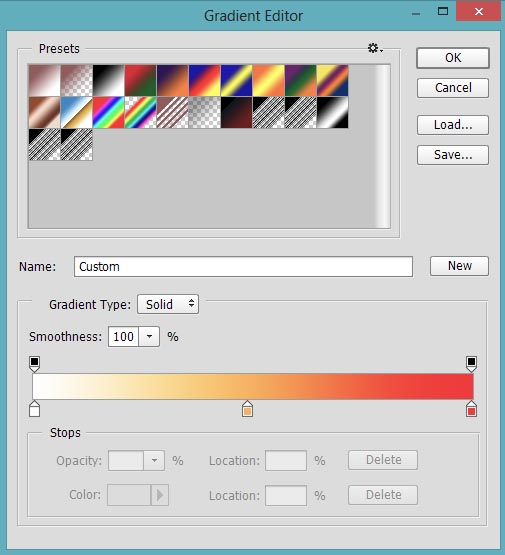
Select the Gradient Tool by pressing (G) on the keyboard. Now choose the Radial Gradient on the options bar. You can see it in the below image highlighted in red color.

Now we’ll create a sunset gradient as you see in the below image. Choose the gradient color flow from #FFFFFF to mid #ffe945 to #ff0000. Remember to click on the points where you want to choose the color like if you want to change the color flow in the middle, then simply click there to add a point and choose the color.
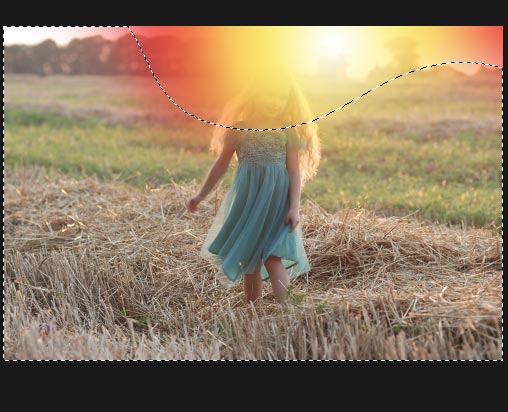
Once you have created the gradient and now it’s time to apply it to the image. You can notice that the image has some light coming from
the top right and we are going to exactly apply the gradient there. So apply the gradient diagonally from top right to bottom left as shown below.

Step 3
We don’t need the red color part instead of that, we just need a
little of it. Add a mask to gradient layer by selecting Layer > Layer Mask > Reveal All and mask the selected parts shown in the below image using a soft black brush.
I shifted the gradient effect little bit to top right. You can see the change in the below image. Feel free to move it according your way or where you want to add the light.
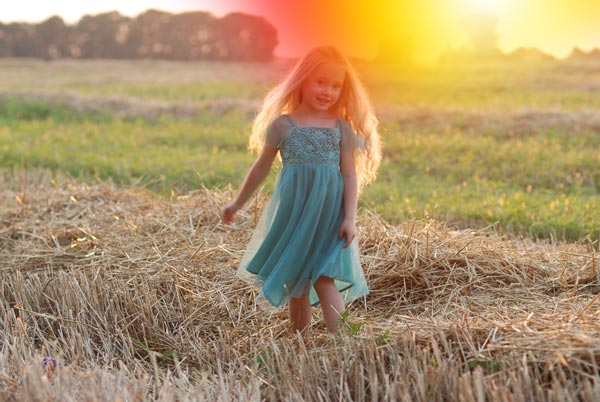
Now simply alter the blending mode to Screen.
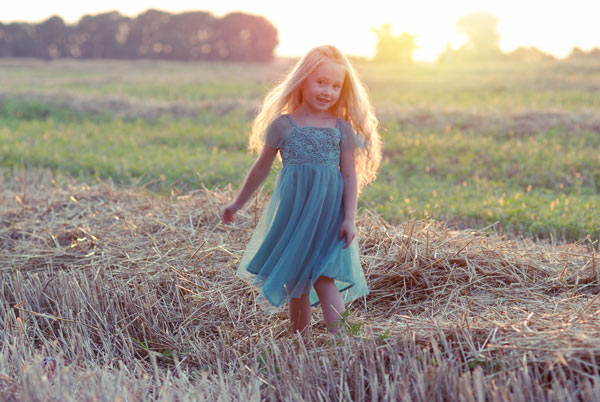
Here are the results with sun light added at the top:
Step 4
Now we’ll work with highlights and shadows of the image. First, create a single layer of all layers by pressing CTRL + ALT + SHIFT + E. Go to Image > Adjustments > Shadows & Highlights and change the settings of the shadow sections.
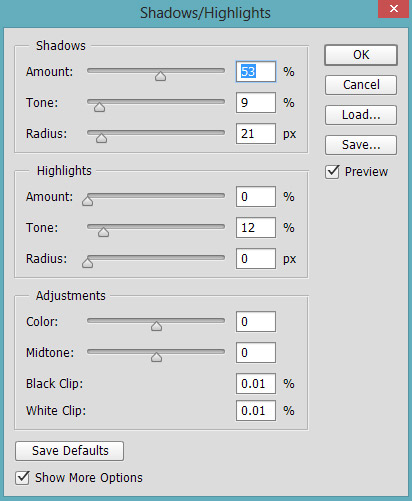
This will add a bit of darkness to the shadow areas of the image.
Here are the results:

Step 5
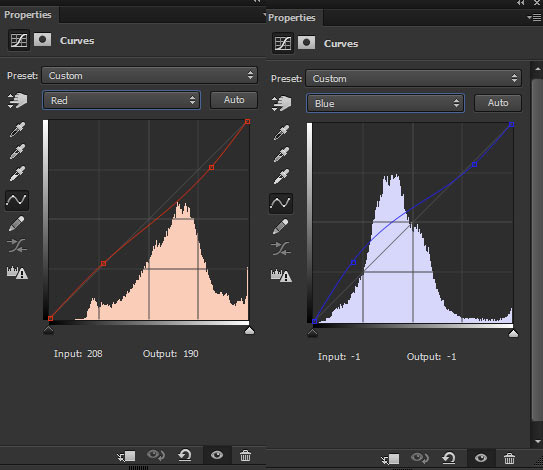
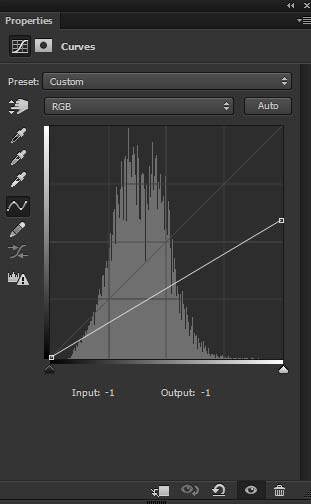
Click on the third icon at the bottom of the layer panel and create a Curves adjustment layer. Change the colors of the entire image by introducing some blue and cyan tones to it.
Here are the values of blue and red channel:
Results:
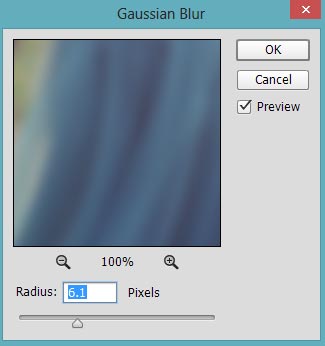
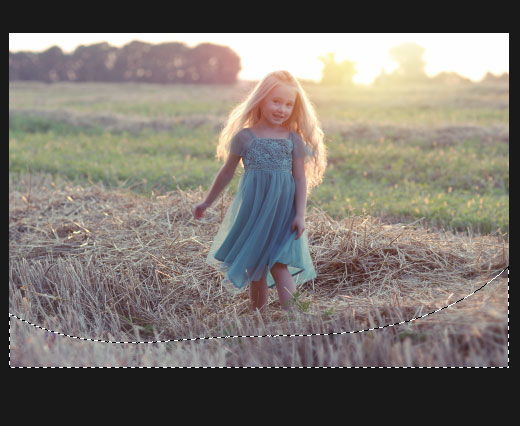
Step 6
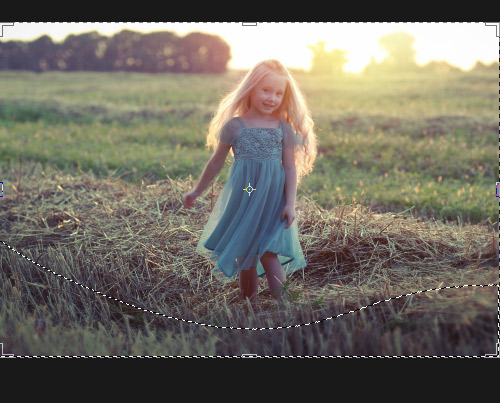
In this step we’ll add depth to the image using the blur filter. Again, create a single layer of all layers. Go to Filter > Blur > Gaussian Blur and set the radius value to 6.1px.
You can see the selected parts in the below image and that indicates where I kept the Gaussian Blur effect. On the layer mask of blur filter, mask the effect on the rest of the parts and keep it mostly on the lower parts like shown in the image below.
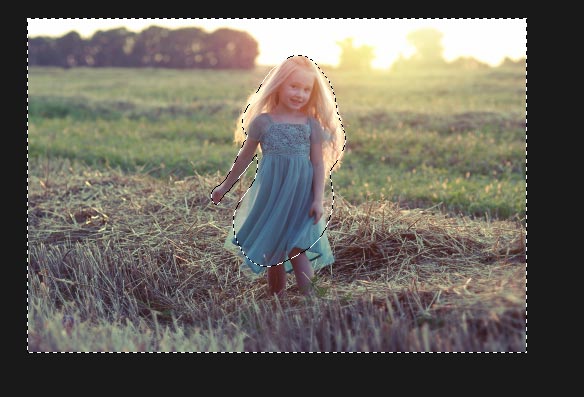
Step 7
Using Selective Color adjustment layer, I try to enhance the color of the image.
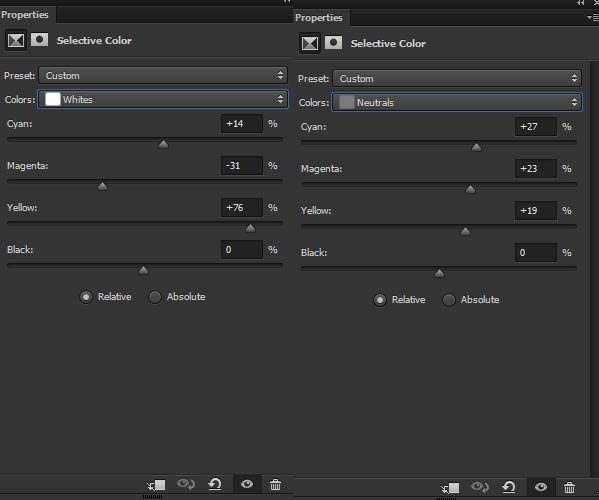
On the layer mask of this, I masked the effect on the little girl as it makes her skin tones darker. Don’t forget to use a soft black brush for masking the effect.
Results so far:
Step 8
I used the Curves adjustment layer to darken the lower parts as they will be less illuminated by the light. This will also correct the light on the picture.
As I said that I reduced the brightness on the bottom parts, then mask the effect on the rest of the areas using soft basic black brush on the layer mask.
Step 9
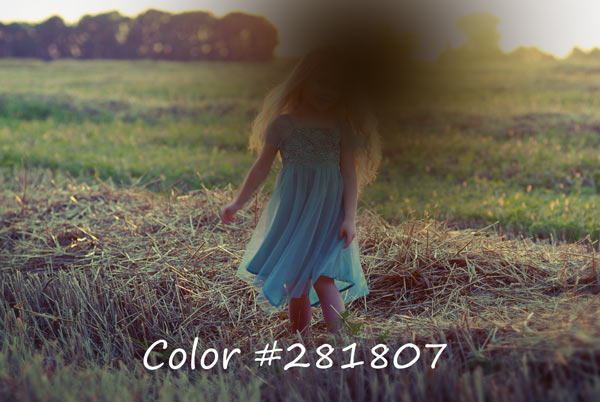
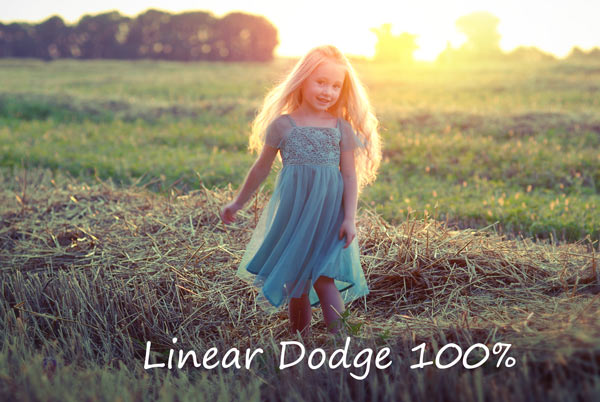
On a new layer, we’ll paint some more lights. So create a new layer and choose a dark orange color, I chose #281807, and paint the light using soft round brush shown in the below image.
Alter the blending mode to Linear Dodge.
Step 10
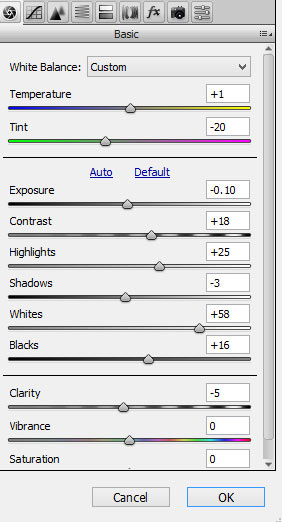
Finally, I used the Camera Raw Filter to modify the colors, highlights, shadows, contrast, clarity and much more.
To do this, create a merged layer on top of all layers and convert this layer into Smart Objects. Go to Filter > Camera Raw Filter or you can also press SHIFT + CTRL + A.
Now use the settings shown in the below image or you can also experiment with the settings to get the different results.
Here are my settings:
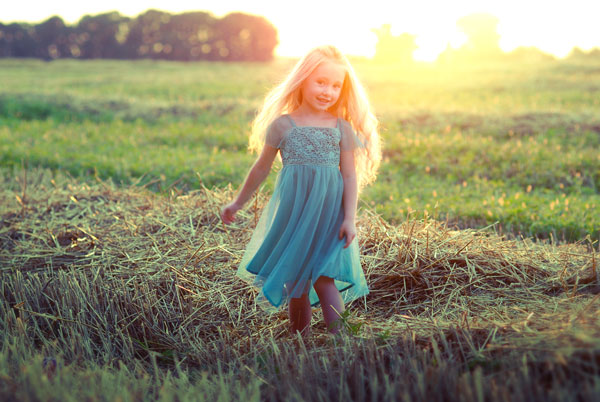
Here is the final outcome of the tutorial:
Conclusion
Thanks for following the tutorial and I hope you like the tips and trick for adding sunset effect to your photos. If you like the tutorial, then do share it into the world.
Need Help With Photoshop or Looking for Professional Support?
Whether you're just getting started with Photoshop or need expert-level assistance, we're here to help! Contact us for personalized Photoshop tutorials, project support, or creative services.
Get in touch today to take your skills or projects to the next level.
CONTACT US NOW📘 Want to Master Photoshop Faster?
🎁 Get Your FREE PDF E-Book "Top 10 Photoshop Tricks Every Designer Must Know" Now – Packed with expert tips, shortcuts, and techniques to boost your creativity & workflow.
👉 Download Your FREE PDF E-Book NOW!

