

This lesson will teach you how to whiten teeth in Photoshop. We’ll use couple of adjustment layers to get rid of pale yellow teeth and brighten them up as well within no time. If you have yellow teeth in your images than this tutorial can help you get rid of them. Let’s get started!
Step 1 – Make Selection of Teeth
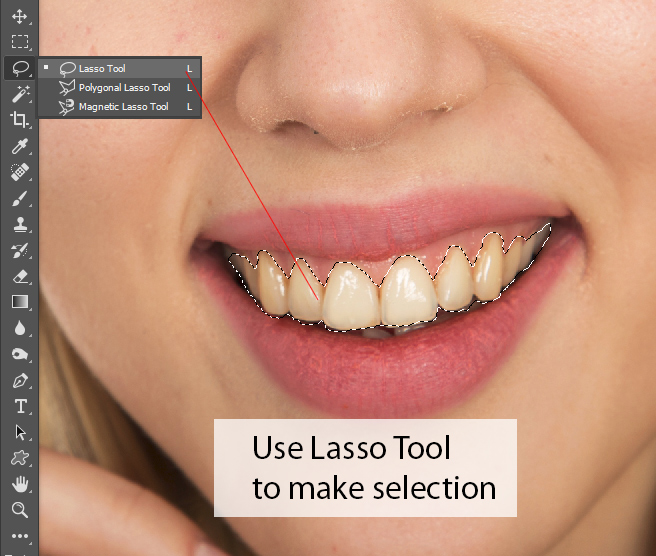
I am using this image in Photoshop which you download from here. I have opened the image in Photoshop as you can see in the below image. I zoomed in so you can see the teeth of the model.
Select the Lasso Tool (L) to make the selection of the teeth. I used Lasso Tool (L) but you can also use Pen Tool (P) for more precise selection.
Step 2 – Add Hue/Saturation Adjustment Layer
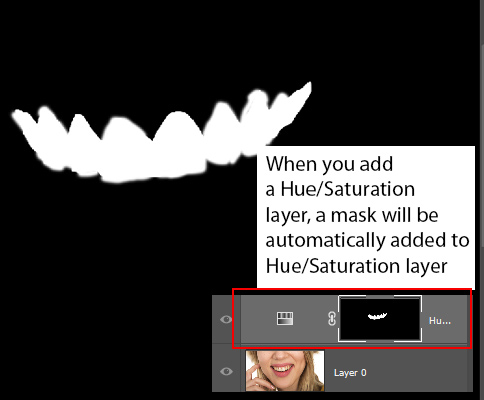
In order to reduce yellowness on teeth we can target only yellowish teeth using Hue/Saturation layer. While the selection is active, go to Layers > New Adjustments Layers > Hue/Saturation to add it.
Once you added it, Photoshop will automatically convert your selection into a Layer Mask. If you HOlD ALT and click on the layer mask it will show a mask results in black/white image something like shown below. Meaning it will only affect the area in white which is teeth. You will see something like this in the below image when you add Hue/Saturation after making a selection.
Step 3 – Reduce the Yellowness on Teeth
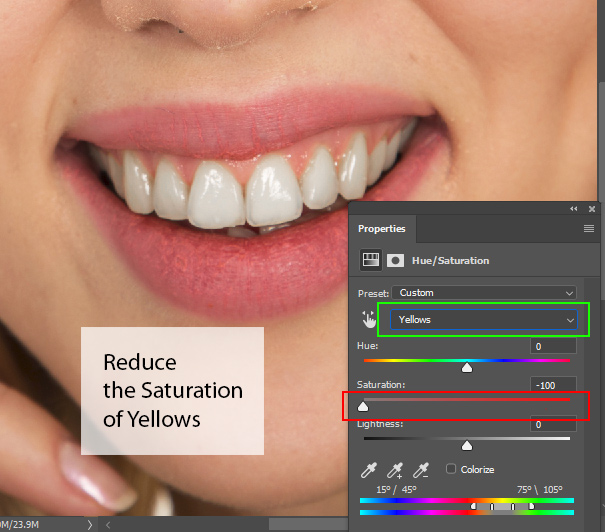
To reduce yellowness on teeth, In the Properties panel of your Hue/Saturation layer, click the options bar labeled Master and select Yellows, this will help us target yellow color.
Once you are in the Yellows, drag the Saturation Slider all the way to the left to whiten the teeth. See the settings and results below!
Step 4 – Add Curves Adjustment to Brighten Teeth
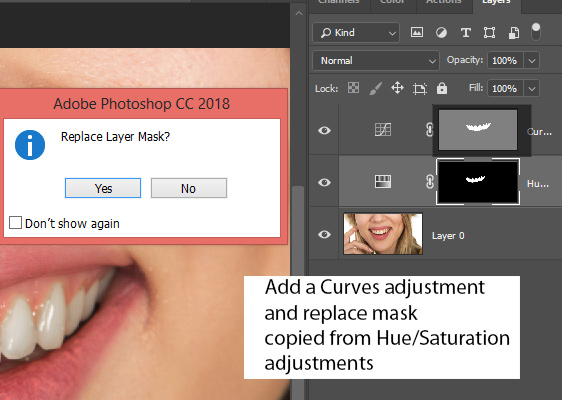
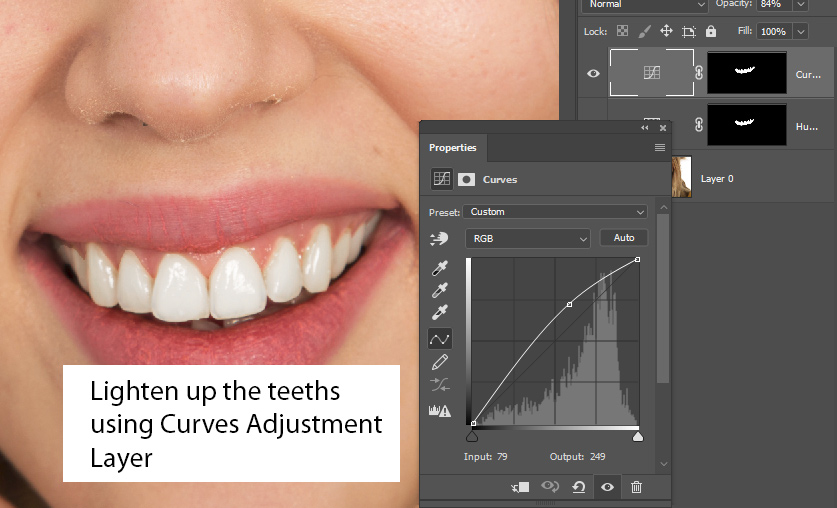
Finally, we’ll brighten them using a Curves Adjustment. Add a Curves adjustlayer by selecting Layer > New Adjustment Layer > Curves.
Once you added it, Hold Down ALT KEY, select Hue/Saturation layer mask, while you hold down the ALT key, drag your mouse over to the Curves mask to replace it with Hue/Saturation.
In this way, you don’t have to worry about creating the selection of the teeth again. This will also make sure that you don’t affect other areas of the image except teeth when you brighten them up.
Now use the settings below to brighten up the teeth:
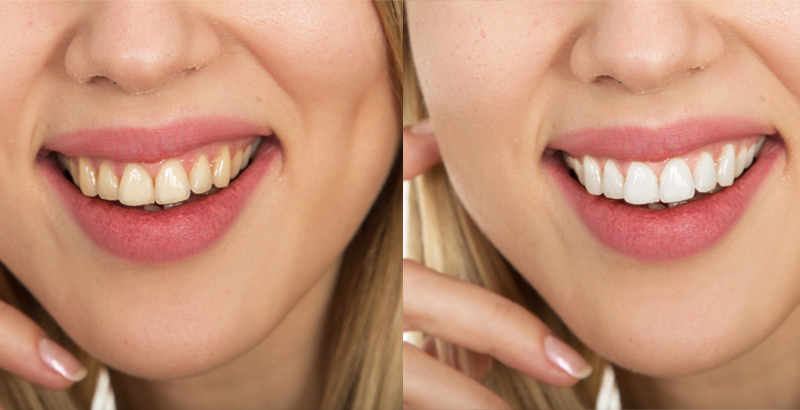
Here you can see the image with yellowish teeth:

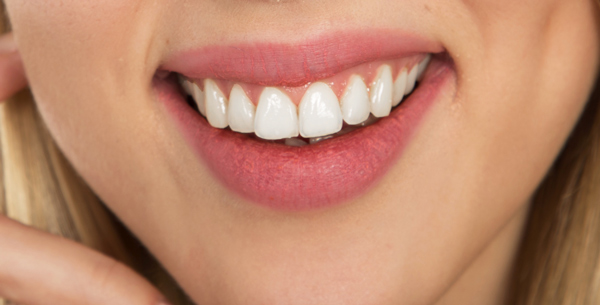
Here you can see the image after making the teeth white:
Step 5 – Clean Up Around the Teeth
You can always go back to Layer Mask of each adjustment layer to fix harsh edges or maybe you want to clean up the area surrounding teeth.
Use a soft round brush with black color, then select layer mask of adjustment layer and then start painting on the image to mask the effect of the adjustment layer. In that you have total control on adjustment layers effects where you’d like to make the effect visible.

Thanks for following the tutorial. I hope you enjoyed it and please leave your feedback in the comment section below.
Need Help With Photoshop or Looking for Professional Support?
Whether you're just getting started with Photoshop or need expert-level assistance, we're here to help! Contact us for personalized Photoshop tutorials, project support, or creative services.
Get in touch today to take your skills or projects to the next level.
CONTACT US NOW📘 Want to Master Photoshop Faster?
🎁 Get Your FREE PDF E-Book "Top 10 Photoshop Tricks Every Designer Must Know" Now – Packed with expert tips, shortcuts, and techniques to boost your creativity & workflow.
👉 Download Your FREE PDF E-Book NOW!
