

Learn how to turn day into night in Photoshop & Lightroom. I’ll show you how to use Lightroom tools such as The Tone Curve to create a night mood scene in simple steps. Turning day into night moody is a popular effect and can be used to instantly change the mood of photos.
It is very easy to replicate this effect, with the help of a few clicks you can turn any daylight photo into a moonlight scene. The key factor to this effect is selecting images that are already on the darker side or don’t have a bright light source.
Although, choosing an image that depicts a dark mood certainly helps but with this tutorial no matter light sources you’ll be able to achieve this effect with any image. Let’s get started!
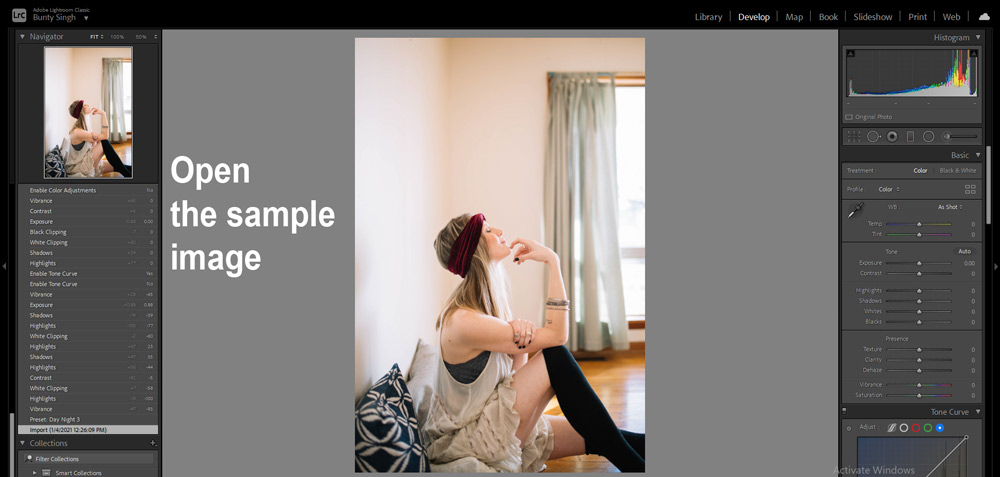
Step 1 – Open The Sample Image
Download the sample image from Pixabay. Go to File > Import Photos & Videos to import the sample image as shown below.
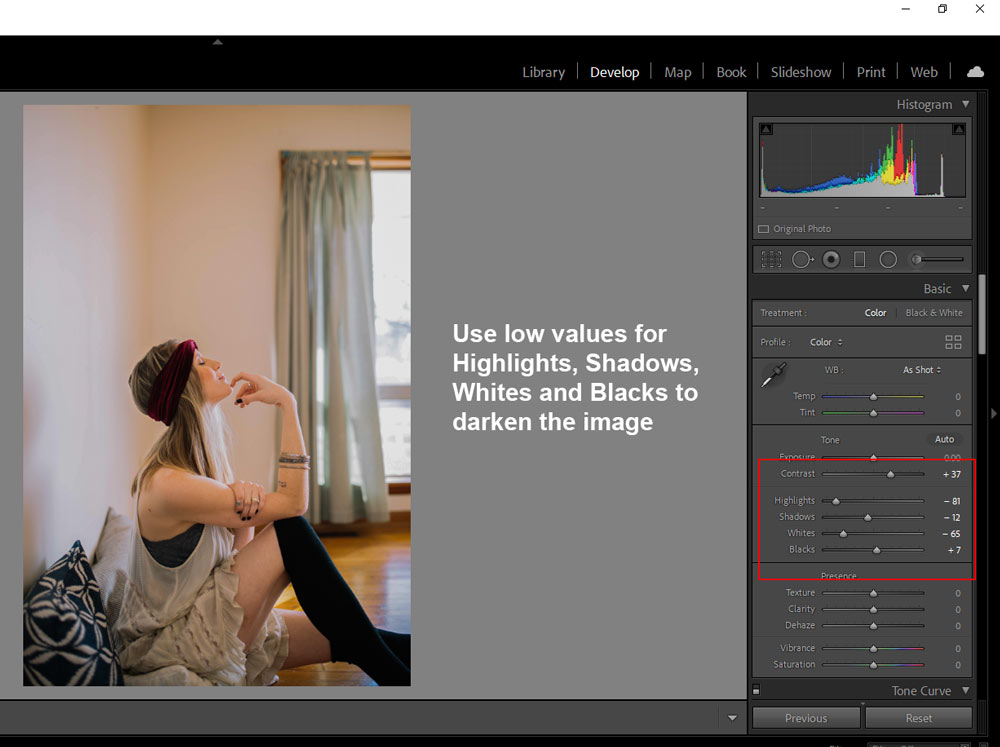
Step 2 – Reduce Lighting
Night scenes don’t have a lot of lights in the background. The lighting is always mere, to bear this point in my mind I have reduced Highlights, Shadows, Whites & Blacks and this will make the image darker. A dark image is always preferred over a bright image for night scenes.
You can see the settings below.
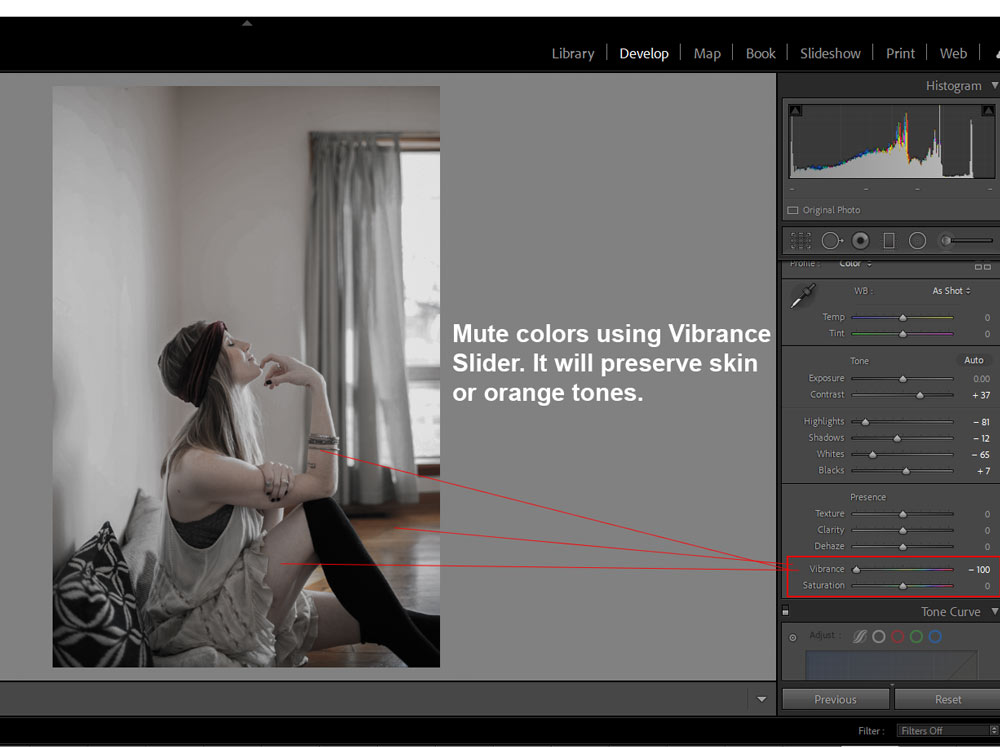
Step 3 – Mute Colors
Chances are very high that in the night scene colors are barely visible. Due to reduced lighting, colors tend to fade away or they don’t look vibrant compared to daylight scenes. Now we will to mute colors using the Vibrance Slider, I dragged it all way to the left to mute all the colors in the image. This will reduce all the colors in the background but protect skin tones (you can still see colors in skin in the image).
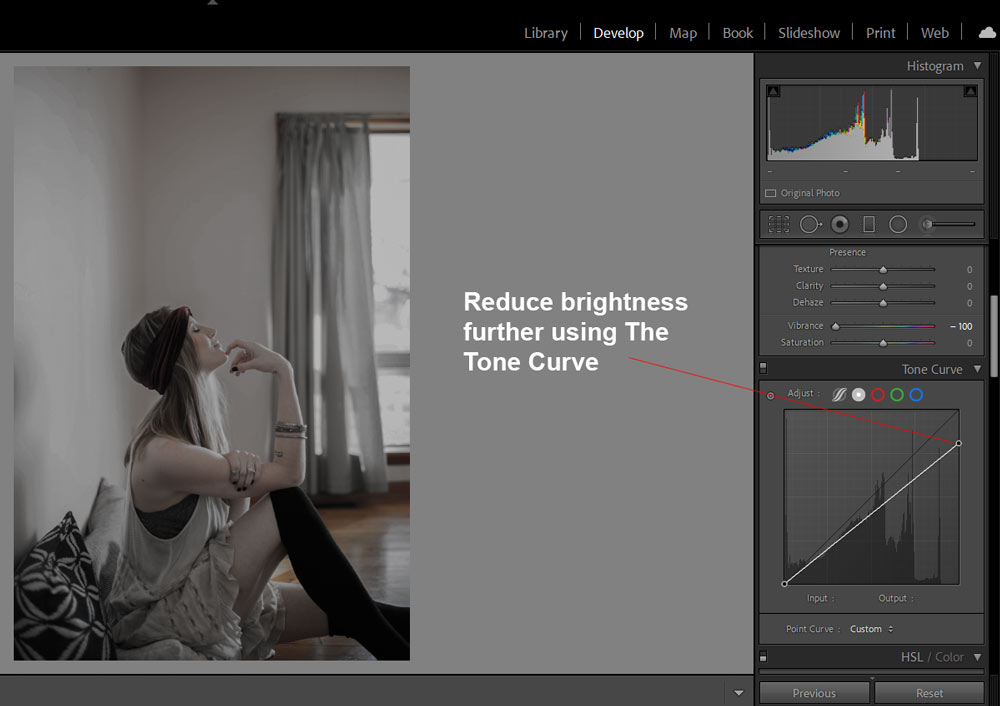
Step 4 – Add Night Coloring
To add coloring to the image we’ll use The Tone Curve but before I do that I further reduced the lighting of the image using the settings below. You need to drag down the highlights point to dim down the highlights (brighter areas) of the image.
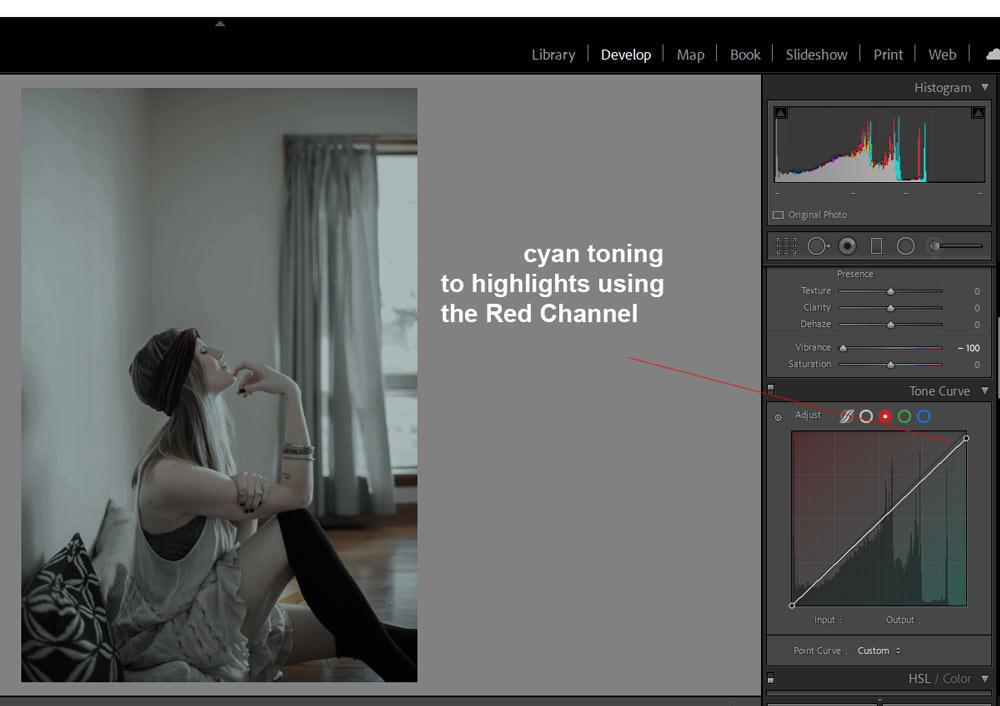
When we talk about night coloring, two colors come to mind cyan and blue. First, I switched to Red Channel and added cyan toning to highlights.
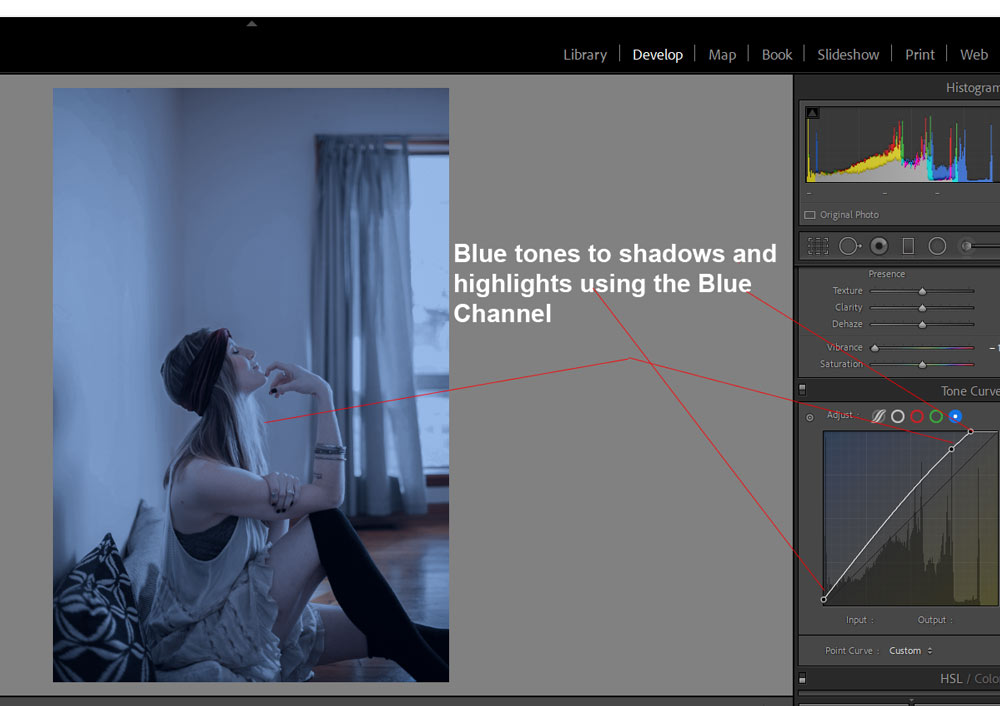
Switch to Blue Channel then add blues tones to highlights and shadows. You can notice I created a couple of points on highlights and pulled it put to add blue tones to the image. I added blue tones to shadows as well by lifting the point.
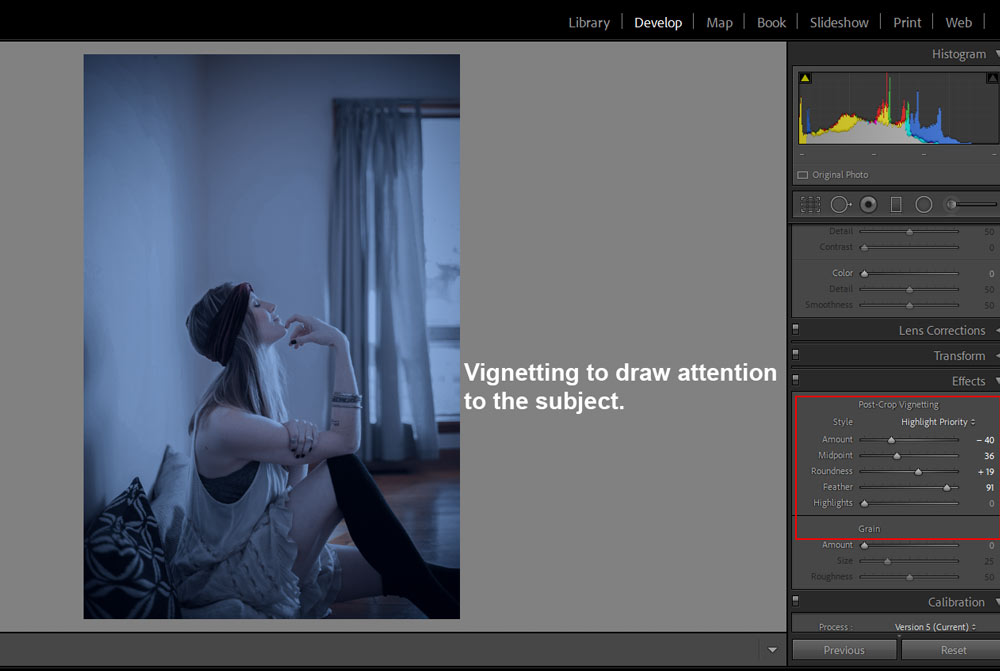
Step 5 – Vignetting
Last but not the least, I created a vignetting effect using the following settings to draw more attention to the subject. You can skip this step if you don’t want to add vignette effects but if it helps draw viewer eyes to your subject then why not do that.
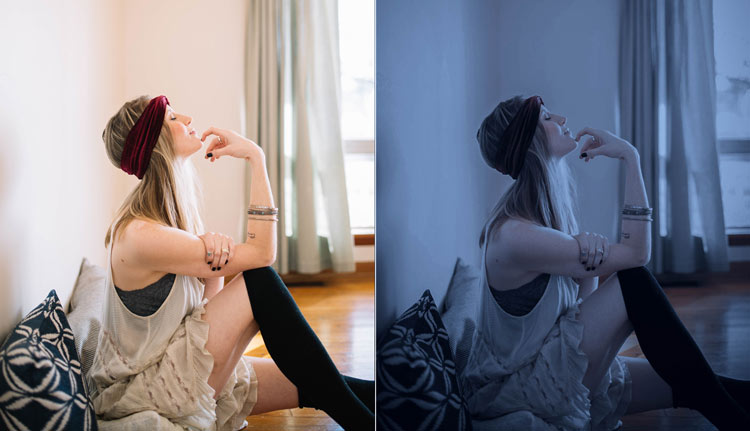
You can compare the before & after results here:
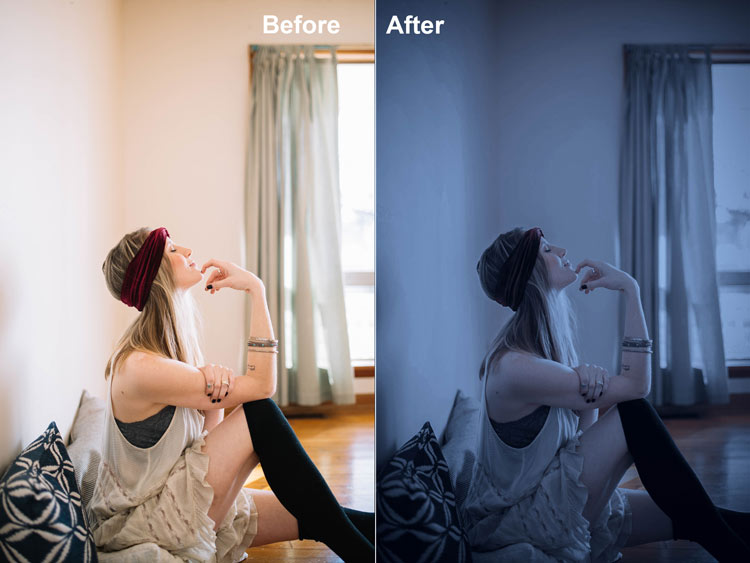
How to Turn Day Into Night in 1-click with Photoshop
You can also use Photoshop to turn day into night using the Color Lookup adjustment layer. Using LUTs can help you achieve this effect in a single click and no need to go through the tutorial.
To do this, open the image in Photoshop by selecting File > Open.
Go to Layer > New Adjustment Layer > Color Lookup.
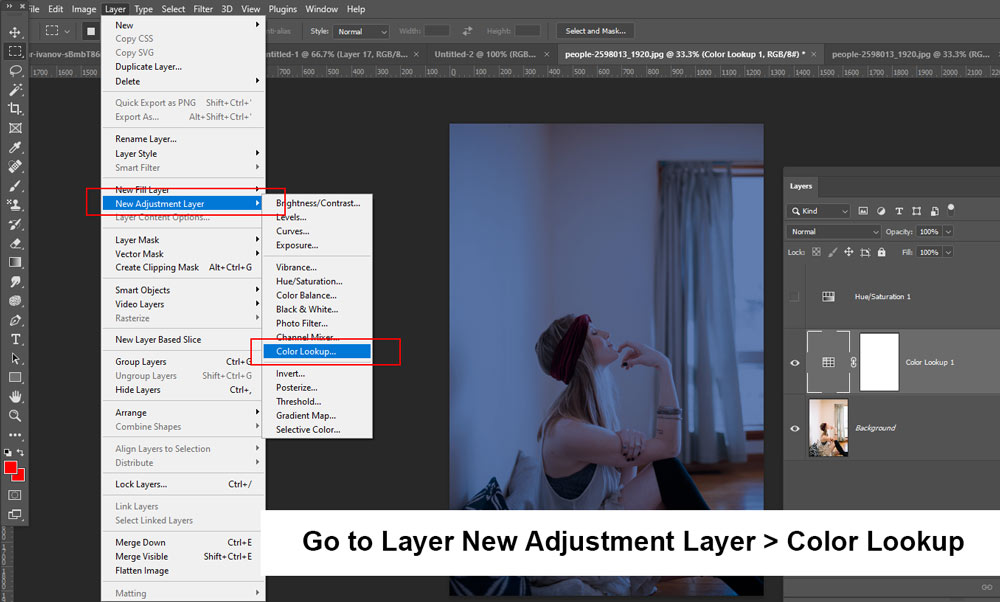
Now select Night From Day.cube to turn the photo into a night scene.

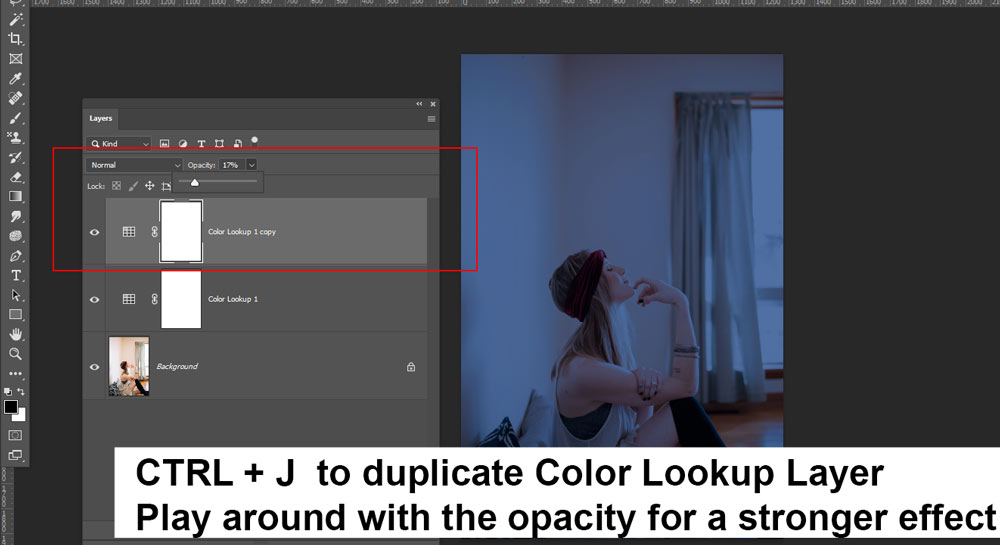
Hit CTRL + J to duplicate the Color Lookup Layer, then play around with the opacity for a stronger effect.
Remember to pick dark images rather than images having a broad light source. I hope you like the tutorial and if you have any questions let me know in the comment section below. If you have tips to create a night scene quicker than the steps mentioned above do let me know.
Need Help With Photoshop or Looking for Professional Support?
Whether you're just getting started with Photoshop or need expert-level assistance, we're here to help! Contact us for personalized Photoshop tutorials, project support, or creative services.
Get in touch today to take your skills or projects to the next level.
CONTACT US NOW📘 Want to Master Photoshop Faster?
🎁 Get Your FREE PDF E-Book "Top 10 Photoshop Tricks Every Designer Must Know" Now – Packed with expert tips, shortcuts, and techniques to boost your creativity & workflow.
👉 Download Your FREE PDF E-Book NOW!

