


In this quick tutorial, I’ll be showing you how you can sharpen your photos using Photoshop in a short amount of time. You’ll be following only 5 steps to sharpen images using the Filters, Adjustment layers, and using blending modes. In the end, I’ll give a bonus tip on how you can refine your final outcome to get the most out of this technique. Let’s get started!
Step 1 – Open the Image
The first step is to choose your image, choose the one that is blurry, maybe soft or anyone which you’d like to sharpen. For this tutorial, I am using this portrait image of a man which you can find in the tutorial resource section.
Open it up in Photoshop by selecting File > Open and open up the image in Photoshop. You can easily notice that the image details on the face are blurry, and many other parts of the image like the hair, beard, eyebrows, etc.

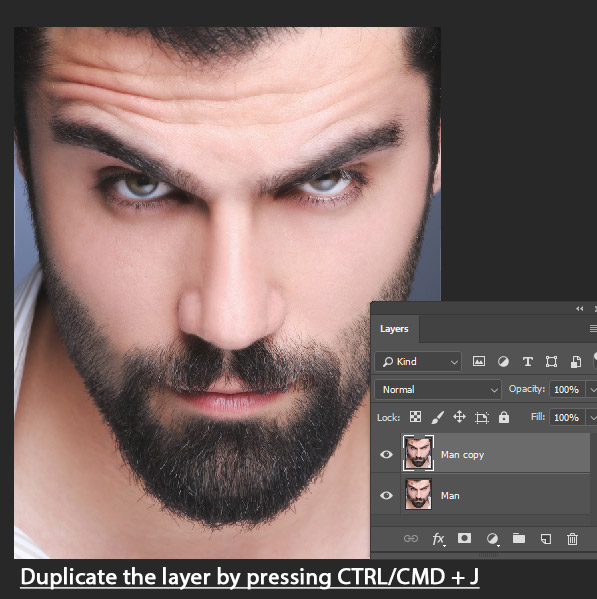
Step 2 – Duplicate the Image
In most of the cases, it is better to duplicate image in Photoshop before you add any effects or your start doing making any changes on it just in case anything goes wrong. But in this case, since the High Pass needs an image below in order to see the sharpening effect that’s why we are going to duplicate the image
Press CTRL/CMD + J to duplicate the image. As you hit the CTRL/CMD + J button, Photoshop will create a duplicate layer of your image.
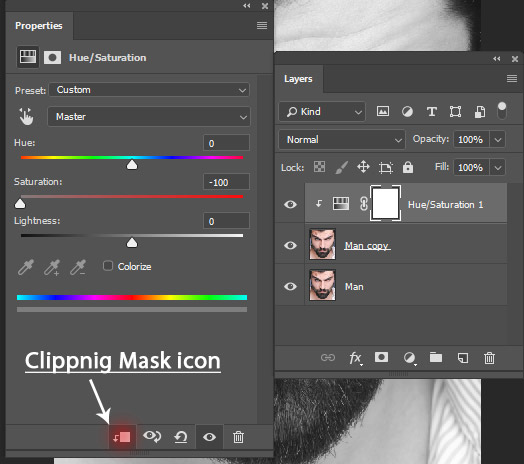
Step 3 – Desaturation
We are going to desaturate the image here. To do this, go to Layer > New Adjustment Layer > Hue/Saturation, this will bring up the Hue/Saturation panel, you need to move the Saturation Slider all the way to left to desaturate the image.
Once you have done with that, don’t forget to click on the Clipping Mask icon (highlighted in red color) to limit the saturation effect only on the duplicated image. Otherwise, it will also affect the original layer as well (that is right beneath it).
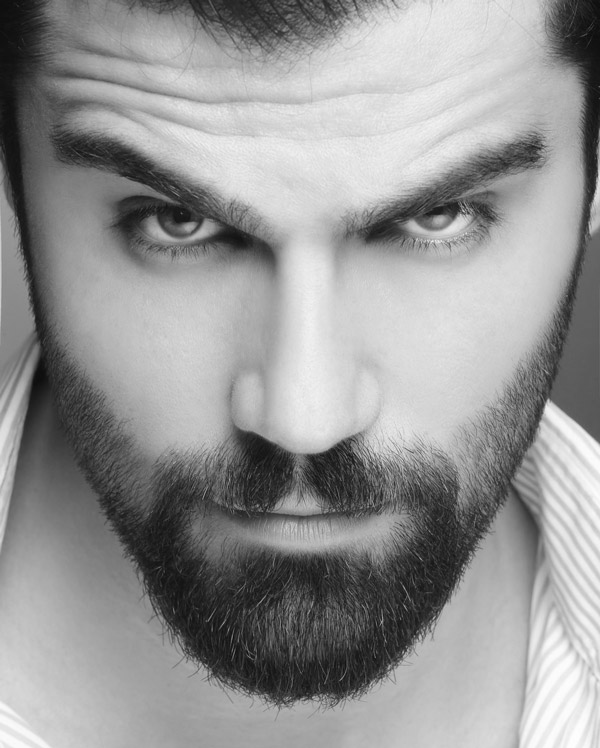
Here you can see the black/white effect:
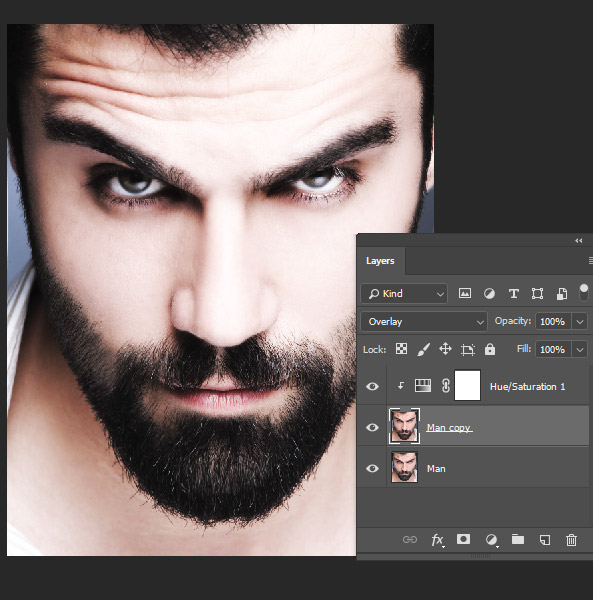
Step 4 – Changing Blending Mode
Once you have the black/white effect on the image, it is time to change the blending mode of the image to Overlay. The Overlay Mode will give us a strong contrast effect on the image thus leading to the sharpening effect on the image.
Here you can see the results and you can easily notice that how brighten the image is now.
Step 5 – Adding Sharpness
Now we’ll use the High Pass filter to sharpen the image. First, convert the duplicated man layer into Smart Objects (right click on the layer and then choose “convert to Smart Objects”).
Go to Filter > Other > High Pass, and increase the Radius Slider until you start seeing the detail of the skin, hair and beard. You can also zoom out while doing it, by clicking the Minus Magnifying Glass Icon in the preview box.
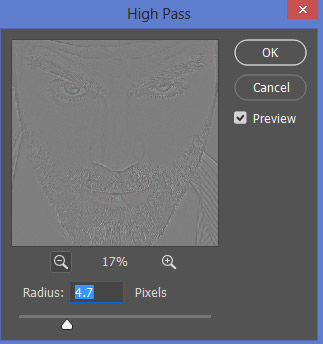
You can experiment with the Radius Slider until you satisfied then you can hit OK to apply the effect to the image. Since we are working on a portrait image, that is why I said that look for skin details. If you got a different image, then keep experiment with the slider until you see the results that you want.
Here you can see the results:

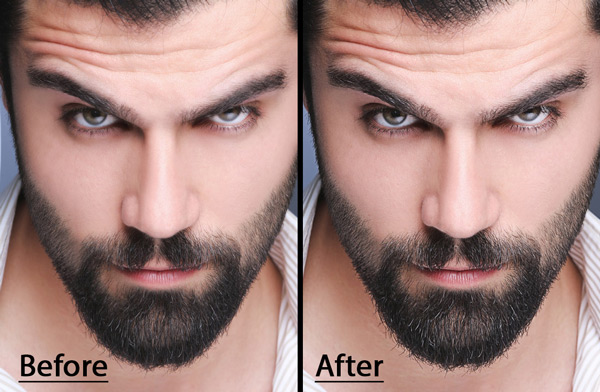
Here you can compare the before and after results:
Bonus Tip
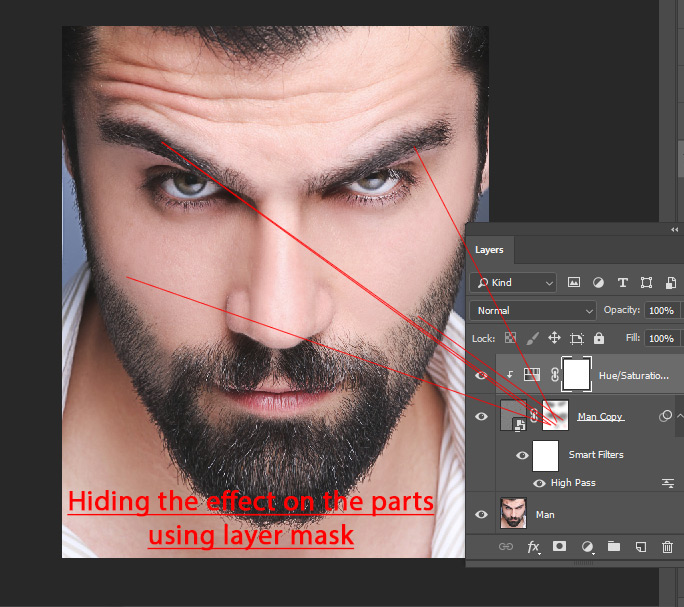
The bonus tip is here is to use the Layer Mask to hide/reveal the sharpening effect on the certain parts or wherever you want. You can add a mask to duplicated man layer by selecting Layer > Layer Mask > Reveal All.
I found the effect on some areas way too much. To remove the effect, I added a mask and I used a soft round black to mask the effect.
Here you can see where I removed the effect:
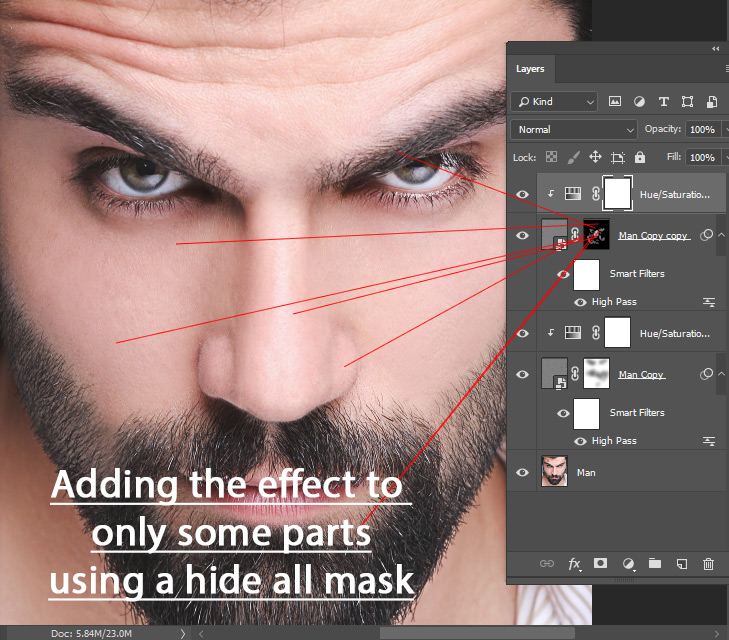
If you want to only apply the effect to some parts, maybe you want to add the effect only on the lips or chicks or maybe on the beard. In this situation, you can use the Hide All Mask.
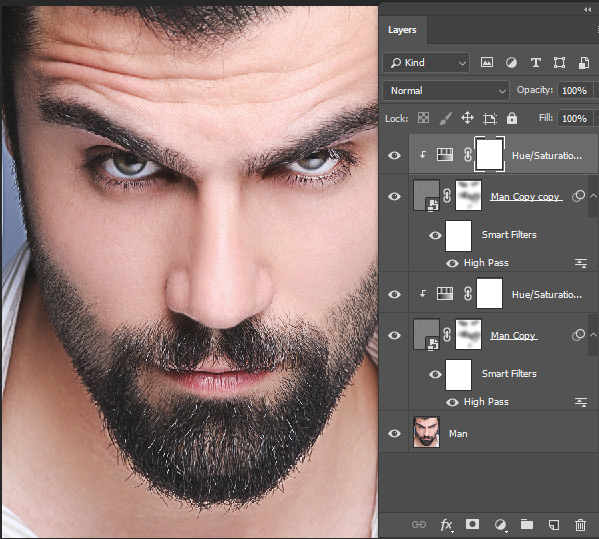
Let’s do this, duplicate the man copy layer one more time. Now go to Layer > Layer Mask > Hide All to add a hide all mask. Now use a soft, basic white brush to apply the effect on the parts on those you want to.
Here how I did it:
For more stronger effect, you can simply duplicate the “duplicated man copy” layer by pressing CTRL + J.
Hope you like the tips and tricks. If you got any feedback or maybe some suggestions for me, then feel free to drop the comment. Happy Photoshopping!
Need Help With Photoshop or Looking for Professional Support?
Whether you're just getting started with Photoshop or need expert-level assistance, we're here to help! Contact us for personalized Photoshop tutorials, project support, or creative services.
Get in touch today to take your skills or projects to the next level.
CONTACT US NOW📘 Want to Master Photoshop Faster?
🎁 Get Your FREE PDF E-Book "Top 10 Photoshop Tricks Every Designer Must Know" Now – Packed with expert tips, shortcuts, and techniques to boost your creativity & workflow.
👉 Download Your FREE PDF E-Book NOW!
