

Hey everyone, welcome to another Photoshop tutorial! In this lesson, I’ll be teaching how you can select and change color in Photoshop. First, we’ll be only changing the color by targeting a specific color using adjustment layers. On the second part, we’ll be using the Color Range to select colors and then changing it using adjustment layers.
Finally, we’ll refine our selection to get the perfect coloring on the image. Let’s get started!
Tutorial Resources
Man
Woman
Adobe Updated Guide On Selective Coloring
Step 1
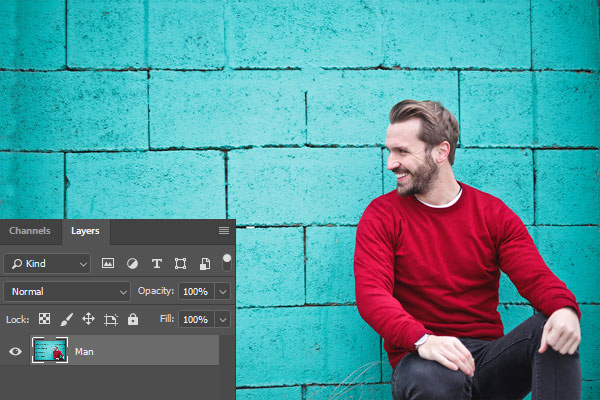
I am using this image for this tutorial which you can find it on the tutorial resource section. I opened it in Photoshop by selecting File > Open.
Step 2
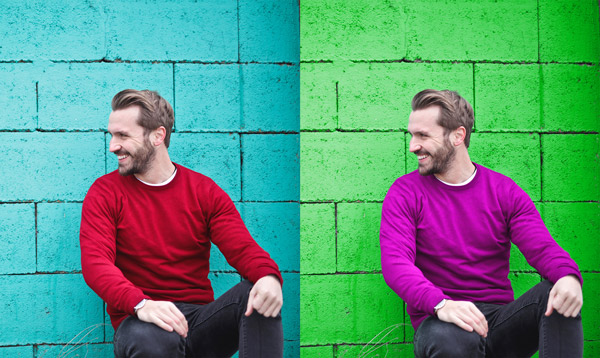
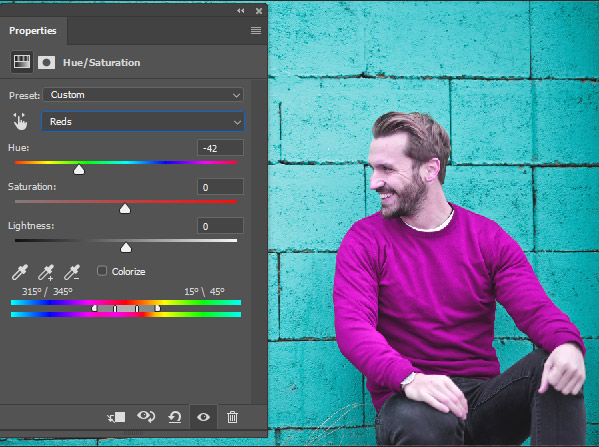
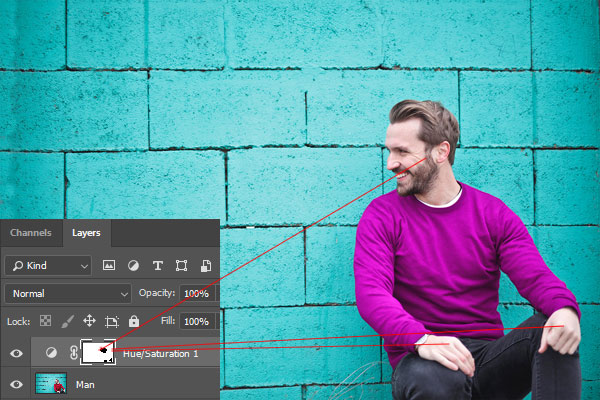
Now we’ll target the sweatshirt color which is red and will change it to pink or magenta. So go to Layer > New Adjustment Layer > Hue/Saturation. Select the Reds from Master drop down list that is beneath the Presets as we are targeting the red color.
Now drag the Hue Slider to right or left to change the color. I changed the color with the below settings from red to pink. See how easy it is.
Step 3
Since the red tones also include the face and hands color tone as well, that is why it has changed the color of the face and hands. We need to remove the color from there, to leave these parts intact.
What you can do here is, select the mask of Hue/Saturation and then use a basic, soft black brush to remove the effect from the face and hands.
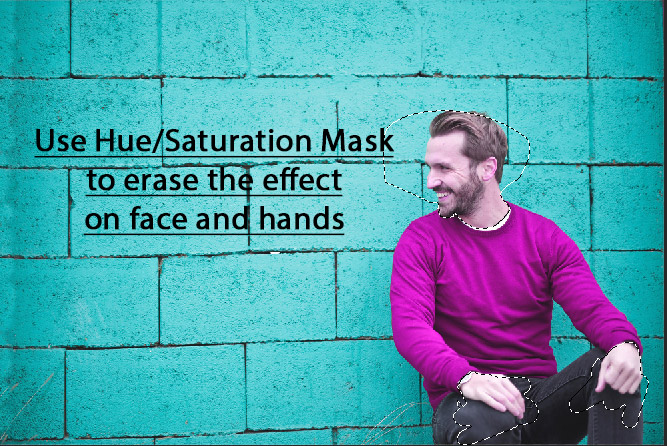
Here are the results after using the mask:
Step 4
Now we’ll change the color of the wall. Make a Hue/Saturation layer again then choose the Cyan color from the list and then experiment with the Hue Slider to change the color of the wall.
I changed the color to green with the below settings.

See that how we changed the color without making any selection. This technique works really well when you are working with solid colors.

Step 5 – Select & Change Color
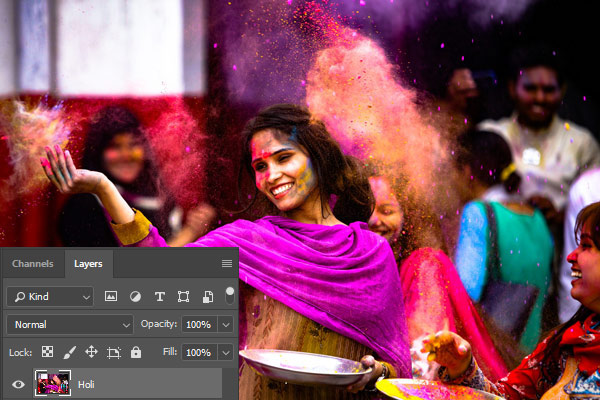
Here we need to focus first on making the selection and the rest of thing, of course, is same as we already done it above. I am using this image of a girl, playing Holi and I wanted to change the color of her dupatta or shawl-like scarf (and her left-hand clothes matching only magenta tones) it has a pink color.
Step 6
We’ll be using the Color Range because it is not time consuming. You can use the Pen Tool to select the particular parts of any image, then change the color using adjustment layers.
Go to Select > Color Range and in the Color Range dialog box use the settings below.
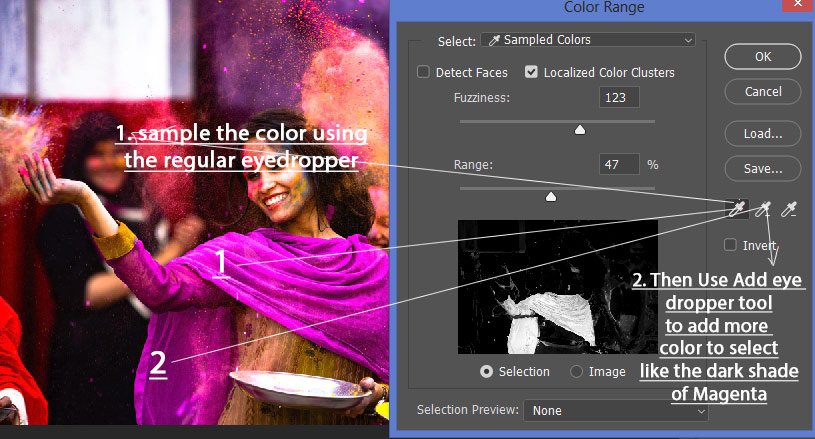
Select: Sampled Colors – As we sampled the color manually by using the Regular Eyedropper tool. I just picked the first color to target that is magenta on her shawl using the Regular Eyedropper tool. See the above image for 1. point.
Now, you can see that on her shawl there are other shades of color. We need to select those as well. Select the Add Eyedropper Tool and start sampling another version of the color like I choose the dark version of it. See the above image with 2. point.
Check the Localized Color Clusters to limit the areas in the photo where Photoshop will look for matching color. With this, we can precisely select the color we want. Otherwise, you could end up selecting more colors.
Increase the Fuzziness to 147 to tell Photoshop to select the color pixels that match with the sampled color or near the sample color. The more the fuzziness value the more color pixels that match with the sampled color will get selected. So keep an eye on the preview box while increasing fuzziness value to make sure that it only select the color we want in our case the magenta color of the shawl.
Set the Range to 47% to tell Photoshop that only look at the areas that are closer to the areas we clicked on.
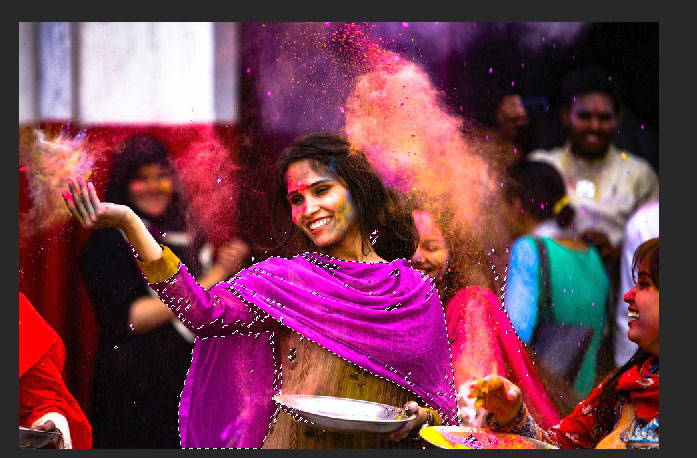
Here we have our selection ready. The problem with Color Range is that it won’t give you the perfect selection if you have a lot of colors in your image as we have now.
Step 7
Now we need do a little clean up on the selection using the Quick Selection Tool (W). Select the Quick Selection Tool (W), use the Add to Selection option to add the selection around the shawl. You can also hold the ALT/OPT to minus the selection.
This step is only for fixing the stray selections, if you managed to make the perfect selection, then feel free to skip the step.
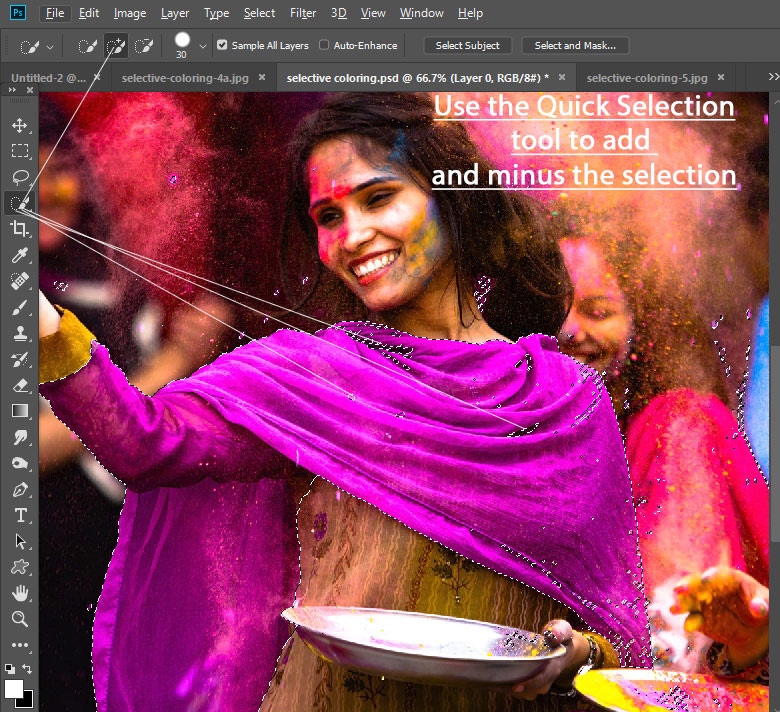
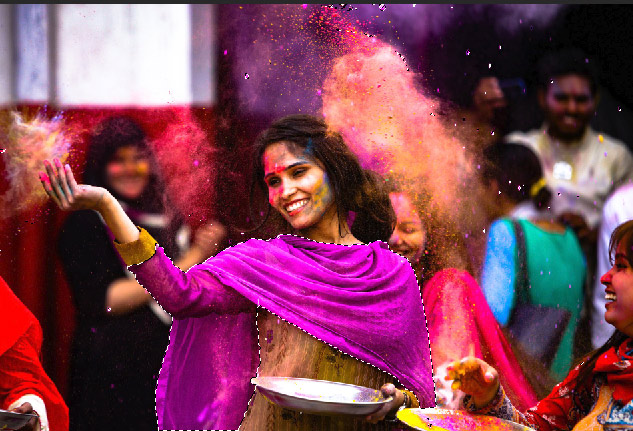
Here we have the perfect selection, phew! Don’t you think I should have used the Pen tool to make the selection?
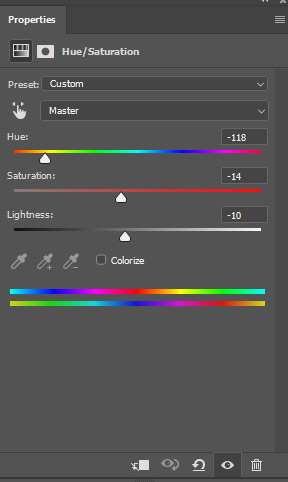
Step 8
While the selection is active, make a Hue/Saturation adjustment and then change the Hue Settings to change the color.
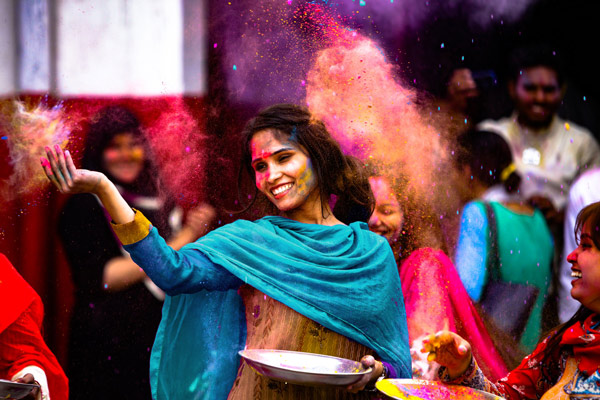
Results with the changed color of her shawl and clothes of her left arm:
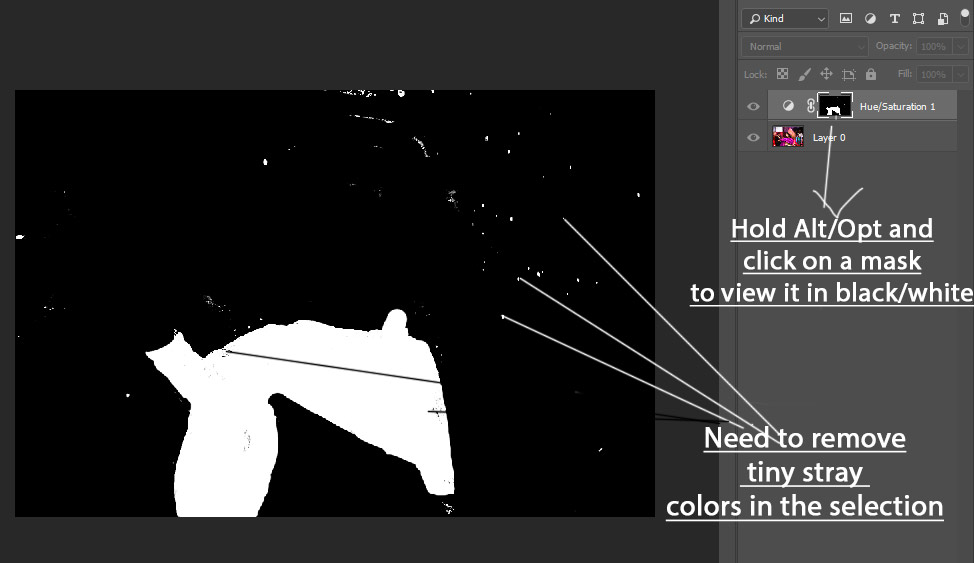
Bonus Tip
If you click on the layer mask holding ALT/OPTION key then you can see the results on the mask in black/white. This can help you spot any color stray in your selection or you can see the where the effect is 100% visible not.
When I did that, you can see in the below image, we have a lot of white spots on the black areas showing that the Hue/Saturation’s effect is also visible at these areas. Similarly, we have black spots on the white areas telling us that the effect is not 100% visible on some parts.
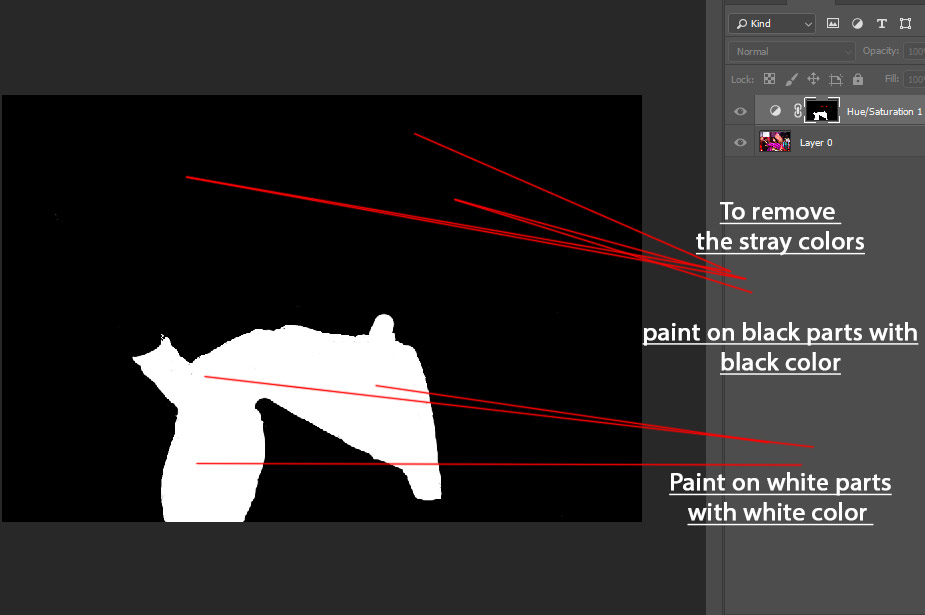
To fix this, you can use the basic brush with a black color to paint on the black parts to remove those white spots or remove the effect from there. Similarly, paint with white color on white parts to make the effect 100% visible there.
Here you can see how I did it:
Final results:

Need Help With Photoshop or Looking for Professional Support?
Whether you're just getting started with Photoshop or need expert-level assistance, we're here to help! Contact us for personalized Photoshop tutorials, project support, or creative services.
Get in touch today to take your skills or projects to the next level.
CONTACT US NOW📘 Want to Master Photoshop Faster?
🎁 Get Your FREE PDF E-Book "Top 10 Photoshop Tricks Every Designer Must Know" Now – Packed with expert tips, shortcuts, and techniques to boost your creativity & workflow.
👉 Download Your FREE PDF E-Book NOW!

