


Hey everyone, welcome to another Photoshop tutorial! In today’s tutorial, I’ll show you how you can remove almost anything in Photoshop using a range of cloning techniques. I’ll be sharing how you can use the Content Aware Tool, Patch Tool, Clone Stamp Tool and some basic copying and pasting techniques to remove whatever you want from an image.
Tutorial Resources
- Woman
- Man
Using the Content Aware Fill
Step 1
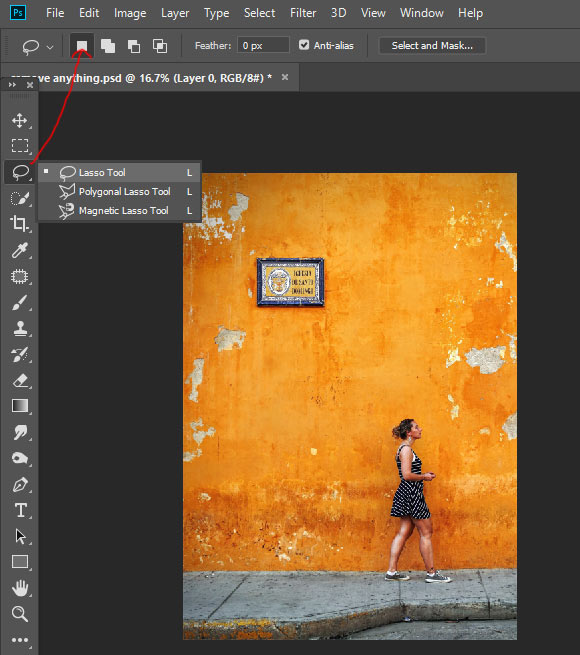
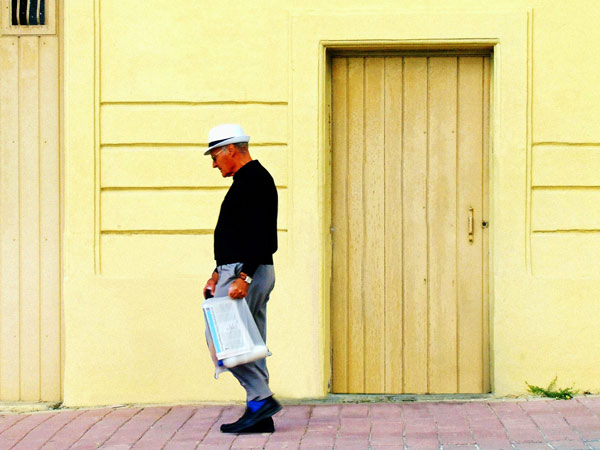
Open the woman image in Photoshop by selecting File > Open. I am directly working on the original image by you can make a copy of it by pressing CTRL + J just in case.
Now select the Lasso Tool (L) and make sure on the option bar New Selection option is selected.
Step 2
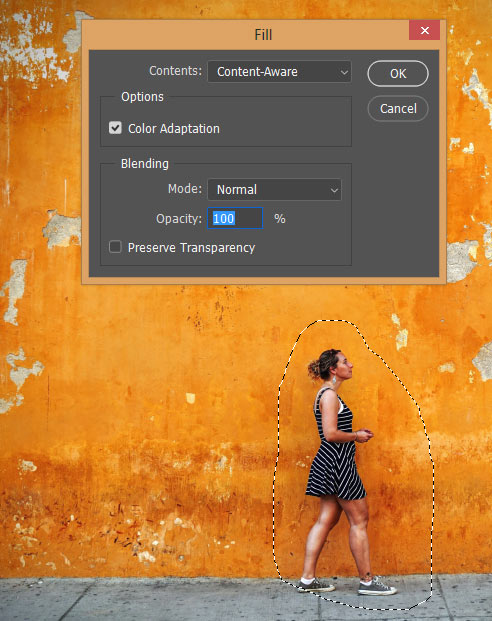
Now use the Lasso Tool (L) to create a selection around the woman.
Here you can see how I made the selection:

Now go to Edit > Fill and then choose Content Aware.
Now press OK and then press CTRL + D to deselect the selection and then boom you can see the woman is gone.

Using the Patch Tool
Step 3
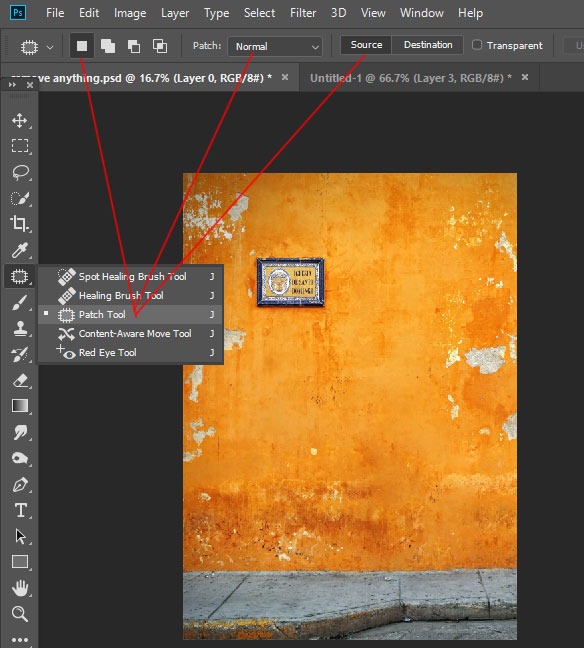
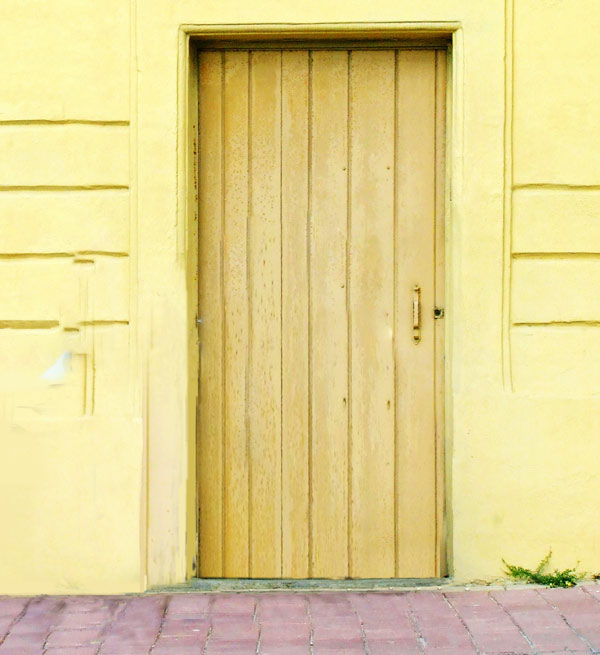
Now we’ll remove the board on the wall using the Patch Tool (J). Activate it and make sure that New Selection, Patch : Normal and the Source option is checked on the option bar.
Now use the patch tool to create a selection around the board using the mouse.

While the selection is active, move your cursor on any other parts of the image, for example, I moved it to right to sample the parts for cloning and then release the mouse button. The Patch Tool will automatically clone the selected area with the sampled source.
You can either move to left, right, bottom and up to sample the area and the release mouse button to remove the board.

You can see we just removed two things in minutes using these basic techniques:

Advanced Cloning Using Clone Stamp Tool
Step 4
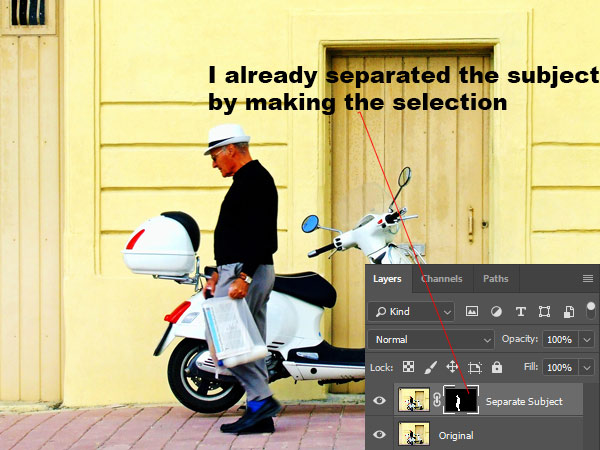
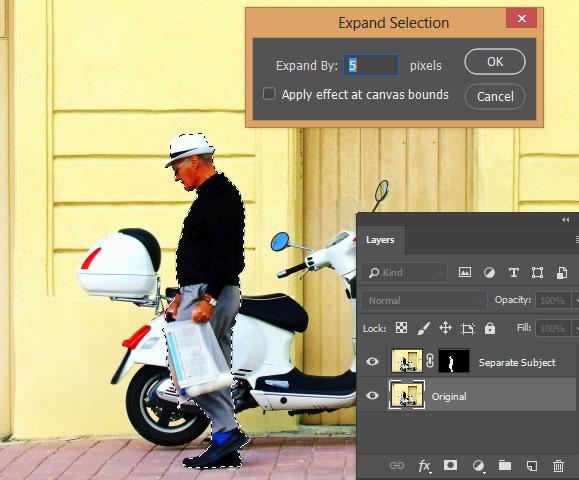
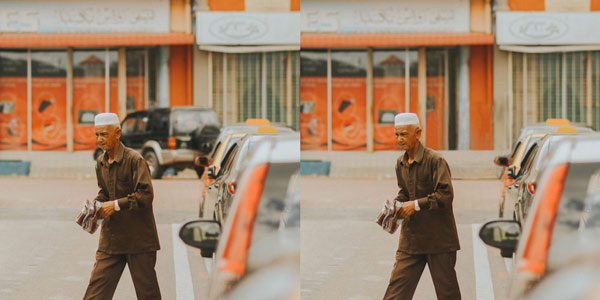
Open up the old man image in Photoshop. Duplicate original layer and name it “Separate Subject”. Make the selection of the man using the Pen Tool (P) and then add a layer mask by selecting Layer > Layer Mask > Reveal All.
Now I will expand the selection which is the same thing I did with my blur background tutorial. Retrieve the selection of the man by holding down the CTRL Key and then left-click on the thumbnail of the mask. Now select the original layer and go to Select > Modify > Expand and enter 5px to expand the selection.
Now use the Content Aware like we did for the woman to clone the man.
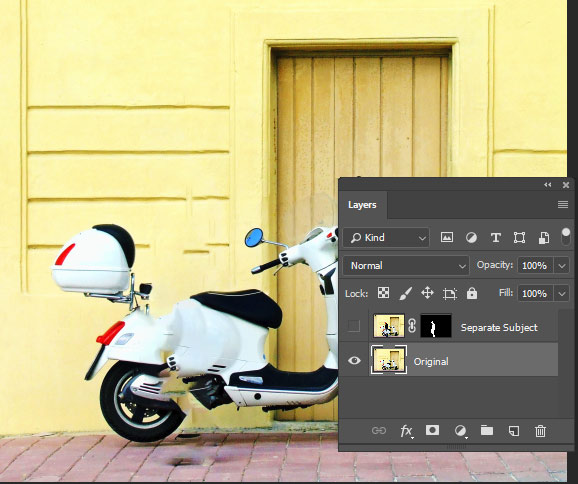
Now our subject is separated from the background and we can start removing the vehicle from the image.
Step 5
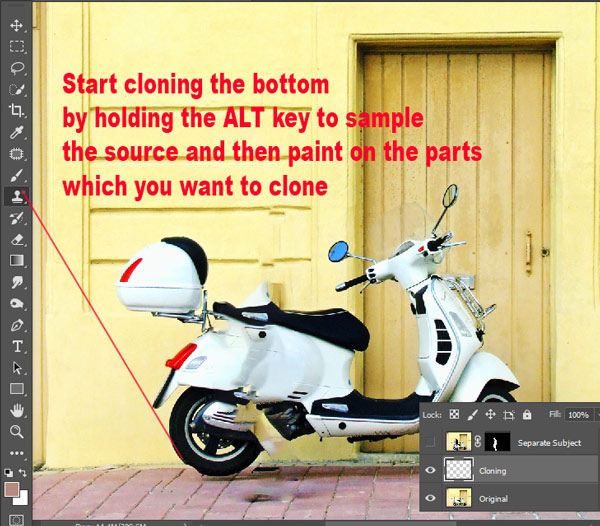
Activate the Clone Stamp Tool (S) and then make sure that Curent and Below is selected in the Sample option.

Press CTRL + SHIFT + N to create a new layer and name it “cloning”. Put it above the original layer and use the Clone Stamp Tool to start copying the bottom. You can sample the bottom parts by holding the ALT Key and once you sampled the source for cloning then start to remove the parts.
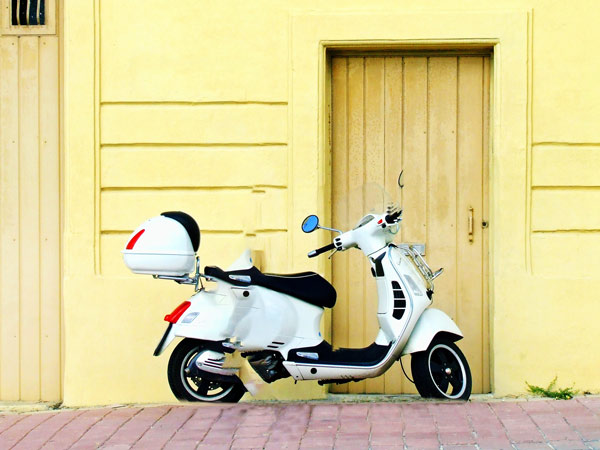
Here you can see I completely cloned the bottom parts:
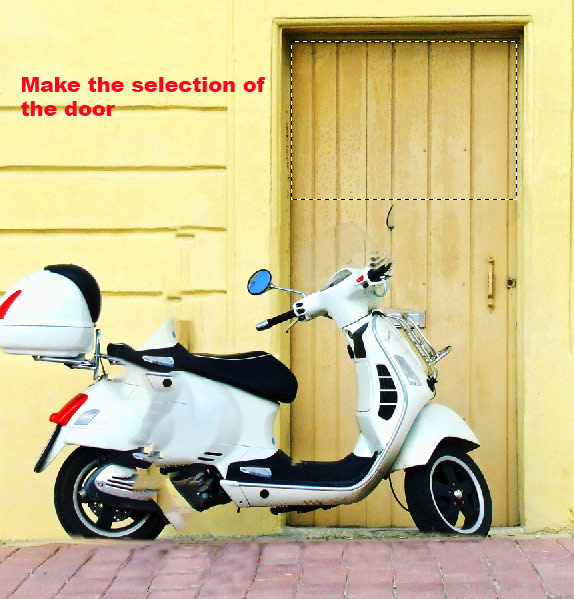
Step 6
Make the selection of the door top parts using the Rectangle Marquee Tool (W). Press CTRL + C to copy the selection and then Press CTRL + V to copy the selected area on a new layer.
Use the Transform Tool (CTRL + T) to enlarge the copied door parts. When the Transform Tool (CTRL + T) is active use the middle bottom handler to enlarge the door parts to cover up the vehicle.

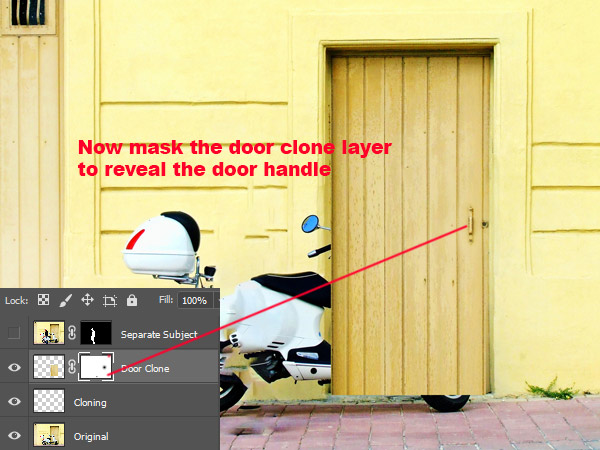
Step 7
Add a mask to door clone layer and mask the indicated parts to reveal the parts of the original image (which is already underneath it) so the door handle can be revealed.
Non-destructive Removal of Anything
Before proceeding forward, let me show a trick to clone which you can use without harming the original image.
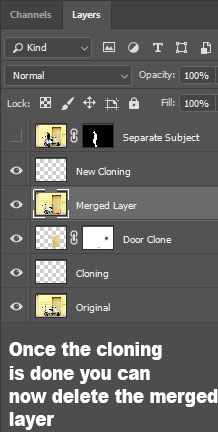
Create a merged copy of all layers by pressing CTRL + SHIFT + ALT + E.

Create a new layer just above the merged layer for cloning and on this layer, you can clone non-destructively as you are not harming the original because we have a merged layer of all layers below it. But only make sure, when you use the Clone Stamp Tool, that the Sample is set to Current and Below like we did in Step 5 to sample the source for cloning from the merged layer.

Now in case if you want to go back to other layers which are below the merged layer then you can simply delete the merged layer and then you can access all other layers below it. In the next step, I’ll be using this cloning technique to remove the remaining parts of the vehicle.
Step 9
Let’s get back to work and start removing other parts of the vehicle.
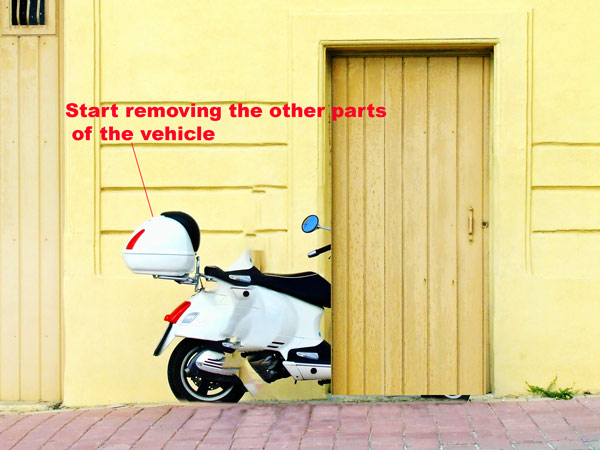
So I starts from the back parts and cloned them by simply sampling the wall:

Some more cloning to clone the middle parts:

Here you can see the vehicle is completely gone:

Step 10
You can notice we did our best and nearly got the results which we want. But the door hasn’t blended yet and got a sharp edge which doesn’t look good at all. To blend the bottom parts of the door, I’m gonna use the original image to reveal the parts as much as I can.
So duplicate the Separate Subject layer which is disable. Once you copied drag the Copied Layer below the separate subject layer and then enable it by clicking on the eye icon. Select its mask and then fill this with black color. This will hide the layer completely. Now use the soft, white brush to reveal the original bottom parts of the door.

Once you have done with this, you need to remove the vehicle’s tires by using the Clone Stamp tool.
Here you can see how I did it:
Now enable the Separate Subject layer to make the man visible again. Also, I used the original shadows from the man shoes to reveal it make sure it blends perfectly using the original image parts like we just did in the last step.

Here you can see the results:
Some More Examples
Here are some more examples in which I used this technique:
Example 1:
Example 2:

Example 3:

Need Help With Photoshop or Looking for Professional Support?
Whether you're just getting started with Photoshop or need expert-level assistance, we're here to help! Contact us for personalized Photoshop tutorials, project support, or creative services.
Get in touch today to take your skills or projects to the next level.
CONTACT US NOW📘 Want to Master Photoshop Faster?
🎁 Get Your FREE PDF E-Book "Top 10 Photoshop Tricks Every Designer Must Know" Now – Packed with expert tips, shortcuts, and techniques to boost your creativity & workflow.
👉 Download Your FREE PDF E-Book NOW!

