


Photoshop Layers, Layer Mask, and Blend modes are the important aspects of Photoshop. Especially without layers, you can’t do anything in Photoshop. In this tutorial, you’ll learn more about the working mechanism of layers, layer mask, and blend modes. You’ll also learn about the most important top five blend modes. Read this tutorial and learn more about the basics of Photoshop.
Tutorial Resources
Photoshop Layers
First, let’s talk about the layers. Photoshop layers are like the page of your notebook. Just like you write on a page of your notebooks and once it’s full you turn the page and start writing on another page. Same applies to Photoshop Layers and you can also see through transparent areas of the layer to the layers below. Layers can contain images, text, shapes and many other objects.
How To Create a New Layer

You can create a new layer by clicking on the Create a New Layer Icon at the bottom of the layer panel. You can also press CTRL + SHIFT + N or go to Layer > New > Layer to create a new layer.
Blend Modes of the Layer

You can set the blending mode of a layer from the Set the Blending Mode of a layer drop-down list. You can choose many blend modes from the list here.
Opacity of a Layer
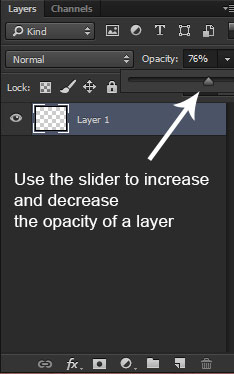
You can control the transparency of a layer with layer opacity.
You can increase and decrease the opacity of layer by the clicking on the Set the Master Opacity Arrow Icon and then use the slider to either increase or decrease the opacity of a layer. Similarly, you can set the Fill percentage of a layer which is right underneath the opacity.
Layer Visibility

You can hide the visibility of layer by clicking the Indicates Layer Visibility Eye Icon. If you want to hide a layer then click on the icon and if you want to visible a layer then again click the eye icon.
Unlocking a Background Layer
You can double-click on the layer to unlock it. Simply Just Double click on a layer to unlock it.
Adding an Image to Layer
To add an image to layer go to File > Place Embedded to place a image into a layer.
Delete a Layer

To delete a layer just select it and then press D button to delete it. You can also right-click on the layer and the choose Delete Layer or click on the Dustbin Icon to delete a layer.
Grouping the Layers
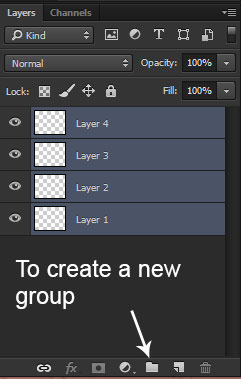
You can group the layers to arrange the layers in a good manner so things don’t look messy in the layer panel. To group the layers, first, select all layer and then press CTRL + E to group them. You can also create a group by clicking on the Create a New Group icon and then put all layers into it.
Learning by Practice
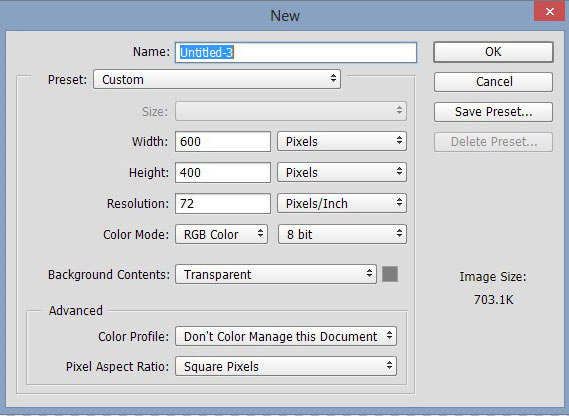
Let’s learn more about layers. First, create a new document to do this select File > New and set the setting as shown in the image below. Feel free to choose your own setting.
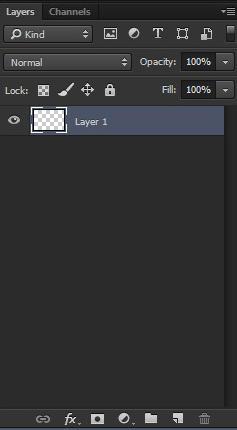
As you created the new document and now your layer panel resembles the below image.
Now activate the Rectangular Marquee tool by pressing (M) on Keyboard. Now create a rectangle by simply dragging it over the document and fill it with any color you want by pressing (Alt + Backspace for foreground color and CTRL + Backspace for background color) on the keyboard.
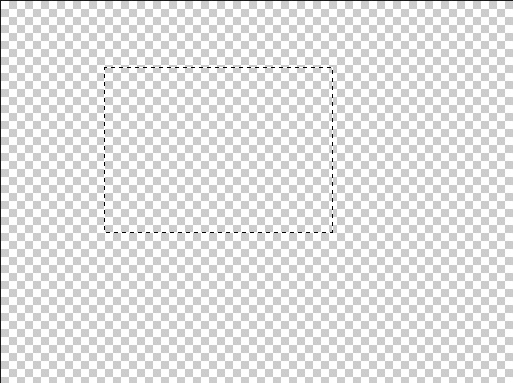
You can also change the foreground and background by clicking on the color icons shown in the image below. As you click on the foreground color a color picker dialog box appears and you can choose whatever color you want. Once you created the rectangle, create another one in the same layer but choose a different color for it.

Right now we have two rectangles in the same layer. Let say I want to move the black rectangle but as I move the black rectangle the pink also move. So what’s happening? why I can’t move the black one? Here is the concept of layers comes and we can’t move black rectangle because both rectangles are in the same layer (remember both rectangles are in the same layer).
Let’s again create two rectangles but this time in different layers.
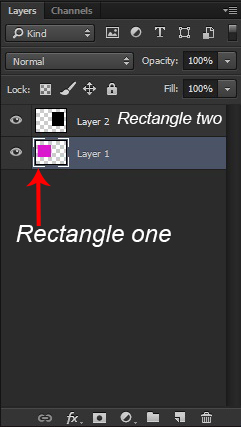
Now I want to move the black rectangle I can easily move it because it’s in different layers. I can also place it behind the first one and all you need to do this is just drag the black layer below the pink one. Now you can move any rectangle wherever you want, you can also change the opacity and blend mode of both rectangle. So this is how layer works in Photoshop.
Layer Mask
Photoshop Layer masks as I mentioned earlier in this tutorial are the important aspects of Photoshop. The Layer mask is used to control the transparency of layer but it’s different from layer opacity. Layer opacity controls the transparency of the entire layer at once, a mask gives you more precise control over very specific areas or wherever you want.
In simple words, you can use the layer mask to hide the different parts of layers which you can’t do using the opacity of layers.
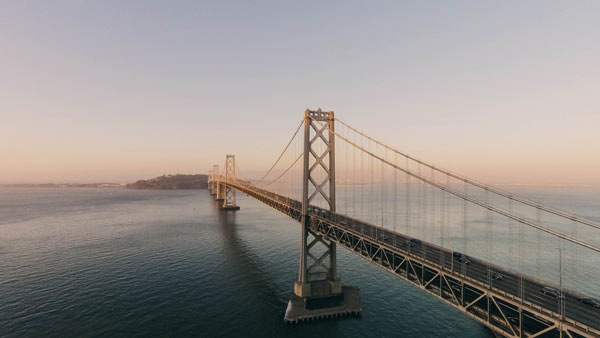
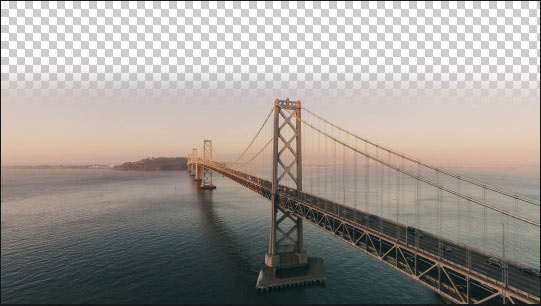
Open up an image in Photoshop. So let’s open the bridge image in Photoshop.
How to Add the Layer Mask
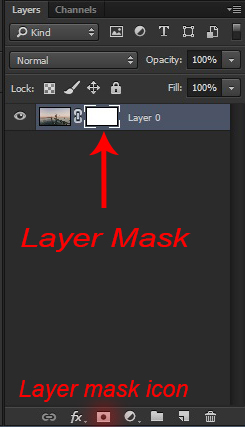
You can add a layer mask to the layer by clicking on the Add Layer Mask icon at the bottom of the layer panel or go to Layer > Layer Mask > Reveal All. So let’s add it to the bridge image.
How Layer Mask Works
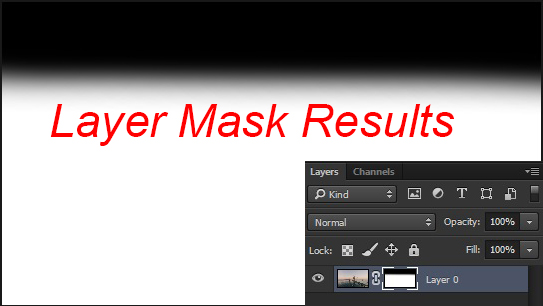
You can see in the above image that the layer mask color is white. White means the layer is 100% visible and black means layer is 100% invisible. In a simple word, if you want to hide the parts of an image then simply paint it with black color on the layer mask of that layer and if you want to reveal the parts of an image then simply paint it with white color. You can also inverse the layer mask results by pressing CTRL + I.
As you can see the layer is 100% visible. Now I want to hide the sky part to do this I need to paint with black color on the layer mask of the bridge using the brush tool.
So activate the brush tool by pressing (B) on the keyboard and set the foreground color to black. Simply paint over the layer mask to hide the sky.
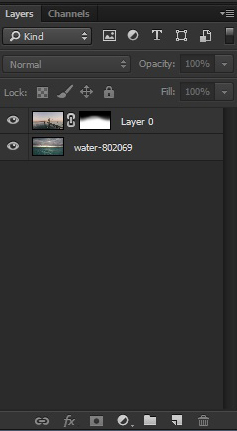
As you can see by simply painting on the layer mask of the bridge with black color, we have the sky part hidden. You can also see the layer mask results.
We have the sky part hidden and now I want to add different sky image to it. All I need to this is just place another image below the bridge layer. So first place the sky image to the main document to do this select File > Place Embedded and place the sky image to the main document. Then drag the sky layer below it.
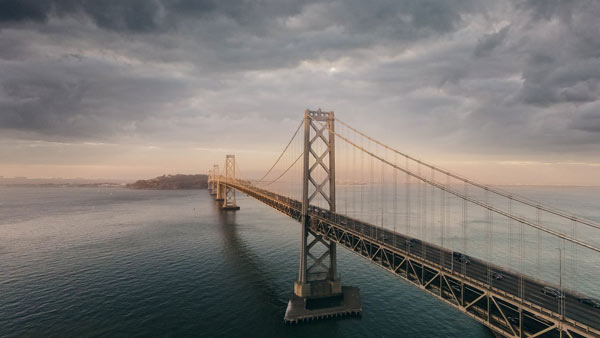
See we have very decent results.
That’s why layer mask is important in Photoshop for seamless blending. You can also combine different stock into a cohesive using layer masks.
Bonus Tip : Whenever you use a layer mask for combining different stock image, always use soft round brush (it’s a default brush in Photoshop) and set the opacity and flow of the brush tool to 30%-40 %. Reducing the opacity allow us to blend the image properly with another image. I always use these brush settings in my every photo manipulation that’s why I am recommending to you.
Blend Modes
Blend modes are another essential aspects of Photoshop. Working with blend modes is always experimental and we can’t predict the results for each blend modes.
Let’s take a look at blend modes group.
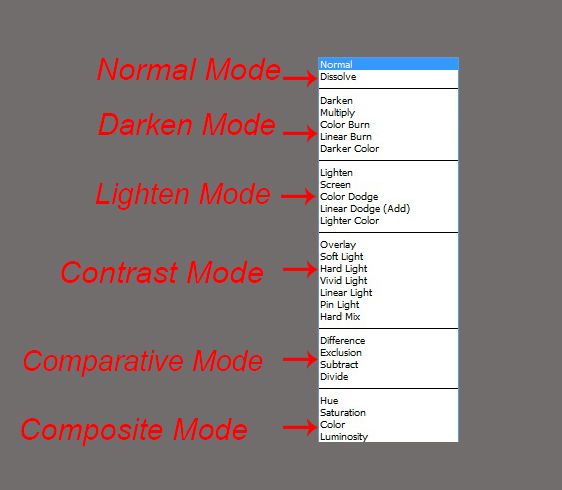
Let’s learn a little bit more about blend modes group. The first group is Normal and its default mode.
Second, we’ve “Darken”, “Multiply”, “Color Burn”, “Linear Burn” and “darker color”, these are the darken mode because they always dark the image.
Third, we’ve “Lighten”, “Screen”, “Color Dodge”, “Linear Dodge” and “Lighter color”, these are the lighten mode. They always lighten the image.
In fourth group we’ve “Overlay”, “Soft Light”, “Hard Light”, “Pin Light”, “Vivid Light”, “Linear Light” and “Hard Mix”, these are the contrast mode. Each one both darkens and lightens the image.
Next up we’ve composite group and we don’t need to learn about these blend modes because they used often, especially in photo manipulation.
Finally, we’ve Composite mode and “Hue”, “Saturation”, “Color”, and “Luminosity” modes made up the composite group.
Basically, we’ll choose most important blend mode from each group and let’s learn more about blend using an example.
Multiply Blend Mode
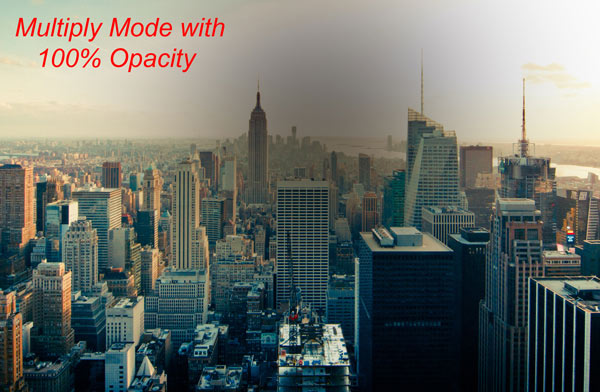
Open the city image in Photoshop. Create a new layer and set the foreground color to #716d6d. Activate the brush tool and make a big stroke as shown in the image below.
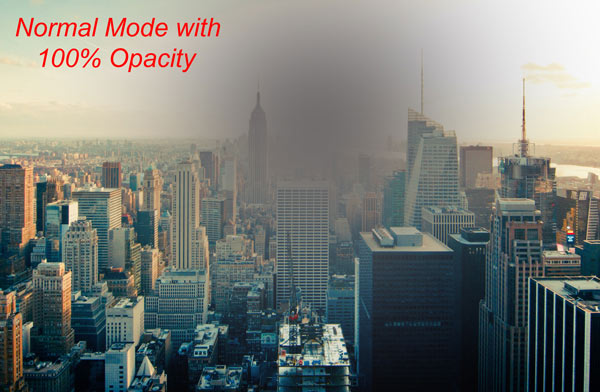
Change the blend mode of city layer to Multiply.
As a result, it has the darken the city image. You can also experiment with another blend mode of darken group to learn more about it.
Screen Blend Mode
Now let’s go to the lighten group which always gone lighten the image.
We’ve city image again and this time change your foreground color to #ffb400. Using a soft round brush tool make a big stroke as shown in the image below.
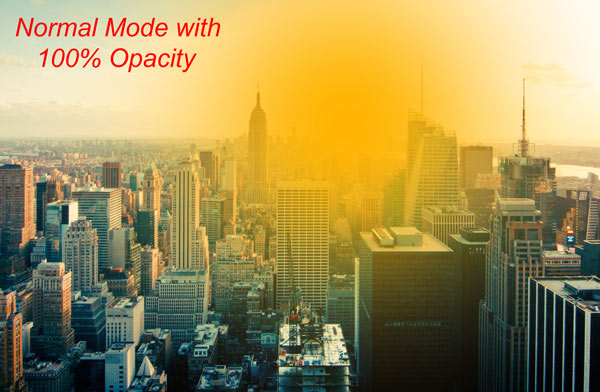
Change the blend mode of the city to Screen.
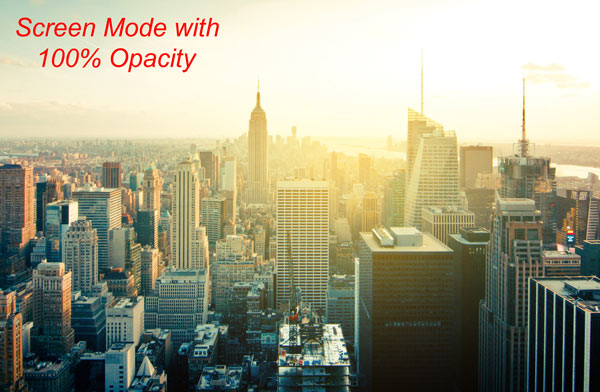
As you can see it has lightened up the city image. Try changing the blend mode to a different one and see the results.
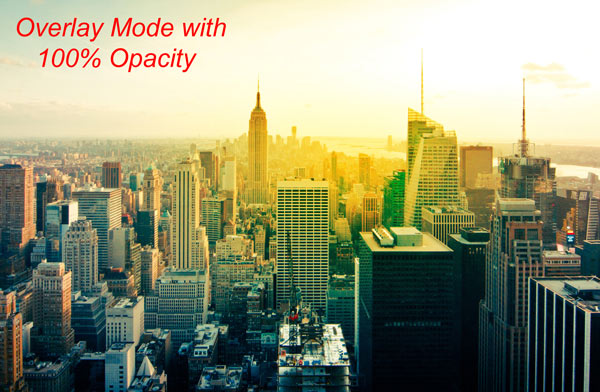
Overlay Blend Mode
Now let’s change the blend mode to Overlay with the same color setting in previous one.
Now reduce the opacity to 40% and here are the results.
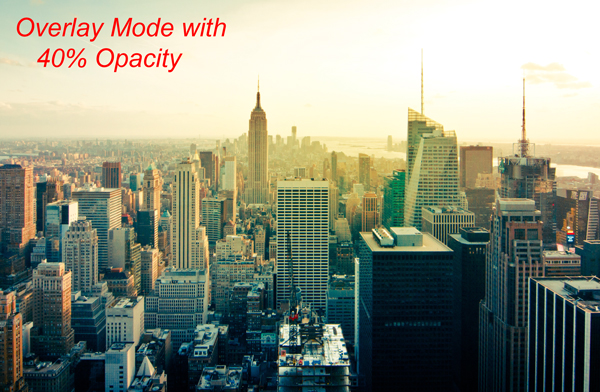
As you can see the overlay mode always boost the contrast of an image. Similarly, you can experiment with Soft Light, Hard Light, and many other blend modes to achieve your desired results.
Bonus Tip: Always always try to experiment with different blend mode and also try experimenting with layer opacity. As I said earlier blend modes are experimental and one can’t predict the results of blend modes. You’ll always get different results from each blend modes so it’s a better practice to experiment with every blend modes.
Conclusion
That’s it for the tutorial. Remember it all about basics and you’ll learn a lot about of layers, layer mask and blend modes from the upcoming advanced tutorials. Meanwhile Happy Photoshopping!
Need Help With Photoshop or Looking for Professional Support?
Whether you're just getting started with Photoshop or need expert-level assistance, we're here to help! Contact us for personalized Photoshop tutorials, project support, or creative services.
Get in touch today to take your skills or projects to the next level.
CONTACT US NOW📘 Want to Master Photoshop Faster?
🎁 Get Your FREE PDF E-Book "Top 10 Photoshop Tricks Every Designer Must Know" Now – Packed with expert tips, shortcuts, and techniques to boost your creativity & workflow.
👉 Download Your FREE PDF E-Book NOW!

