


Learn how to change background color in Photoshop in no time. I’ll show you how you can make the selection of a background based on color and fine-tune it to make the color visible on the background. You’ll also learn how you can create the multi-color background and you can even change the background color at any time as we use non-destructive technique to change the color. Let’s dive into it!
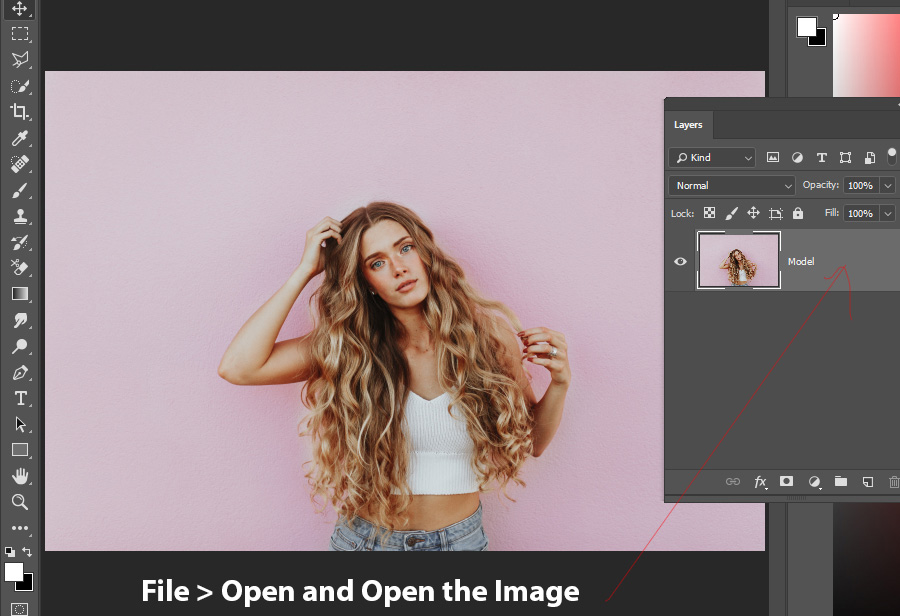
Step 1 – Open Image
Open image in Photoshop and I am using a model image from Unsplash and you can download the same here. This technique works well if you have a solid color background such as your subject against a clean wall, or having a simple solid background as our model has.
Go to File > Open and open the image in Photoshop.
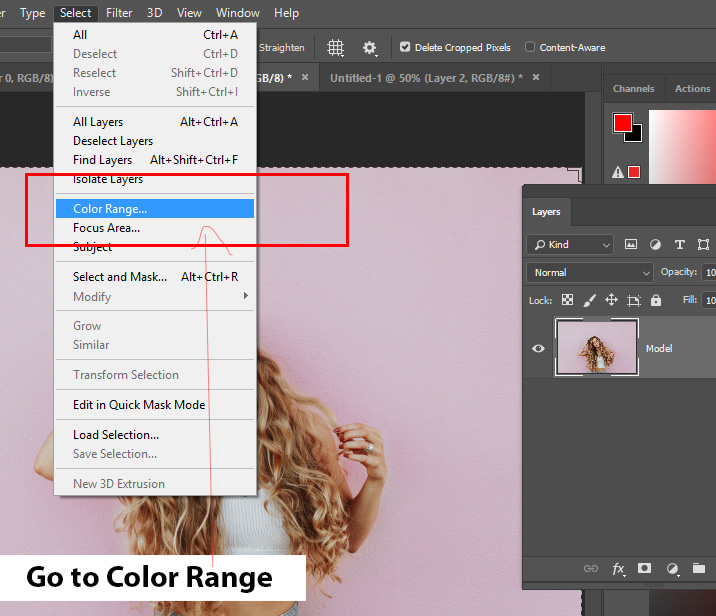
Step 2 – Create Selections
Since the background is really simple and we have only one color to select, considering that in my mind, I chose Color Range to make selection. If you want to learn more about Color Range you can follow my in-depth tutorial on Color Range here.
Go to Select > Color Range.
1. In the Select Color Range dialog box just click on the background color to sample and select it.
2. Set the Fuzziness to 100% to tell Photoshop to select the color pixels that match with the sampled color or near the sample color. This will make an accurate selection based on the sampled color.
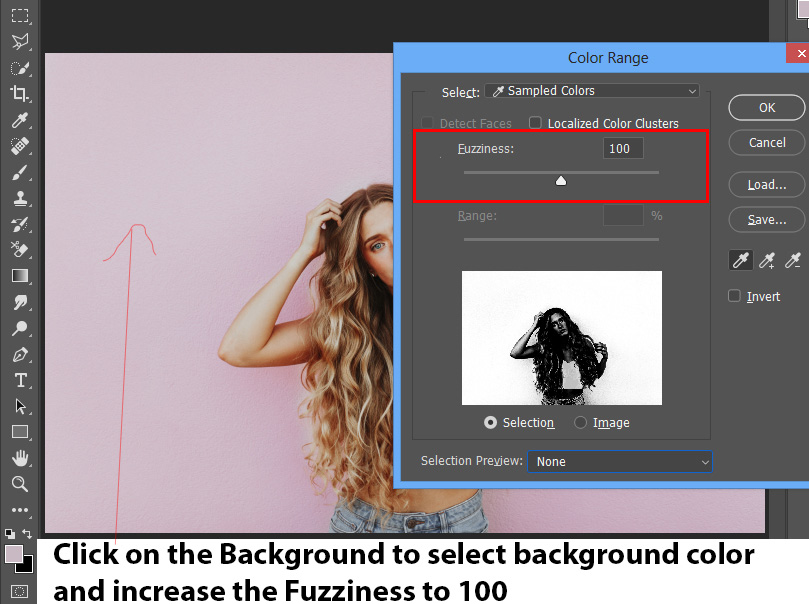
Now press OK to create a selection around the model:

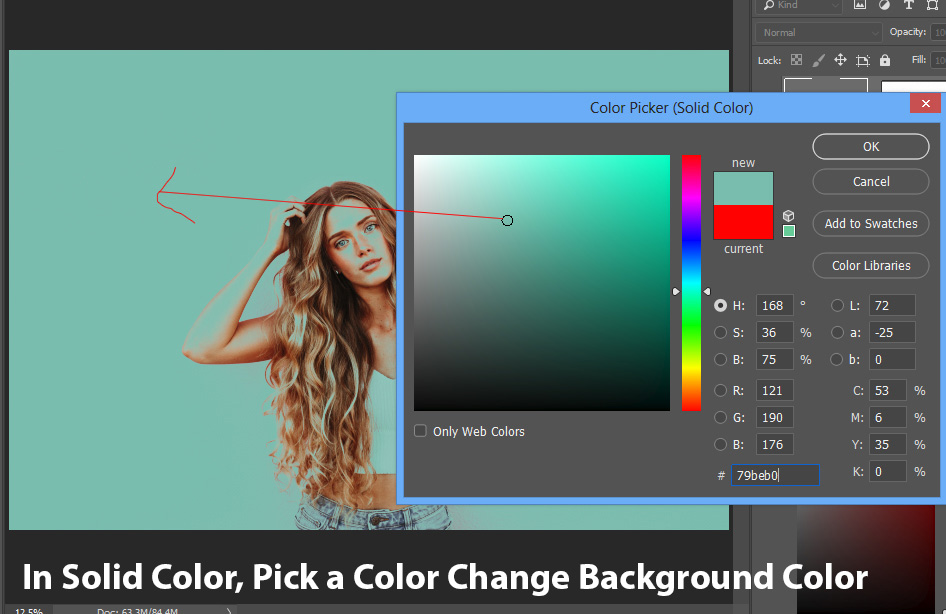
Step 3 – Change Background Color
Now we’ll change the background color using a Solid Color Fill Layer. Click on the new adjustment layer icon at the bottom of the layer or go Layer > New Adjustment Layer > Solid Color.
Make sure you add this adjustment layer while the selection is active as it will load the selection in the layer mask of the adjustment layer.

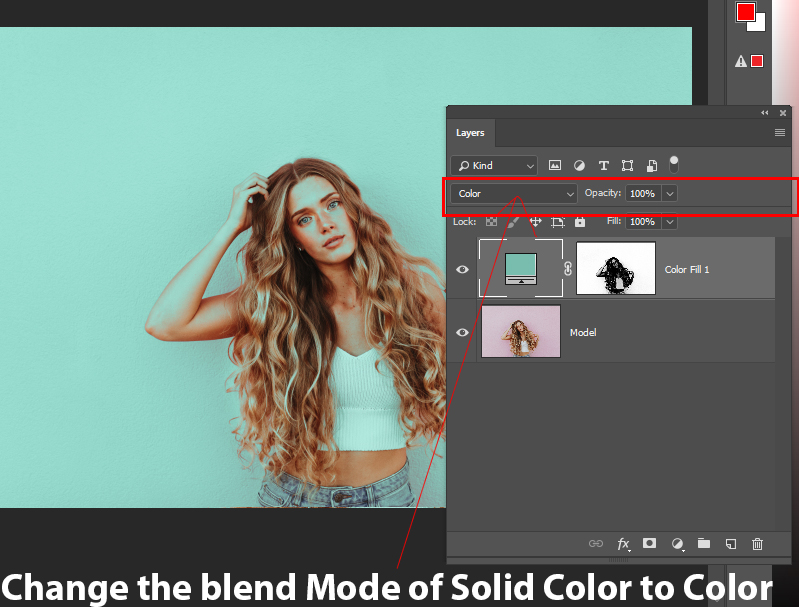
Pick any color that you like and change the background color:
Change the blending mode of Solid Color to Color Blend Mode. This will blend the color more naturally on the background.
Step 4 – Fine-Tune Layer Mask
The Select Color range did a pretty good job with the initial selection process but it’s not accurate. You can see we have some color visible on the model face, hands, and clothes. We don’t want that and to fix this we’ll fine-tune the results of the layer mask.
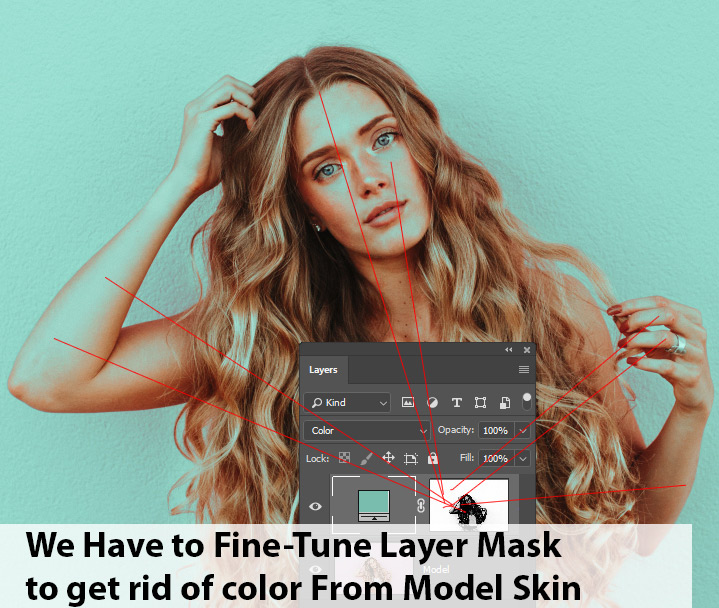
Select the mask of Solid Color adjustment layer, mask the effect of Solid Color using a soft round black brush. You can see in the below image where you exactly need to paint.

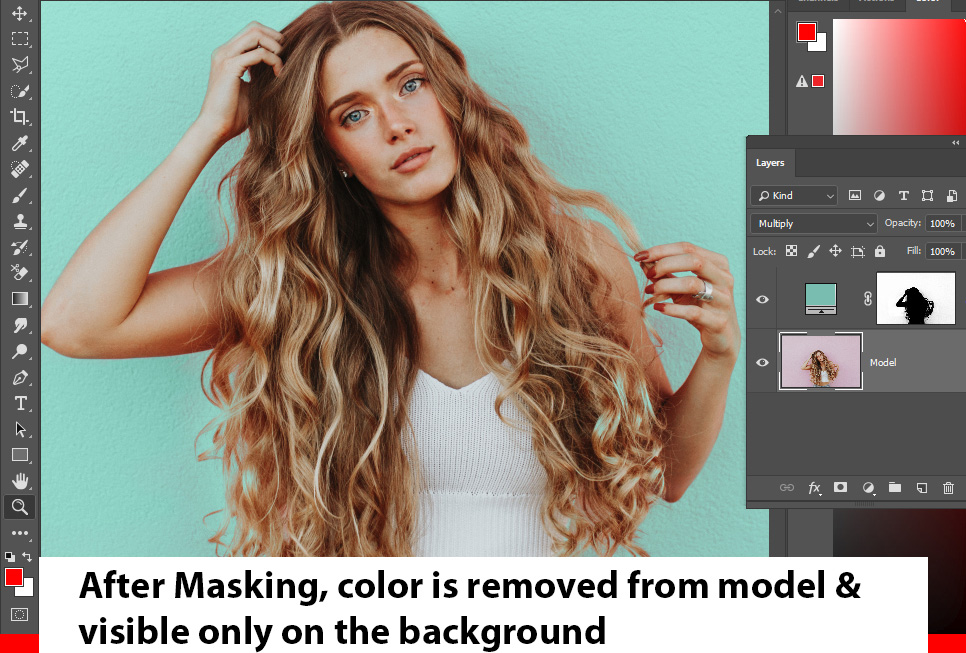
Here you can see we have removed the color from the model:
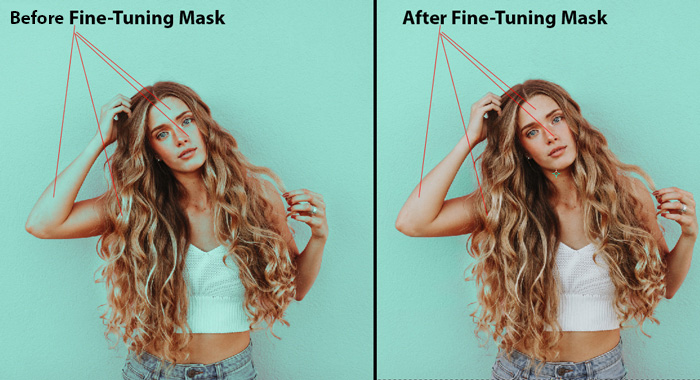
You can compare the results before and after fine-tuning results:
Step 5 – Create Multi-Color Background
Now you have changed the color of background completely but if you want you can even create a multi-color background as well. It’s much easier than you think.
To create a multi-color background, create a new Solid Color adjustment layer by selecting Layer > New Adjustment Layer > Solid Color.
You can see I’ve chosen a different color this time.

Now clip the newly created solid color layer to the existing solid color layer by pressing CTRL + ALT + G. This will make sure Solid Color 2 will be visible through the layer mask of Solid Color 1.
That simply means it won’t be visible on the model and will be visible only on the background.

Now make a random selection of your choice, you can use Polygonal Lasso Tool (L) or Rectangular Marquee Tool (M) to create a selection of your choice.

Now we’ll load the selection in the layer mask of solid color 2 layer. To do this, select the layer mask of Solid Color, change the foreground color to black by pressing (D) on the keyboard and now press ATL + BACKSPACE to fill the layer mask with black color.
This will make half of the layer visible and making the color visible on the second half of the layer.

As you press ALT + BACKSPACE you’ll see a multi-color background. You can even inverse the layer mask results by pressing CTRL + I to swap color from one half to another half.

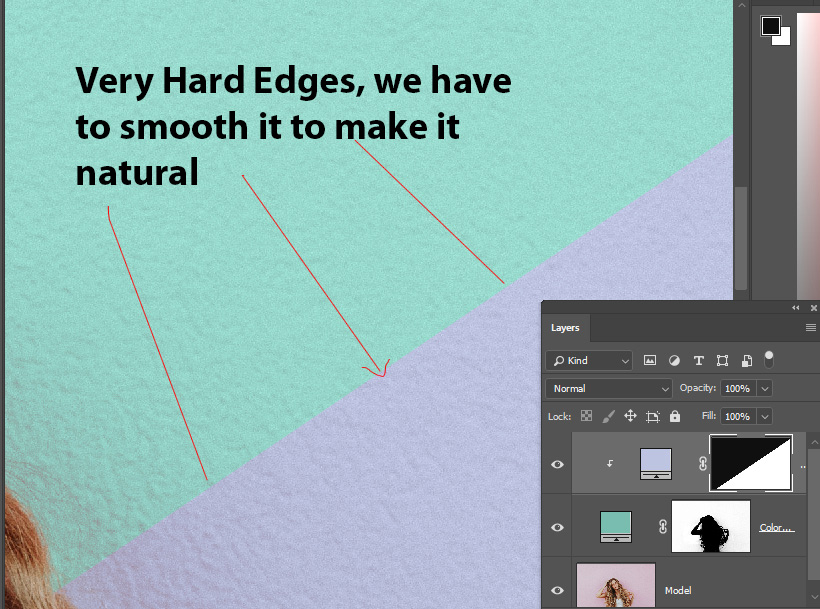
Step 6 – Smoothing Edges
Since I used Polygonal Lasso Tool (P) to create a selection and by doing so you can see we have a very hard edge separating colors from each other.
We have to smooth edges to make them look natural otherwise it won’t look good.
Right-Click on the layer mask of Solid Color layer and choose Select & Mask.
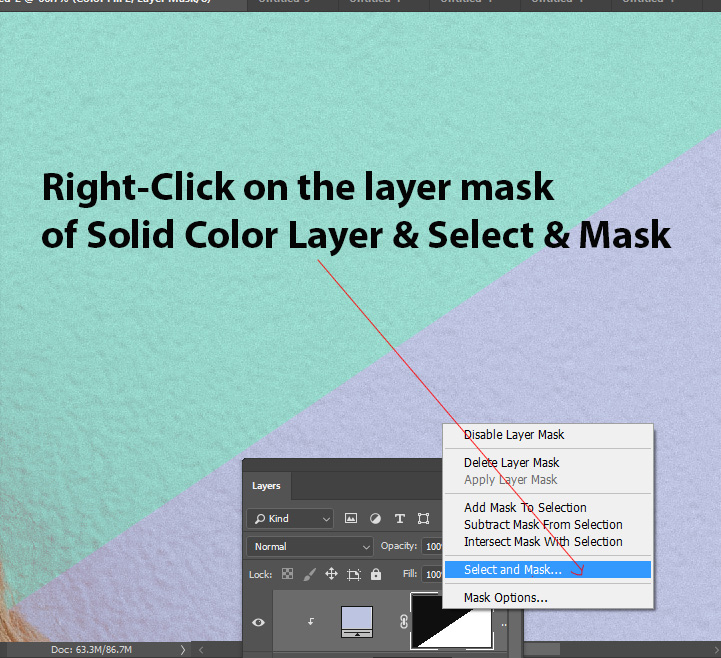
In the Select & Mask Dialog, head over to the Global Refinements Section and start increasing the Feather Value until you start seeing smoothness on the edges.

Here you can see the edges has a softness now:

Here are the Final Results:

I added another solid color layer and using masking I added another color on the background:

Step 7 – Change Background Color At Any Time
If you like this “Oh, I don’t like the color, I want to change it with another color”, it is super-easy to do. All you have to do this, double-click on the Solid Color Layers and choose a different color from there to change the color at any time.

I hope you enjoyed the tutorials and learned how to change background color in Photoshop. If you deem the tutorial useful then share it with the world and don’t forget to leave a comment in the comment section below.
Need Help With Photoshop or Looking for Professional Support?
Whether you're just getting started with Photoshop or need expert-level assistance, we're here to help! Contact us for personalized Photoshop tutorials, project support, or creative services.
Get in touch today to take your skills or projects to the next level.
CONTACT US NOW📘 Want to Master Photoshop Faster?
🎁 Get Your FREE PDF E-Book "Top 10 Photoshop Tricks Every Designer Must Know" Now – Packed with expert tips, shortcuts, and techniques to boost your creativity & workflow.
👉 Download Your FREE PDF E-Book NOW!
