
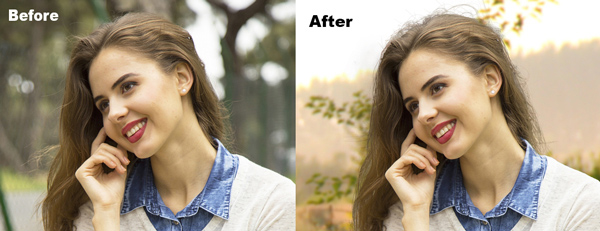

In this tutorial, I’ll be showing you how you can mask hair using a range of techniques. Hair Masking is one of the most popular topics in Photoshop and the most difficult one as well. Beginners always went mad when it comes to hair masking and you need to know little more than basic when it comes to masking the hair.
With this tutorial, you’ll able remove hair from any busy background as we’ll either paint the hair or use the hair image to recreate hairs. So let’s get started!
Tutorial Resources
Open the Photo
Step 1
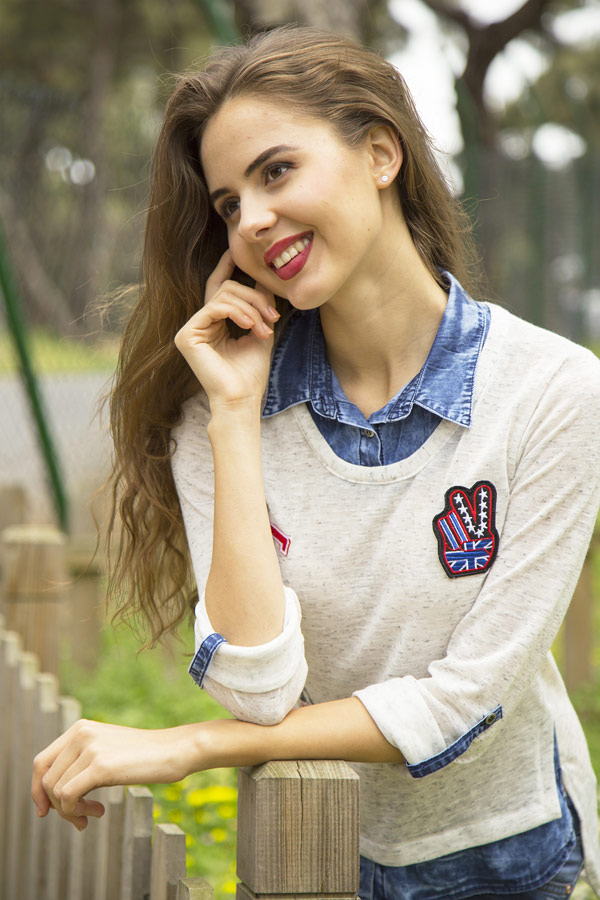
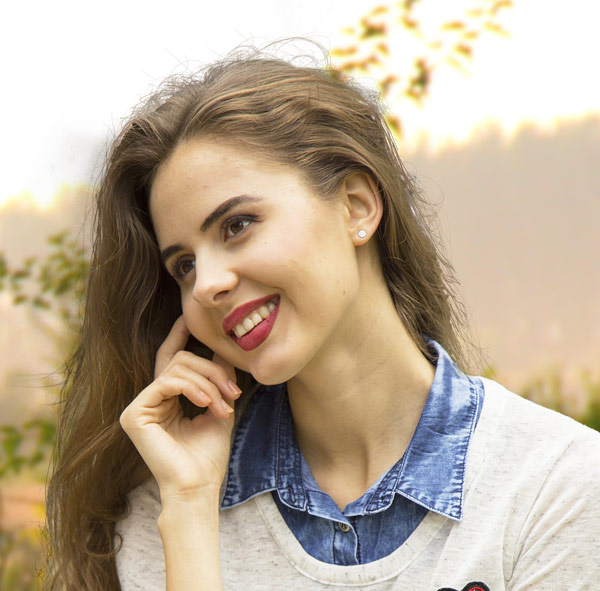
I’m using this girl image and I opened in Photoshop by selecting File > Open. You can see in this image, the hair is difficult to extract because the background is not plain or solid or white, and thanks to flying away and stray hairs.
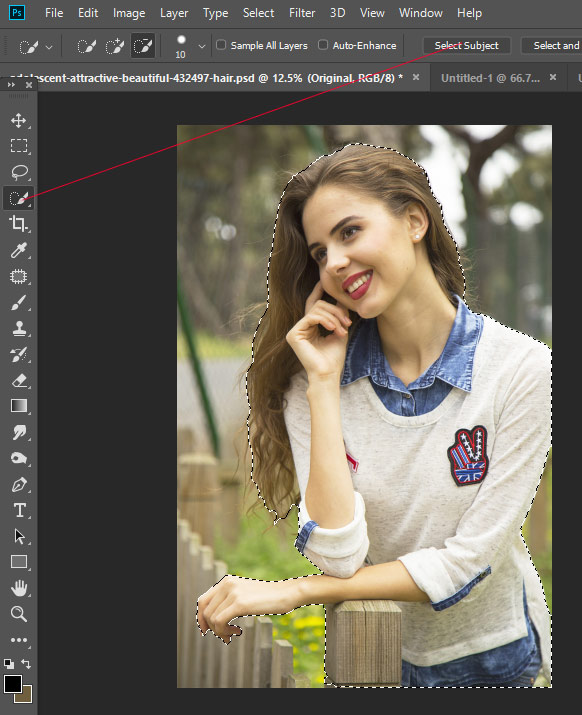
Make a Rough Selection
Step 2
Now you need to make a rough selection of the subject either using Pen Tool or you can use the latest Select Subject feature to make a selection.
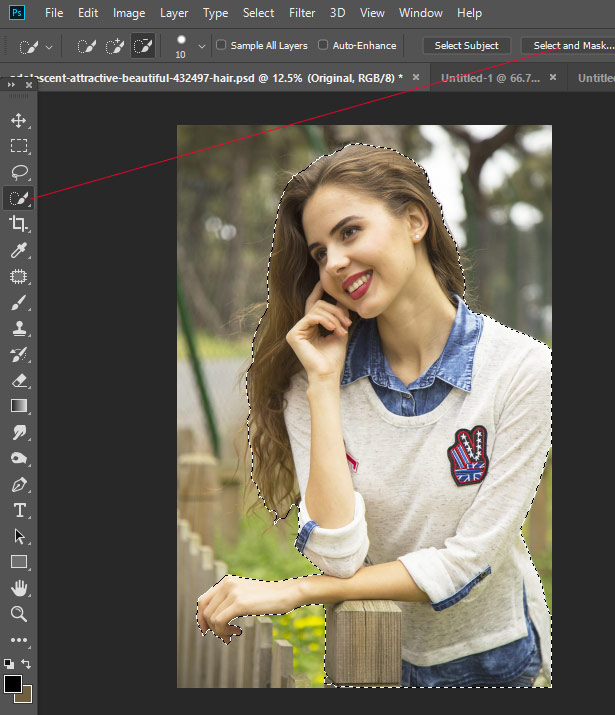
Step 3
Just beside the Select Subject button, you’ll see a Select And Mask button click on that so we can refine the selection.
If you are using the Photoshop CS6 or CS5, then first you need to add a mask once you made the selection. Then right-click on the mask and select Refine Mask. Now you’ll have the same option which you are seeing in the below image.
Now you need to refine the selection which we just made. Once you click on the Select and Mask button, then use the Refine Edge Brush Tool to make some adjustments to the edges of the hair as they look too sharp right now. While this tool won’t work on this complicated background but at least it can make our task a bit easier by softening the edges of the hair.
Here you can see I used the Refine Edge Brush Tool to refine the hair on the right:
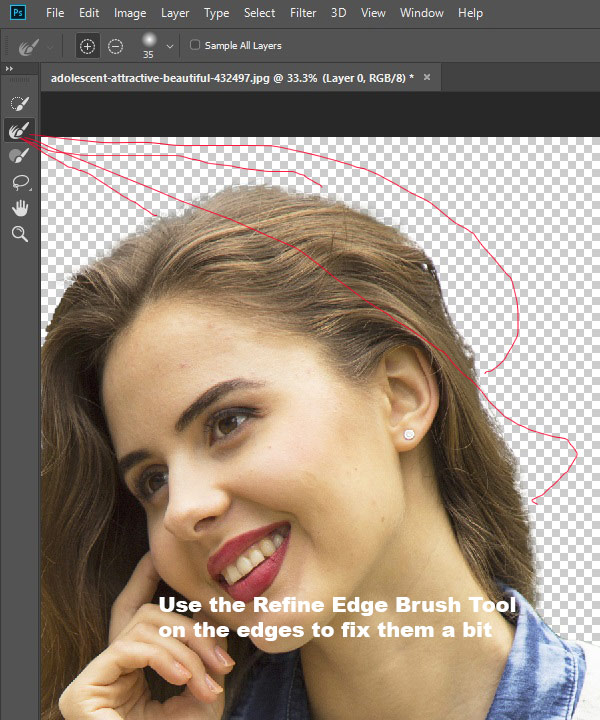
Here I used it on the left part of the hair:

Here I used on the bottom hairs:

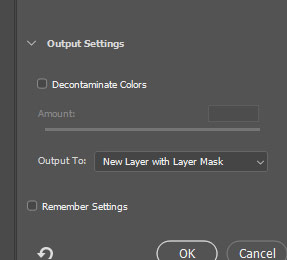
Once you are happy with the results and scroll down to output settings (on the right side) and use the New Layer with Mask to create a new layer with a mask.
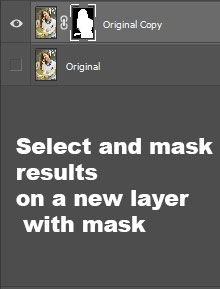
Here we have original copy layer with new masking results:
Reap the Benefit of New Background
Step 4
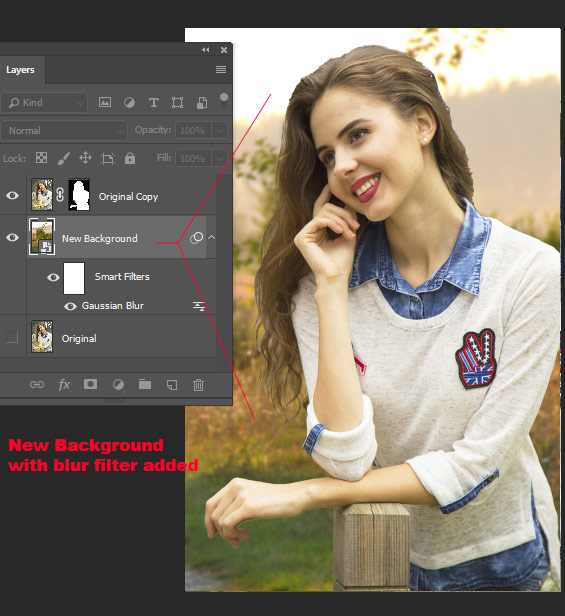
So, guys, we are extracting the girl for what? Obviously, we are going to add a different background behind her. Before we proceed further, just add your new background here.
If you add your final background here then it is going to much easy for you to deal with the hair as sometimes final background may help you hide a lot of mistakes. You will not waste your time on those areas which you don’t need to be.
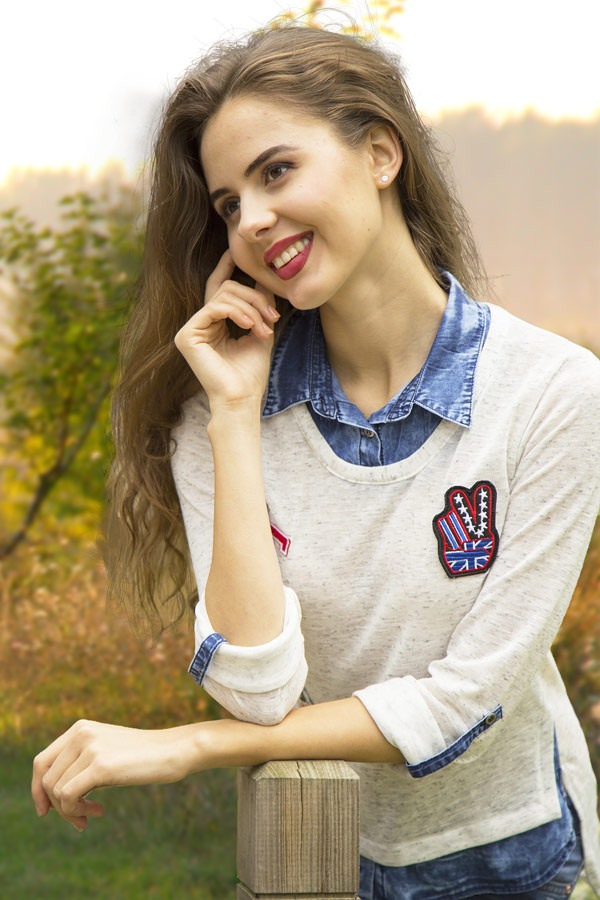
So I added my new background behind her:
Paint the Hair
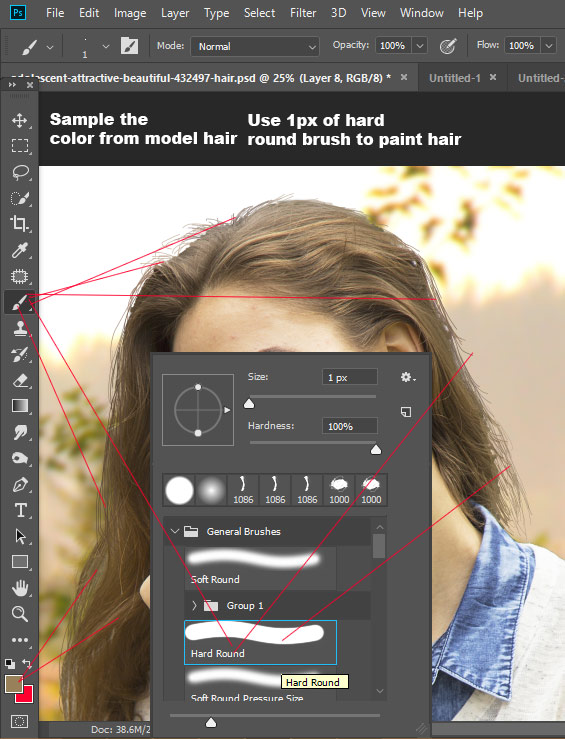
Step 5
Now we need to paint hair not too much and you don’t have to be that perfect in order to paint hair. I recommended using a graphic tablet to paint hair. You can sample the color for hair from model hair. You can see I used the 1px Hard Round Brush with 100% Opacity and Flow. You can vary the brush size, opacity and flow if you need it.
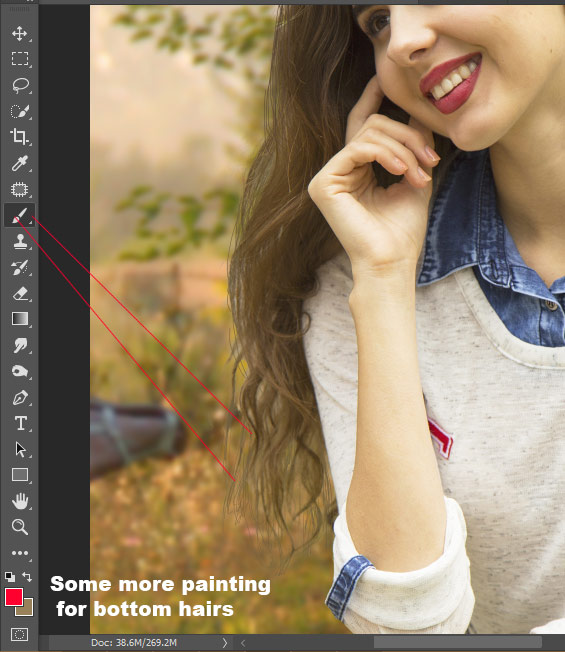
Here you can see where I painted the hair:
Here I painted some more hairs using the brush tool:
Use the Hair Brushes
Step 6
So you can see we are almost done but we need to give the final touches to hair. For that, I am using hair brushes to paint back the stray and fly away hairs.
You can get these brushes once you subscribed to our newsletter only from this tutorial, don’t use the sidebar form otherwise you won’t get a link to download brushes.
Download Hair Brushes (You need to Subscribe)
Here you can see I created a new layer below the woman layer and then I used the hairbrush to paint the flyaway hair on the top.
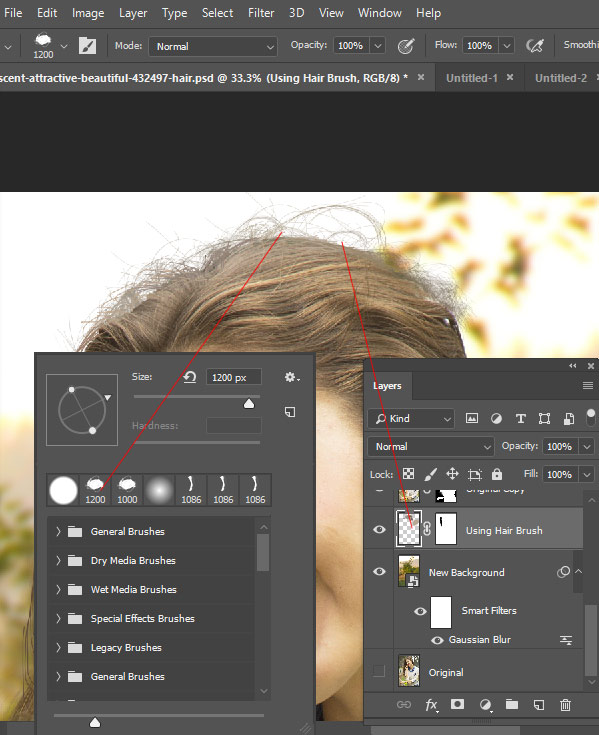
Here I created a new layer on top of all layers and painted using another hairbrush:
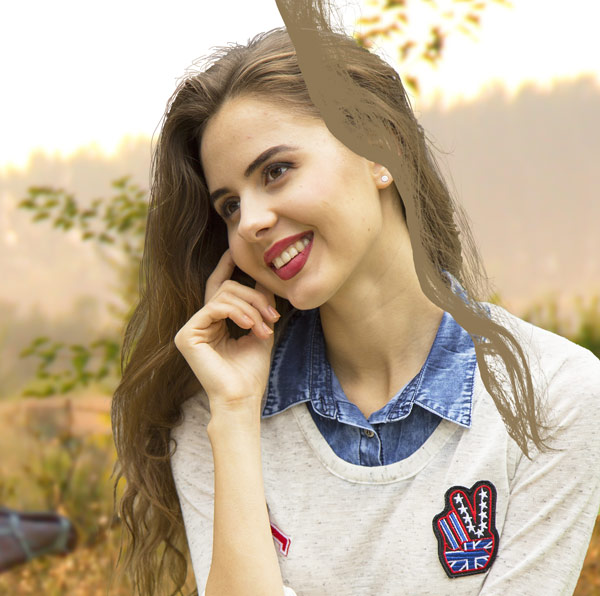
So this time I painted over the woman and clearly, I need to erase some other areas to blend the hair. Go to Layer > Layer Mask > Reveal All to add a mask to hair layer and mask those unwanted parts using a black brush.

Results after masking:
Step 7
Similarly, I painted more hairs using hair brushes. What I did I sampled the color from the model hair, then painted some more hairs where I think there should be. I vary the brush size and colors to paint hair. I ended up with the following results but you can do a lot better than me if you spend some more time.
Here you can see the how many brush strokes of hair’s brushes I used in order to replicate the hairs:
How to Create Hair Brushes or Any Brush
Step 8
So now you know that how to get rid of the hairs but you don’t know how I created those hair brushes. Let me show you now!
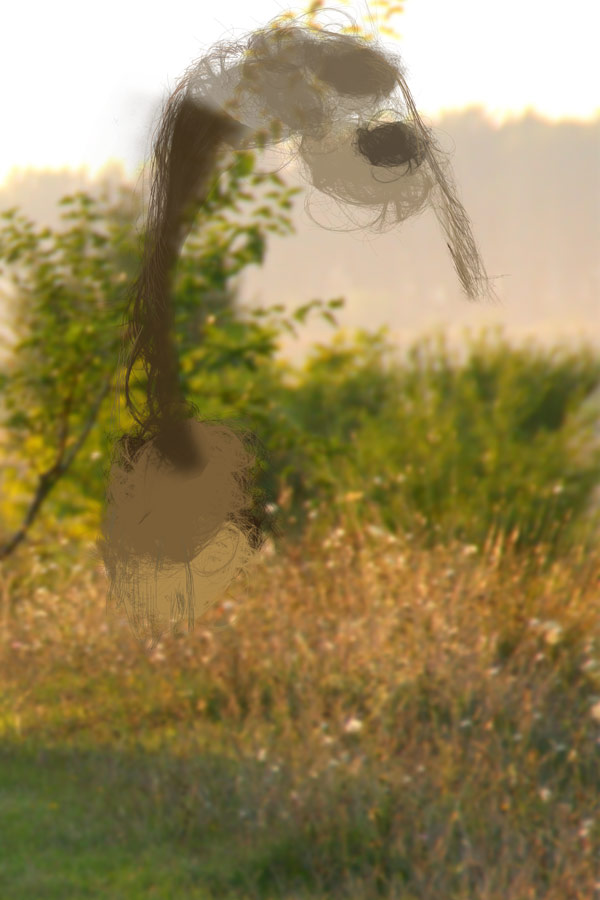
For the first step for creating a hair brushes is that you need the hair image in the white background or in any solid background. So we can make the selection of the hair very easily.
For example, here is the image which I am using to create the brush:

I’ll be using Channels & Calculations technique to make the selection of the hair. You can read this technique in detail manner here. In short, this technique focus on the mainly creating more contrast between subject and background.
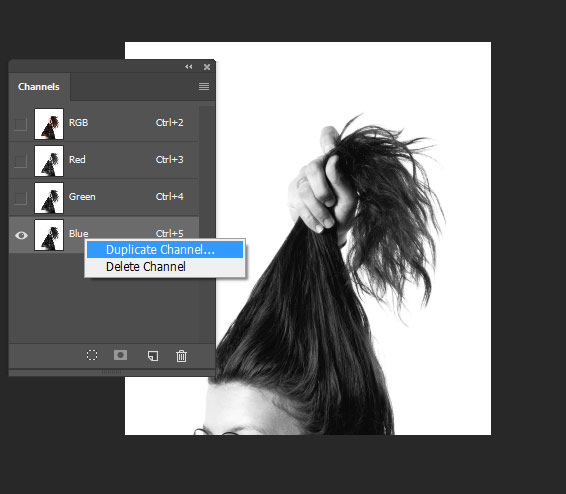
Now go to Channel Tab, if you not seeing the Channel Tab then go to Window > Channels to get the Channels Tab.
Duplicate the blue channel by right-clicking on it and then choose duplicate channel.
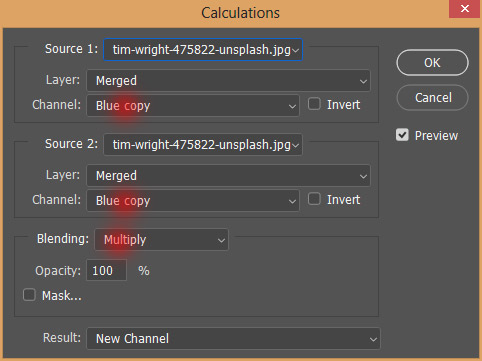
Now go to Image > Calculations:
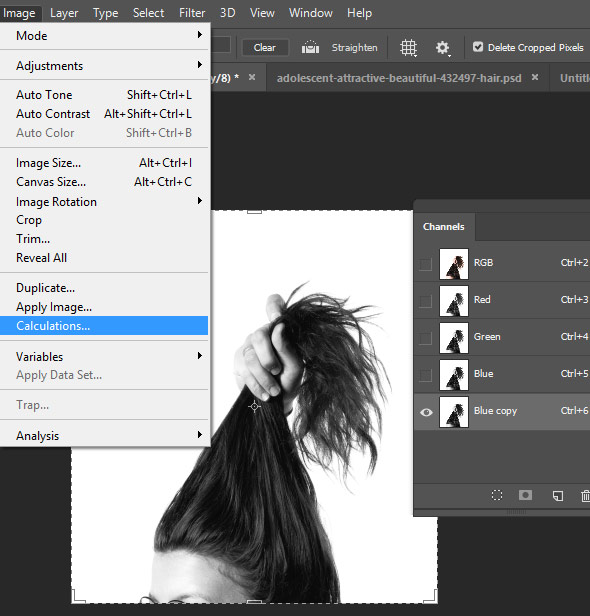
Change the blending mode to Multiply and make sure Source 1 and Source 2 should be the image name in which you are working on it. Make sure you are merging the Blur Copy and layer should be selected to Merged.
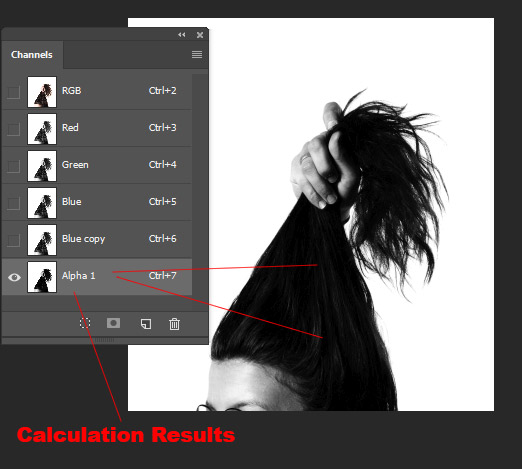
As a results we have increased the contrast or darken the hair:
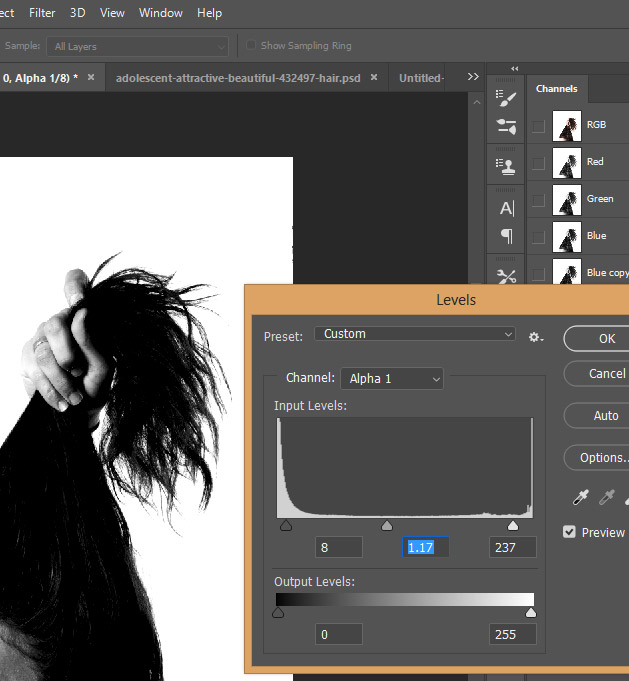
Step 9
I further darken the hair using the Levels adjustment layer. Go to Image > Adjustments > Levels and use the shown settings below:
Now you need to click on the Load Selection icon in the Channels Tab to load the selection:
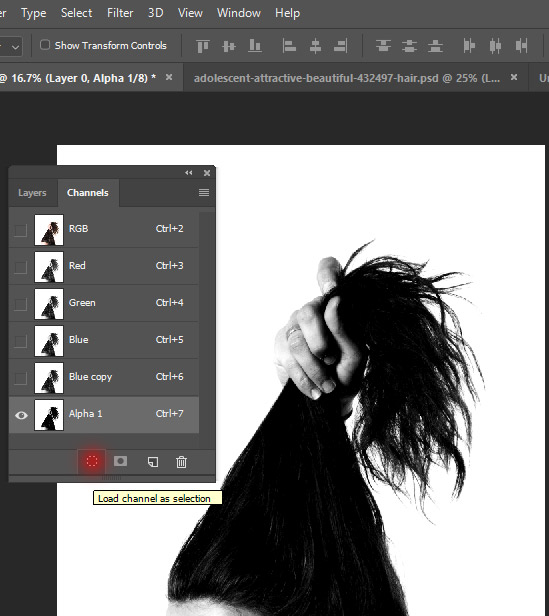
After clicking the Load Selection icon, you can see the marching ants or the selection is active:
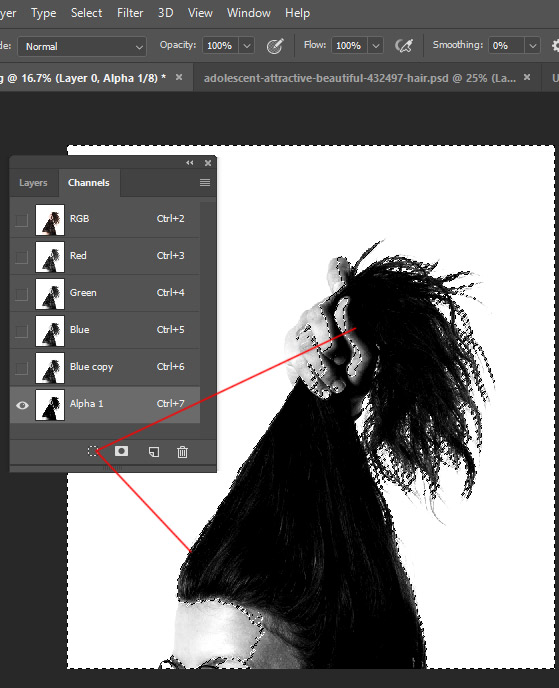
Now click on the RGB channel which is on the top in the Channels Tab and then get back to Layers Tab.
Add a mask by clicking on the second icon on the layer panel. You’ll see the following results and the hair is perfectly selected. After adding a mask if you not seeing these results then press CTRL + I to invert the mask results.
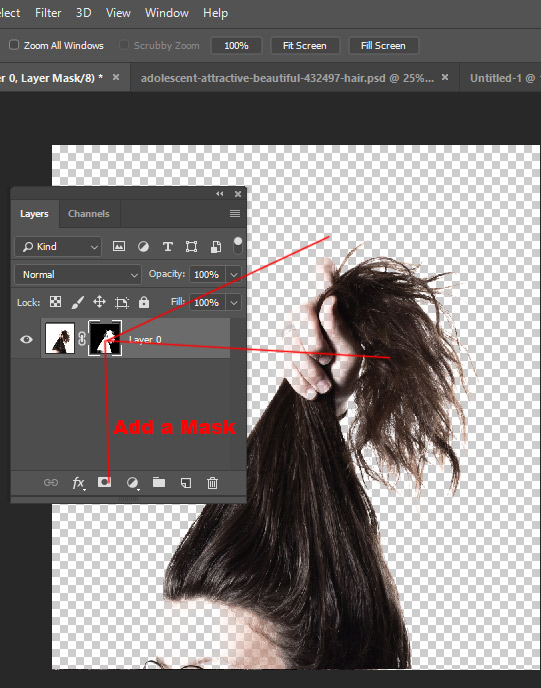
I masked other unwanted parts like the girl and her hands as we are only interested in the hair. You can mask those parts by painting on the layer mask with black color.
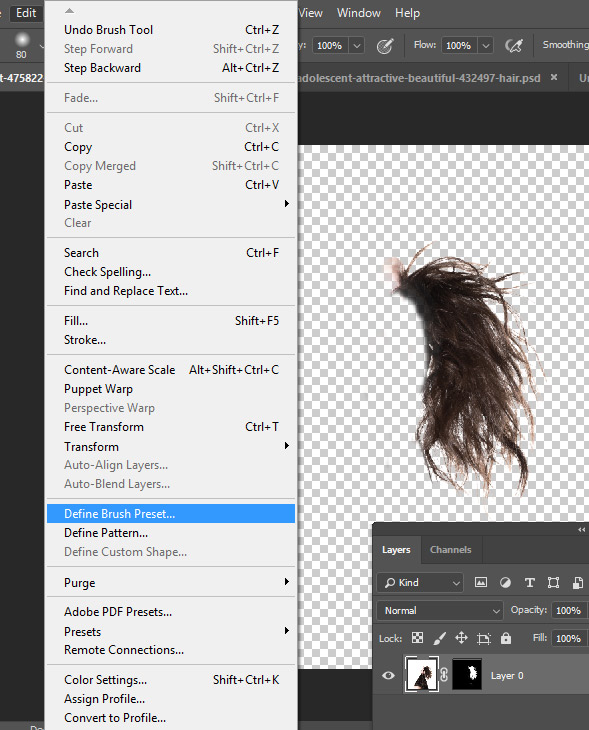
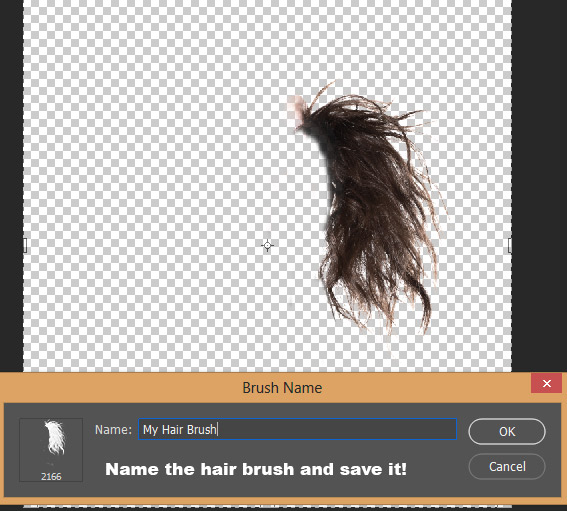
Once you erased all other parts, go to Edit > Define Brush Preset, make sure the layer mask isn’t selected otherwise Define Brush Preset won’t highlight.
Now name your brush:
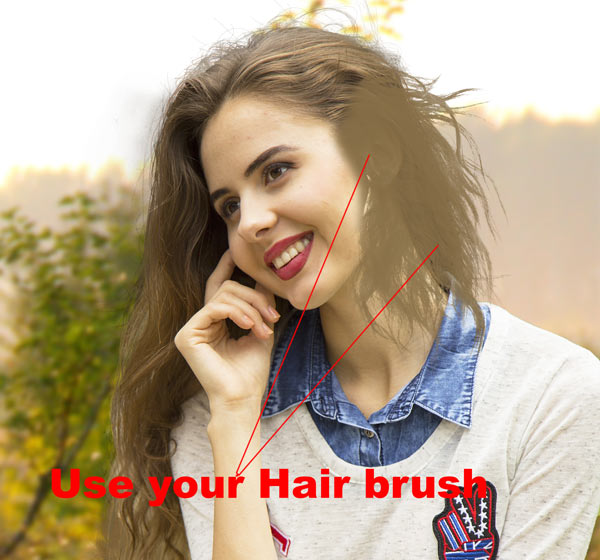
Use your brush by selecting it from the brush library:
So you can extract the hair by painting hair, using hair brushes, reaping the benefit of new background and making your own hair brushes. Thanks for following the tutorial!
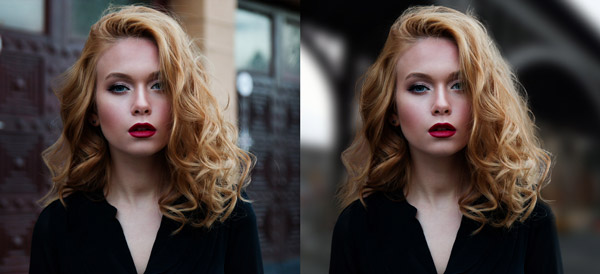
Some More Examples
Example 1:

Example 2:
Need Help With Photoshop or Looking for Professional Support?
Whether you're just getting started with Photoshop or need expert-level assistance, we're here to help! Contact us for personalized Photoshop tutorials, project support, or creative services.
Get in touch today to take your skills or projects to the next level.
CONTACT US NOW📘 Want to Master Photoshop Faster?
🎁 Get Your FREE PDF E-Book "Top 10 Photoshop Tricks Every Designer Must Know" Now – Packed with expert tips, shortcuts, and techniques to boost your creativity & workflow.
👉 Download Your FREE PDF E-Book NOW!

