

In this tutorial, you’ll learn how to create a dramatic portrait image in Photoshop. You’ll learn how to use the Camera Filter and its tools such as Radial Filter, Color Grading, Curves, and Color mixer to draw attention to your subject. You can use both Lightroom Classic & Photoshop to follow this tutorial.
Step 1 – Open The Sample Image
Creating a dramatic image is all about creating focused lighting. The light guides the eyes to the main subject of the image and leaving other elements of the image out of focus/darken. To create a dramatic image, we can always work with Highlights and Whites, especially with whites and blacks. Because these two can help you add a high key and dramatic tones while avoiding harsh lighting.
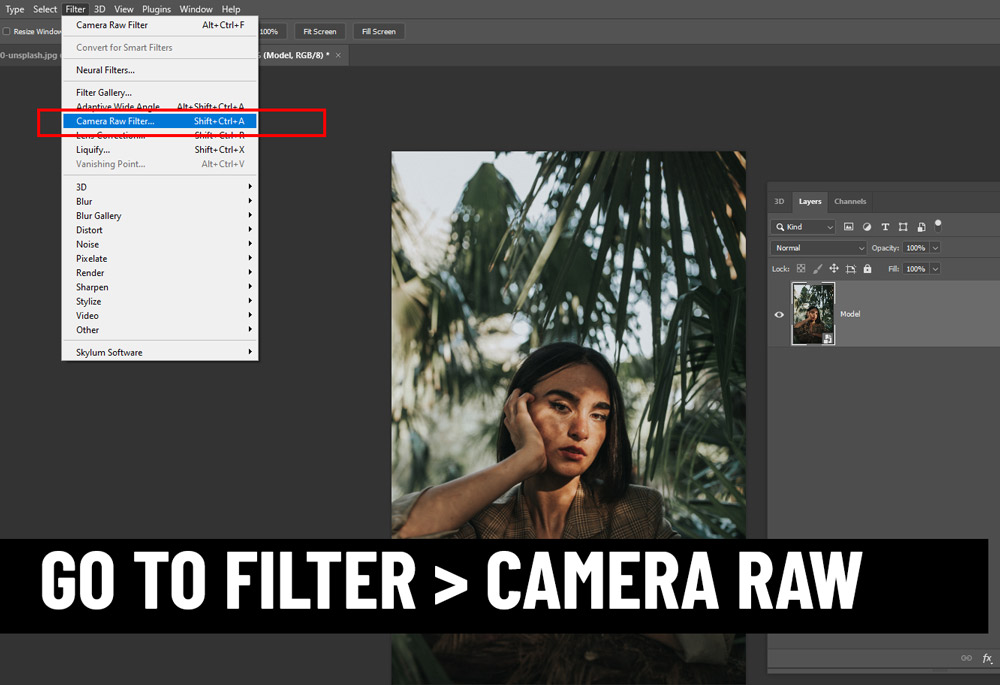
First, download the sample image from Unsplash and open it up in Photoshop.
Then, go to Filter > Camera Raw:
Step 2 – Radial Filter
To create focused lighting you can use the Radial Filter and it’s one of the best tools to add focused lighting to any image as it provides a lot of controls such as exposure, highlights, shadows, and color control.
Also, it’s one of the best tools to make selective adjustments to any image.
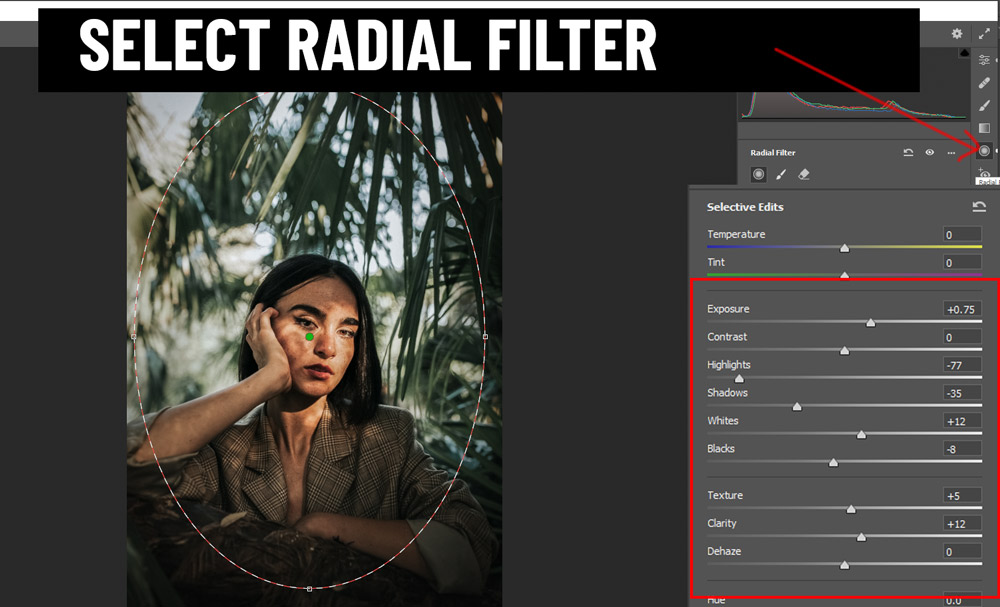
To create focused lighting, select the Radial Filter (J) and then draw a circle (or oval) as shown in the image below.
Now, only the area inside the circle will be affected by the changes which I am going to make inside the Selective Edits menu.
First, I increased the exposure a bit but dialed down the highlights and shadows. Pay attention to the increased whites, and reduced blacks as these are giving the image a high contrast dramatic look.
Remember, we are only affecting the area inside the circle.
Step 3 – Basic Tab & Curves
Now get back to Basic Tab by hitting [E] and do a bit of edit to the entire image. This time I increased whites and reduced the blacks as well. This will affect the entire image and don’t forget to increase the clarity a bit to pop details.

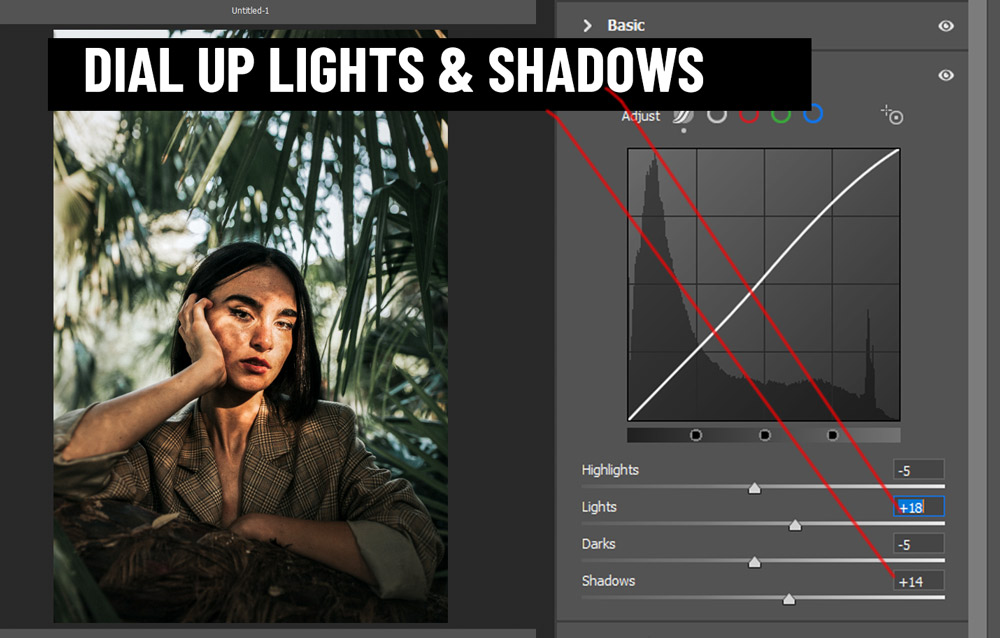
I went to the Curves Panel, then increased the Lights again but this time I also increased the shadows. Increasing shadows will help reduce the high contrast that we are adding to the image and help adds a soft look to the image.
This is necessary to avoid any harsh lighting in the image. Increasing the level of the shadow of any image helps reduce contrast which leads to fixed harsh lighting. So, if your image is suffering from harsh lighting condition or it looks very contrasty just increase the shadows level to fix it.
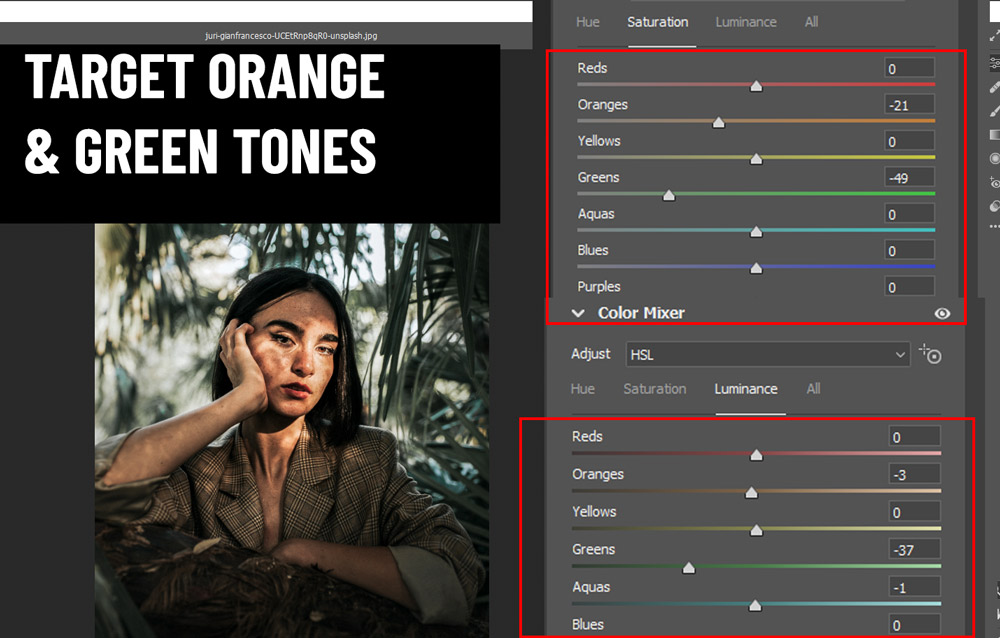
Step 4 – Working with Colors
To target the colors of the image, you can use the Color Mixer or HSL Panel. I am gonna use the Saturation Tab to mute skin tones (orange color) and green color in the image.
You can see in the setting below that I have reduced the green and orange colors. Also, I went to the Luminance Tab, where I darken the green tones, and you can use the Luminance tab if you want to darken or lighten any color. In dramatic images, the background is mostly dark and very contrasty, so it makes sense to mute and darken the colors of the background.
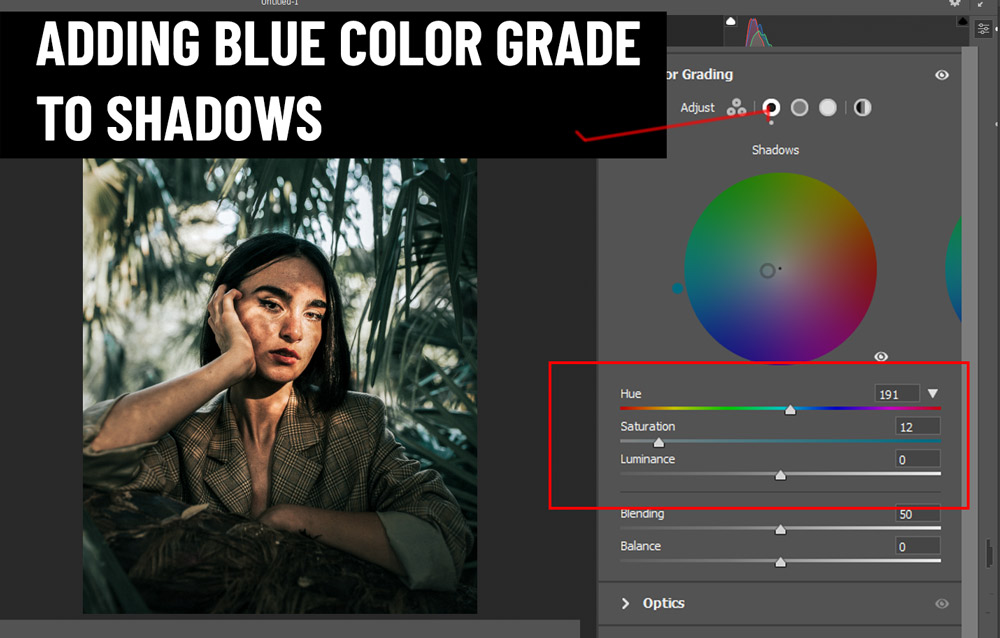
I decided to add blue tones to the image using the Color Grading Tab. I didn’t add any color to Highlights, but if you want to you can do that. The skin tone is looking perfect and I don’t want to add a color on top of that by adding color to highlights. I chose a cyan color but you can go for a different color. See the settings below.
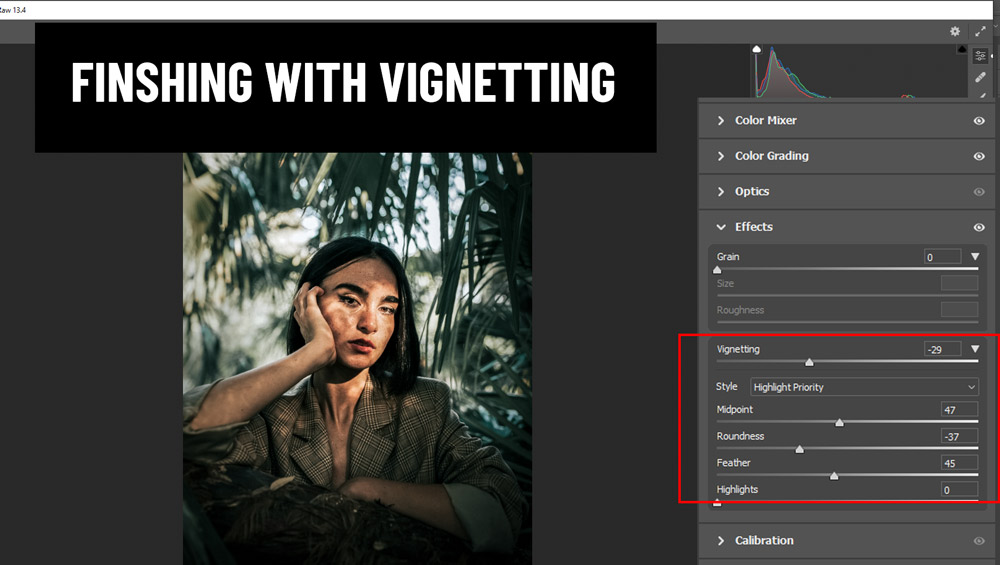
Step 5 – Finishing with Vignetting
Finally, I have finished the image with vignetting. You can go to the Effects Tab and use the settings below. Play around with settings, it all depends on how strong you want that vignette effect.
Also, you can go to the Details tab to help detail pop especially skin details. For now, the image looks sharp, focused lighting is there, the contrast looks good and we don’t have any harsh lighting in the image resulting in a beautiful and dramatic portrait image.
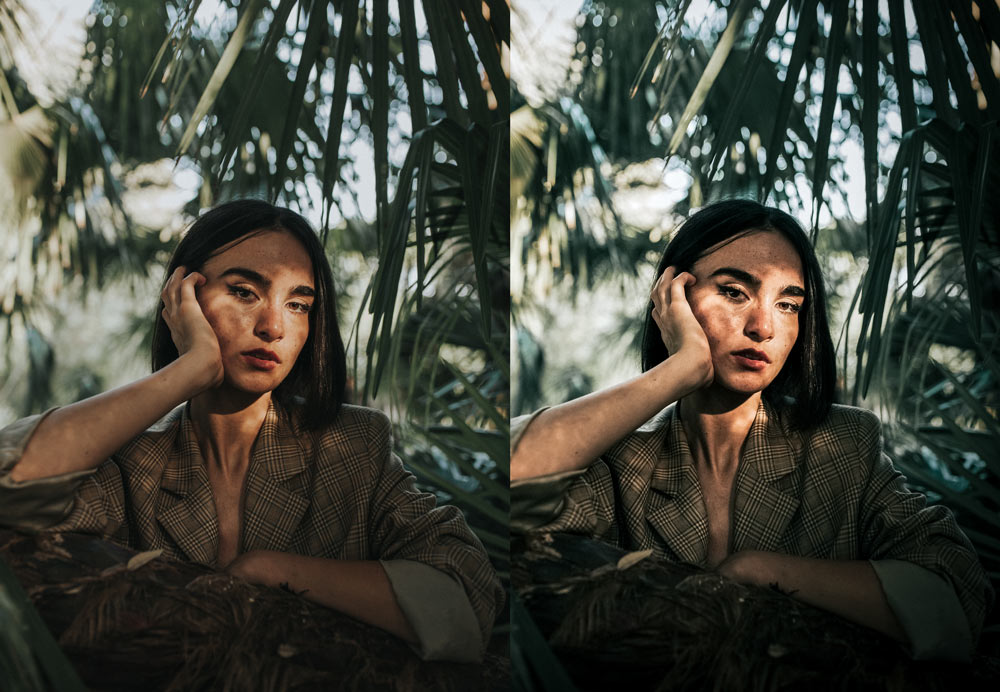
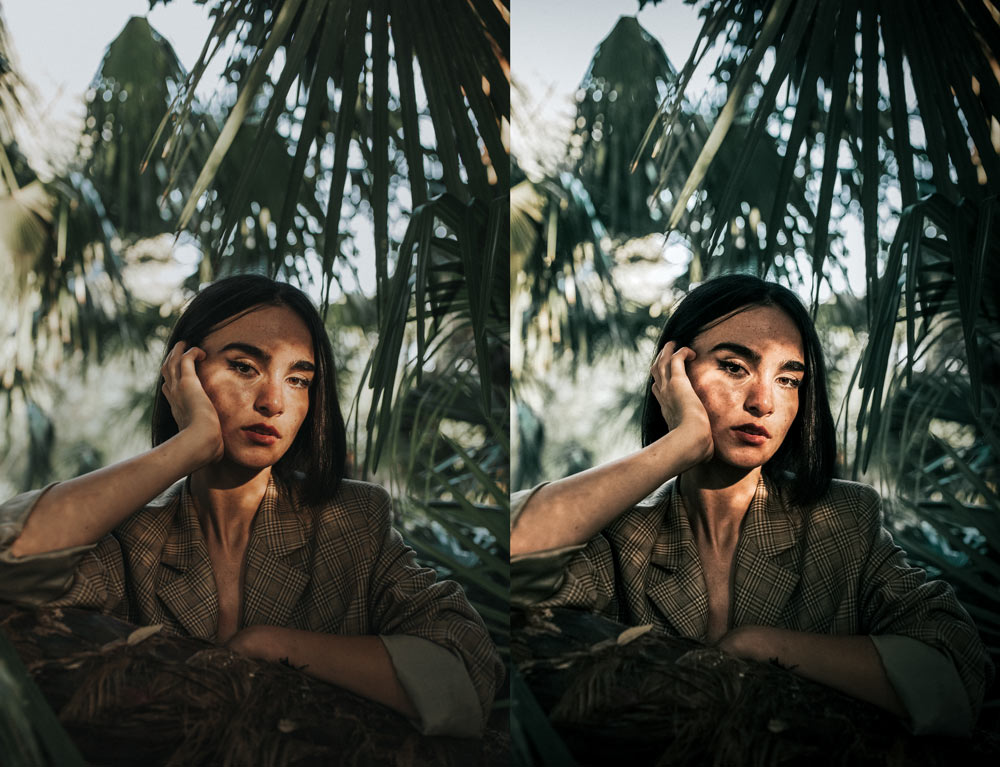
Here you can compare the before/after results:
I hope you enjoyed the tutorial. If you have questions, feel free to comment below.
Need Help With Photoshop or Looking for Professional Support?
Whether you're just getting started with Photoshop or need expert-level assistance, we're here to help! Contact us for personalized Photoshop tutorials, project support, or creative services.
Get in touch today to take your skills or projects to the next level.
CONTACT US NOW📘 Want to Master Photoshop Faster?
🎁 Get Your FREE PDF E-Book "Top 10 Photoshop Tricks Every Designer Must Know" Now – Packed with expert tips, shortcuts, and techniques to boost your creativity & workflow.
👉 Download Your FREE PDF E-Book NOW!
