
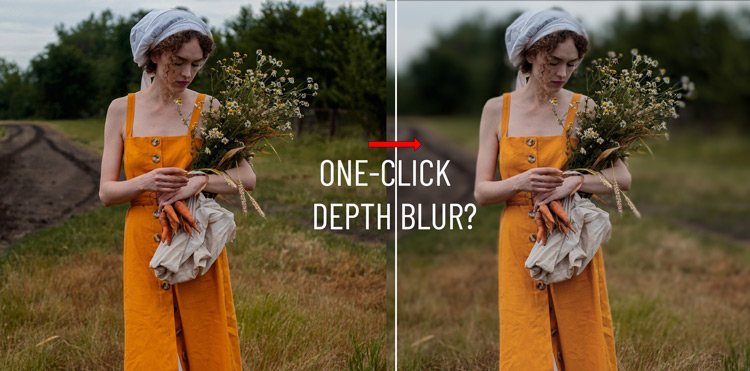

With the new release of Photoshop update, Adobe has updated the array of its Neural Filters and introduced a new filter “Depth Blur”. Does it promise to create depth of field in one click? Traditionally, Photoshop artists and photographers create depth blur in Photoshop or using their cameras (aperture, lens, and subject distance).
This filter can become handy for beginners if this works as promised by Adobe. We’ll take a look at this new filter, how it works, its features, most importantly on which images it works the best. Let’s get into it!
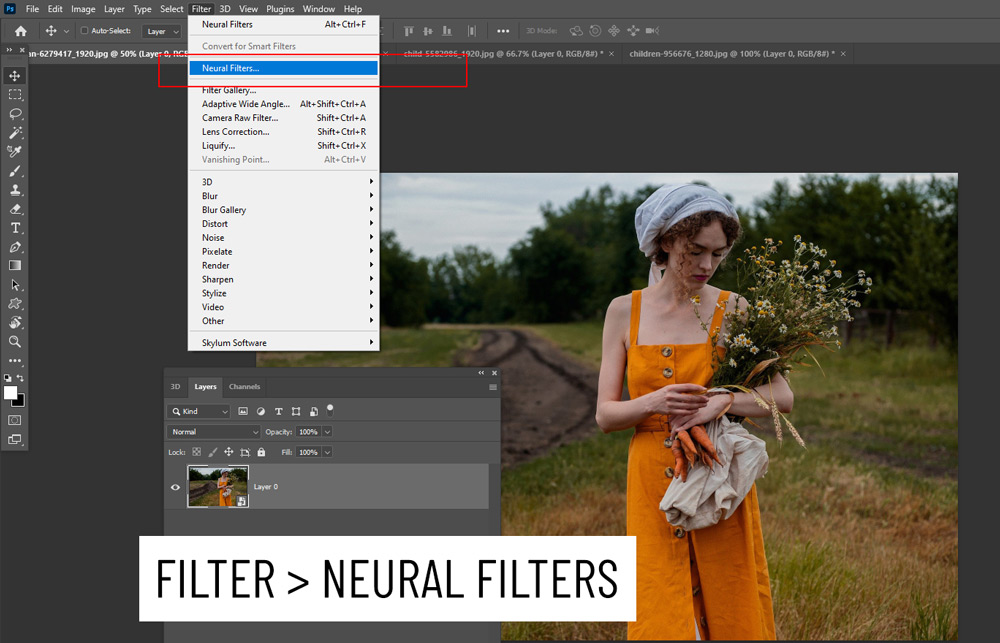
Step 1 – Depth Blur Filter
This brand new filter can be found in the Neural Filters.
You can go to Neural Filters.
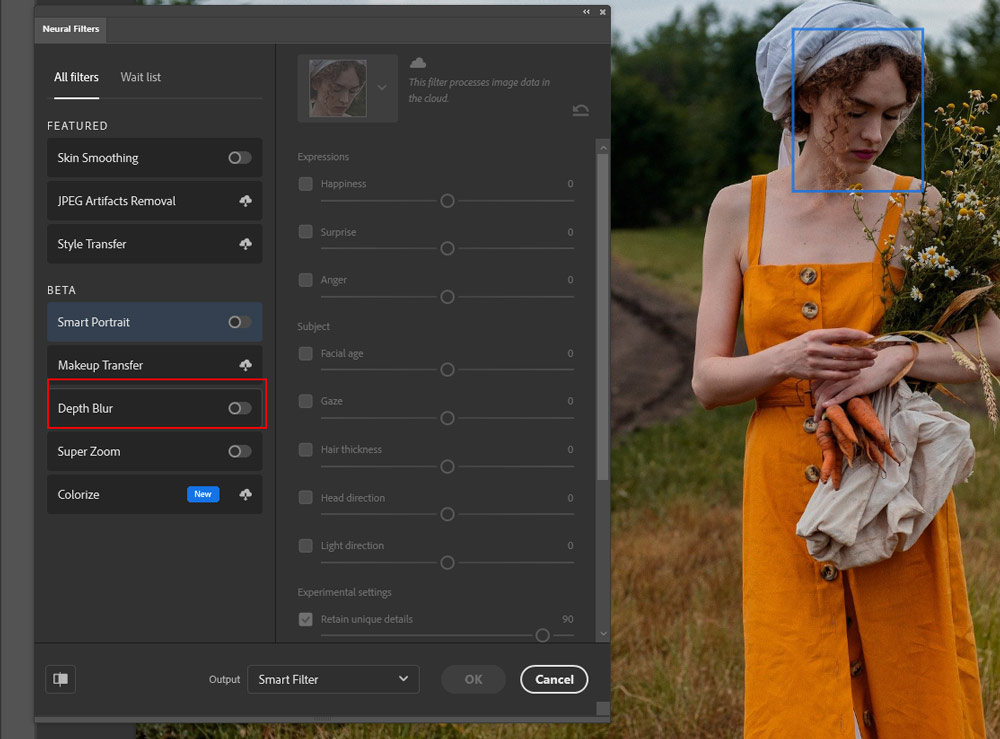
You’ll find the filter in the Beta panel. It’s currently in the testing phase and I think maybe that’s why it has not made in the list of the featured filters.
You can toggle the button on/off to activate/deactivate this filter. Make sure your internet connection is working as this filter process image data in the cloud, otherwise you won’t be able to use it.
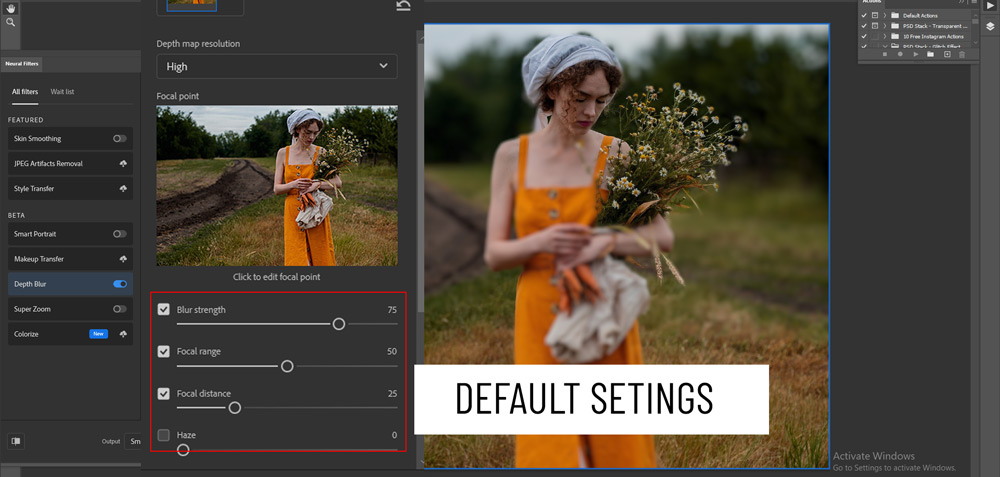
Step 2 – Depth Blur Filter Default Settings
I have a photo opened in Photoshop, I turned this filter on, and right off the bat, it has started working.
With default settings, it creates a depth of field which is good but need to customize the settings. The default settings might work for some images but you need to adjust the settings for every photo.
Notice the hands and neck of the subject are out of focus.
Step 3 – Customize Settings
Focal Range: How much scene will be focused or captured (if you are using a camera) .
Focal Distance: The distance between your subject from your Camera lens..
These are the Photography terms that you might know but I have simplified them. Since we are not using a camera, you can think of the Depth Blur filter as a camera and the image can be seen as a scene.
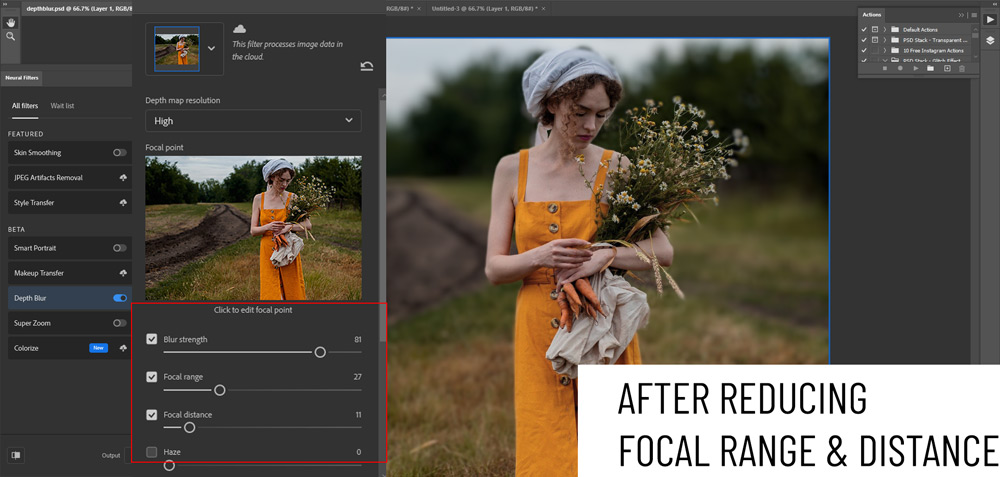
I reduced the Focal Range and Focal Distance to see how it works.
This worked nicely with the subject and it is making the background out of focus.
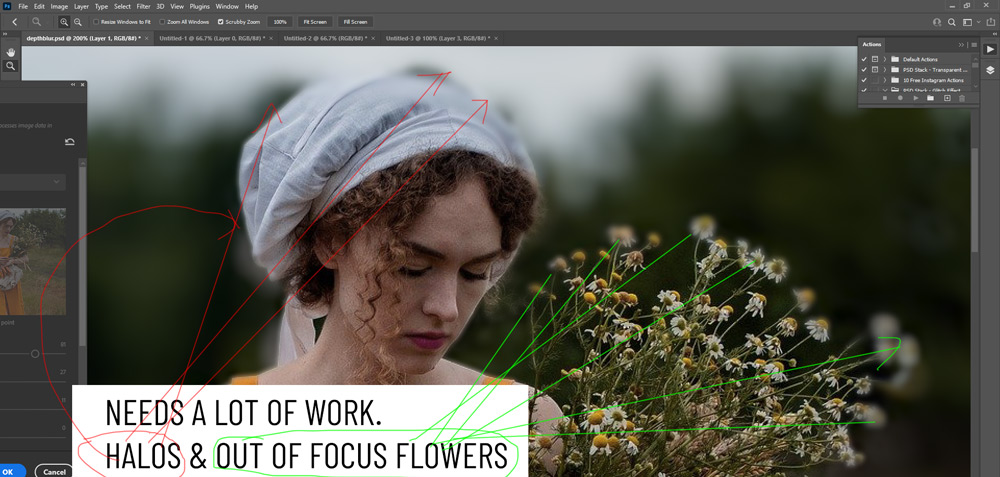
But as I zoom in I have noticed a lot of mistakes. My subject does have a lot of halos around her and the flowers should be in focus but they are out of focus (it might be due to the background is matching with the flowers).
Step 4 – Haze & Warmth
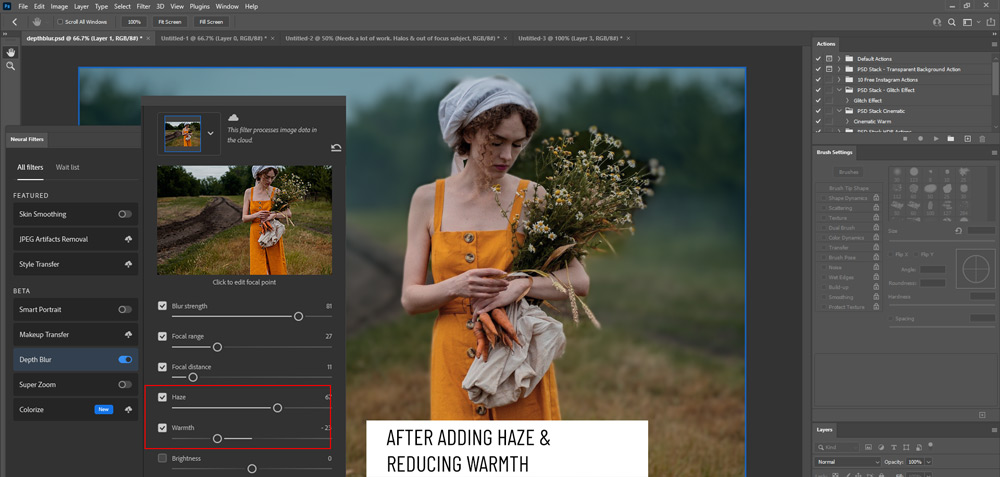
This is the first thing that I really like about this filter is adding Haze.
You can add haze to the background using the Haze Slider.
I have used the Warmth feature as well to add cool tones to the image. The image is already on the darker side so adding blue or cool tones to the image goes along very well as you can see.
Step 5 – Focal Point
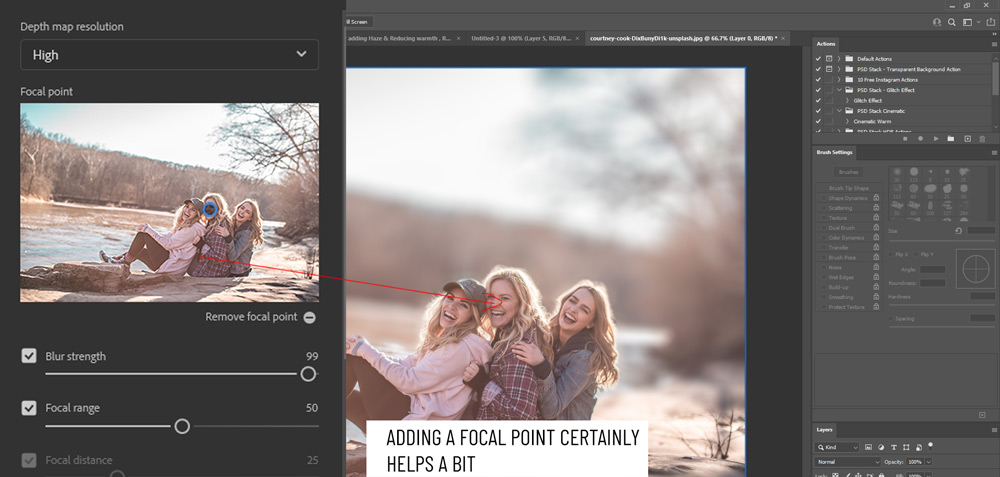
This filter also allows you to add a focal point in your image and after adding a focal point it will focus on the focal point leaving the rest of the background out of focus.
I have added a focal point by clicking in the Focal Point Screen area. But not sure why it didn’t focus on the face of the girl in the middle.
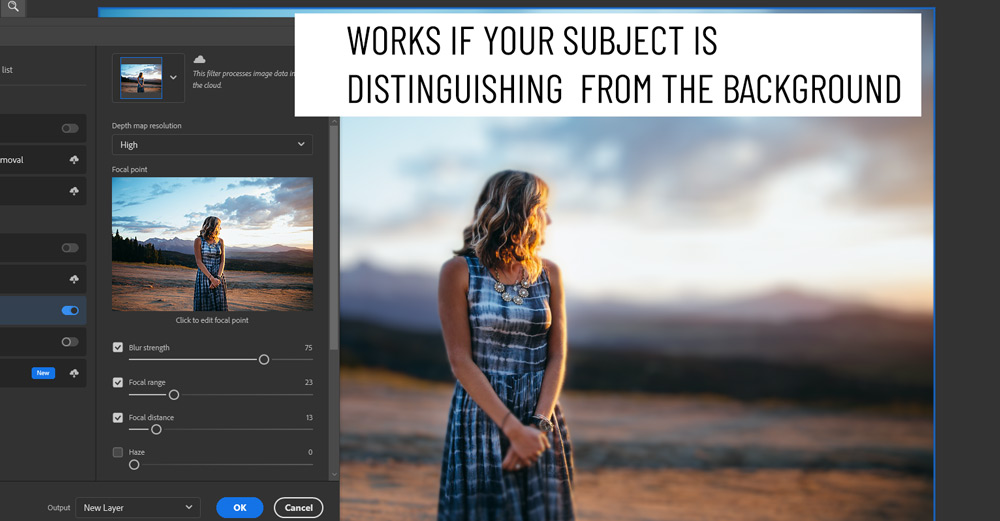
Step 6 – When To Use The Depth Blur Filter?
To be honest, this filter does require a lot of work before it becomes useful to all of us. But there are some exceptions where it might work, for example, you can use this filter on those images where your subject have a clear-cut distinction from the background. Otherwise, it might not work. You can see in the below image it does work with the image below.
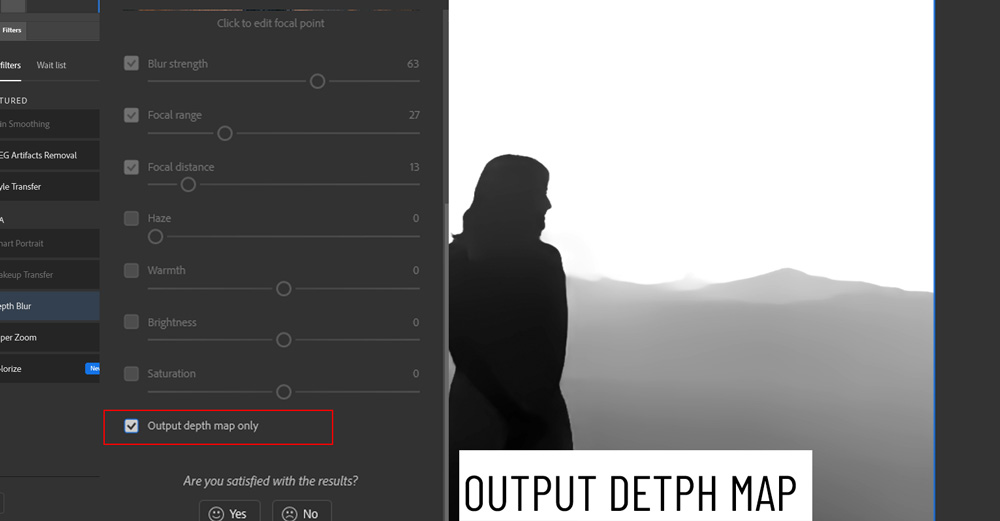
Step 7 – Depth Map
This filter can output the depth map of images that you can use later on for a variety of use.
Before we do that, let’s output the depth map.
To do this, check the Output Depth Map Only option.
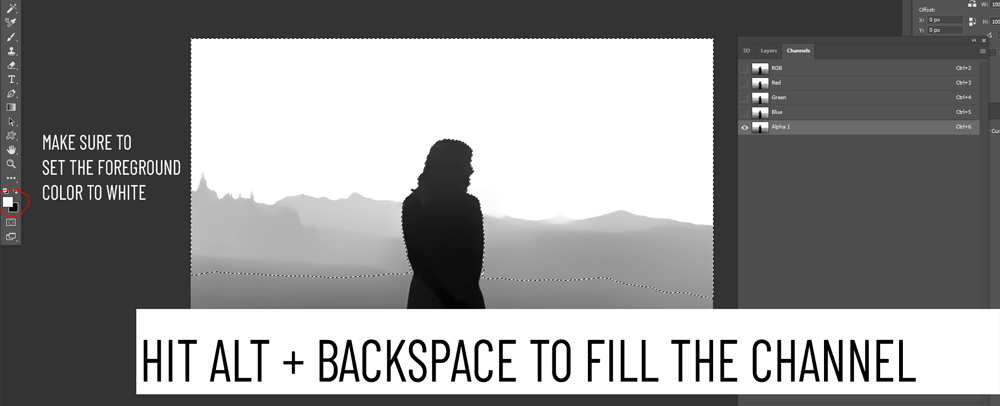
Step 8 – Saving Depth Map
Once you output the depth map, switch to Channels Tab, CTRL/CMD + Click on the RGB Channel and then create a new alpha channel by clicking on the button at the bottom of the layer panel.

Once you have the new alpha channel, hit ALT + Backspace (make sure foreground color is set to white), this will load the depth map in the alpha channel.
You can delete the layer of the depth map in the layer panel as we don’t need it anymore.
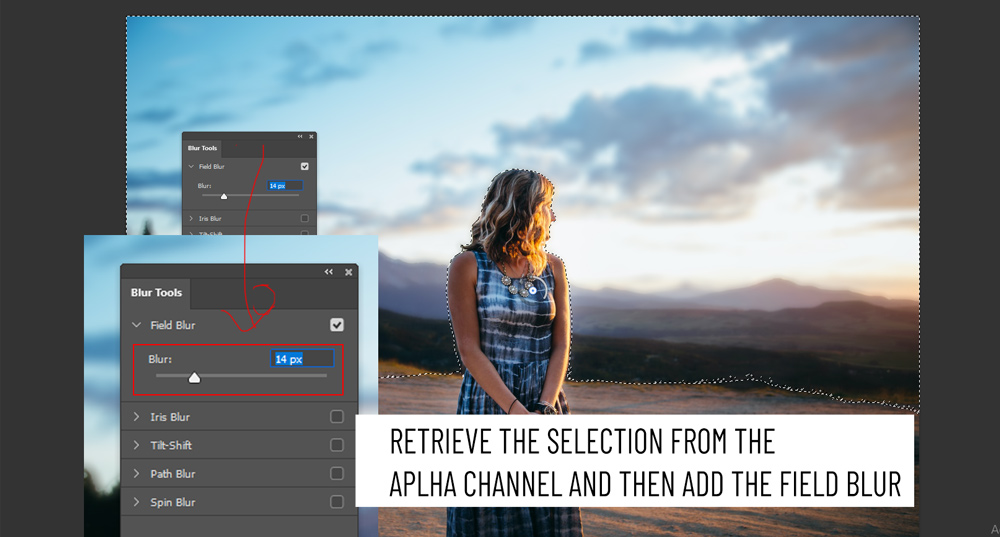
Step 9 – Using Depth Map
To use the Depth Map, all you have to do is retrieve the selection from the Alpha Channel. To do this, CTRL/CMD + Click on the alpha channel, once the selection is active, now I can blur the background to make it out of focus.
So, with the selection active, go to Filter > Blur Gallery > Field Blur to blur the background.
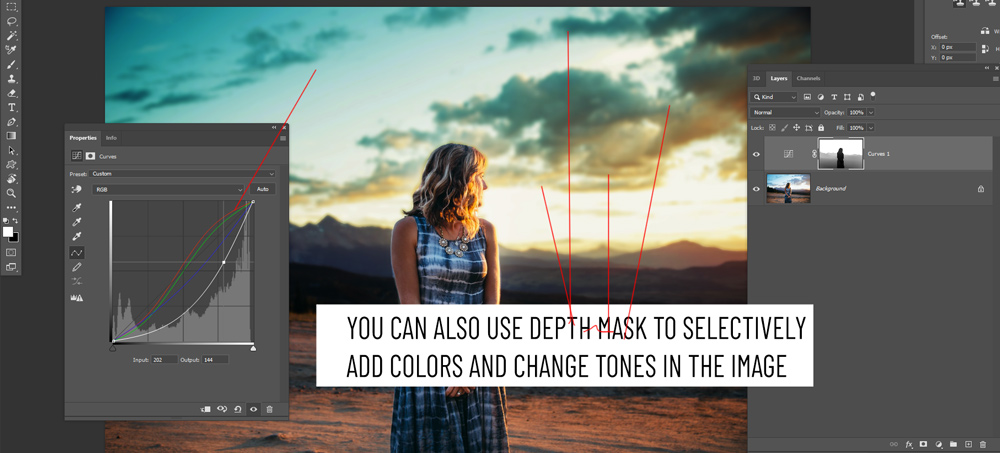
You can also use the Depth Map to selectively add colors or change brightness of the background while keeping your subject intact.
Step 10 – More Examples
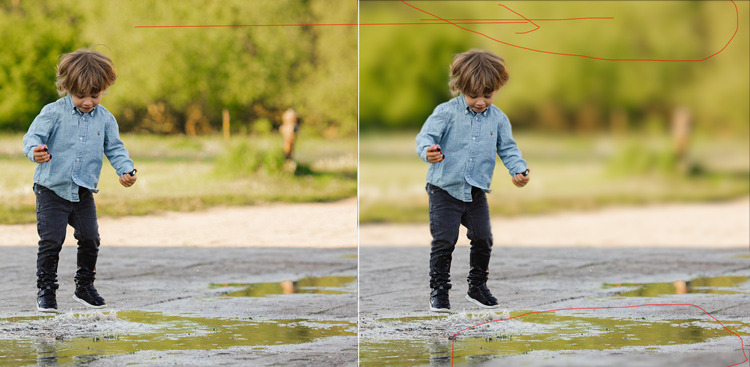
Here are some examples I tested this filter with:
You can see it did a pretty good job, but still, the hair of the subject was blurred out by the filter.
The depth of field effect was not too bad either.
In this image, I tried many settings such as reducing focal range and distance, but it just won’t work here.
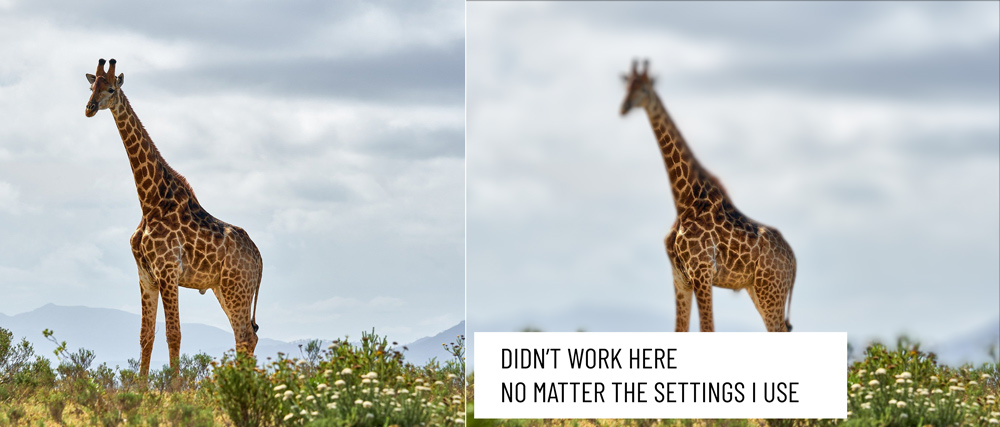
I think it’s far from better at the moment. It needs a lot of work. In fact, there are a lot of techniques that you can use to create better results than this filter.
I hope you enjoyed the tutorial. Let me know if you have tested it, did it work for your images?
Need Help With Photoshop or Looking for Professional Support?
Whether you're just getting started with Photoshop or need expert-level assistance, we're here to help! Contact us for personalized Photoshop tutorials, project support, or creative services.
Get in touch today to take your skills or projects to the next level.
CONTACT US NOW📘 Want to Master Photoshop Faster?
🎁 Get Your FREE PDF E-Book "Top 10 Photoshop Tricks Every Designer Must Know" Now – Packed with expert tips, shortcuts, and techniques to boost your creativity & workflow.
👉 Download Your FREE PDF E-Book NOW!

