

In this tutorial, you’ll learn how to correct exposure of portrait images using only 3 layers or I would say that only 2 layers. This tutorial will assume that you have an image that is already on the side of underexposure and needs improvement so you can gain information from the dark region of the image. Not only you’ll learn how to keep your background intact while brightening up portraits but how to target skin tones & bring colors back in no time. Let’s get into it!
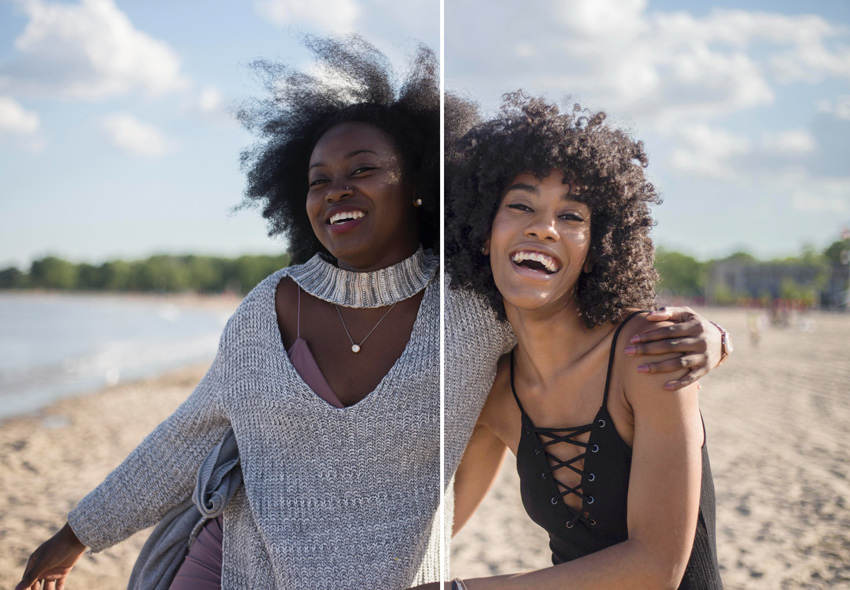
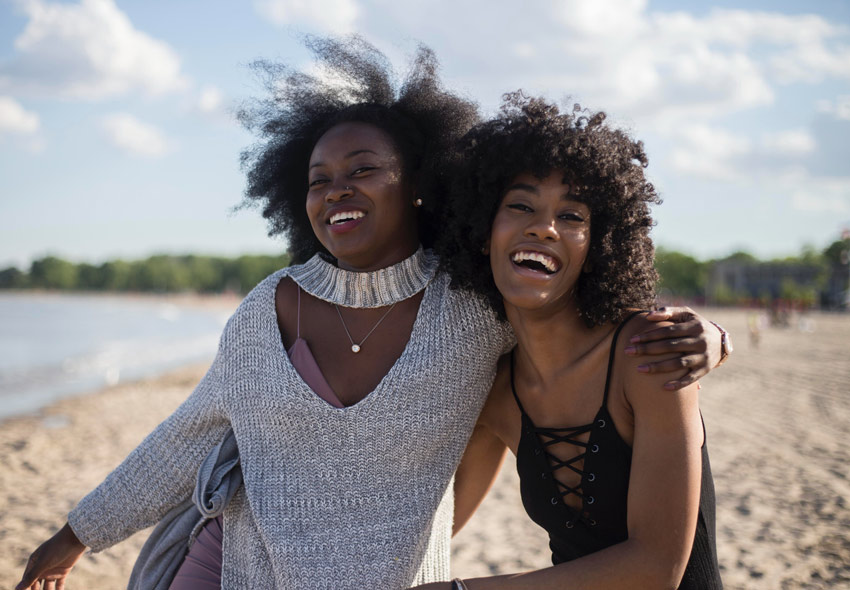
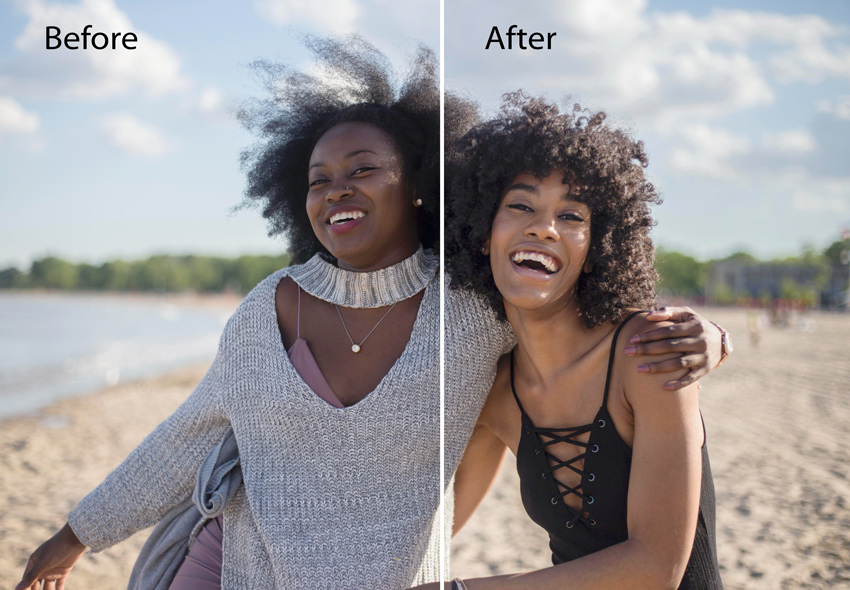
Before:
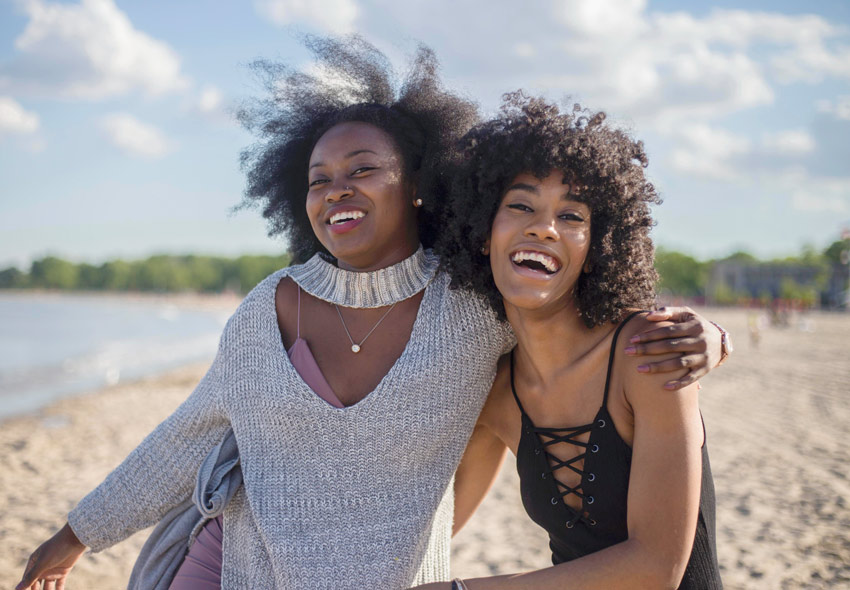
After:
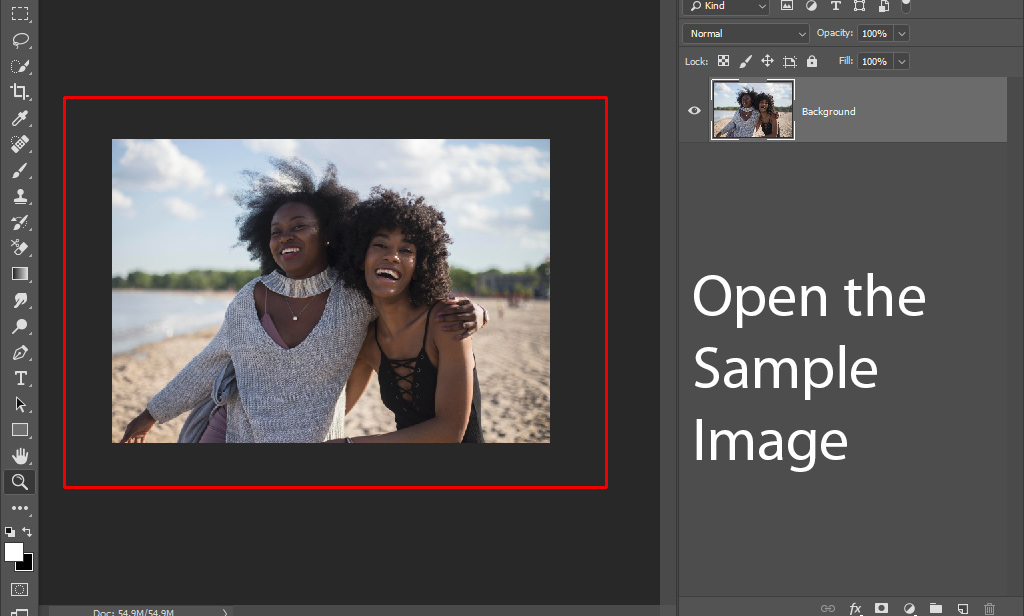
Step 1 – Open the Sample Image
The sample image is from Unsplash as always you can download the image to follow along with me. As you can notice the image is underexposed both of the subjects’ skin tones look darker. But we can pull information from shadows to correct exposure.
Before we do that, let’s open the image in Photoshop by selecting File > Open.
You can see I opened the image in Photoshop:
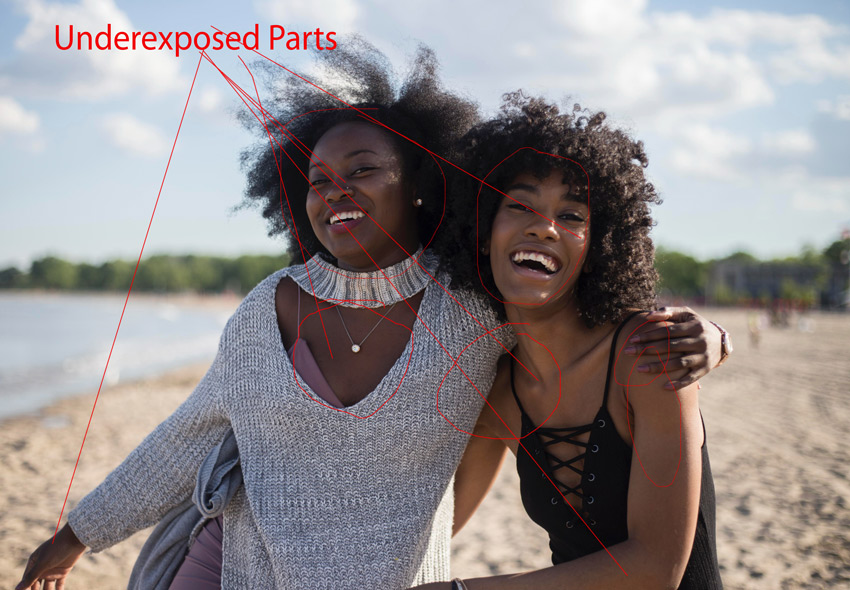
Step 2 – Underexposed Parts
As I said that skin parts are underexposed such as the face, arms, ear, neck & etc. But the clothes & hair of the subjects fall in this category as well. We will be brightening them up so it worth noting that.
Also, the background is a bit darker & some of its parts will get affected but we’ll try to minimize the effect there so we can keep it intact.
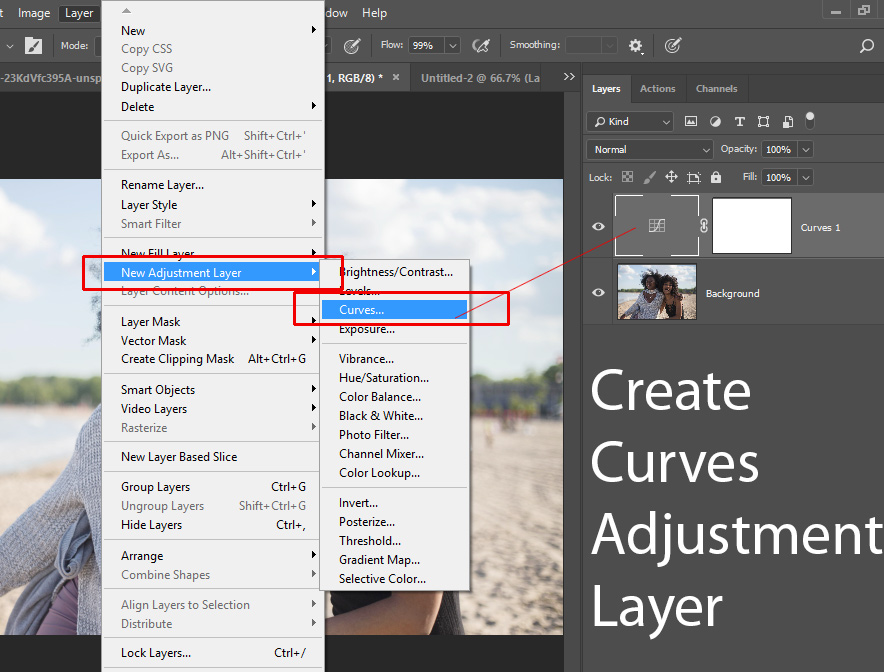
Step 3 – Recover Shadows Details
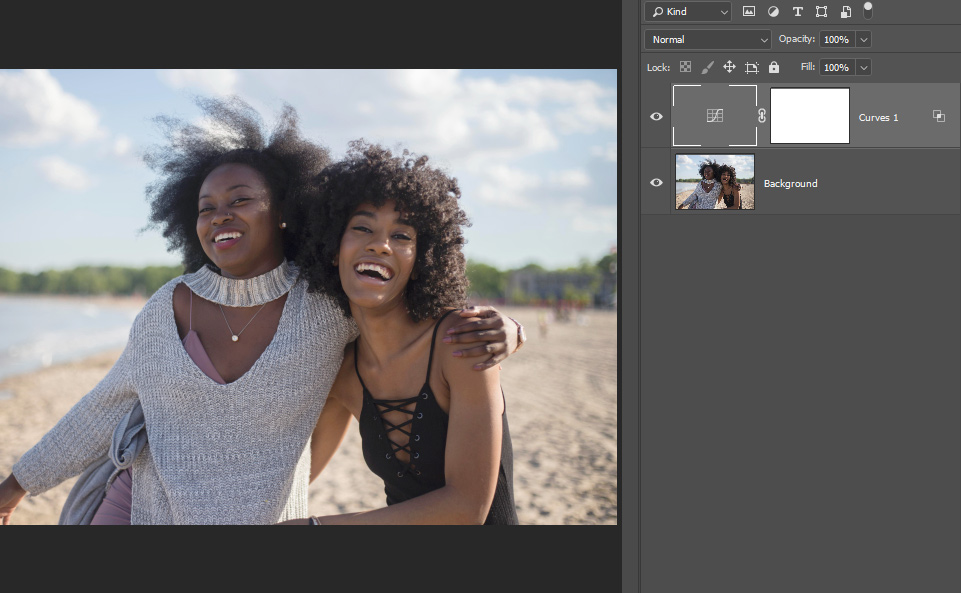
We gonna lift the shadows on our subjects so we can reveal details that are hidden due to unbalanced exposure. To do this, go to Layer > New Adjustment Layer > Curves to create a Curves Adjustment.
Notice I added a point in the region of the shadow because I want to affect only the shadows of our subjects. You can add a point there by clicking on it and then lift the line to increase exposure on the shadows.
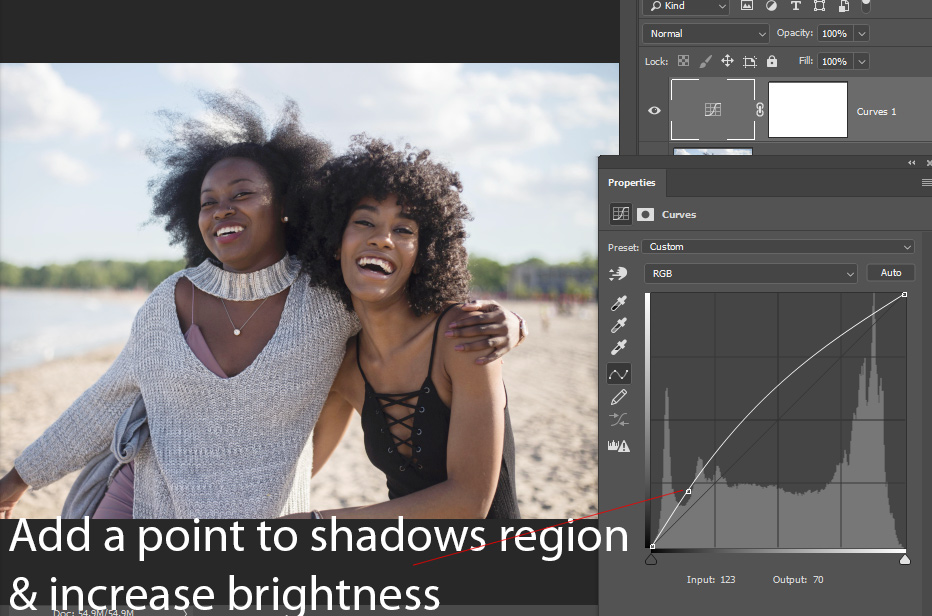
As you lift the line you’ll see subjects’ skin starts to pop up but we can do a lot more to improve further.
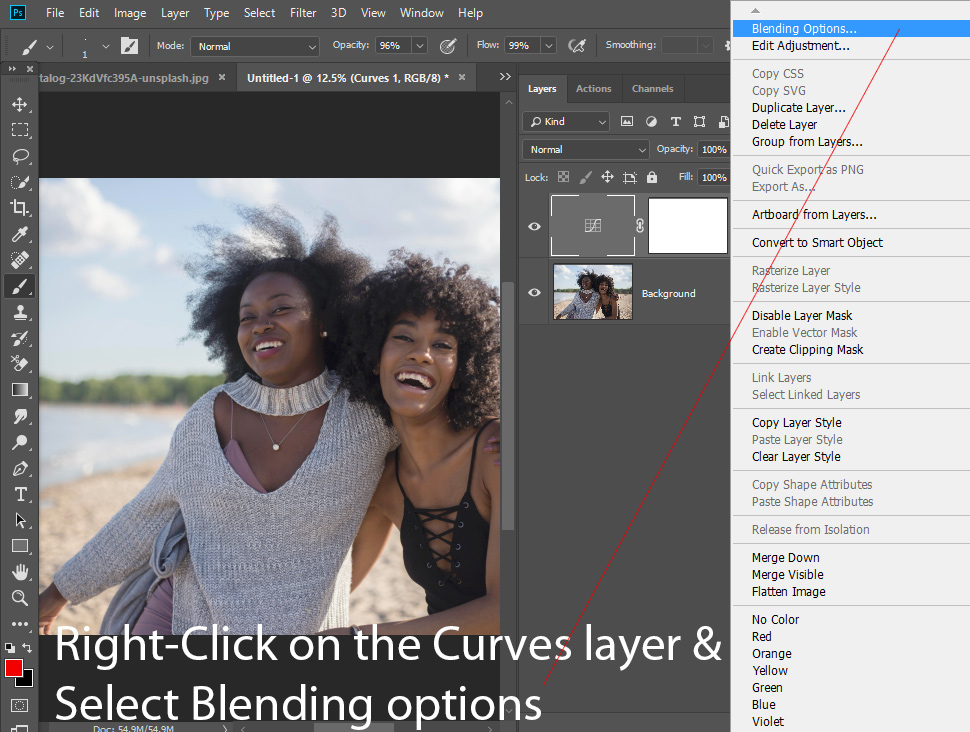
Step 4 – Target Shadows
Treating an underexposed image is all about targeting shadows so we can recover as much as possible information from there. We’ve already started targeting shadows in the previous step but that wasn’t accurate but we can use Blend-IF to be more accurate here.
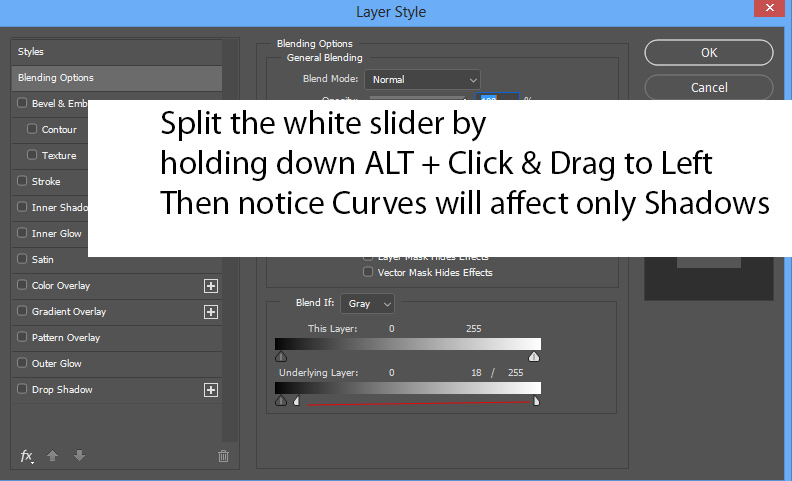
Right-click on the Curves Layer & choose Blending Options.
Once you are in the Blend IF Dialog Box, you’ll see two sliders white & black at the very bottom. We’ll split white slider and drag it towards the left (or towards shadows) to limit the effect of Curves to only shadows of the image.
In the Underlying Layer Section, split the white slider by Holding Down ALT Key + Click & Drag the white slider to the left to split it. Once you split the white slider, drag its half towards the left to keep the effect of Curves to shadows only. You can play around with the sliders to kinda find a balance.
Here are the results so far:
Step 5 – Use Adobe Camera Raw Filter To Find A Balanced Exposure
The Adobe Camera Raw Filter can bring balance to the exposure of any image. Because not only you can lift shadows but bring down the white freaky background highlights. It does a lot alone and a great way to fix exposure of any image.
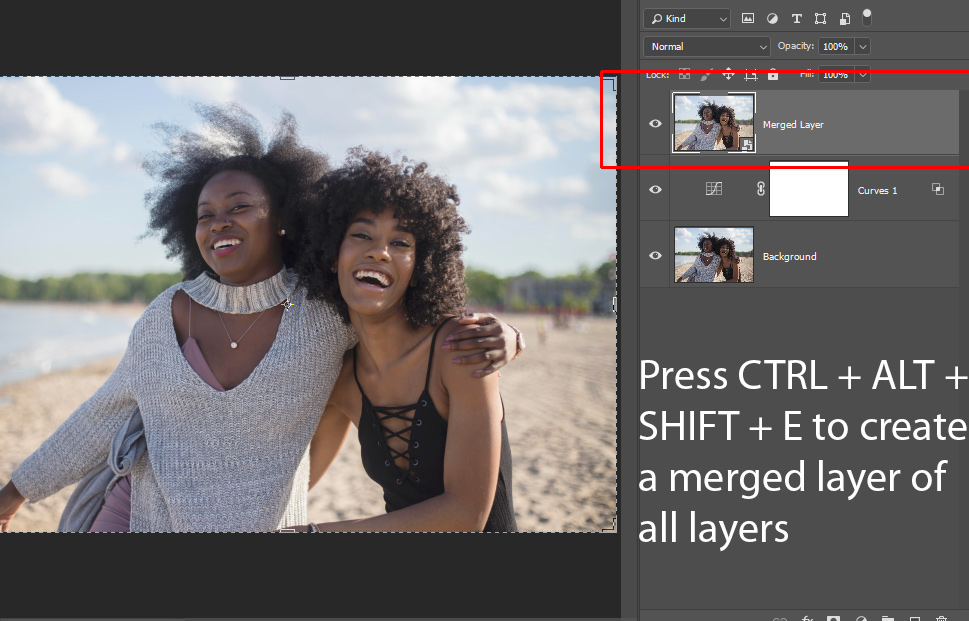
Before we start using it, create a merged layer of all layers by pressing CTRL + SHIFT + ALT + E. Make sure to convert this layer into “Smart Objects”.
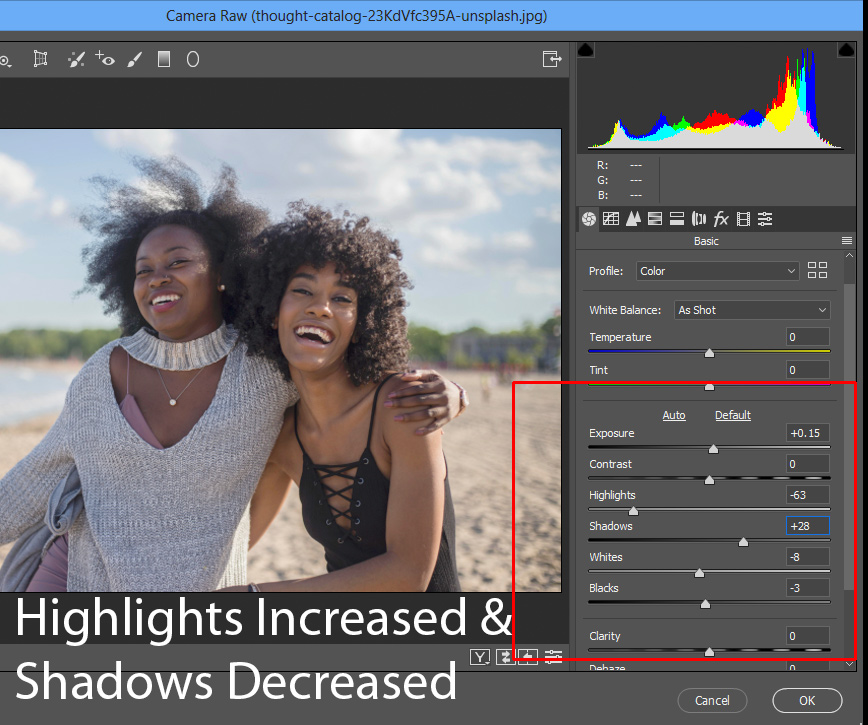
In the settings below, you can see I increased the Exposure to +0.15. I decreased the Highlights to -63 to bring down the highlights in my background & I increased the Shadows to +28 to pull more info from there.
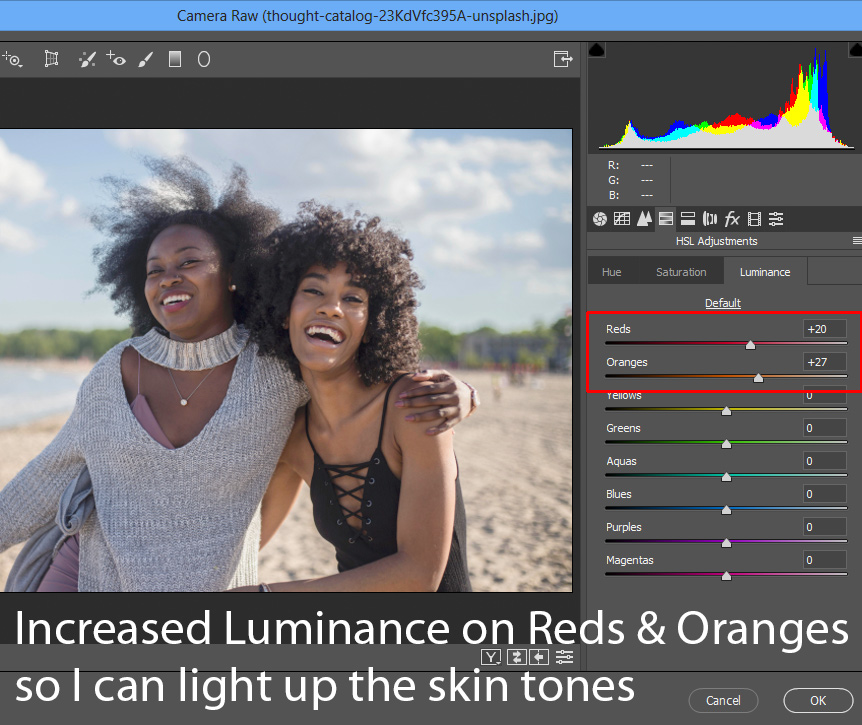
Next, I used Luminace from HSL Adjustments, Luminance basically means lightness and it increases or decreases the light on colors. Skin tones fall under Reds & Oranges so I increased the lightness or luminance on these two colors to lift the lightness on my subjects’ skin tones.
You can play around with these sliders if you want to. Also, it worth noting that you may not want to copy & paste the following values because it won’t work on every image.
You can see a noticeable and decent difference before & after using Adobe Camera Raw Filter:
Step 6 – Bring Back Colors
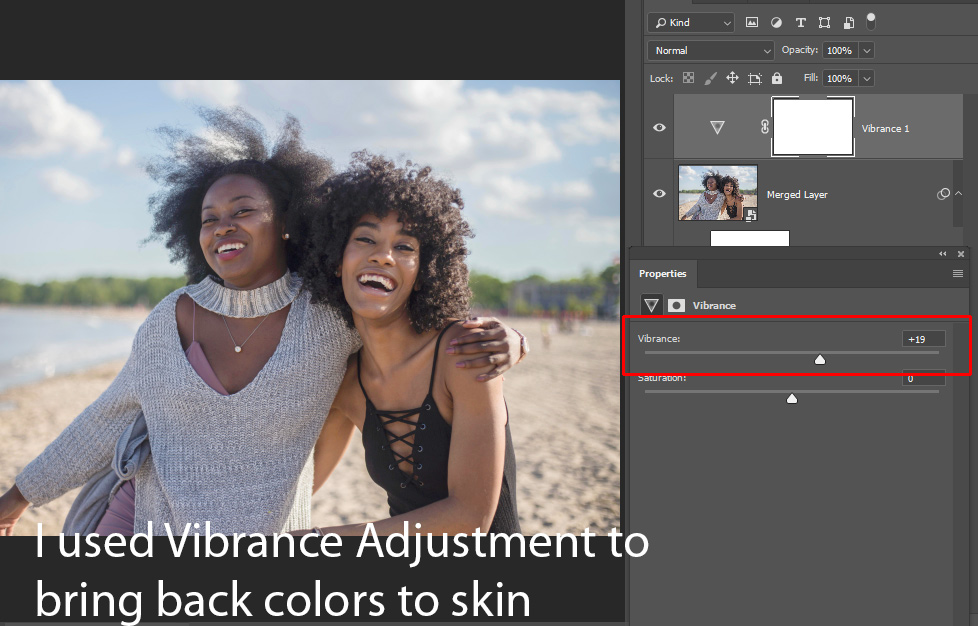
If the color in your image has faded you can bring it back using Vibrance adjustment layer. The image looks a bit on the side of desaturation but I want some colors in my background and everywhere else but I don’t want to affect skin tones as well.
I chose Vibrance adjustment because it will not affect skin tone much & it will add some saturation to the image.
Go to Layer > New Adjustment Layer > Vibrance and increase the vibrance. Don’t use Saturation slider as it will affect skin tones which we don’t want.
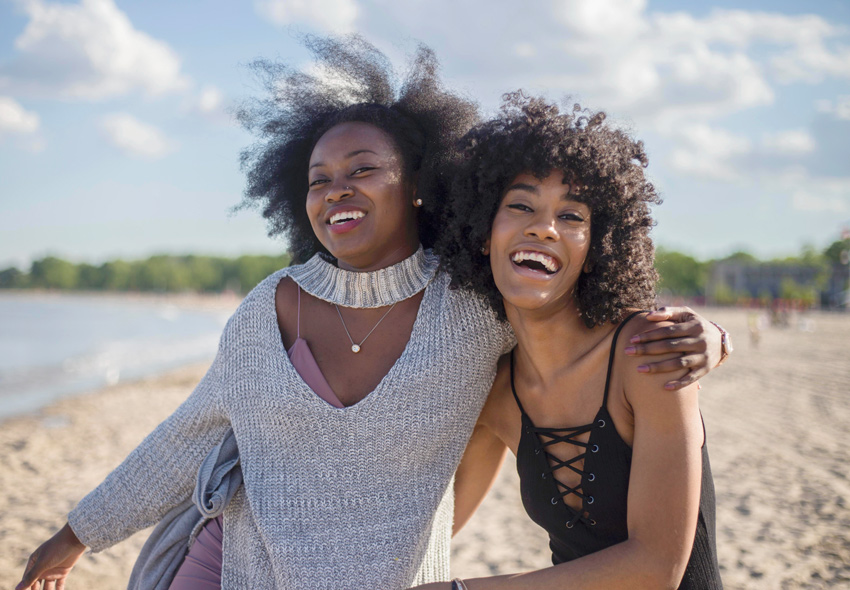
Here are my final results:
I hope you enjoyed the process of 3 layers to bring a balanced exposure to your images. If you deem the tutorial useful do share it and comment in the comment section below. Keep Photoshopping!
Need Help With Photoshop or Looking for Professional Support?
Whether you're just getting started with Photoshop or need expert-level assistance, we're here to help! Contact us for personalized Photoshop tutorials, project support, or creative services.
Get in touch today to take your skills or projects to the next level.
CONTACT US NOW📘 Want to Master Photoshop Faster?
🎁 Get Your FREE PDF E-Book "Top 10 Photoshop Tricks Every Designer Must Know" Now – Packed with expert tips, shortcuts, and techniques to boost your creativity & workflow.
👉 Download Your FREE PDF E-Book NOW!
