

In this tutorial, we’ll learn how you can change an image size and then further how you can reduce its size to optimize it using the Photoshop’s save for web option. At the end, we’ll be creating an action to optimize multiple images at once.
Step 1 – Change the Image Size
To alter the image size, you need to first open an image by selecting File > Open.
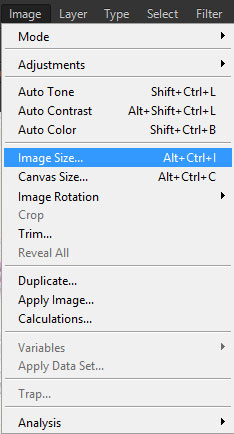
Now go to Image > Size
Once you did it, then enter the width of the image, like I entered it to 500px and Photoshop will automatically select the height for the image.
Once you set the width then check the Resample option to change the number of the pixels in the image and choose the Automatic option.
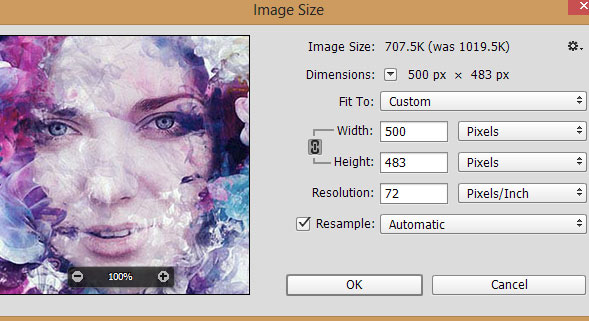
Now hit OK to change the image size and you’ve changed the image size.
Note: Only choose the image width below the original one,
otherwise, your image can lose its quality and we don’t want that.
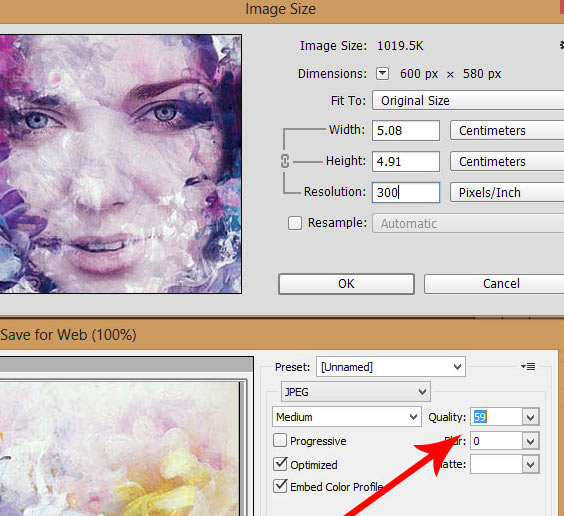
Step 2 – Changing the Resolution
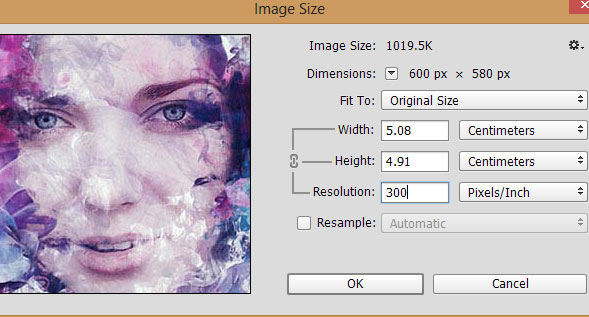
For printing the image you need the 300dpi resolution at least. If you don’t set the resolution to 300 then the print quality of the image won’t be excellent.
So once again go to Image > Size and uncheck the Resample option, this will the tell Photoshop that we don’t want to change the image size pixels.
Once you do that, now enter the Resolution to 300, Photoshop will automatically set the width and height of the image, that is the dimension in which this image is going to be print.
Hit Ok and you are all done.
Step 3 – Reducing and Optimizing Image Size
Many web designers and developers know if they want to load a website fast then its images needed to be optimized. Also, images take a lot of space while determining the website page size especially if you have a lot of images on your website like mine.
Many of you heard about the WordPress plugins to optimize the images but I never used them as I use Photoshop for that.
To optimize a single image, open it up and then go to File > Save for Web or go to File > Export > Save for Web if you are using Photoshop CC 2017.
Then reduce the image quality to 60 or 55. Don’t go for lower numbers, otherwise, it will also impact the quality of the image. That is why I recommend don’t go below 60.
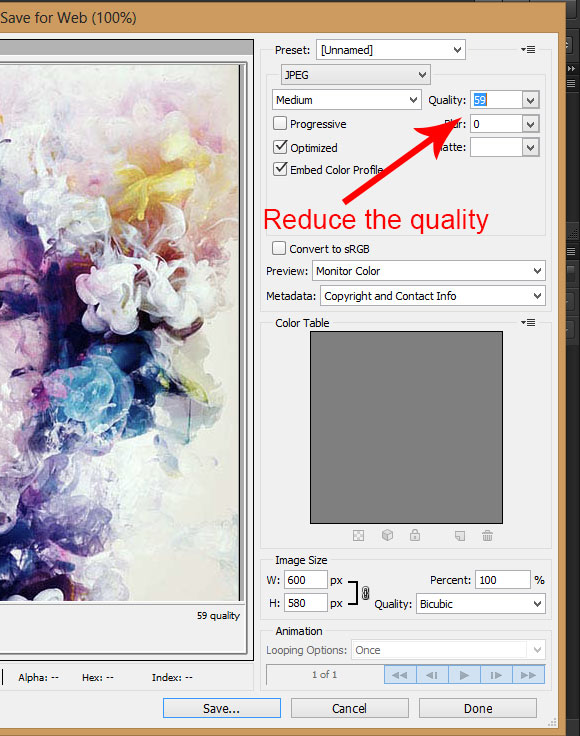
Once you did it then just click Save and save the image and now you can check the image it size should be reduced. You just optimize an image.
Note:
I already have written a tutorial teaching you about how to resize multiple images using Photoshop action. You can read it here.
This is a different tutorial on how to reduce the image size. How did you know then which one to use?
It is simple as that:
1. If you got many images in the same pixels or dimension, let’s say that all of the images has 1000 pixels and you want to reduce the pixels size of the images to 600px then you should read my resize multiple images tutorial.
2. If you don’t want to change the image pixels size and only want to reduce the size of the images then you can continue below.
Step 5 – Optimizing Multiple Images at Once
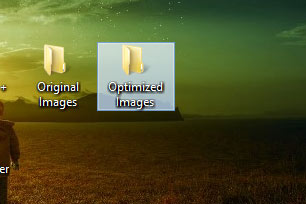
To optimize multiple images, first, create two folders name the first one as the Original Images and name the second as Optimized Images.
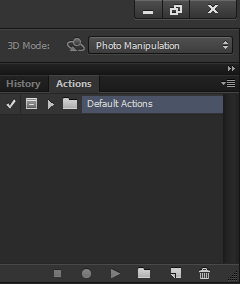
Step 6 – Create the Action
Go to Window > Actions to access the Action Panel.
Step 7 – Open the Image
Open the image from your original image folder.
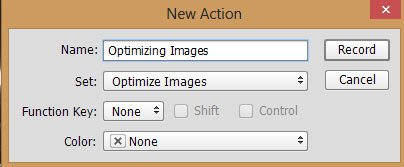
Now create a new action by clicking on the create a new action icon.

Name the action and then hit the Record Button.
Step 8
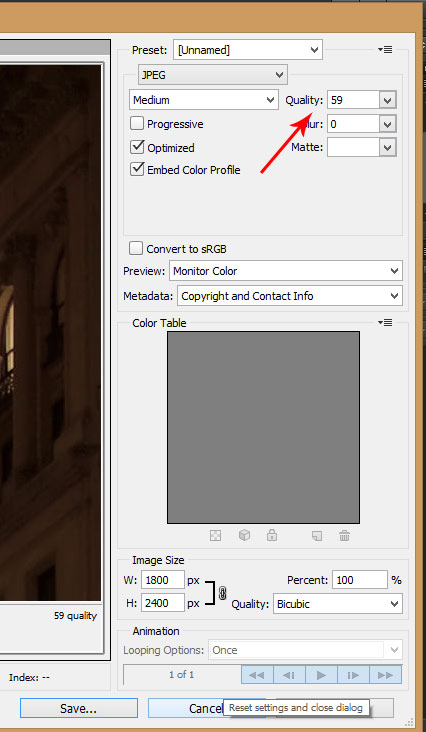
While the action is still recording, go to File > Save for Web or go to File > Export > Save for Web (Photoshop CC 2017) and reduce the image quality to 59 like we did in step 3 and then save this image to the Optimized Images Folder which you created in your desktop in step 6.
You can also change the width and height at the bottom. But since we are only reducing the size and not resizing the image that is why I didn’t use it. If you do, then this action will record this activity as well and will apply it to all of your images. Be sure what your doing!
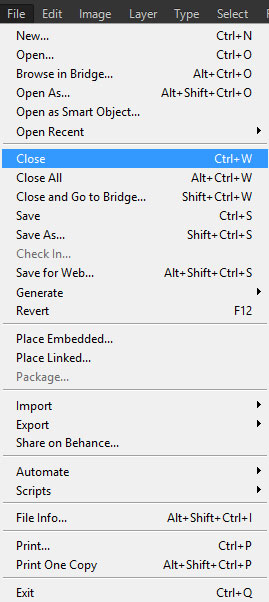
Once you did it and now close the image by selecting File > Close. When it says Save Changes to file before closing it then click on No and then close the image.
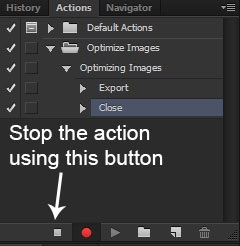
Now stop the action by clicking on the stop icon.
Step 9 – Using the Action
To use the action, we need to go to File > Automate > Batch and in the batch dialog box, First choose the action which you just created in my case I selected the Optimize Images Action
Then click on the Choose button under the Source Section select the folder which got your original images. In my case, I kept all of my images in Original Images folder so I selected it.
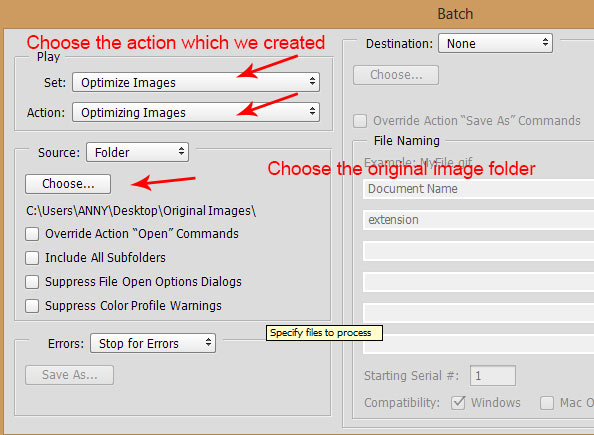
Now hit OK and Photoshop will now start the process of reducing the size of each image and saving it to optimized image folder. So this saves a lot of time when you have hundreds or even thousands of images for optimization. Just run action and you are all set.
Need Help With Photoshop or Looking for Professional Support?
Whether you're just getting started with Photoshop or need expert-level assistance, we're here to help! Contact us for personalized Photoshop tutorials, project support, or creative services.
Get in touch today to take your skills or projects to the next level.
CONTACT US NOW📘 Want to Master Photoshop Faster?
🎁 Get Your FREE PDF E-Book "Top 10 Photoshop Tricks Every Designer Must Know" Now – Packed with expert tips, shortcuts, and techniques to boost your creativity & workflow.
👉 Download Your FREE PDF E-Book NOW!
