
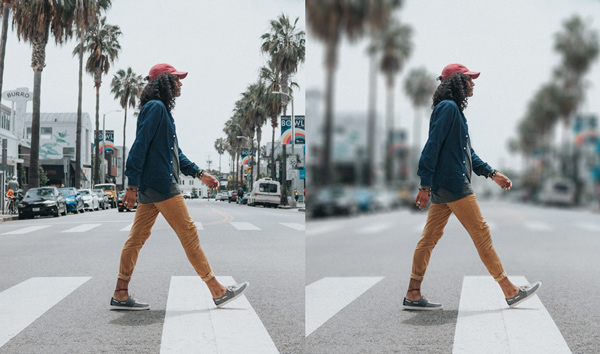

In this tutorial, I’ll be teaching you how you can blur the background without getting the halos around the edges of the subject. We’ll first use the Select and Mask (previously Refine Mask) tool to make the perfect selection to separate our subject. Then we’ll use the Field Blur to blur the background. So let’s get started!
Tutorial Resources
Step 1
I opened the image of the man by selecting File > Open. You can download the image from the tutorial resource section. Once you opened the image, duplicate the original layer by pressing CTRL/CMD + J just in case if anything goes wrong.
Name the duplicated layer Blur and disable the original layer by clicking on the eye icon.

Step 2
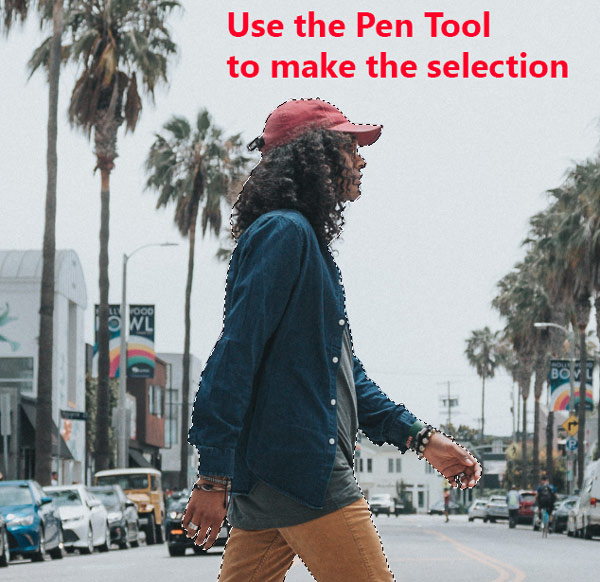
First, we need to make a proper selection of our subject. I used the Pen tool (P) to make a selection of the man. I didn’t select the hair properly and I just made a rough selection as we don’t need to that perfect in order to make the selection of the hair.
Step 3
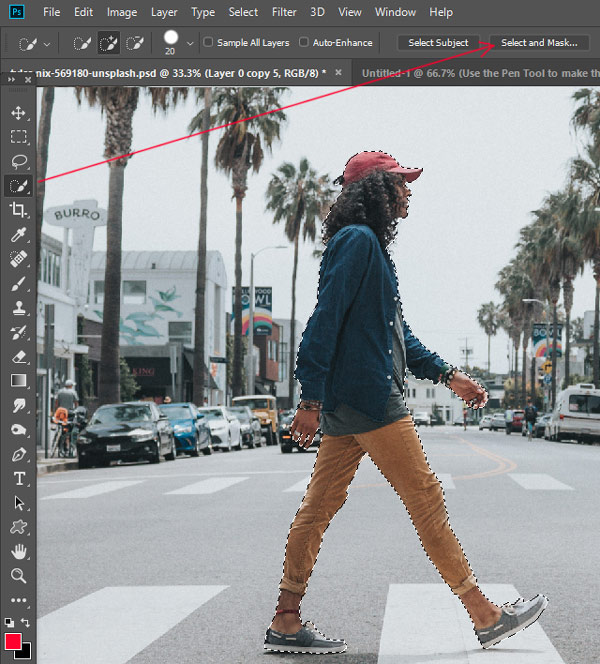
While the selection is active, first select the Quick Selection Tool (W), if you are in New Photoshop CC 19.1 version, you’ll see the Select and Mask option on the options bar. Just click on that to open the Select and Mask features.
If you are in the CS6, then what you can do here is that while the selection is active add a mask first and then right click on it then choose the Refine Mask. Then you’ll have the almost similar feature there like in the Select and Mask.
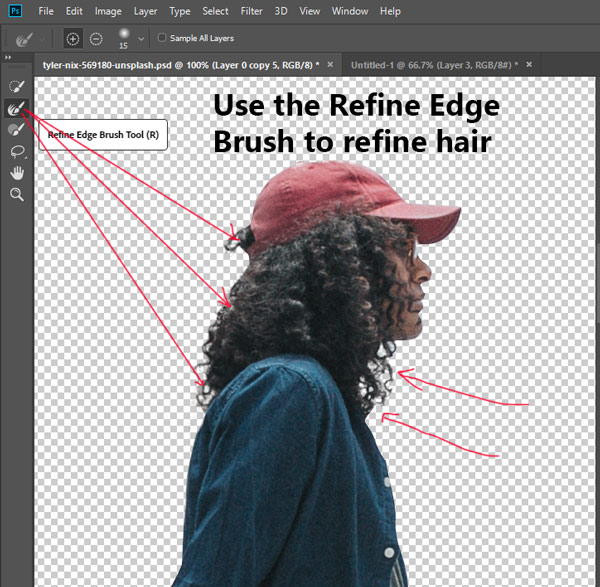
Once you are in the Select and Mask dialog box, select the Refine Edge Brush Tool (R), then use it on the hair to extract the background. What is going on here? Here Photoshop Edge detection calculation is going on to determine what is subject and what is background.
Please note that I am not extracting the stray hairs of the man, instead of extracting them I already removed them from my selection. I’ll be writing a tutorial heavily focused on how to mask hair and how to deal with stray hair. So, for now let’s focus on this tutorial.
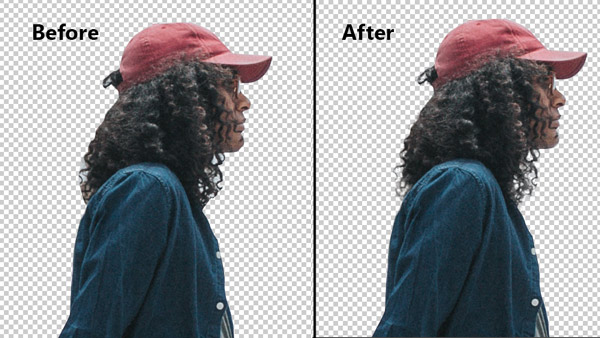
Once you used that tool, you’ll have the results resemble the below image.
Here you can compare the results before and after using the Select and Mask tool:
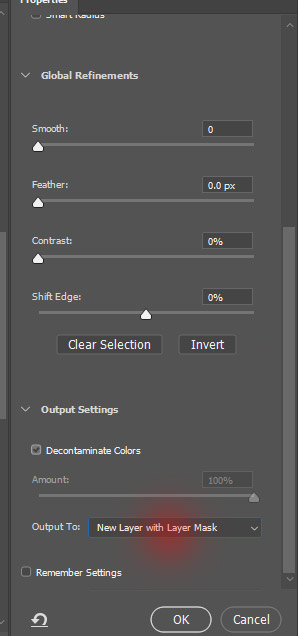
Note we are still in the Select and Mask option, now scroll down to the bottom (on the right side), and you’ll see the Output Settings. In the Output To option, select New Layer with Layer Mask. By choosing this option, you are telling Photoshop we want the results in the new layer with a mask. You can check the Decontaminate Colors to remove any color infringement if you want.
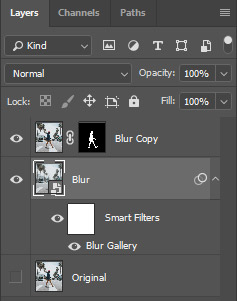
Once you press OK, now you’ll have another layer named Blur Copy with the layer mask.

Step 5
So we have a perfect selection of our subject and we can proceed to blur the background. First, retrieve the selection of the subject or man which we just made, by holding the CTRL/CMD and then click on the Layer Mask thumbnail.
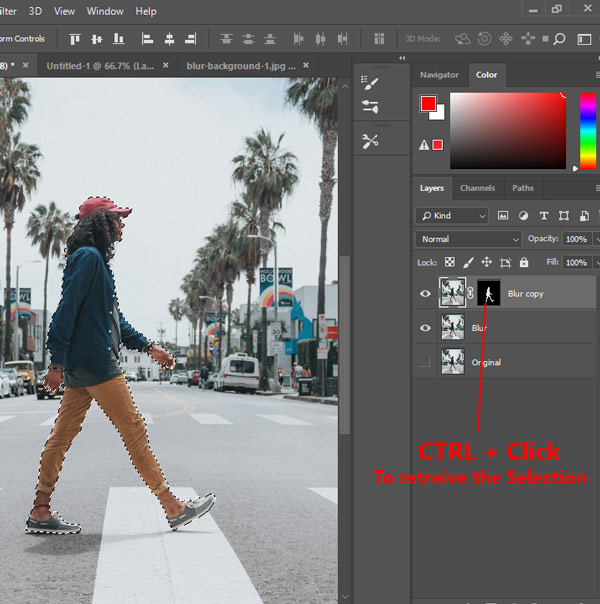
Now select the Blur Layer:

While the Blur layer is selected, go to Select > Modify > Expand:

Step 6
Enter 5px to expand the selection by 5 pixels. Expanding selection will help us to avoid getting halos around our subject edges.

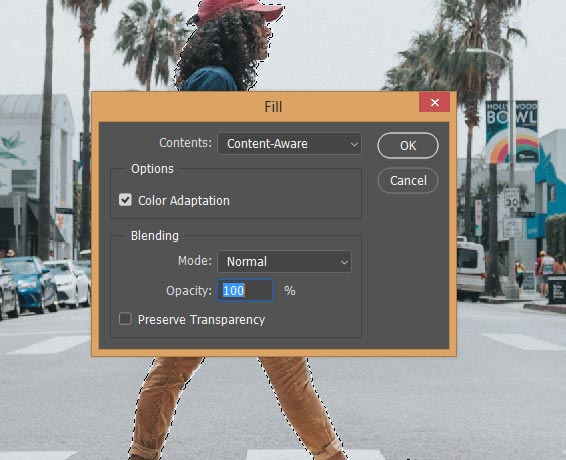
After expanding the selection, go to Edit > Fill > and then choose Content Aware and enter the following settings:
Step 7
If you disable the blur copy layer, then you’ll see that man is completely gone. Actually, Photoshop just clones the selected area by selecting the different parts of the image and then filling this area to clone.
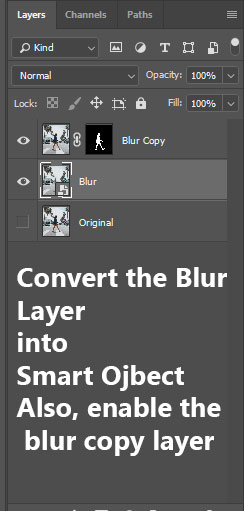
We are not cloning anything here so, get back to business. Convert the Blur layer into Smart Objects by right-clicking on it and then choose Convert to Smart Object. Also, don’t forget to enable the blur copy layer.
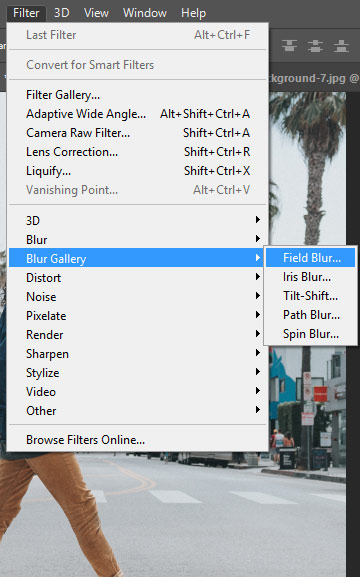
Go to Blur > Blur Gallery > Field Blur.
Step 8
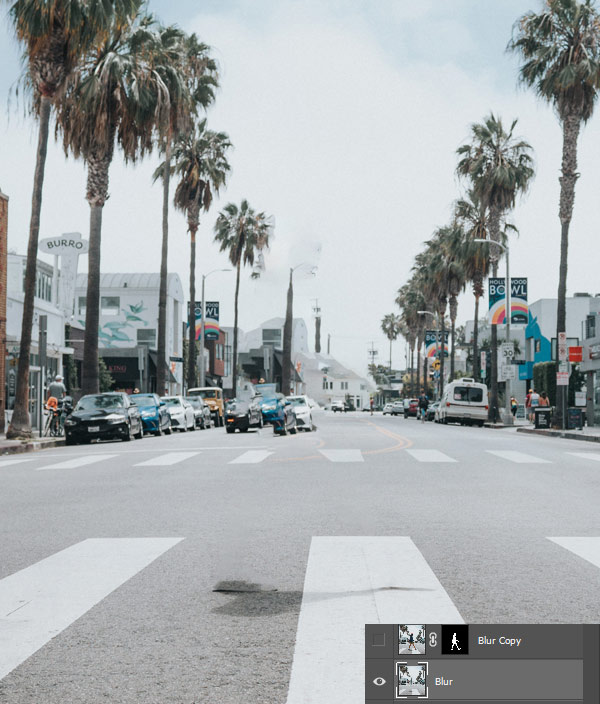
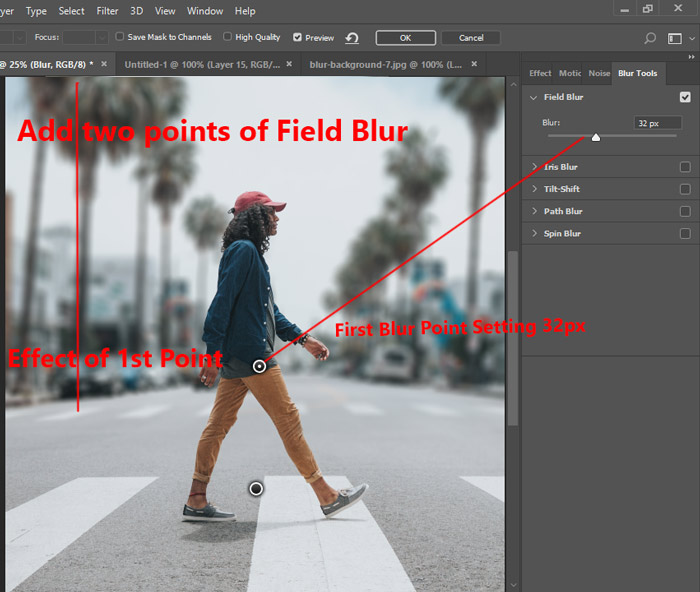
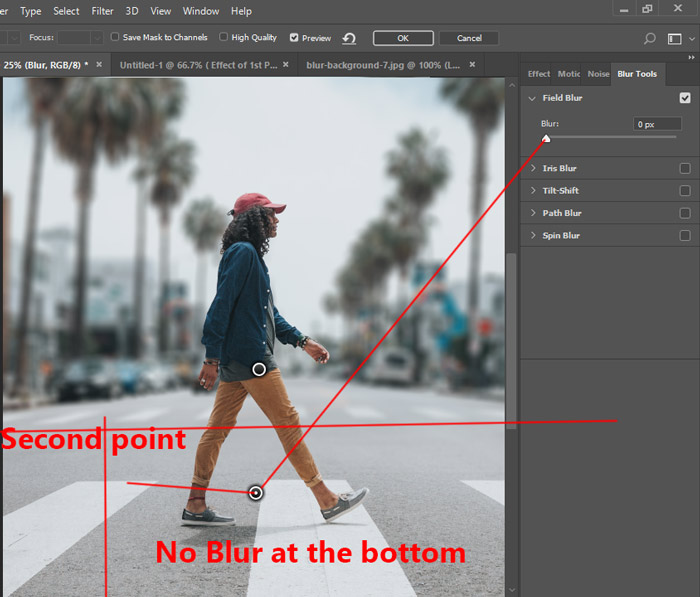
Now we’ll set the Field Blur settings. First I added two points of the field blur one on the middle (Just click on the image where you want to add the blur points), this will create a gradual blur from top to the middle of the image. On the right side, I entered the value of the Blur is 32px.
If you want to blur the entire background then only the one point is sufficient. Remember this is the settings of the first blur point and you can see the image below that how it is affecting the background:
Now click again to add another blur point, with this point we are telling Photoshop then the bottom area from this point shouldn’t be blurry. Photoshop will only blur the area between these two points. If you blur the bottom then it won’t look good. That is why I entered the blur setting for this point is 0px.
Step 9
Here you can see we just blurred the background and the best parts no halos edges around the subject:

Remember I applied the Field Blur filter on the Blur Layer. Don’t add the field blur to the blur copy layer.
Step 10
If you zoom into the image you can easily notice that the background doesn’t have the grain which is easily visible on the subject.

Select the Blur Layer again, and now go to Filter > Camera Raw.
Under the Effect Tab (Look for FX icon), you’ll see the Grain section, just set the Amount, Size and Roughness by dragging the sliders to add grain on the background.

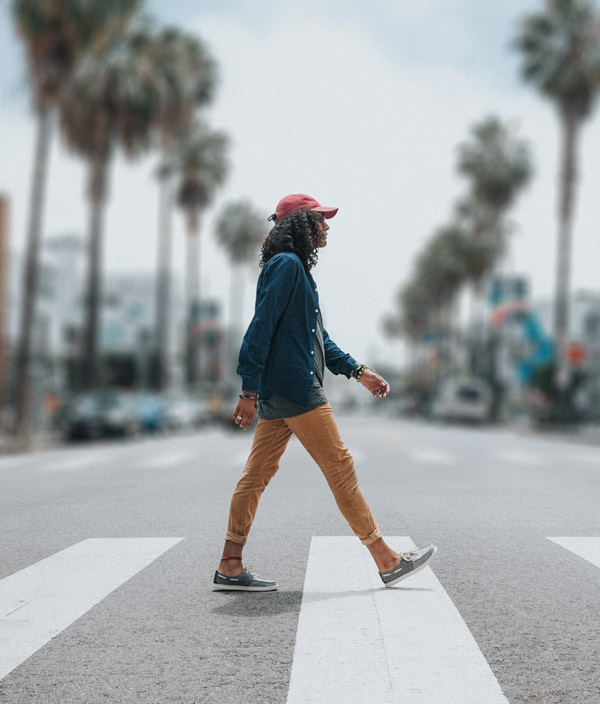
Here are the final results:
Need Help With Photoshop or Looking for Professional Support?
Whether you're just getting started with Photoshop or need expert-level assistance, we're here to help! Contact us for personalized Photoshop tutorials, project support, or creative services.
Get in touch today to take your skills or projects to the next level.
CONTACT US NOW📘 Want to Master Photoshop Faster?
🎁 Get Your FREE PDF E-Book "Top 10 Photoshop Tricks Every Designer Must Know" Now – Packed with expert tips, shortcuts, and techniques to boost your creativity & workflow.
👉 Download Your FREE PDF E-Book NOW!
