

Photoshop adjustment layers are one of the essential features of Photoshop. Adjustments layer applies color and tonal adjustments to your image without permanently changing pixel values. In this tutorial, you’ll learn more about adjustments layers, how it works, how you can apply it and how you can use it. Read this tutorial and find out why Adjustments layers are important for every photo manipulation.
Tutorial Resources
Photoshop Adjustments Layers
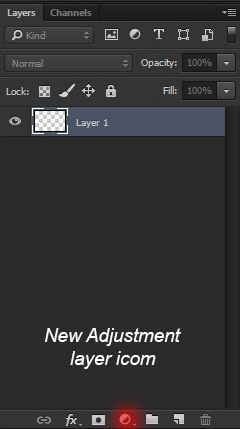
Photoshop Adjustments layer used to edit the color, saturation, levels, channel, mix colors, contrast and brightness. With adjustment layer you can adjust any image to your desired scene. Before we proceed let’s a take a look at the new adjustments layer icon.
By pressing the new adjustment layer icon, you can add new adjustment layers into the main document. It’s non-destructive that means new adjustment layer will not permanently damage your images. You can go back to change the value of every adjustments layer anytime, you can also hide the effect of adjustment layer in certain places using a layer mask and moreover, you can delete them like layers.
Since adjustment layers treated like a layer in Photoshop you can change the blend mode of each adjustment layer and you can also reduce the opacity of every adjustment layers. That means New Adjustment layers are totally non-destructive and flexible.
But these features are not available for adjustment layer applied by Image > Adjustments. This is also harmful to your image.
Brightness/Contrast Adjustment Layer
Open up any in Photoshop. Let we have this city image.
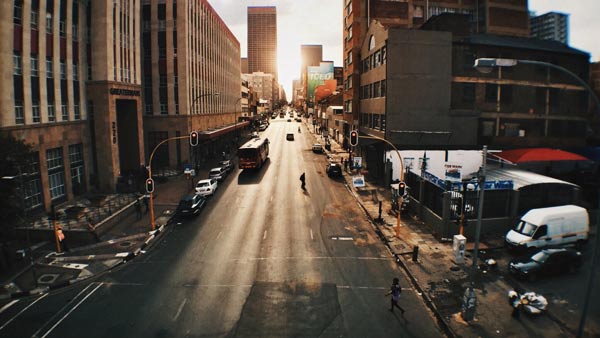
Add a Brightness/Contrast adjustment layer to the city image.
As you add Brightness/Contrast adjustment layer to city image, you will have a Brightness/Contrast adjustment layer with built-in layer mask linked to it. With a layer mask, you can hide the effect of this adjustment layer wherever you want to.
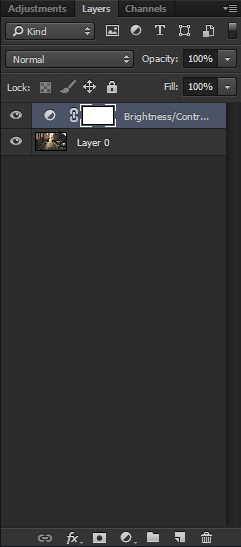
Brightness/Contrast adjustment layer is a very simple and powerful adjustment layer. You can control the brightness and contrast of an image with it.
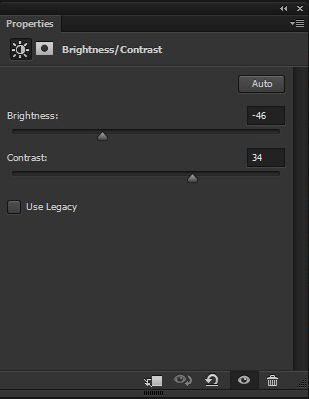
Let’s make some change to this adjustment layer and I’ve reduced the brightness and increased the contrast of city image. You can easily reduce and increase the brightness/contrast by just dragging the slider.
Here are the values:
Here are the results:
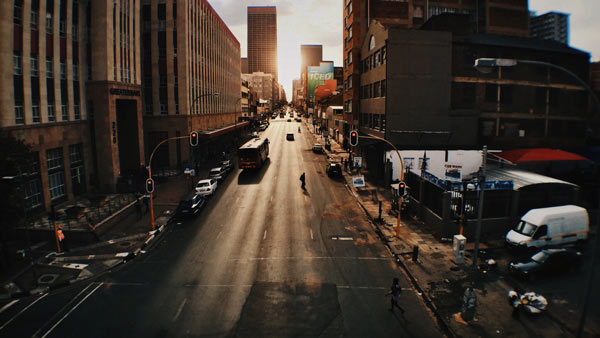
As a result, we have increased contrast and decreased brightness for city image. If you want to alter the effect, you simply go back to it by double clicking on the brightness/contrast adjustment layer. You can also hide the effect of this layer in certain places using a layer mask.
You’ve noticed that there is Use Legacy Box is unchecked, if you check the Use Legacy Box then Photoshop will only increase/decrease each pixel’s brightness value, that’s why it isn’t recommended.
Photo Filter
Photo Filter adjustment layer is used to warm up or cool down overall colors in a photo. It is widely used in every photo manipulation and you can add it using adjustment layer icon.
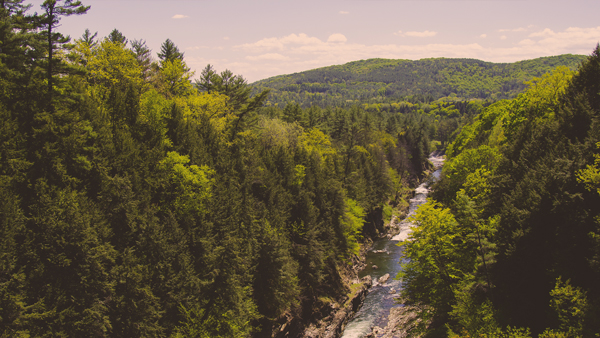
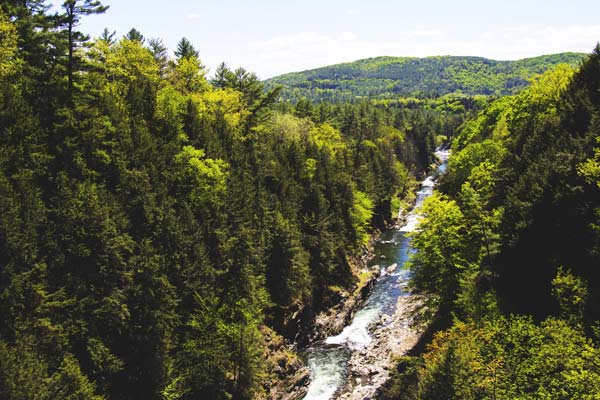
To practice this adjustment layer, open up the creek image in Photoshop.

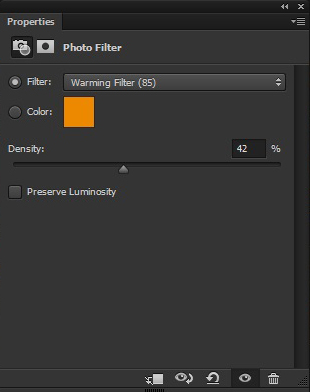
I added a warming filter to creek image. You can see that I am using warming filter (85) and it’s built-in Photo Filter in Photoshop. You can also choose your own color by clicking on the color icon box.
Here are the values:
Here are the results:
As a result, we’ve warm yellow tone added to creek layers.
Levels Adjustment Layers
Levels adjustment used to adjust the light and dark areas of an image. You can easily adjust the color and tonal range by dragging three sliders. The black slider for dark tones, gray for the midtones and white for highlights.
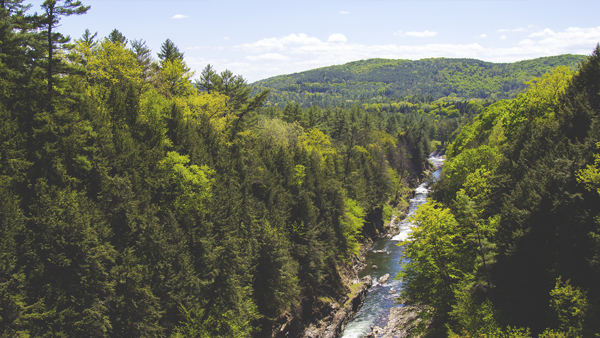
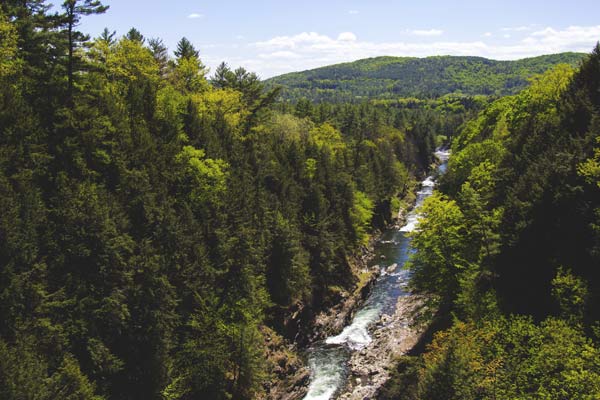
Open up the creek image again in Photoshop. Add the levels adjustment to creek image to enhance the light and dark areas of the creek.
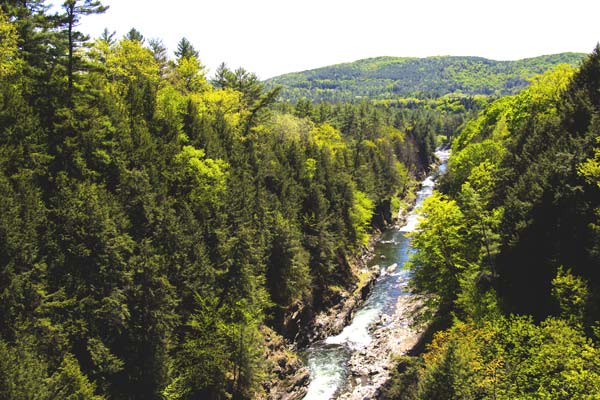
Here we have creek image:
Here are the values for Levels adjustment layer:
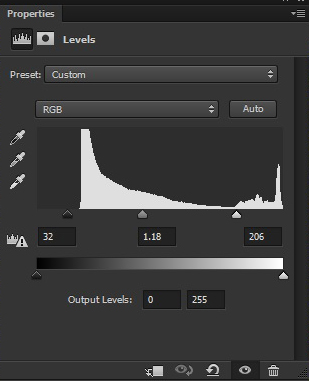
You can see that to enhance the dark area, drag the black slider to right. For midtones, drag the gray slider to the left to lighten the midtones. Finally, I dragged the white slider to the left to lighten the highlight (brighter tones).
Here are the results. As you can we have very decent and creek image does not look dull as it was before.
Curves Adjustment Layers
Next up we’ve Curves Adjustments layer. It’s works same as the Level adjustment layers but it has single line rather than a slider. You can also add any point to curves to directly affect the tonal range while you can’t do this in Levels Adjustment layers.
Let’s take look at Curves adjustment layers.
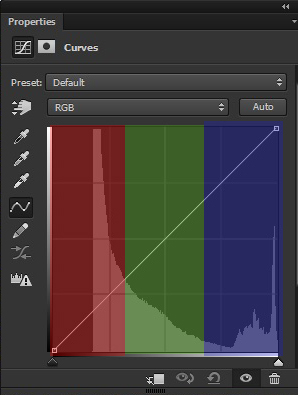
The first thing you’ll see a line because the tonal range is represented as a straight diagonal baseline as shown in the image above.
In the above image, we’ve also the red area for shadows (dark tones), the green one for midtones and the blue for highlight (brighten Tones).
Let’s learn more about the Curves adjustment layer using creek image.
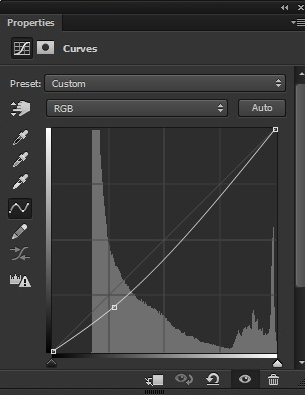
First I added a point in the straight line by clicking on it. I added it to the shadow area and this will only affect the darker area. Now drop the line as shown in the above image.
As a result, it has only affected the darker area and it has darkened it a bit. But it has darkened, only the shadows areas not the rest of it. In a same way you can also lighten up the dark area by lifting the line up.
Now let’s lighten up the highlight in creek image. To lighten up the creek image add a point on the highlight area and simply lift up the line as shown in the image below.
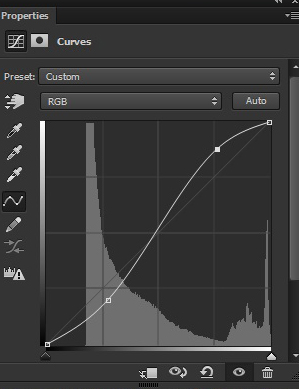
As you can see that we’ve brighten creek image. It doesn’t over yet you can add many points on the line at shadow, midtones and highlight area. To lighten up the area just lift the line and to darken the area just drop the line.
Similarly you can choose the red, green and blue channel to affect the each color tones. In red channel when you lift the line that means you are adding red tones to image and dropping mean you are adding cyan tone to it. So it’s depend on the opposite colors (You’ll learn more about opposite colors later in this tutorial).
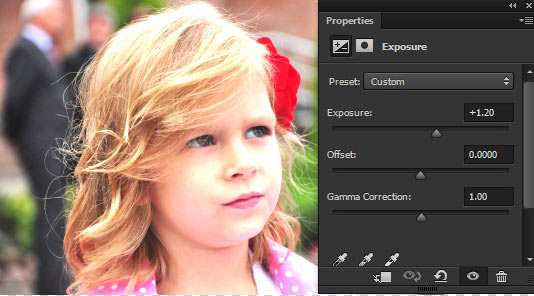
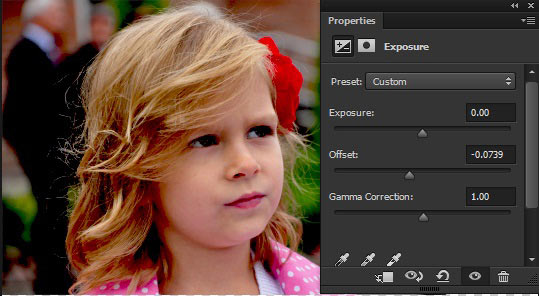
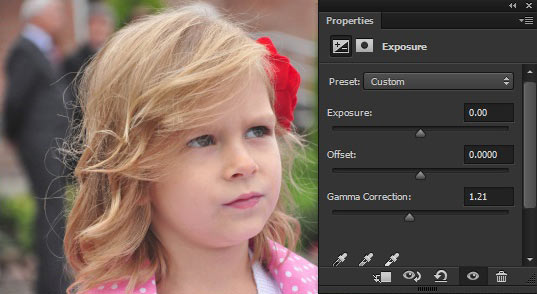
Exposure Adjustment Layers
Exposure Adjustment layer is used to control the exposure of an image. In Exposure adjustment layer you’ll have three slider, Exposure adjust the highlight without affecting the dark areas. Offset adjust the midtones and Gamma adjust the dark tones without modify the highlights.
Here we’ve the first image with increased exposure.
Second image with decreased offset.
Third image with decreased gamma.
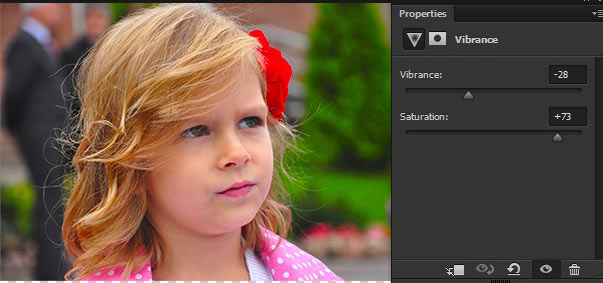
Vibrance Adjustment Layers
The Vibrance adjustment layers is used to edit the color and saturation of a photo. You can increase and decrease saturation and vibrance of an image.
Here we’ve the image of girl again. Add a Vibrance adjustment layers to it and see the effect.
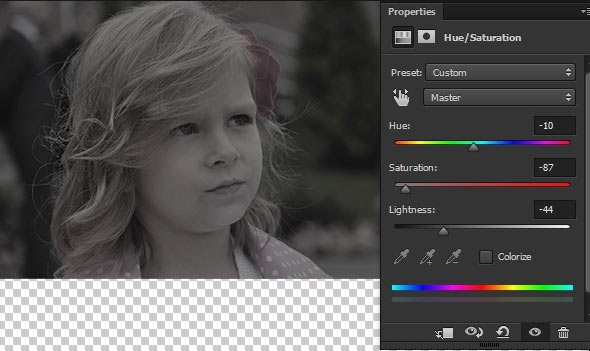
Hue/Saturation Adjustment Layer
Another adjustment layer is Hue/Saturation adjustment layer. You can adjust the color, saturation, and lightness of a specific range of color in a photo or it also allows you to adjust all the colors simultaneously.
You can adjust all the colors at the same time by selecting the Master on the color list and then move any of the three slider.
Image with decreased lightness and saturation.
Using the Hue.

Colorizing the whole image at once using Colorize options.
Color Balance Adjustment layers
Color Balance adjustment layer is used to adjust the color from shadows to highlight. It is very useful and used in all kind photo manipulation.
Before we head towards the Color Balance adjustment layer let me give you little bit detail about the opposite colors in Photoshop.
We are working in RGB document (To ensure select Image > Mode) and obviously it will have three color Red, Green and Blue. In Photoshop each of three colors has its opposite colors. Opposite color of Red is Cyan, Green has Magenta and opposite of Blue color is Yellow.
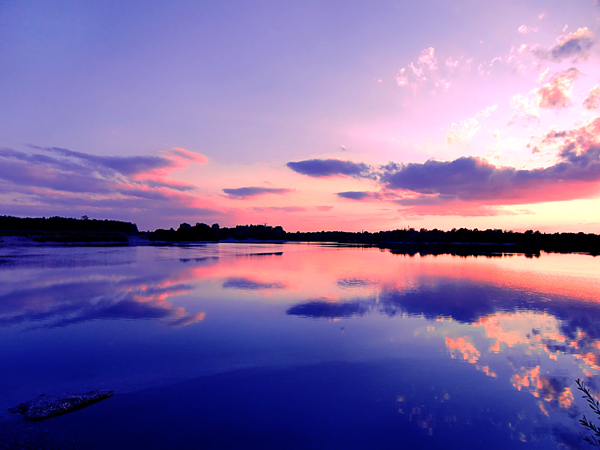
To practice Color Balance adjustment layer open up the sky image (feel free to open any image).
Add a Color Balance adjustment layer to sky.
Here are values:
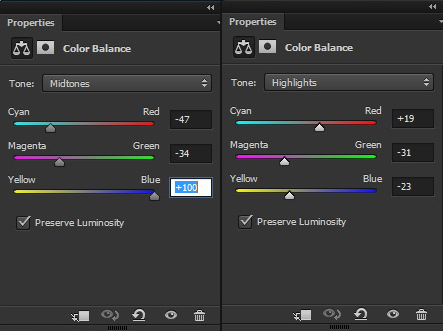
In the above image I added colors to midtones and highlights by dragging the slider toward the color which you want to. As you can also see that each color has it’s own opposite color.
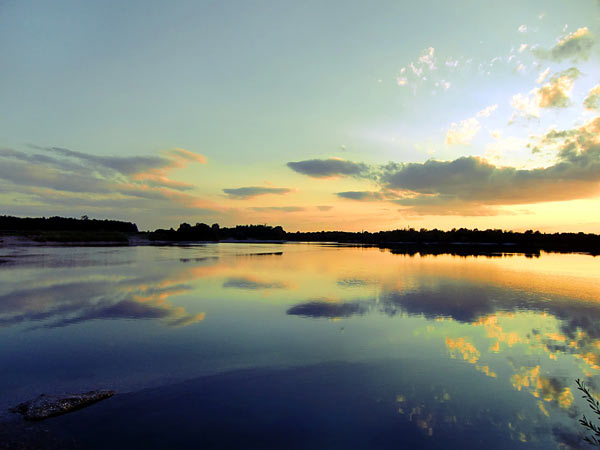
Here are the results:

As a result we’ve very beautiful dreamy lake scene with fantastic color. Similarly you can add colors to shadow tones and I think you should try that to see the results.
Gradient Map
Another important adjustment layer is Gradient Map. You can add many colors to different tones with Gradient Map. It works same as Gradient tool.
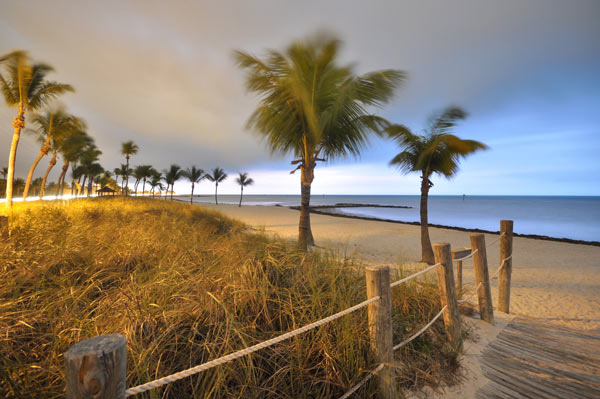
Open up the beach in Photoshop.
Add a Gradient Map adjustment layer to it and double-click on it to open gradient editor then choose the black/white (3rd on presets) gradient.
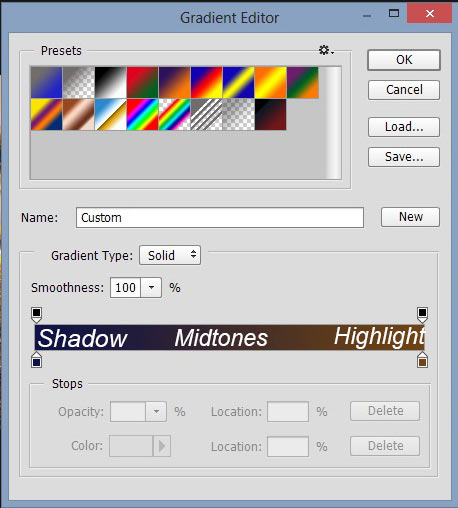
Shadow area will effect on darker tones and I’ve chosen the dark blue color for it. For highlight I’ve chosen dark orange color for highlights and remaining area will affect the midtones.
Change the blend mode of Gradient Map to Color Dodge (that always gone brighten up the image). Here are the results:
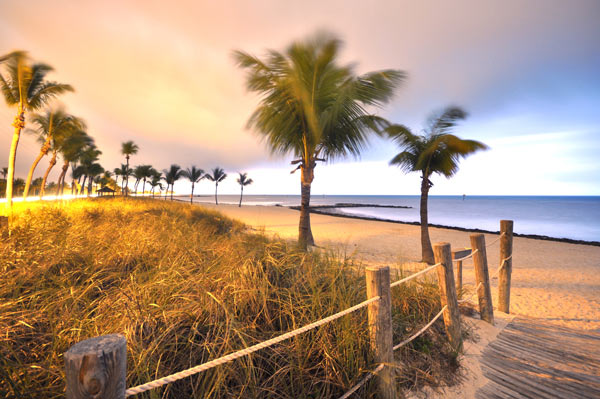
Gradient Map works best with blend modes and you can change the blend mode of gradient map to different one that satisfied your need. Also, try reducing the opacity because sometimes it’s gives you more better results.
Selective Color Adjustment layer
Selective Color adjustment layer allow you to modify the primary color without affecting the other colors. This adjustment layer used at least as often because most of the people don’t know how Selective Color adjustment layer work.
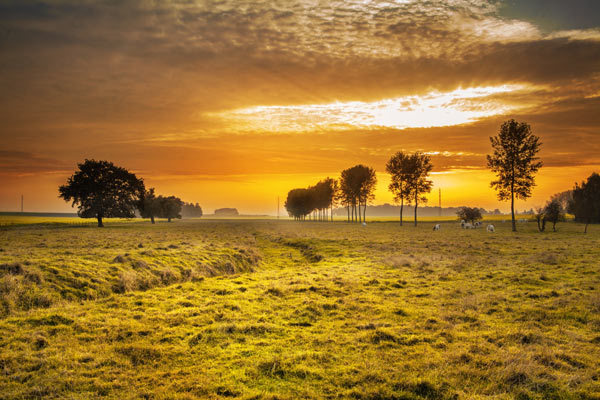
Let’s learn more about it using an example. Open up the countryside image in Photoshop.
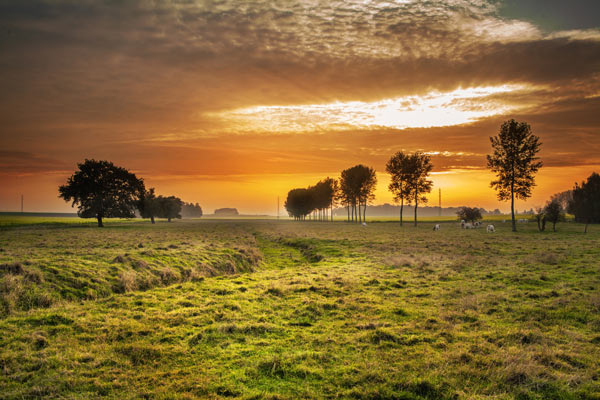
In the countryside image the majority of the color is yellow and red. But it has more yellow tone than red tone. Now add a Selective Color adjustment to it and choose yellow colors. Here are the values:
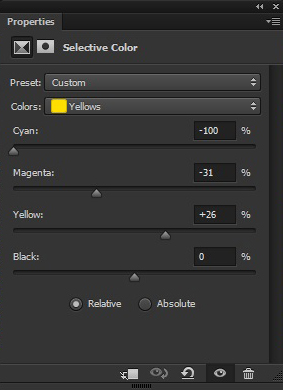
In the above image we have four sliders, first three for color and last one is black which used to change overall luminosity of the chosen color. A Negative value on the black will make the color brighter and positive values make the color darker.
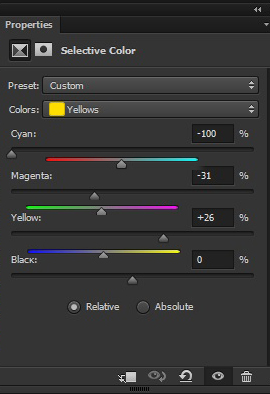
The above illustration explains how Selective Color adjustment layers work’s. You’ve also noticed (in the previous screenshot) that I’ve reduced the cyan color that means I added the red color to the image. Reducing the magenta means adding the green color and finally increasing the yellow mean reducing the blue color.
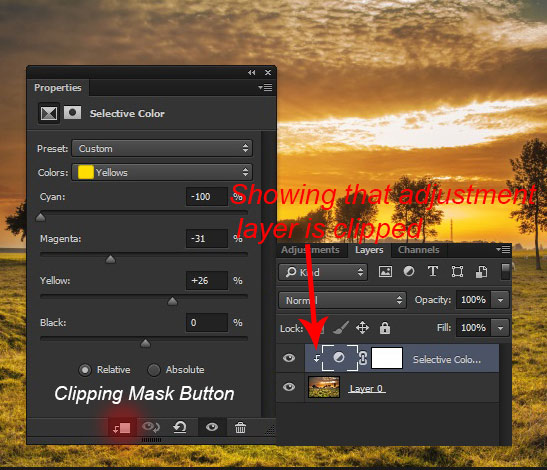
Here are the results:
Now I think you are well aware of with Selective Color adjustment layer. You can use Selective Color when Hue/Saturation and Color Balance adjustment layer doesn’t work.
Bonus Tip: All the adjustment layer affect all the layers below it. You can get rid of this using Clipping Mask and it allows you to only affect layer which you want. In the below image you can press the clipping mask icon button to clip the adjustment layer to the image.
Conclusion
That’s it for the tutorial and obviously it all about the basic of the Adjustment layer. There is always more to learn in Photoshop. You’ll learn more about it in upcoming advanced tutorials.
Need Help With Photoshop or Looking for Professional Support?
Whether you're just getting started with Photoshop or need expert-level assistance, we're here to help! Contact us for personalized Photoshop tutorials, project support, or creative services.
Get in touch today to take your skills or projects to the next level.
CONTACT US NOW📘 Want to Master Photoshop Faster?
🎁 Get Your FREE PDF E-Book "Top 10 Photoshop Tricks Every Designer Must Know" Now – Packed with expert tips, shortcuts, and techniques to boost your creativity & workflow.
👉 Download Your FREE PDF E-Book NOW!
